How do I manage my event registrations?
Accessing your event registrations
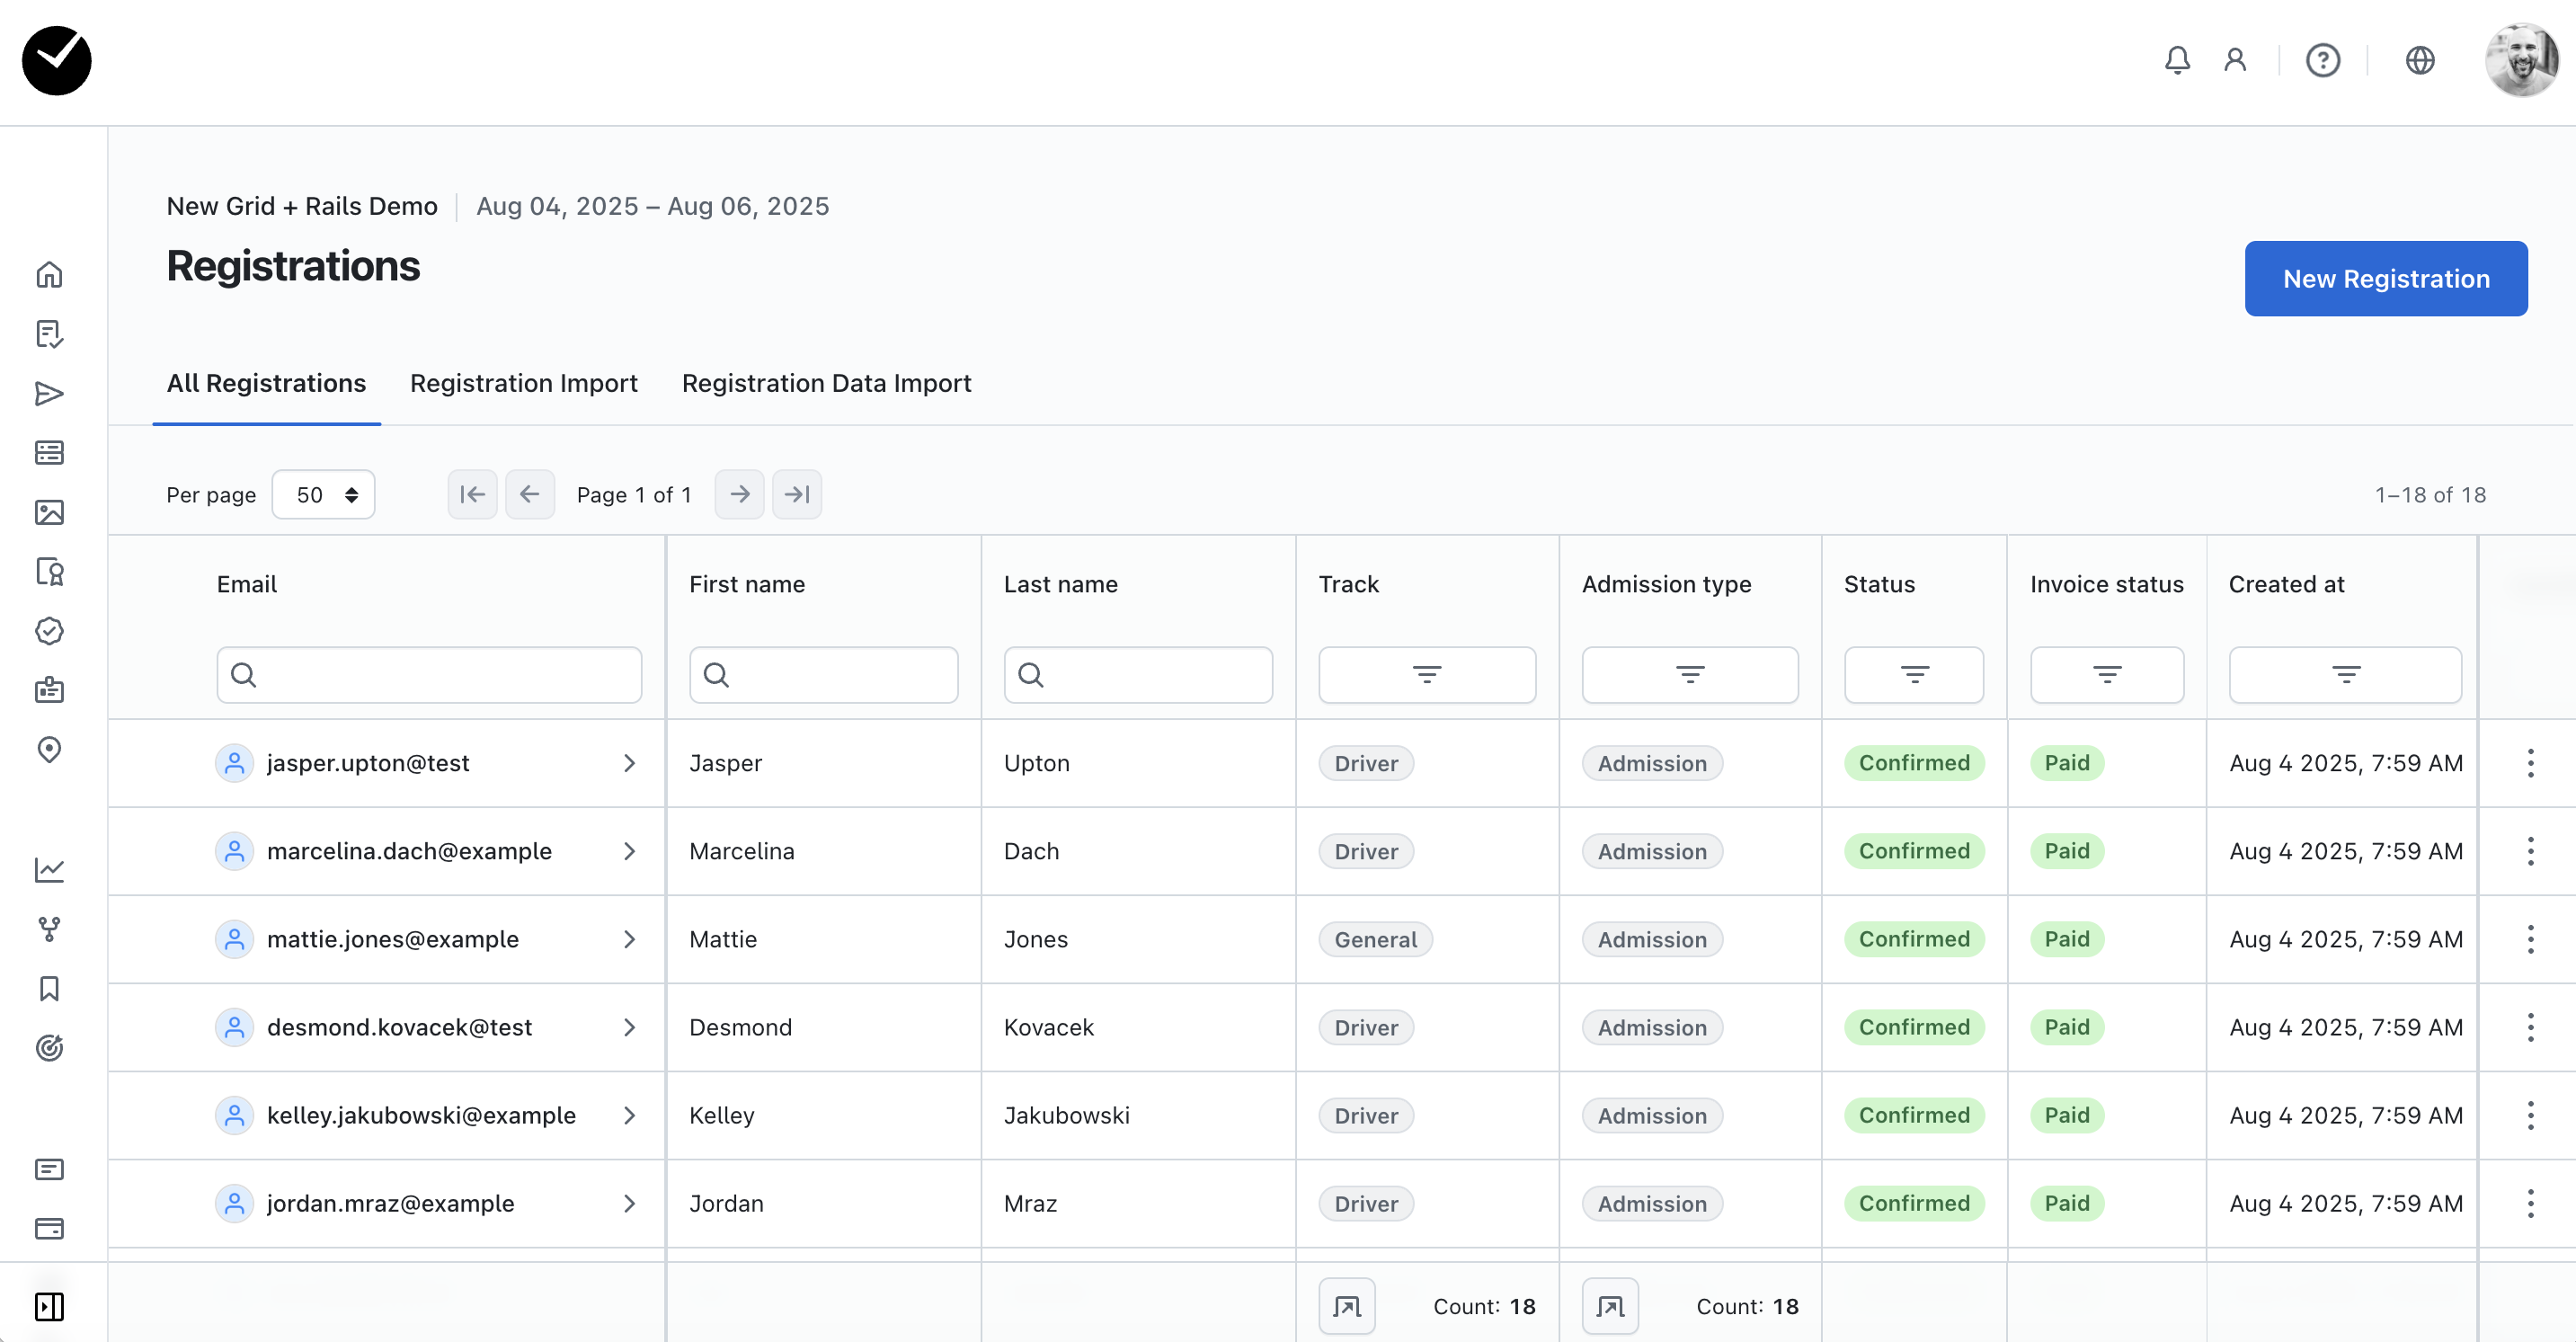
To access your event registrations click on the 'Registrations' tile on your Event Dashboard.

When you enter the Registrations area, you will see a list of all attendees currently registered for your event.
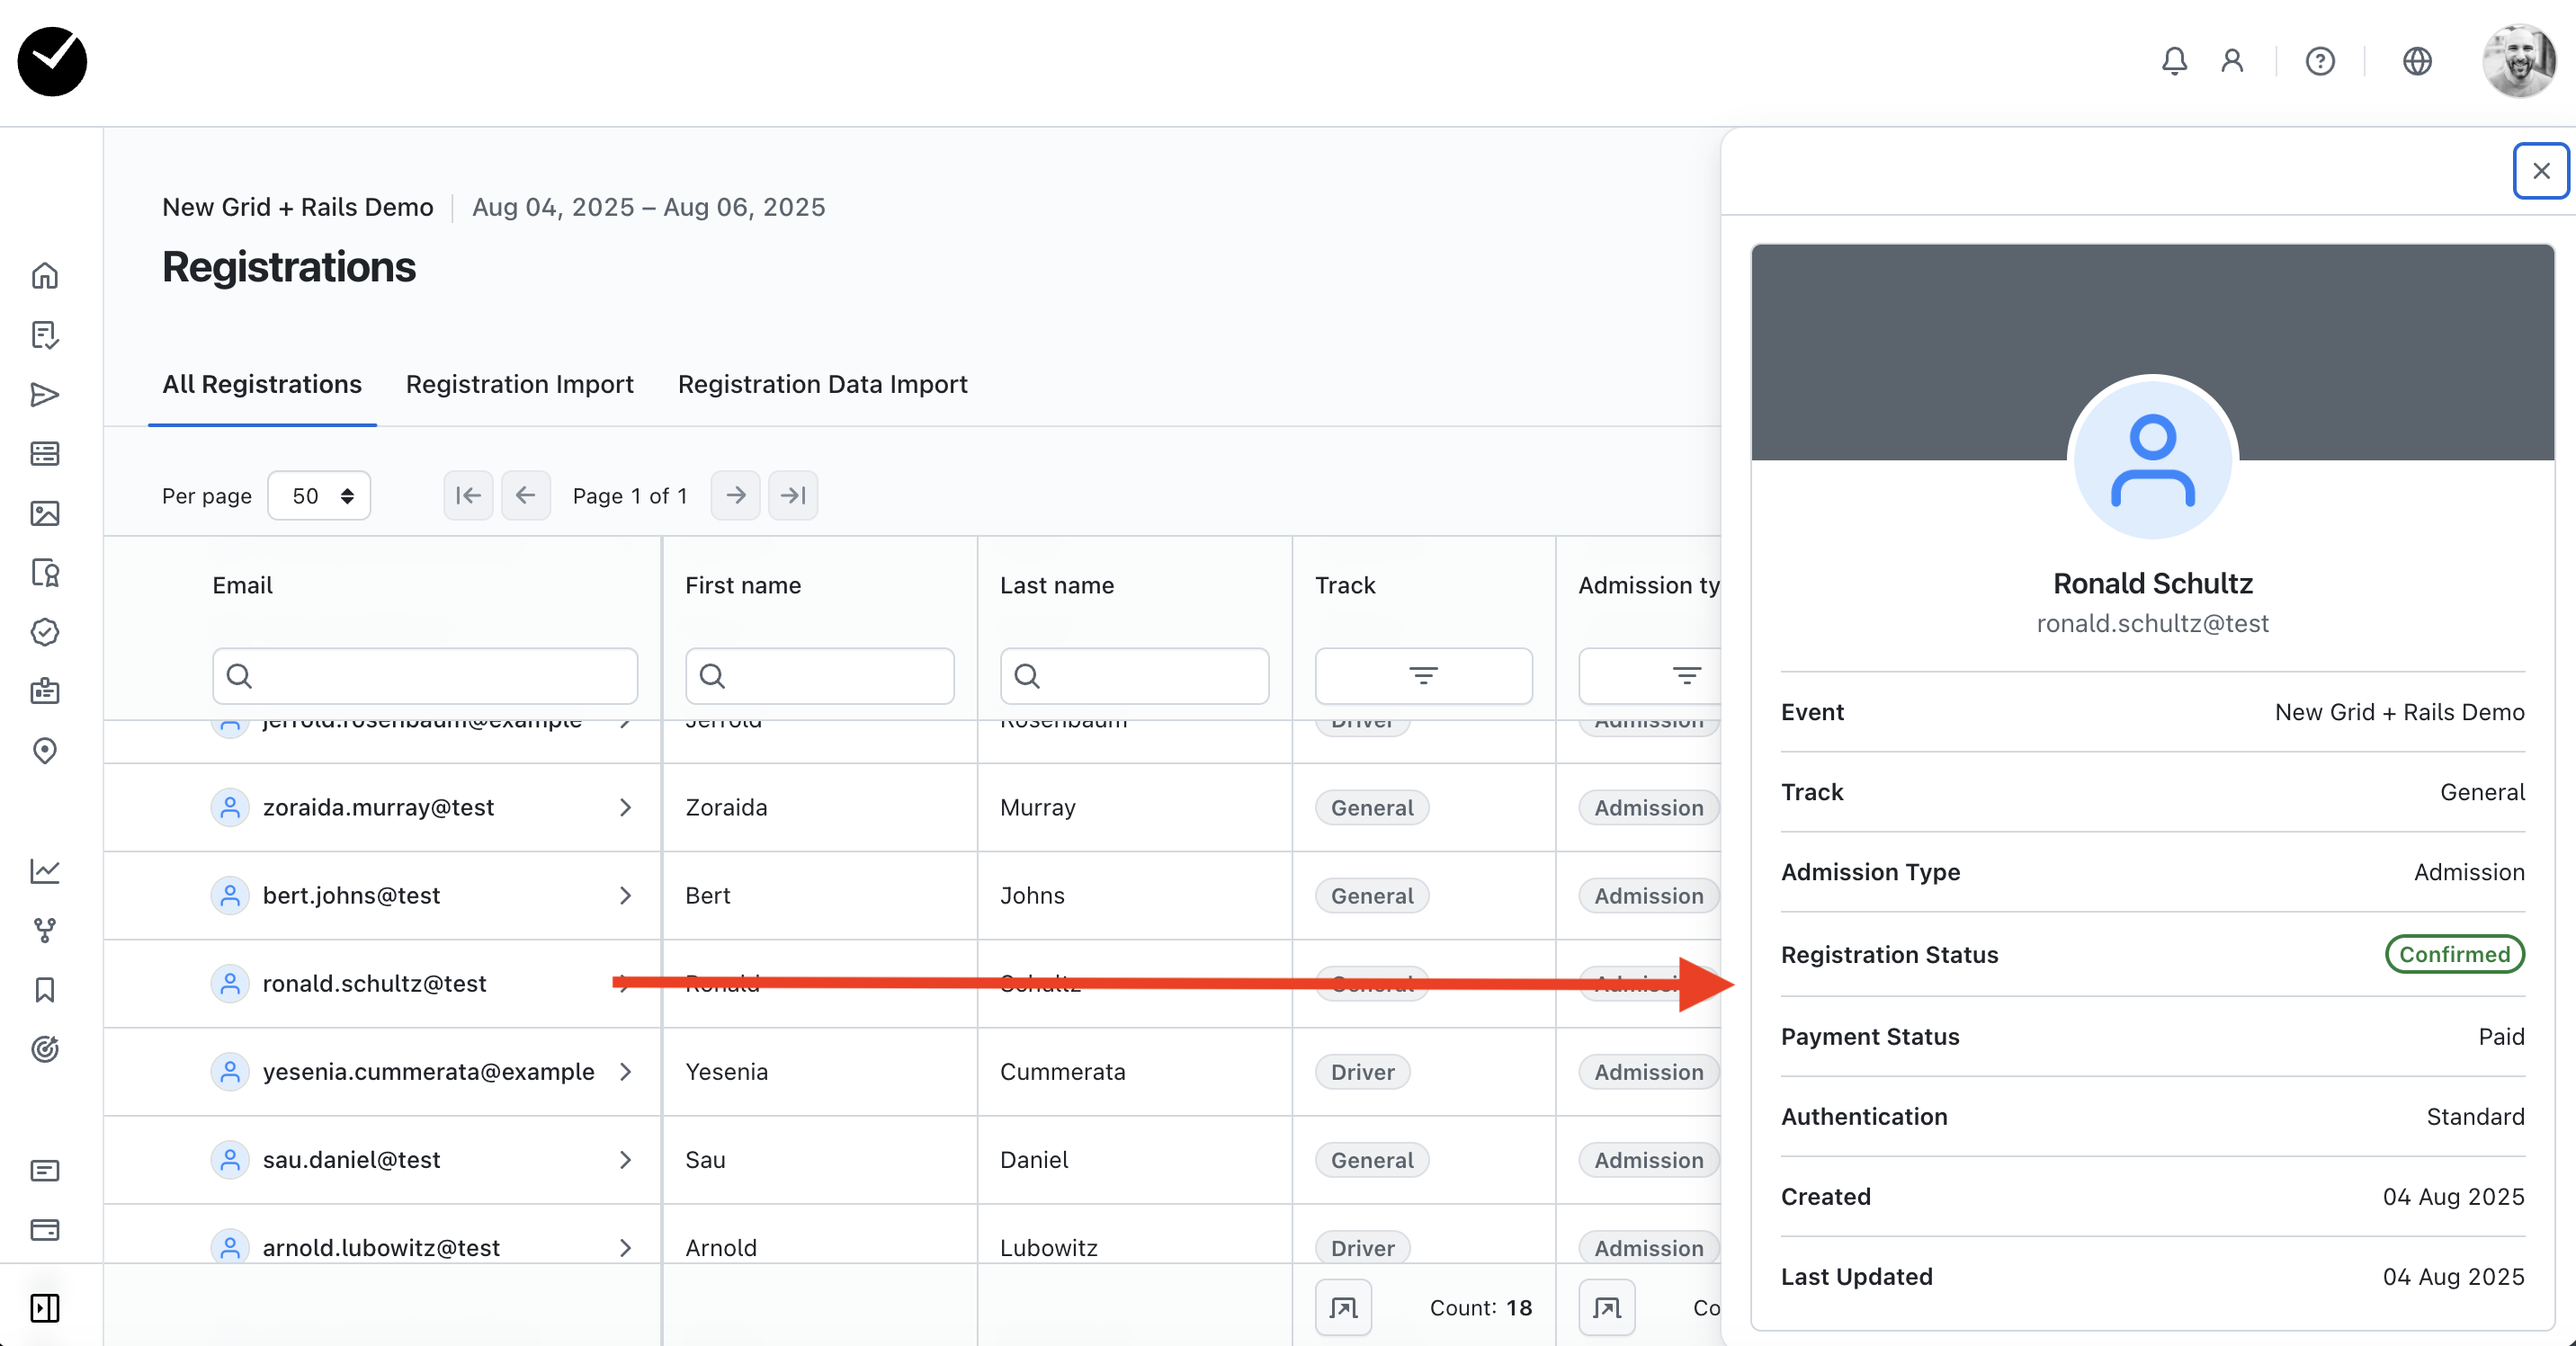
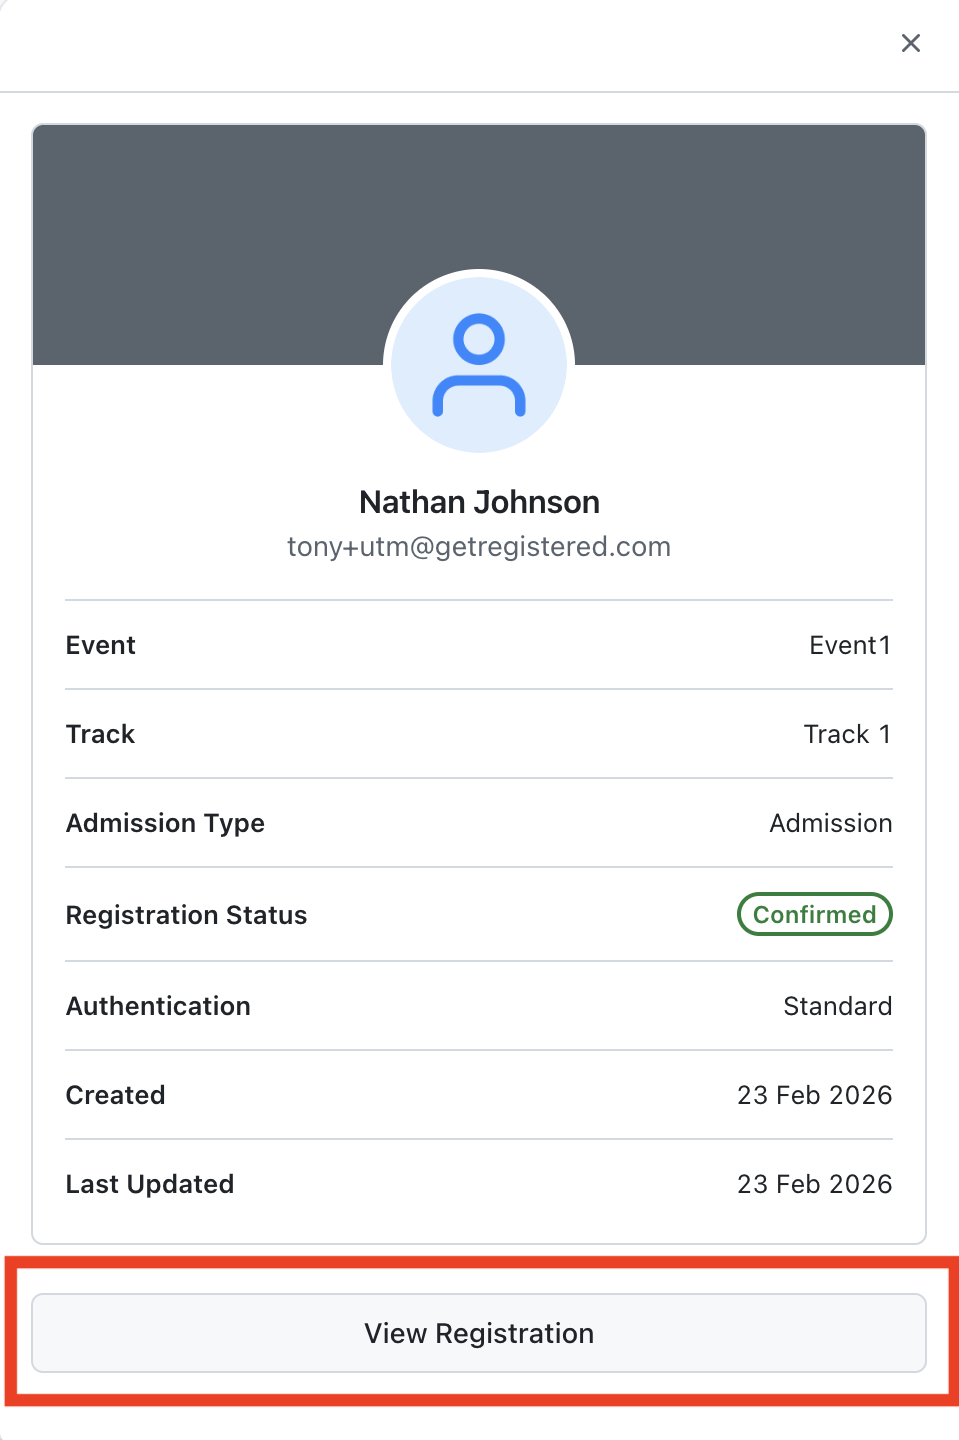
You can quickly view an attendee's core registration information by clicking on their email address, which will display a card to the right of the page - handy if you want to quickly check an individual attendee's registration statuses! You can also jump directly to view the attendee's full registration details by clicking on the 'View Registration' button displayed on the attendee card.
Creating a new registration
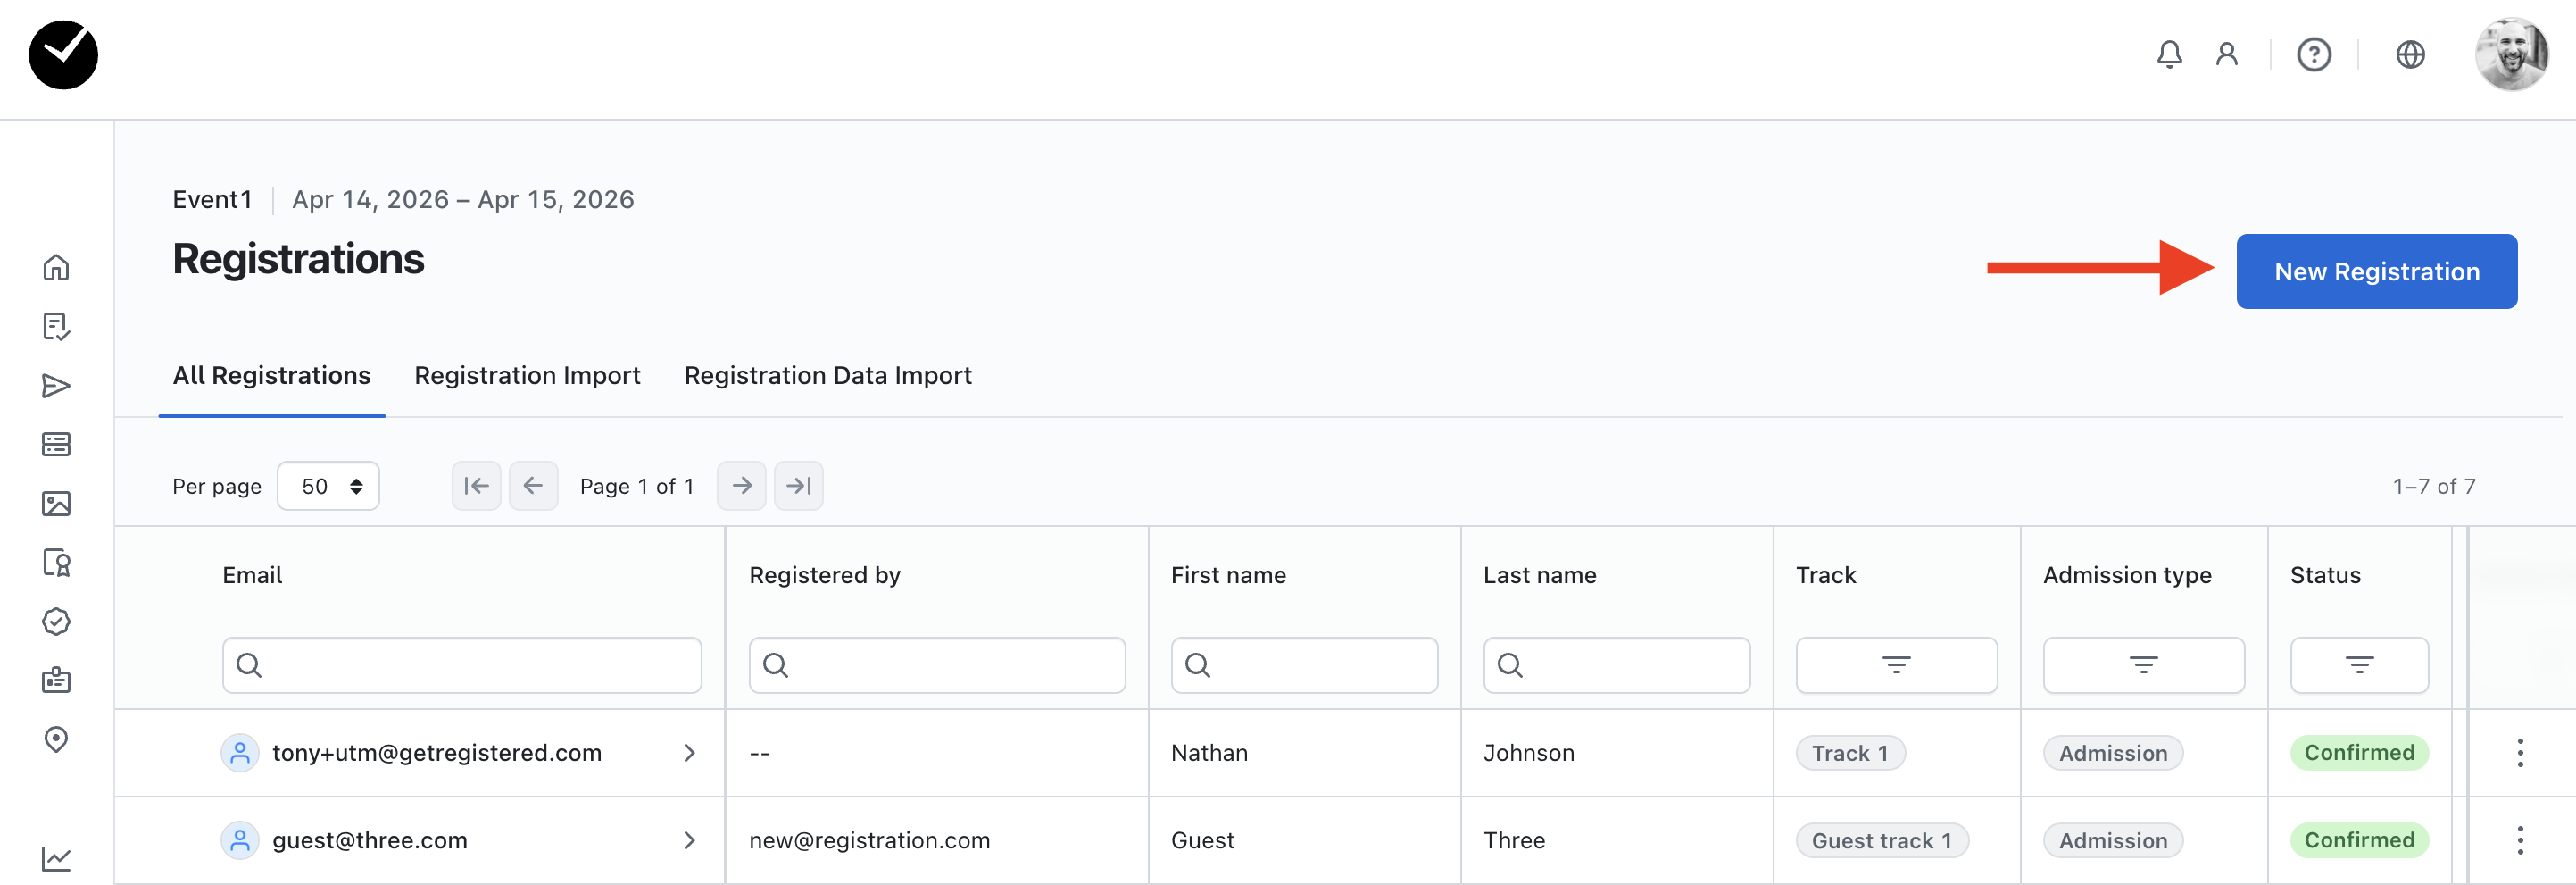
To create a new registration, you just need to click on the 'New Registration' button displayed at the top right of this area.
Once selected, you will be taken directly to the registration form for your event. The registration form will appear very similar to that of which an attendee would see, with two possible exceptions - there may be some 'back office' fields available to you as an Admin Event User that can be completed on the registration form (these are not visible to an attendee when registering) and also you have the ability to choose to send an email to the new attendee to confirm that they have been registered successfully (once the form has been successfully completed).
Importing event registrations
To create multiple registrations at once, you can enter the 'Registrations Import' area (by clicking on the option adjacent to the 'All Registrations' tab) and then select the 'New Registration Import' button at the top right of the page. From here, you can then upload a CSV containing registration information for multiple new attendees.
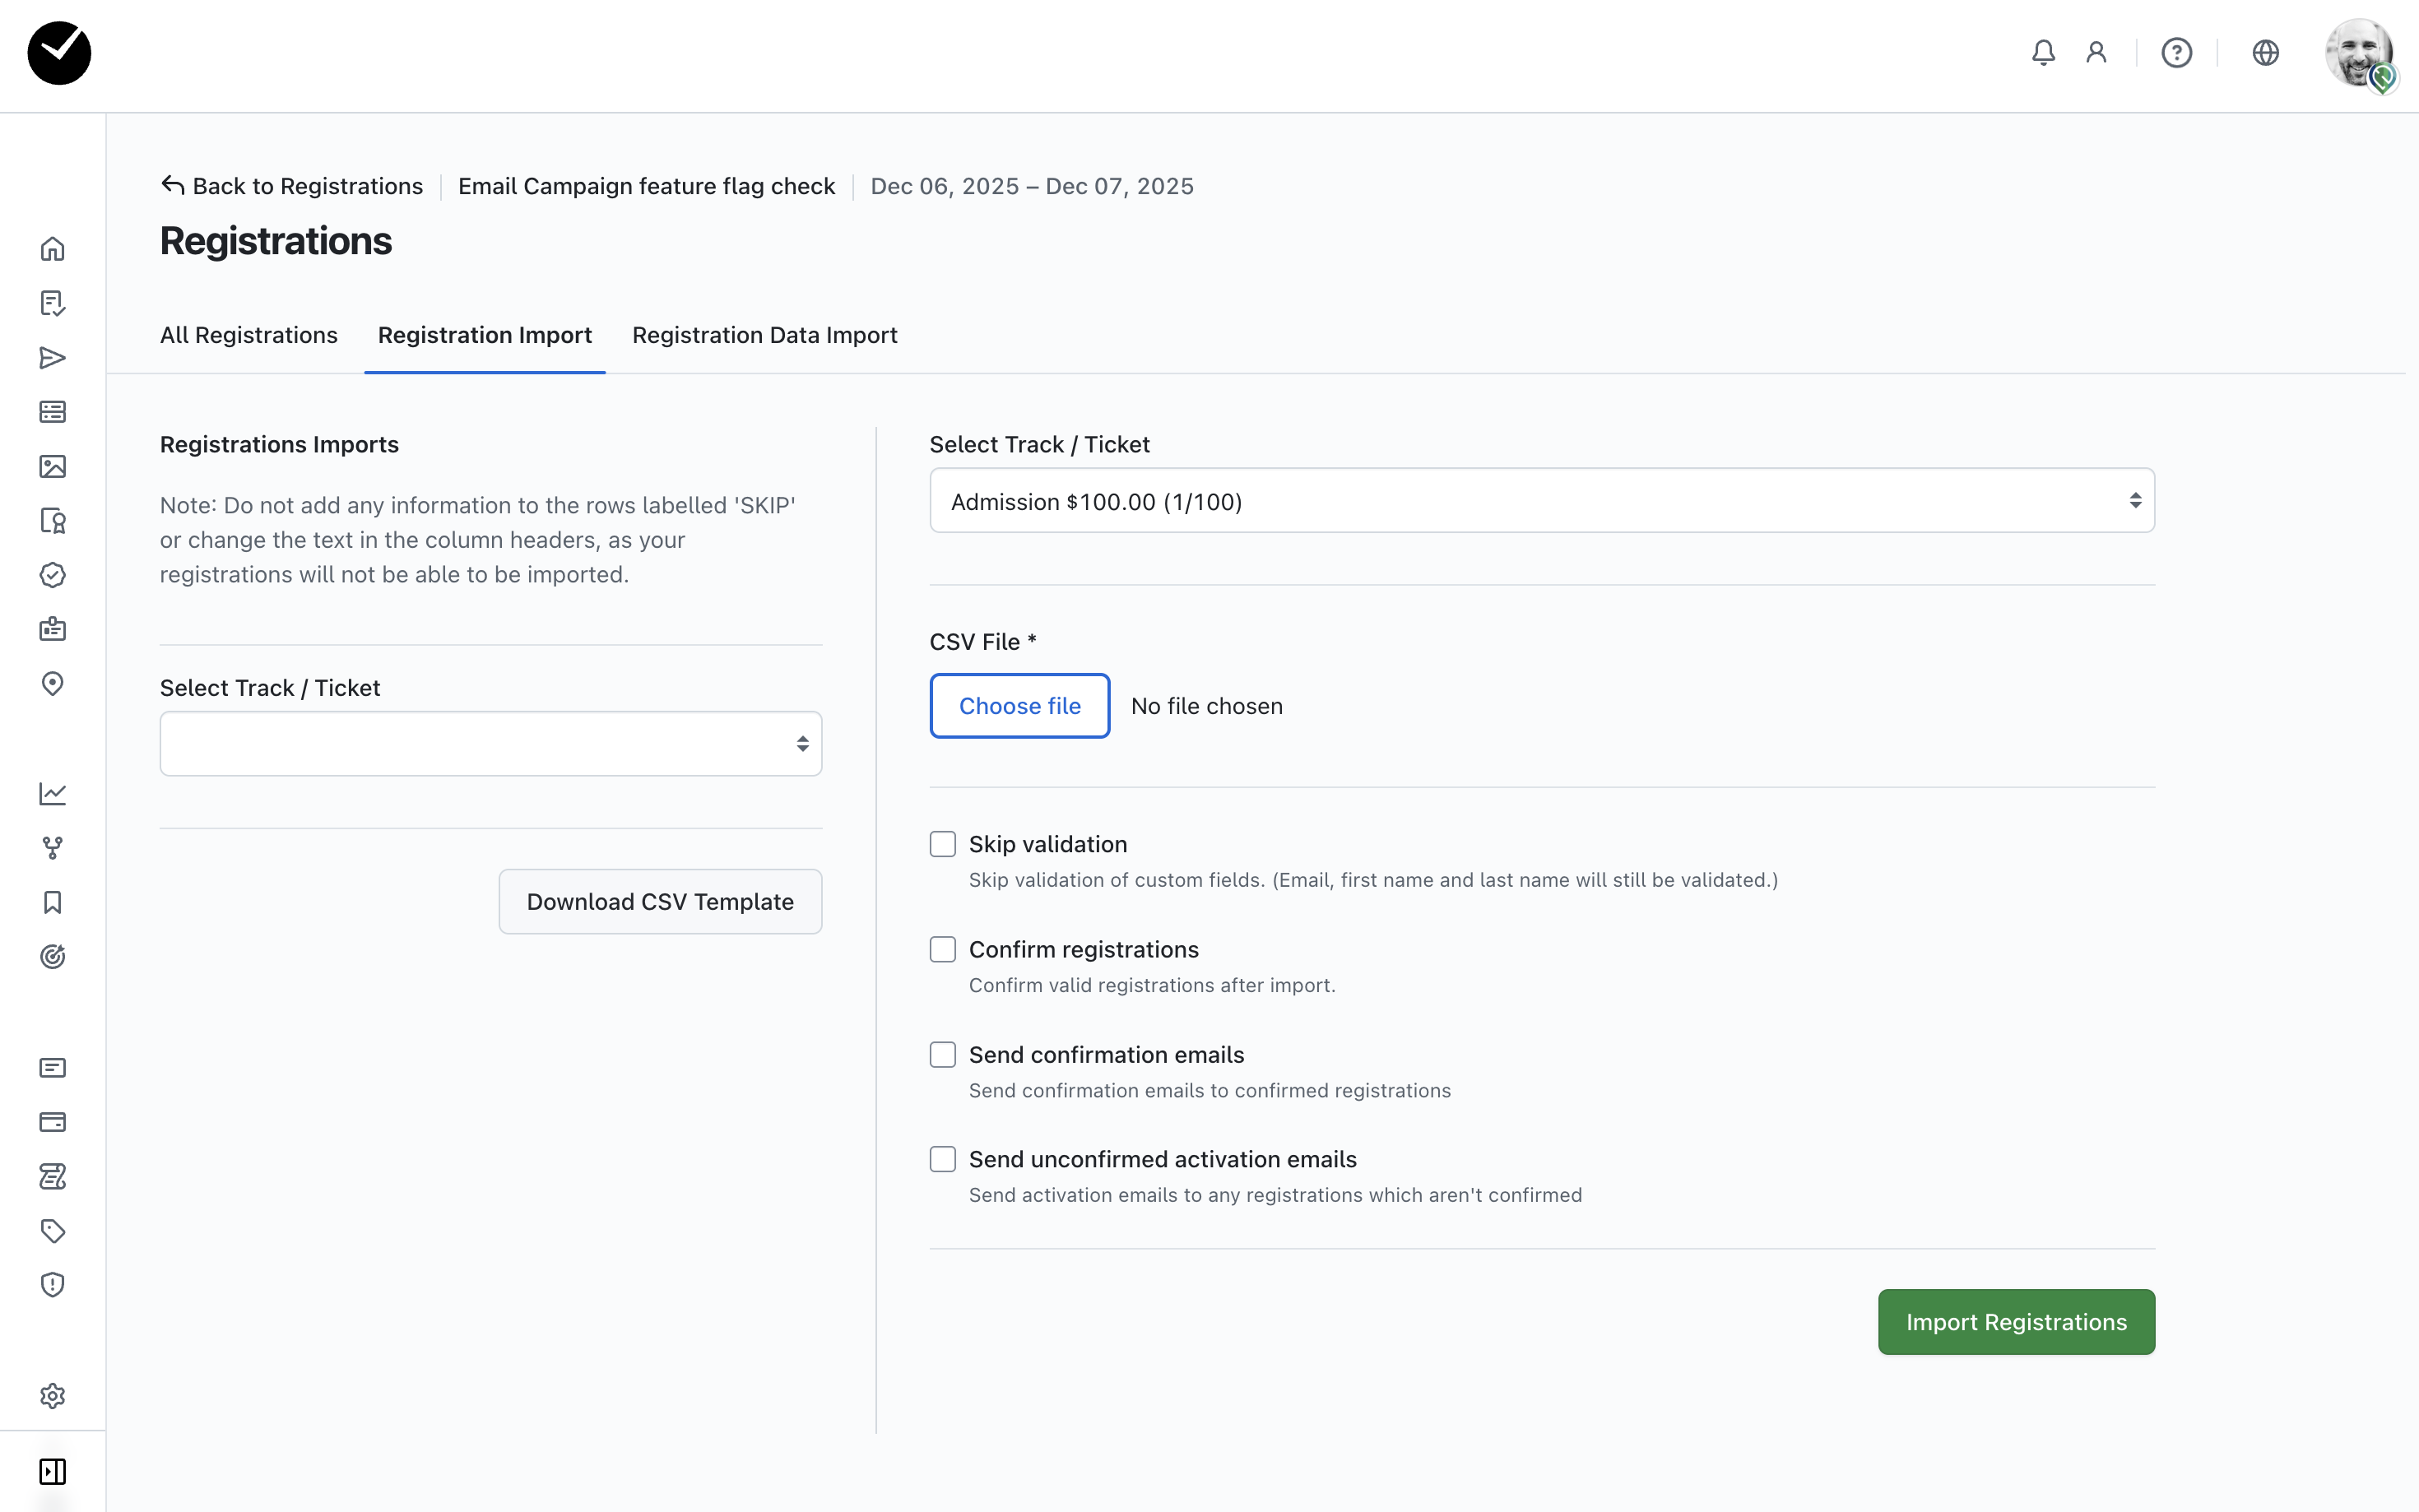
You can also update multiple registrations at once using our 'Registration Data Import' feature. Simply click on the 'Registration Data Import' tab and select the 'New Registration Data Import' button at the top right of the page, and you will be presented with the following page:

From here, you can create a CSV template with the specific fields you wish to update per attendee using the 'Select Fields' menu:
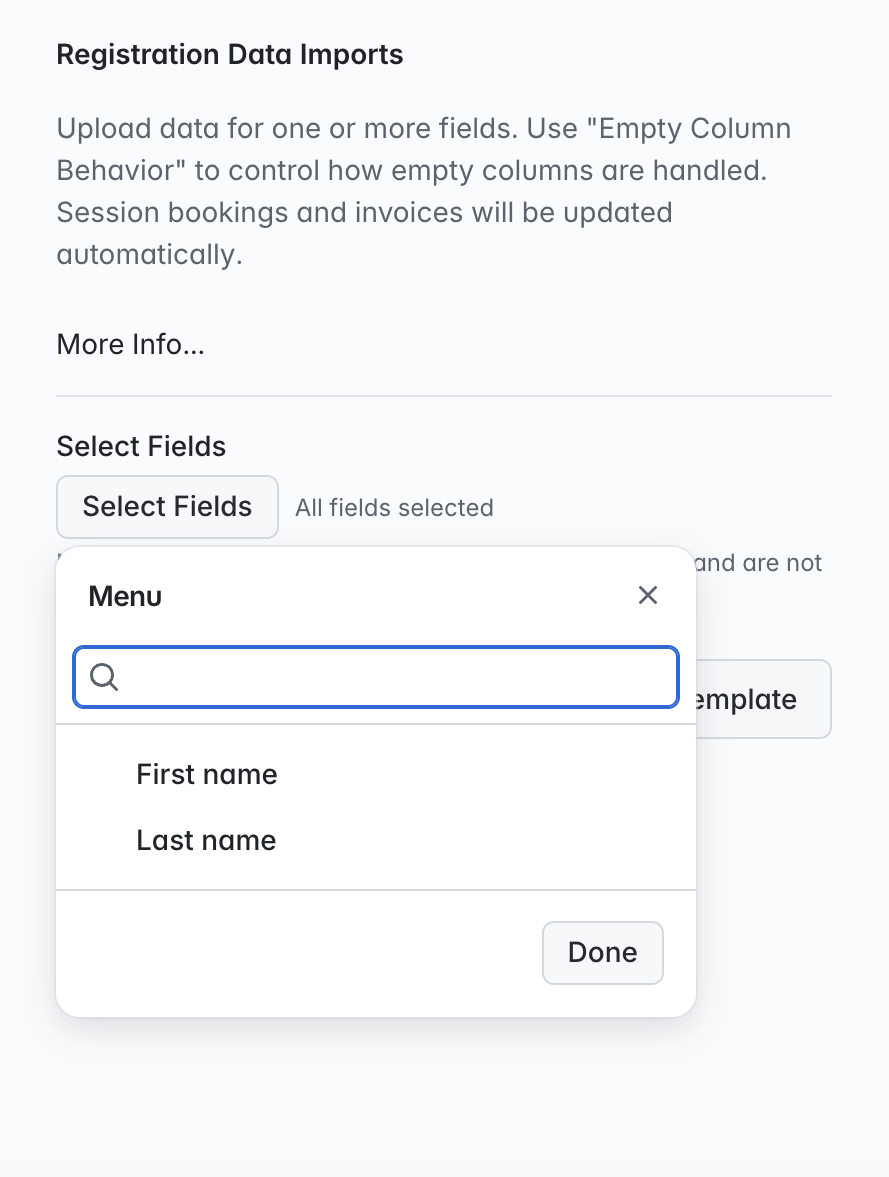
Simply select the fields you wish to update for the registrations and click 'Done'. Select to download you new CSV template, update the CSV as required and when you're ready to import, upload your CSV and click on the 'Import Registration Data' button to submit.
Viewing a registration
You can view, edit, resend or cancel a registration using the tools on the right side of the Registrations page - just click on the 3 dots at the end of the row of the attendee you wish to interact with.
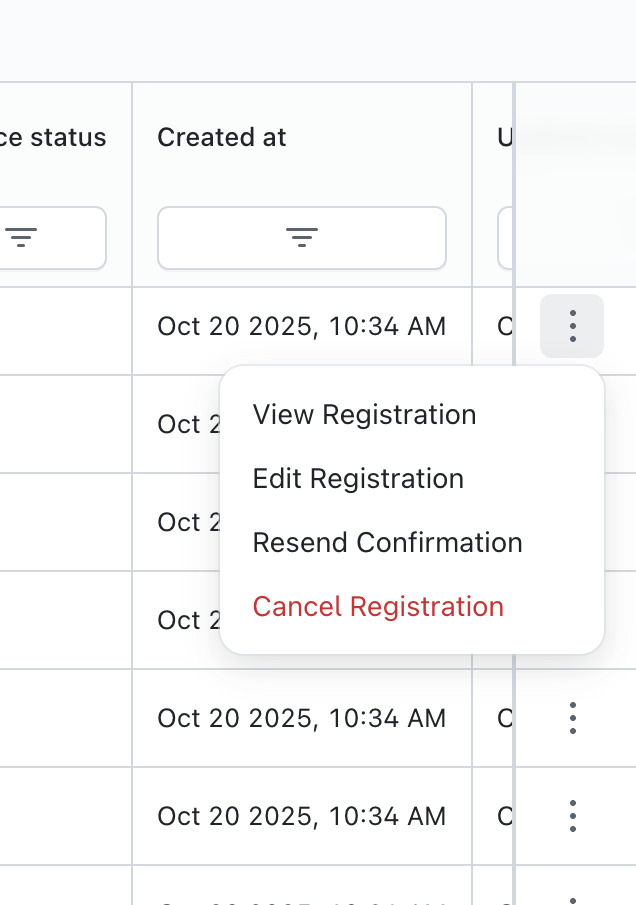
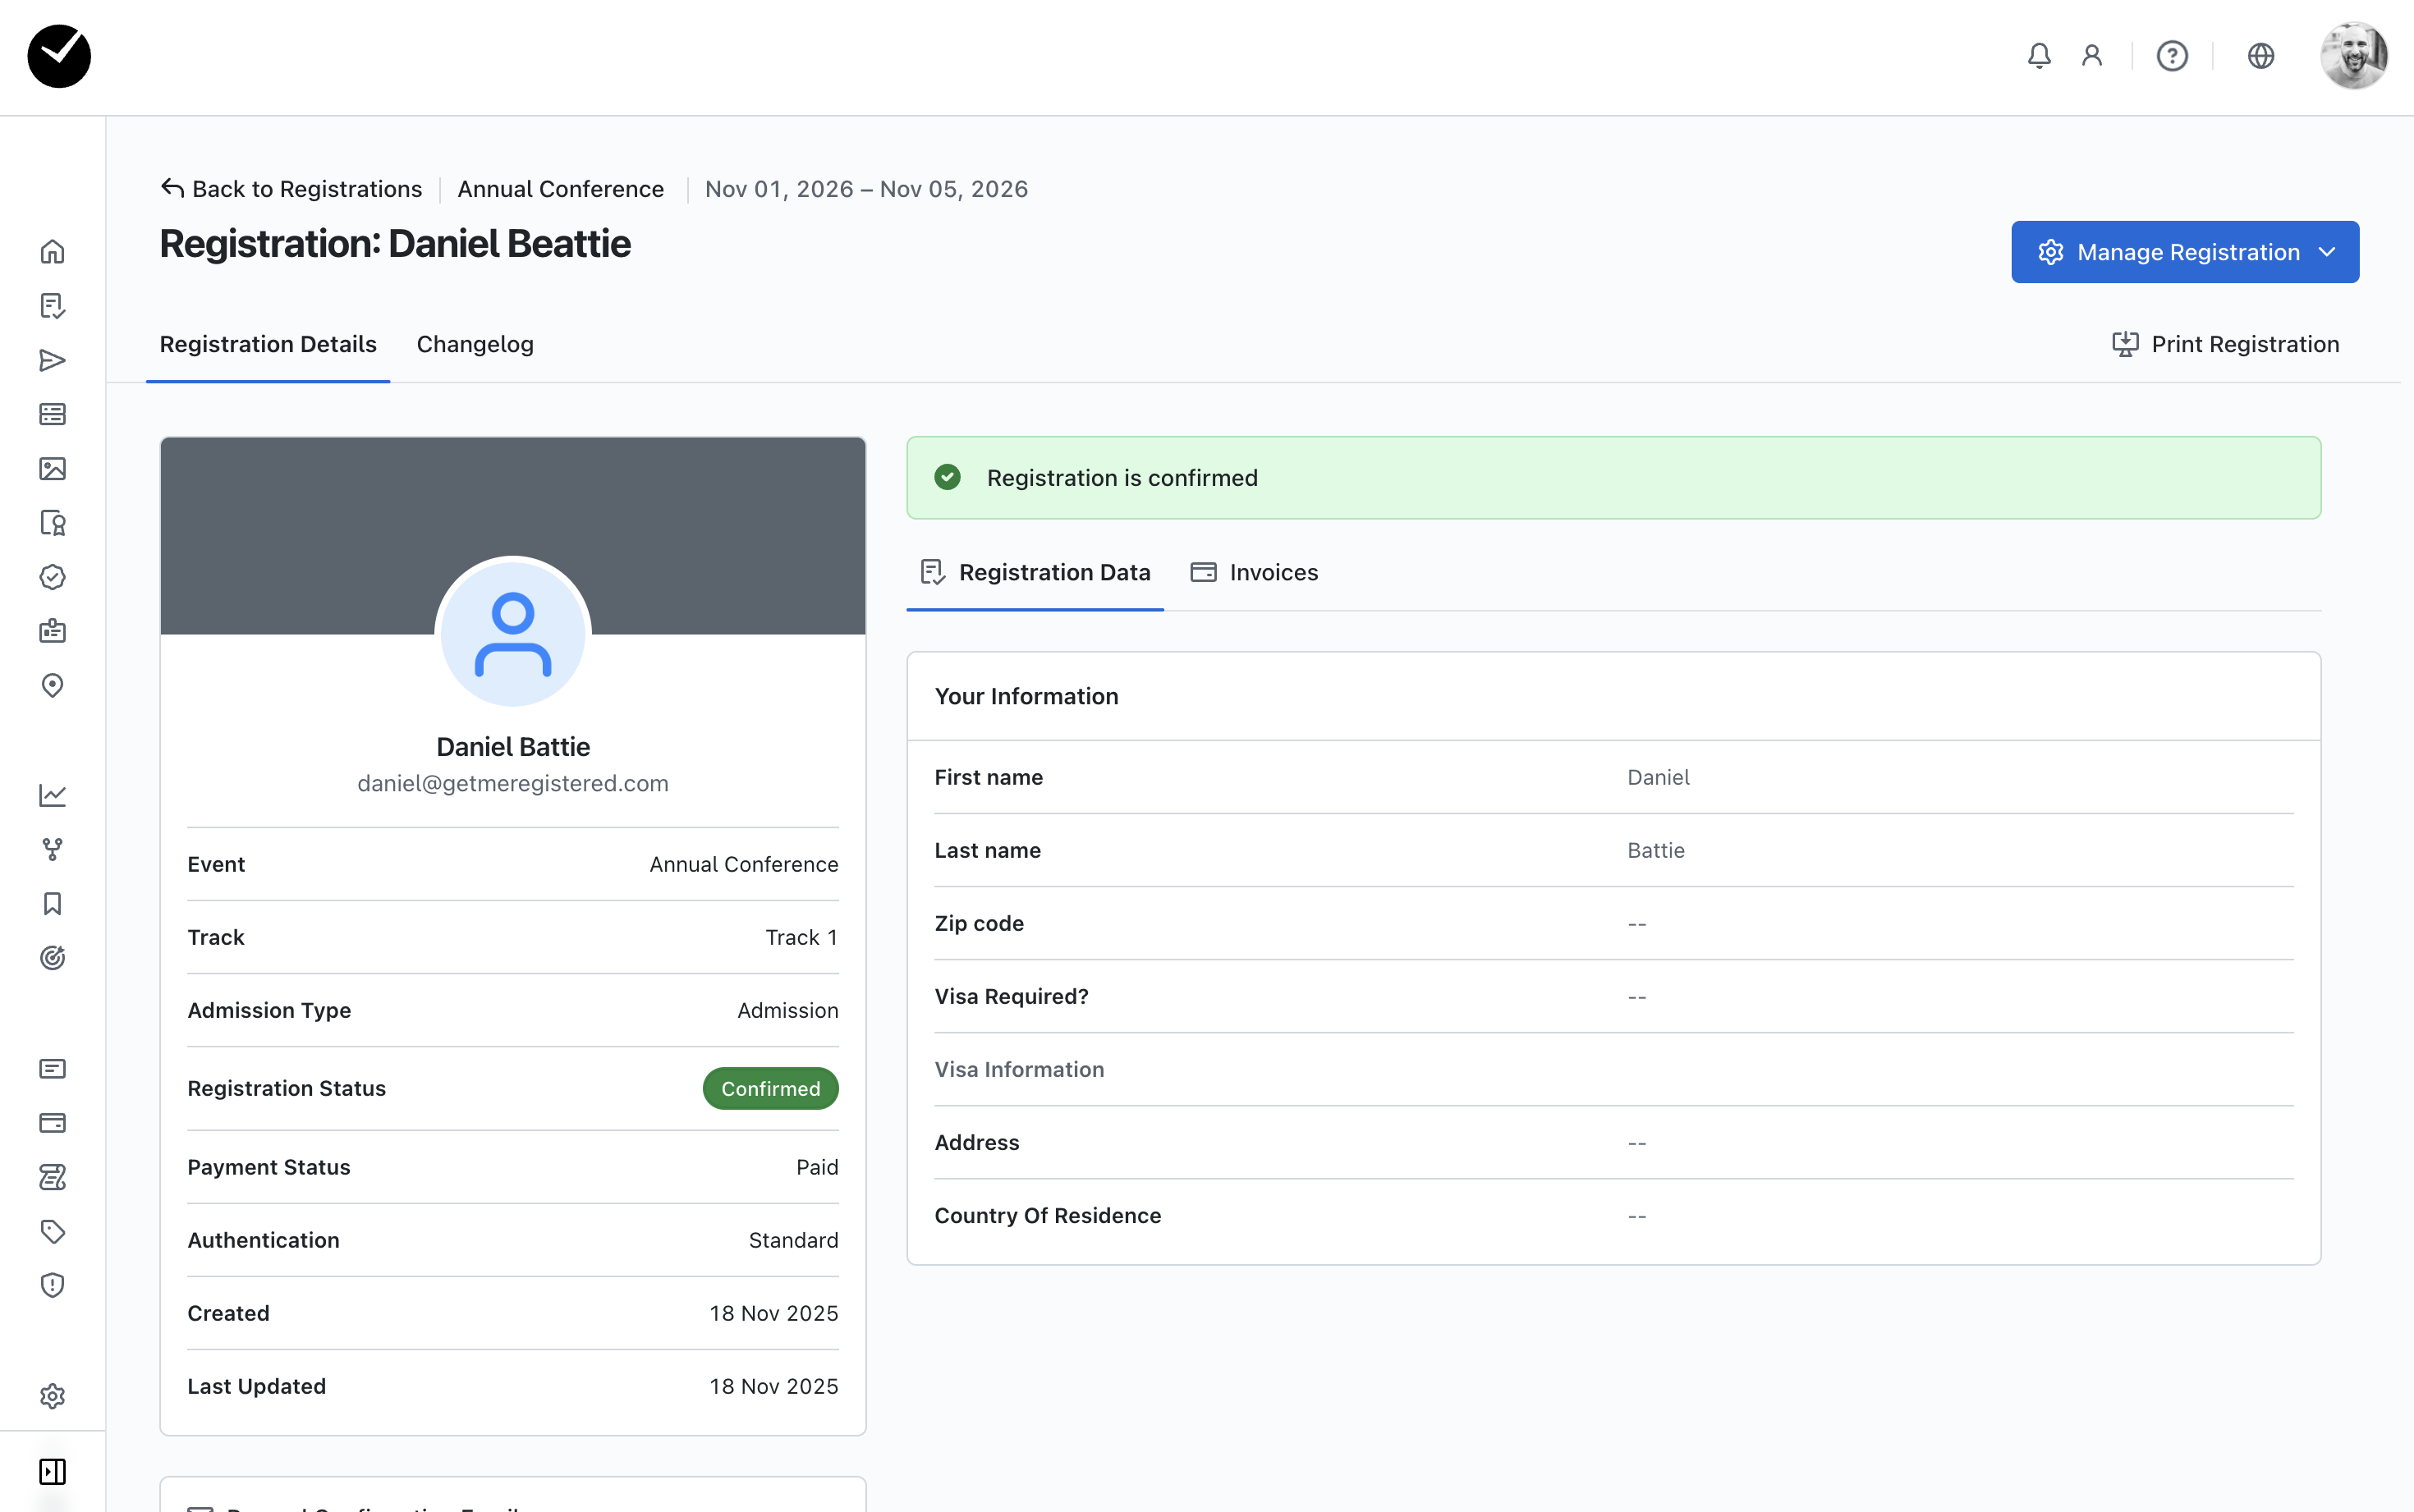
If you select 'View Registration', it will take you to directly view the attendee's registration - from here you can view their submitted information, amend their registration if required using the 'Manage Registration' menu (top right), and also view any recent changes made to the form by the attendee by selecting the 'Changelog' tab. You can easily return to the 'Registrations' area of your event by clicking the 'Back To All Registrations' option.
Editing a registration
When you select 'Edit Registration' for any row on the Registrations page, it will take you directly to the attendee's registration form - from here you can make amendments as required, and also enter any supplementary information into back office fields that are only visible to the Admin Event Users viewing the form. Once again, you can return to the 'Registrations' area of your event by clicking the 'Back To All Registrations' option.
Cancelling a registration
As an administrator, you may need to cancel a registration in your event at some point. This can easily be done by entering the 'Registrations' area of your event and selecting the 'Cancel Registration' option displayed under the menu option inline with the attendee you wish to cancel. When a registration is canceled, all of the attendee's registration details are retained, but this information will not be displayed in reports (unless specifically selected when creating a report). Also, any rooming night information displayed on your Event Dashboard will be updated (if affected by the attendee's cancellation). You can also restore or completely delete a registration in your event from the same menu once a registration is in a 'Cancelled' state.
Resending an attendee confirmation email
Once either you have registered an attendee or an attendee registers themselves via the event website, you will have the ability to resend the attendee their confirmation email. This is a handy tool when an attendee claims they haven't received their email or they have deleted it by accident.
To resend a confirmation email to a registered attendee, enter the 'Registrations' area of the Event Dashboard. Next to each registered attendee listed, you can find the 'Resend Confirmation' option displayed under the menu options on the far right of the row - just click on this and the attendee will receive a new confirmation email straight to their inbox!