.png)
How do I create and manage users for my organization?
Note - only Administrator Users can create and manage Event Users within your organization.
There are two types of user roles that can access the 'back office' of your event in getregistered® - these are Admin Event Users and Member Event Users.
Admin Event Users can access the admin areas of any of your organization's current events and can interact with all of the administration features.
Member Event Users can only access events they have been granted access to by an Admin Event User and have limited access to features within their events based on their role type.
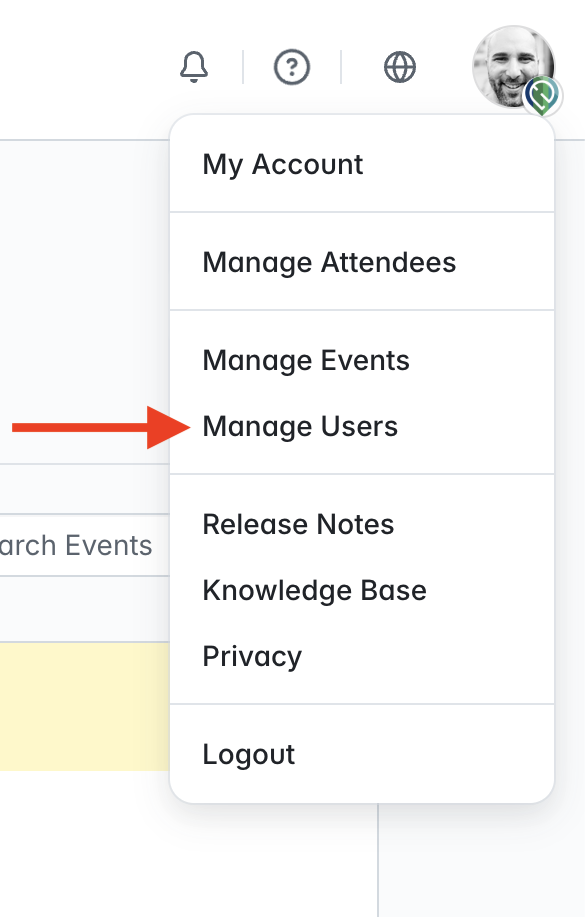
Both types of users can be created by an Admin Event User, and can be managed directly from an event or when interacting with the Organization Dashboard. To create or manage users of Admin level and below, click on your profile avatar (top right of the page) and select the 'Manage Users' option. This will redirect you your organization's 'Team' page.
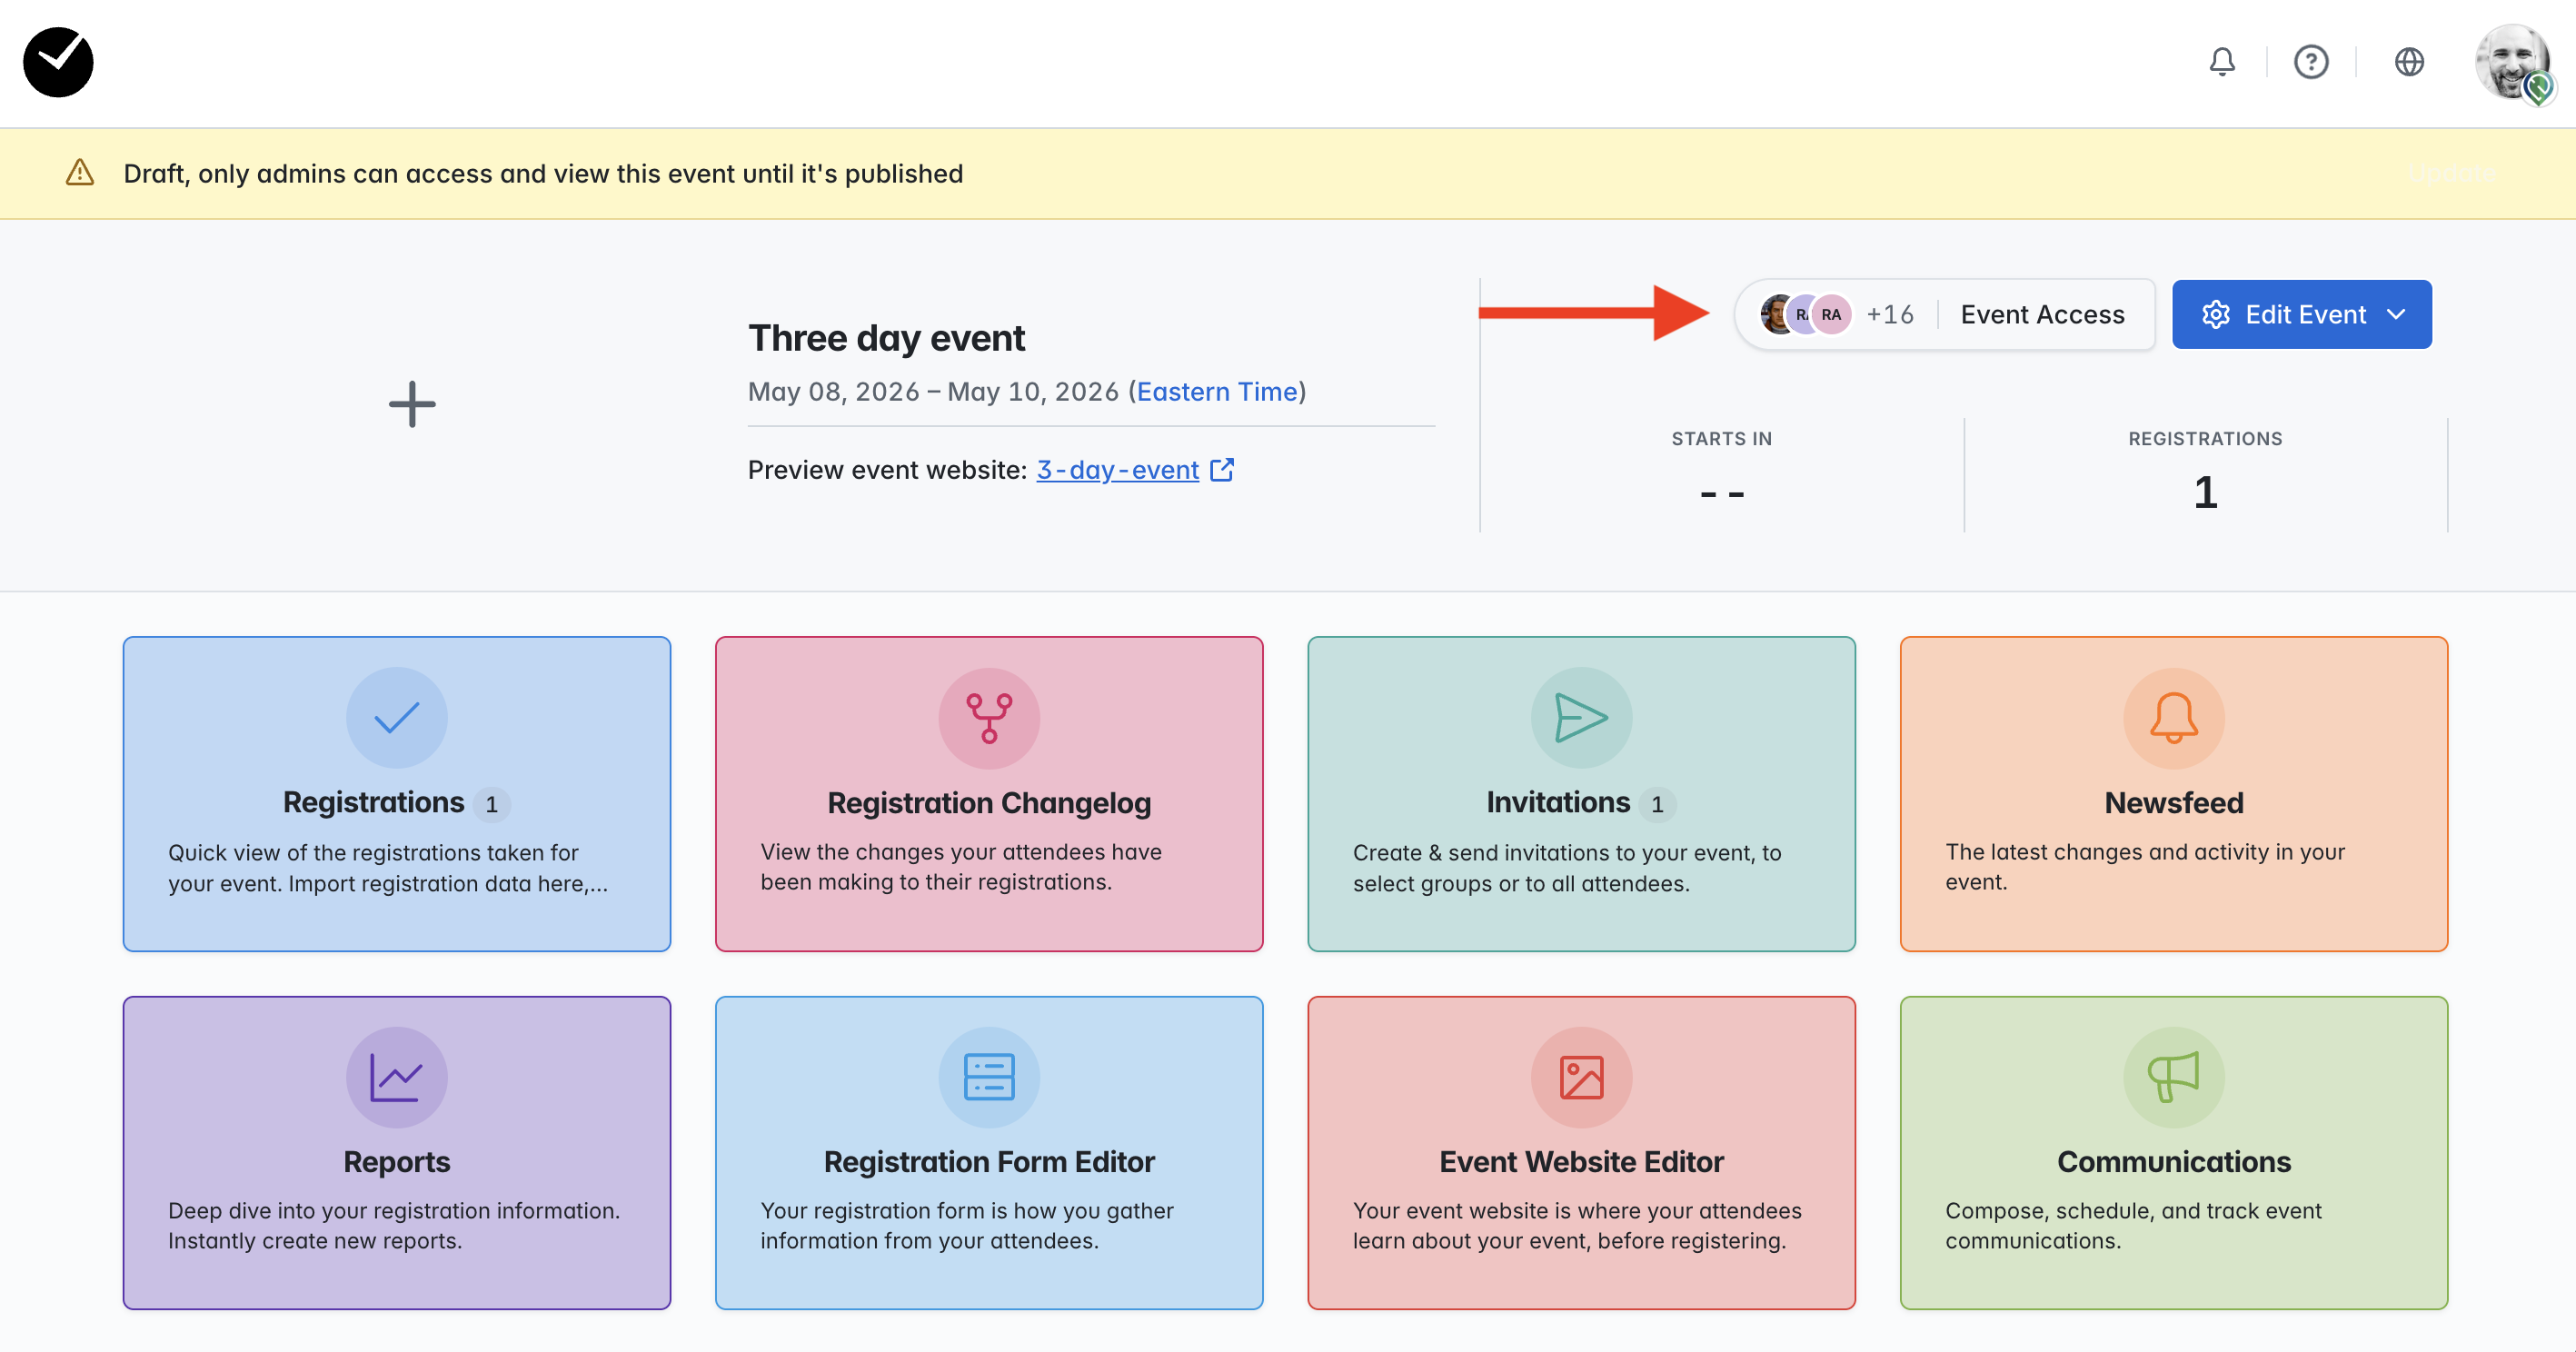
You can also create or add existing Member Event Users to a single event directly from your Event Dashboard via the 'Event Access' option at the top of the page:
The main differences between creating an Event User at event level and organization level is that at organization level you can:
- Create new Admin Event Users as well as Member Event Users
- Manage access for all Event Users in your organization (eg assign to multiple events, change roles, manage event and report accesses)
What kind of roles can I assign to my organization's users?
There are a number of different user roles available to you within your event/organization as an Admin user, which are as follows:
Admin Event Users
- Administrator - this role grants a user full access to all events and features within your organization, with the ability to create and manage user roles as well as create/manage any event available.
Member Event Users
- Report Viewer - this member role type grants users the ability to access an event and view any reports you have permitted them to. They solely have the ability to view and download reports, and cannot perform any other actions within your event admin areas.
- Check-in Staff - this member role type grants users the ability to access an event and interact with any features related to checking in attendees in your event (eg Checkpoints). Users with this role will be limited to using check-in related features only.
- Site Builder - this member role type grants users the ability to access an event and interact with any features related to building your event website (eg Event Website Editor). Users with this role will be limited to using site building related features only.
- Registration Manager - this member role type grants users the ability to access an event and interact with any features related to event registrations (eg Registrations). Users with this role will be limited to using registration related features only.
- Event Admin - this member role type grants users the ability to access an event and interact with all features related to your event. Users with this role can access all areas and invite new/add existing users to the event (at 'member' role level only).
- Event Requestor - this member role type grants users the ability to access an event and interact with any features related to Event Requests. Users with this role will be limited to using site building related features only. Please note that this role should only be used by organizations that have the 'Event Requests' feature enabled.
Creating a new Event User via 'Manage Users'
Once you have selected the 'Manage Users' option, you will be redirected to your organization's 'Team' page. In here, you will see a list of all users currently added to your org - we also provide separate tabs for you to view your 'Admin' and 'Member' users specifically if required (by selecting either the 'Admins' or 'Members' tabs. On this table you can see the name, email, 'organization role', event access and current activation status for every Event User.
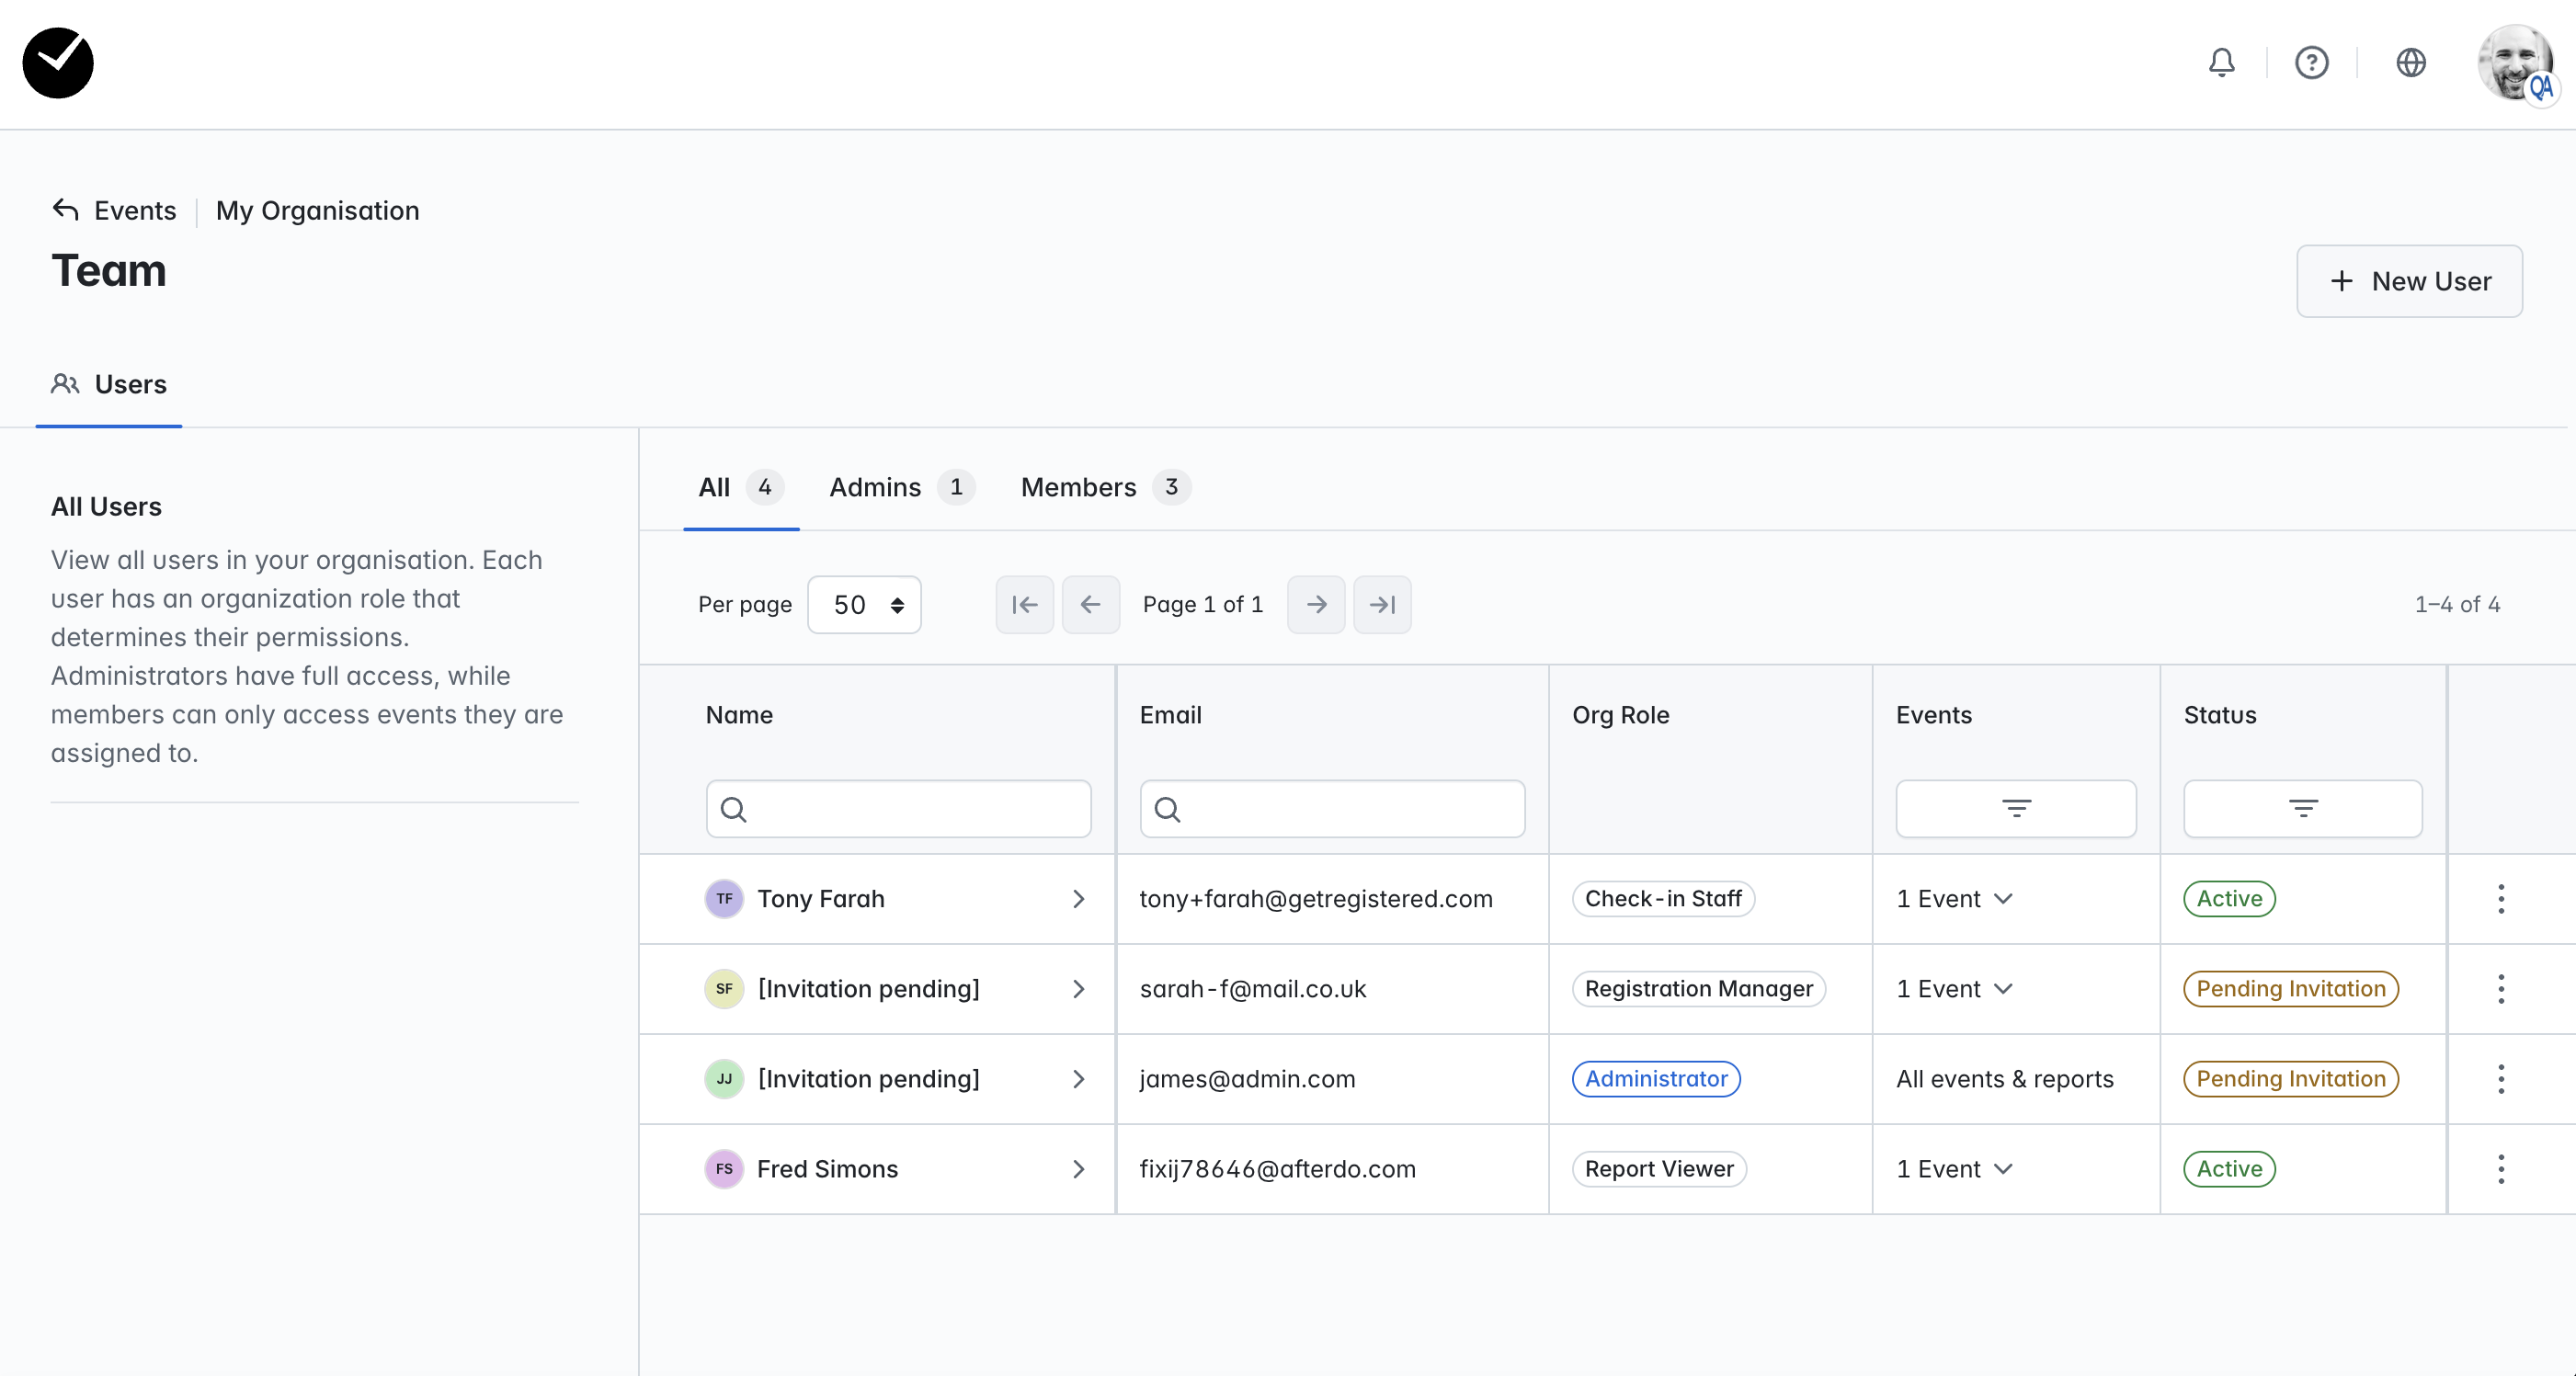
To create a new Event User, click the 'New User' option displayed at the top right of the page - you will be asked to provide the email address for the new user and select their role. Once a valid email address is submitted, you will then be asked to confirm the user's 'organization role'.
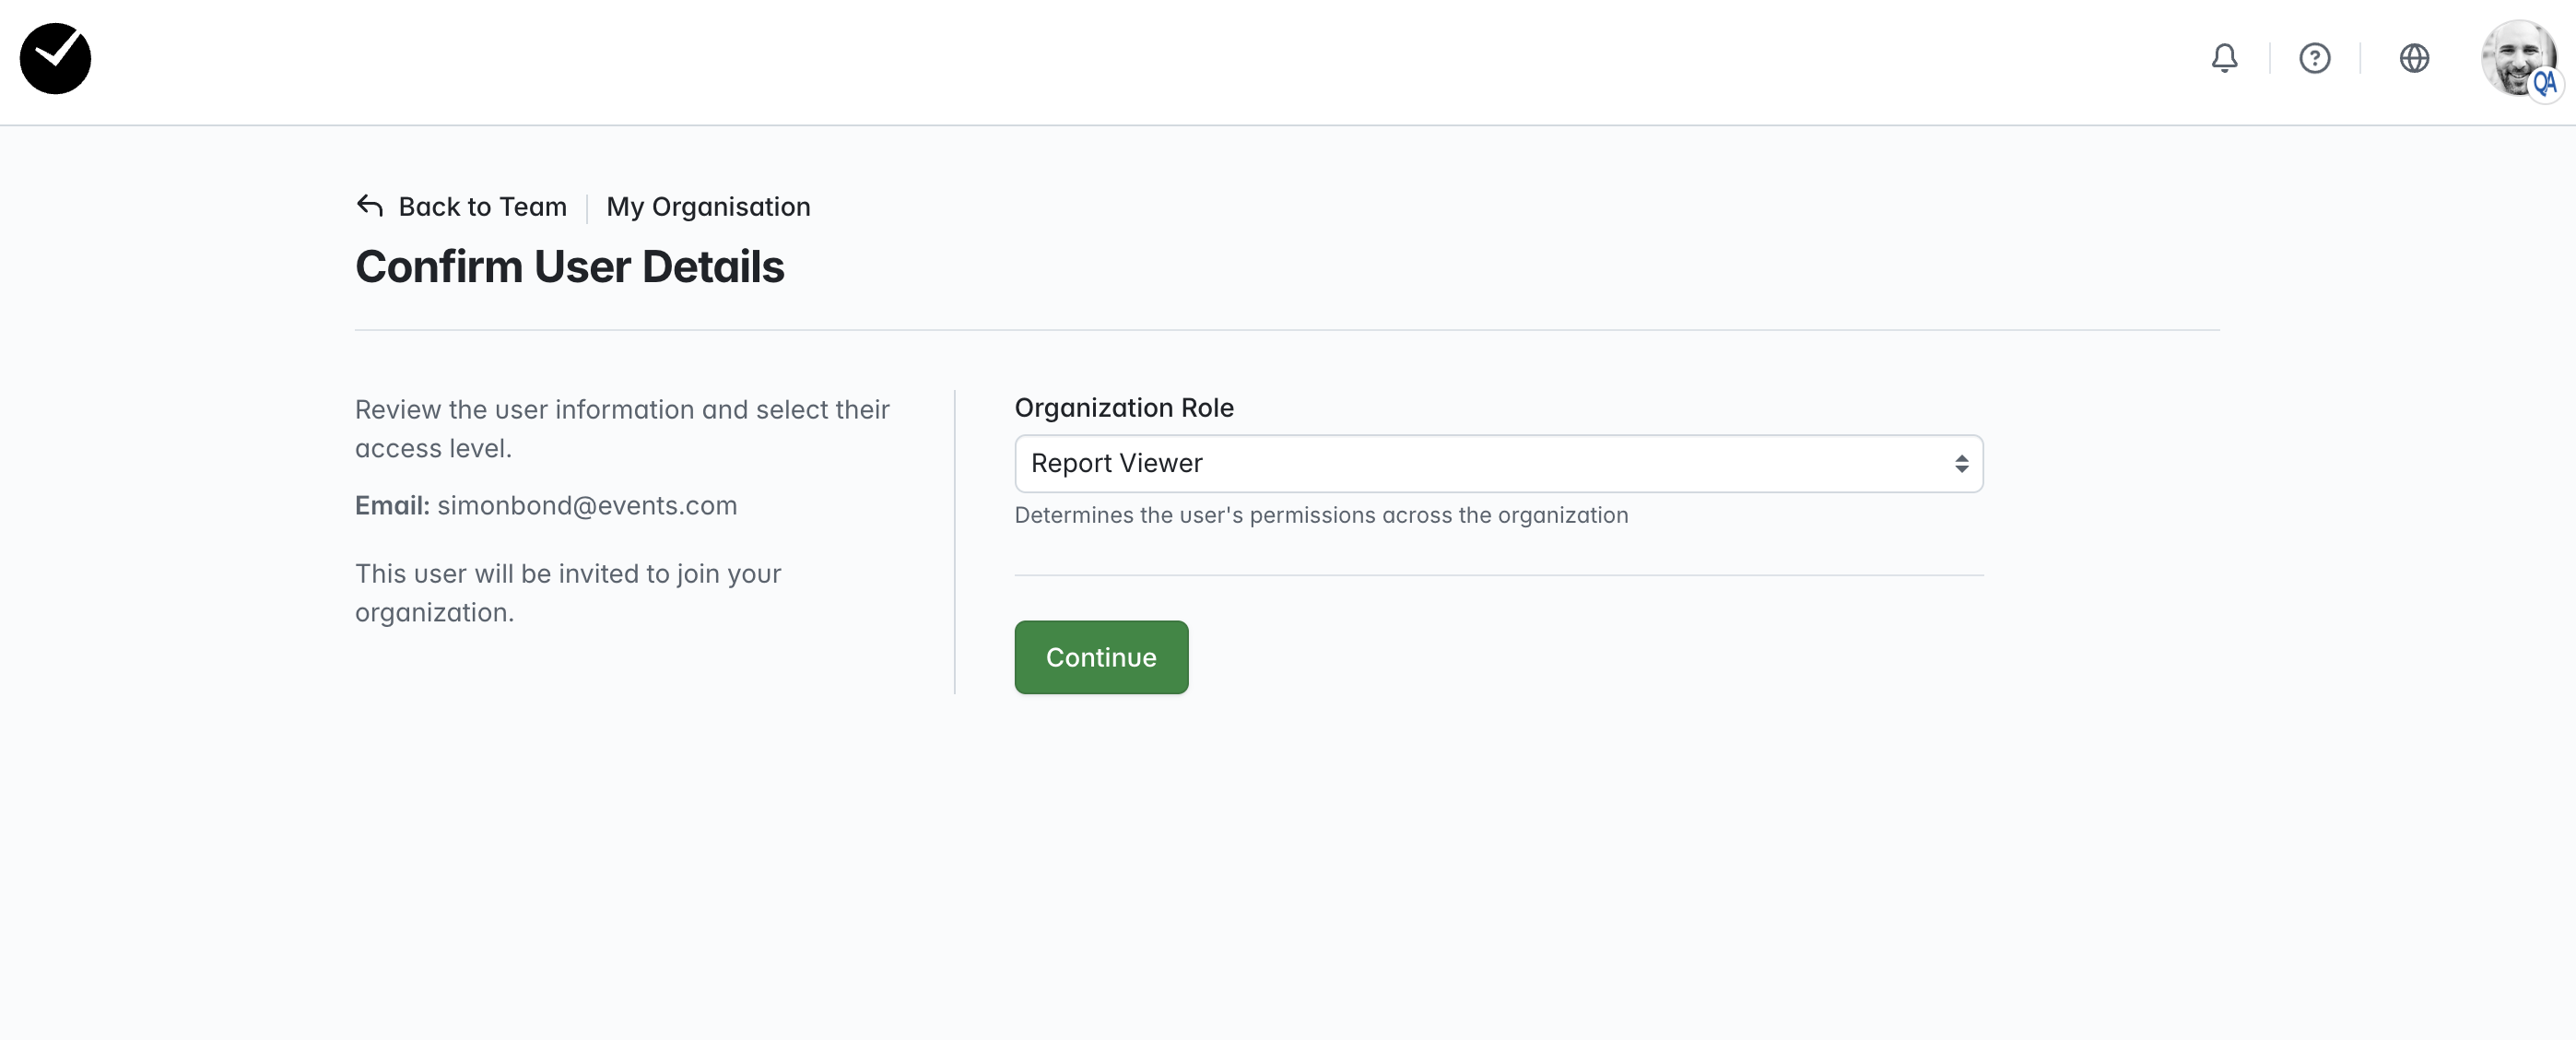
An 'organization role' is basically the role you wish to assign to the user as a default. For example, if you were to add a new user and want to add them to multiple events, by setting their 'organization role' to 'Report Viewer', when adding them to a new event, the default role of 'Report Viewer' will be pre-selected for you. A user can have different roles across events if needed, but general practice is that a user will have the same role throughout your organization, and therefore we provide a quick and easy way for you to assign without having to make any extra choices during the flow.
Once you are happy with the user's 'organization role', click on 'Continue' to proceed. You will then be redirected to the 'New User' form page.
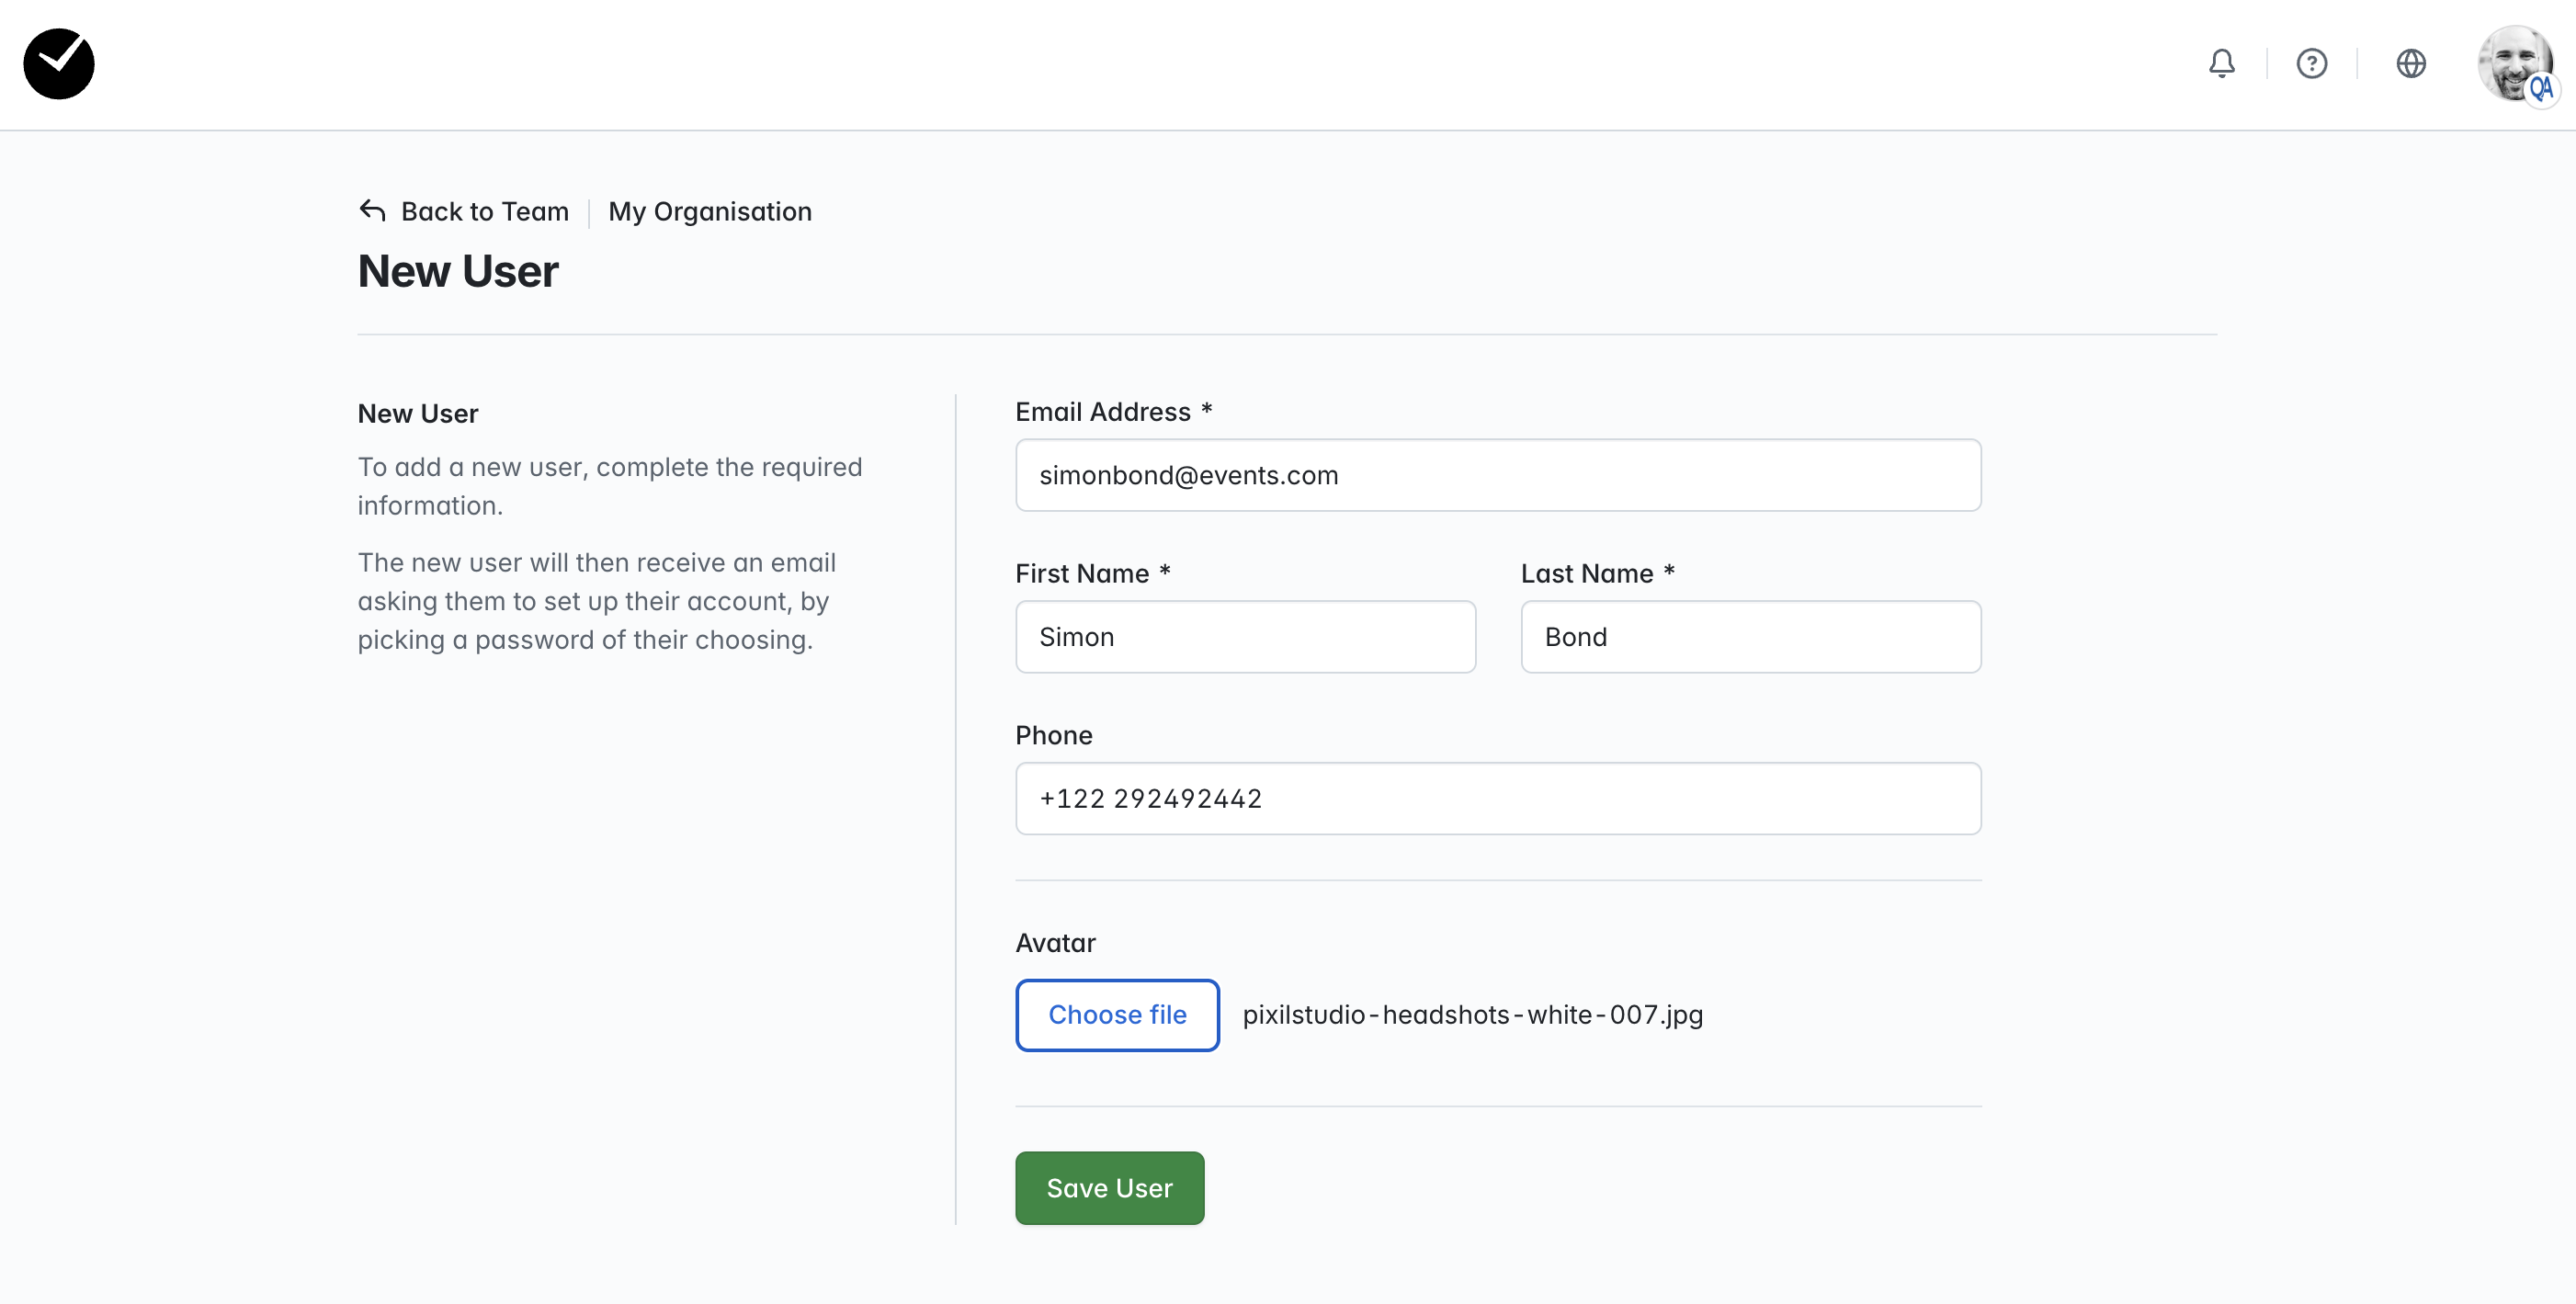
The form displayed allows you to add your new Event User's basic information (name, phone number and avatar). Once you have populated the form, click 'Save User' to continue, and the new user will receive an invitation email to your organization. You will then be taken to the 'Event Assignments' page to add any event and/or report access for your new user.
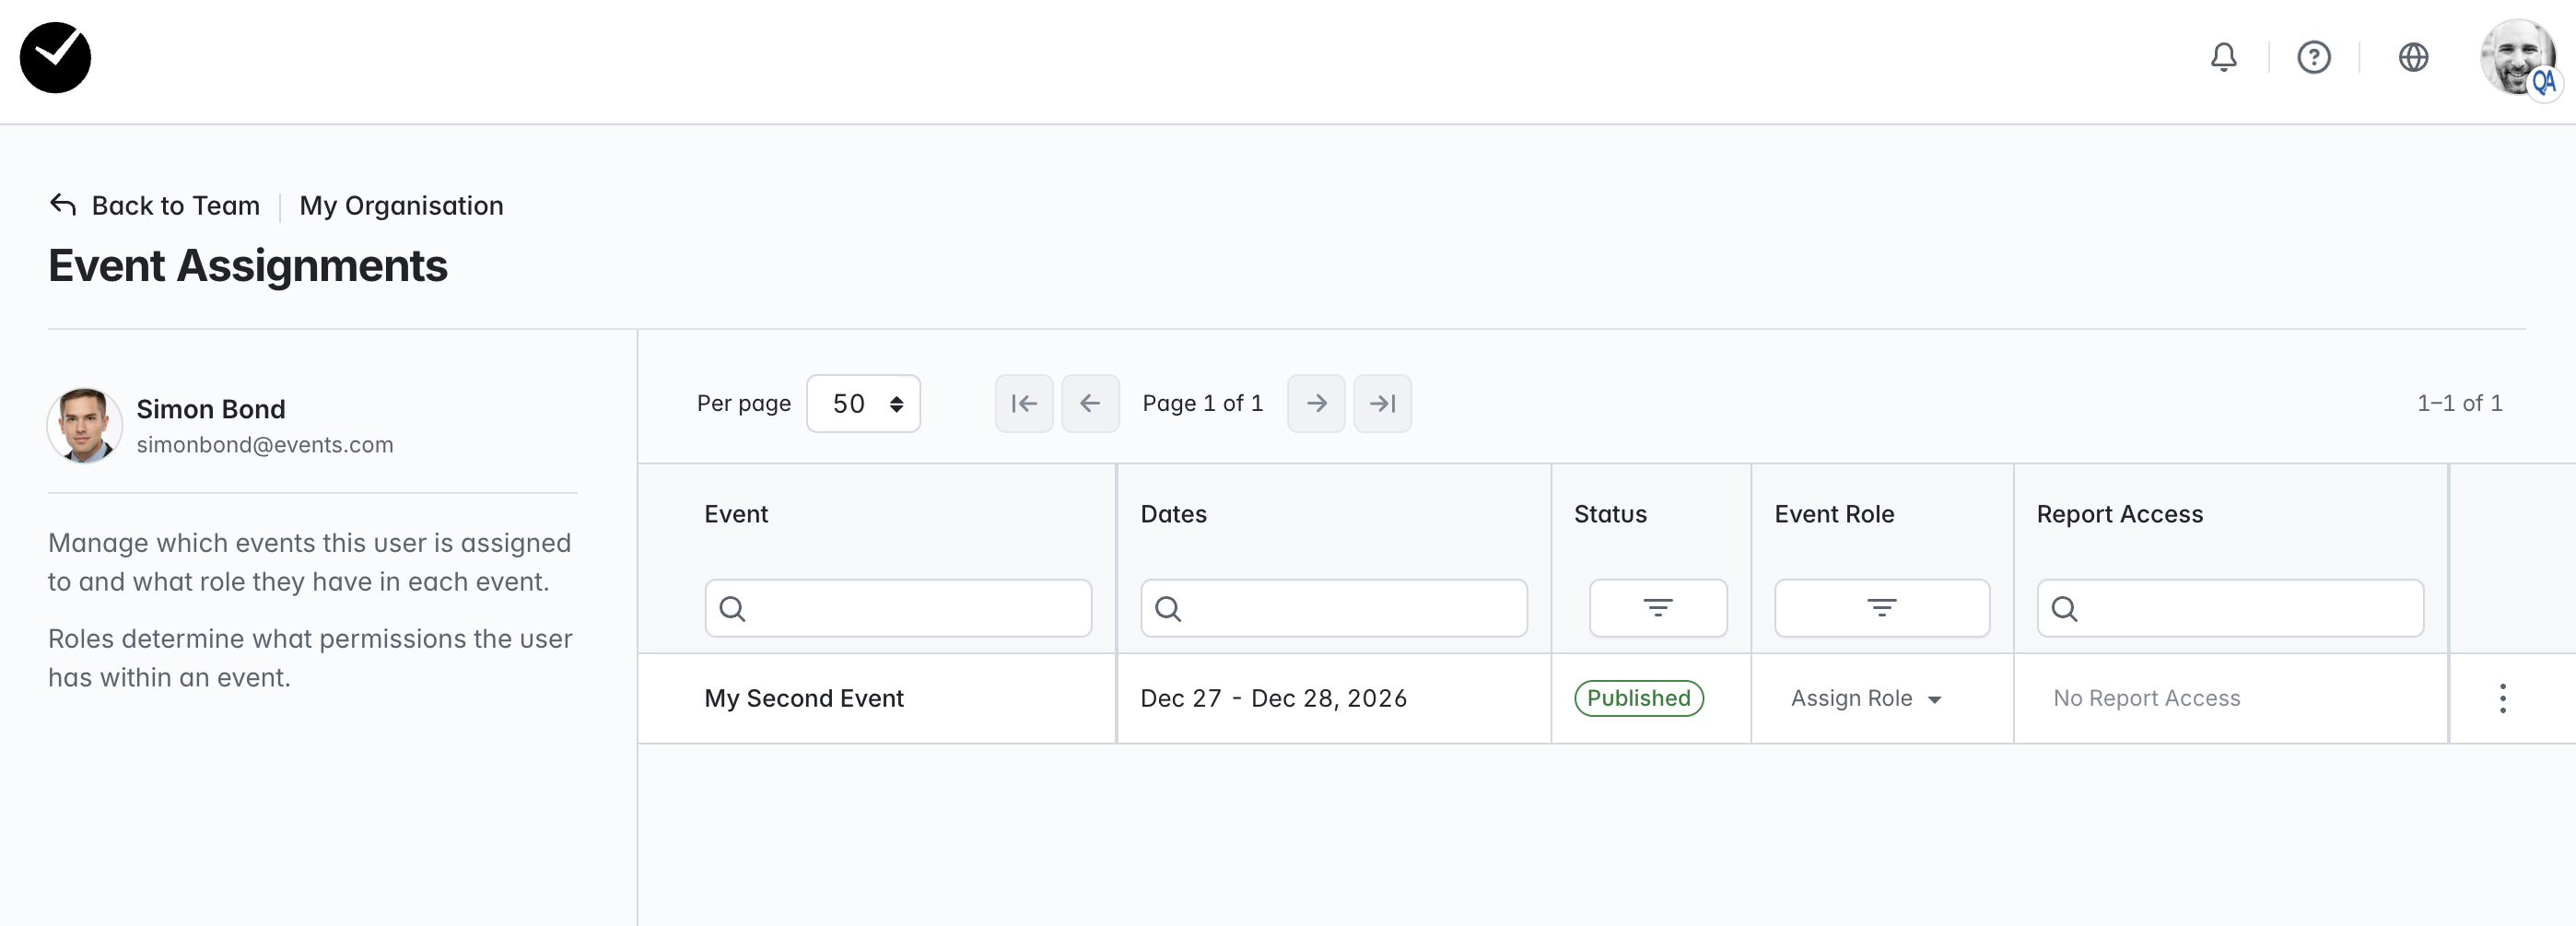
As you can see in the screenshot above, the Event Assignments page displays all the events available in your organization, along with running dates, statuses and current access for the new user. The table can be filtered and sorted as expected, making it easy to quickly find specific events while creating your assignments. If the user you have added is an Administrator, there is no further action required here (as they have access to all events and areas in your organization), but if they are assigned a 'Member' user role, then access must be created on this page for them to begin interacting with your events.
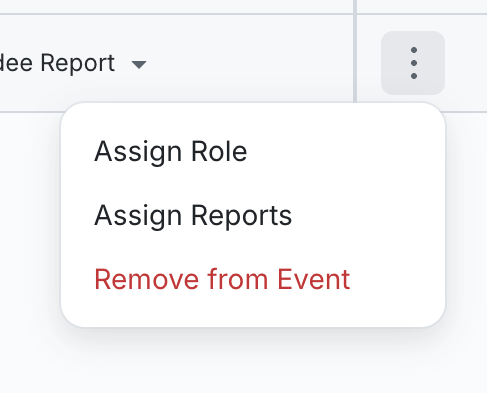
To grant your Member Event User access to an event, either click on the 'Assign Role' option under the 'Event Role' column or select the three dots at the end of the row for an event and select 'Assign Role'.
You will then see the following window:
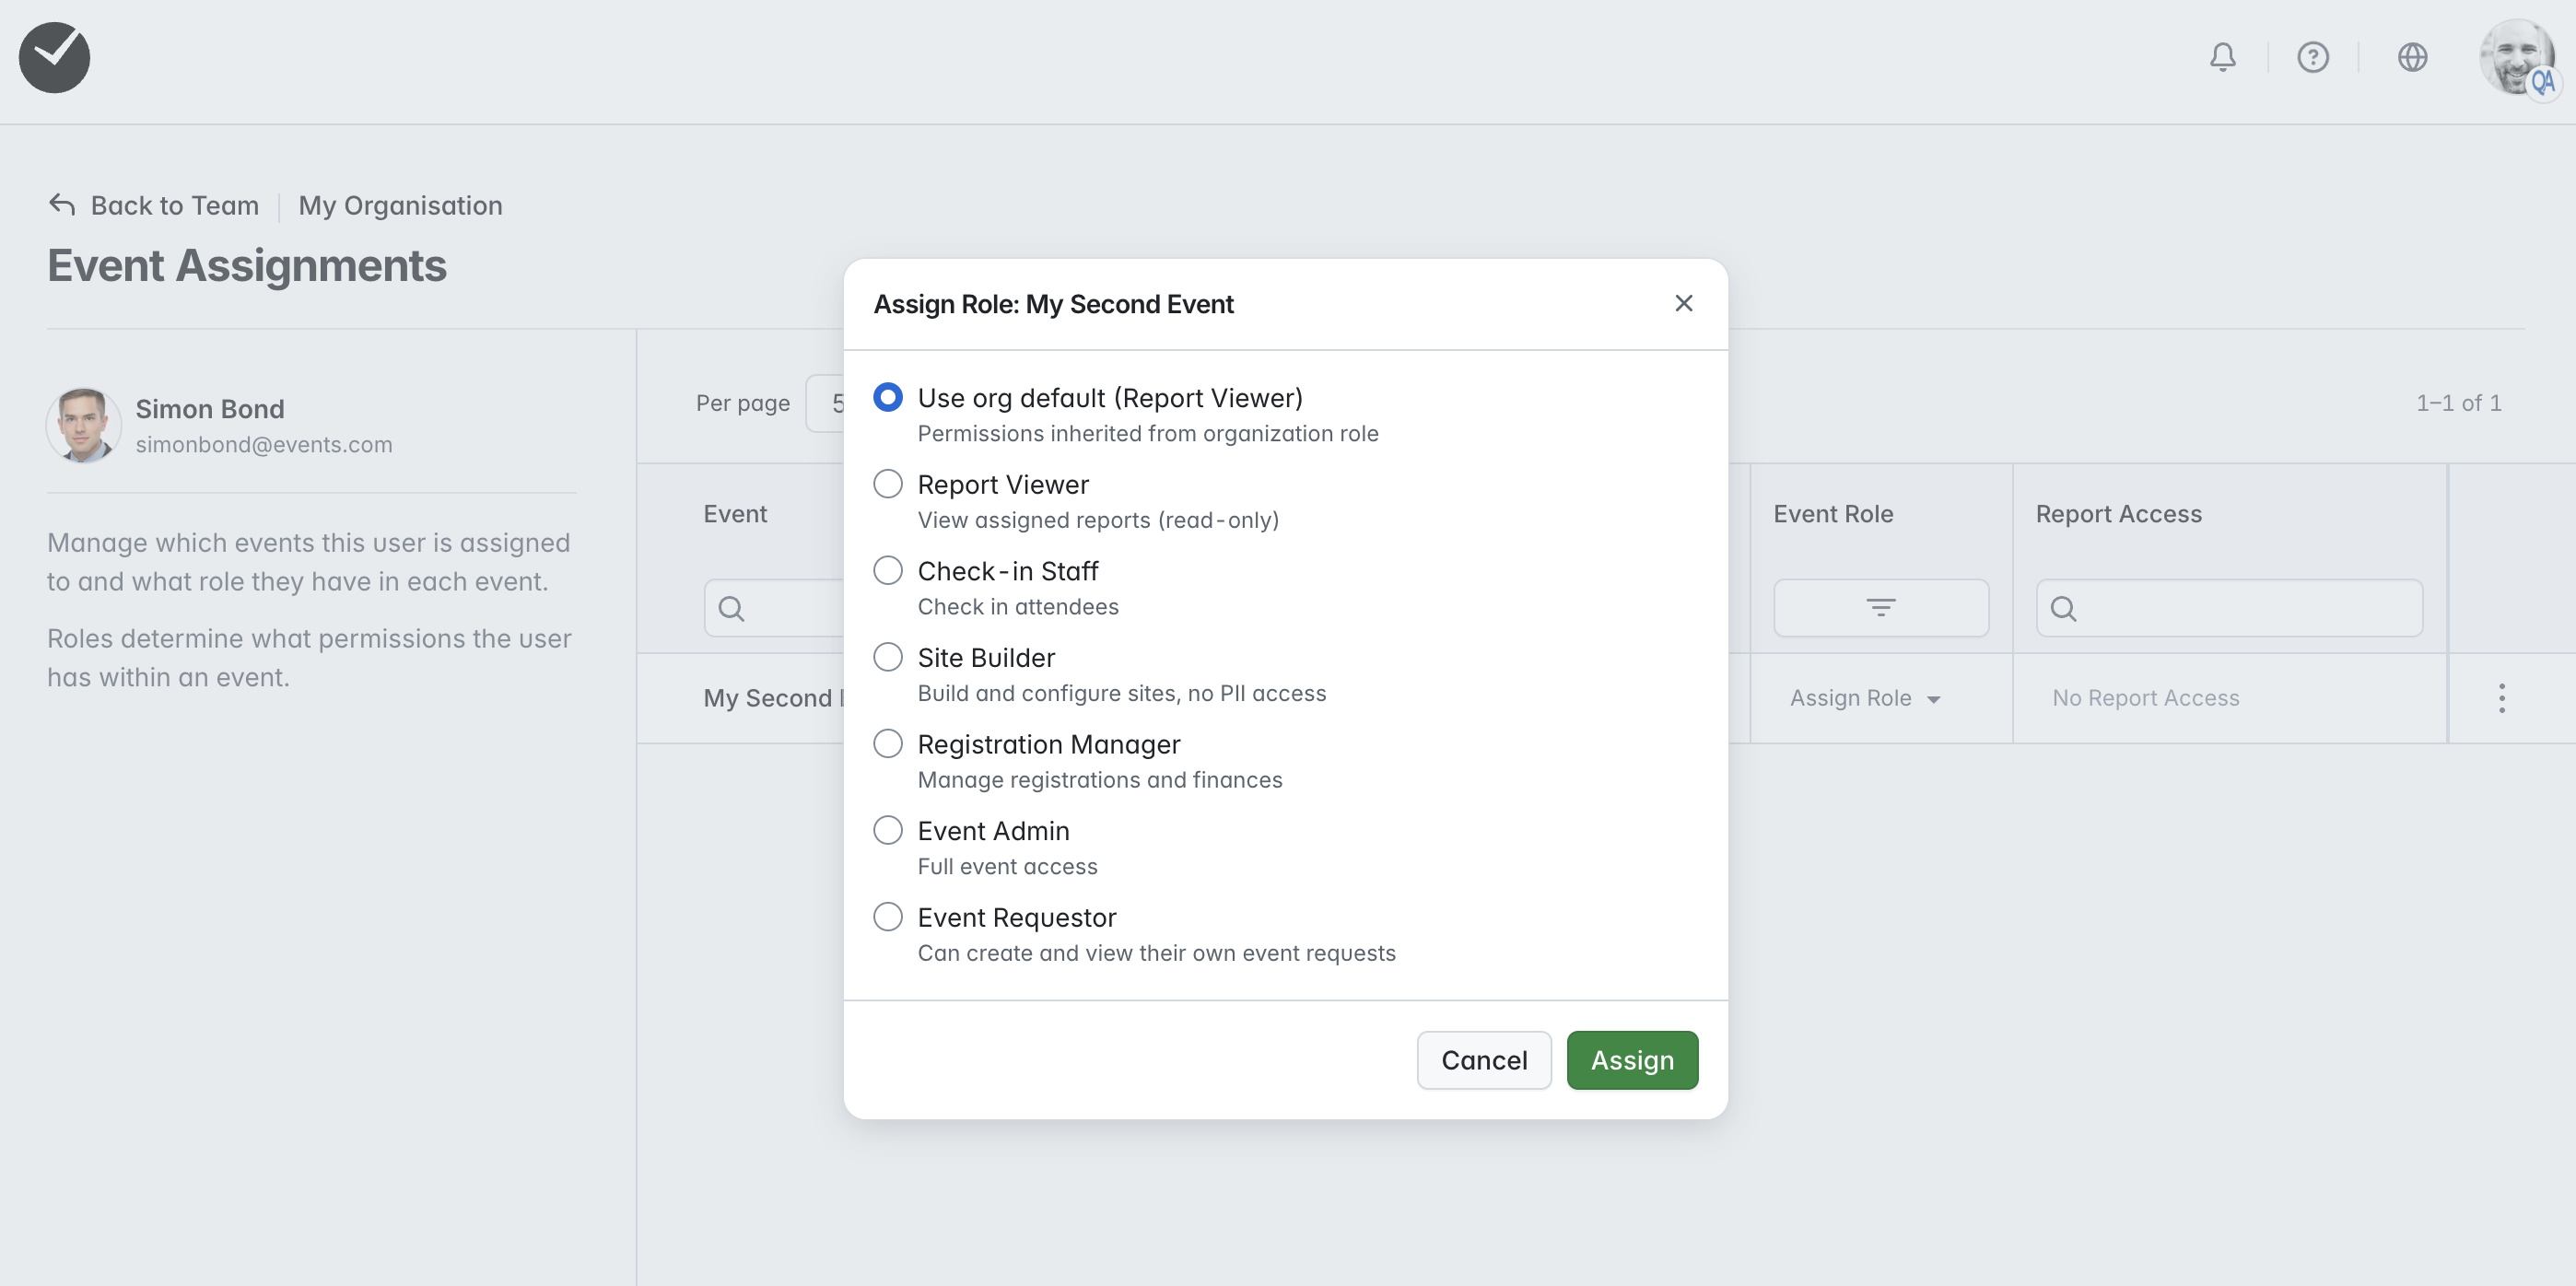
As mentioned earlier when assigning the user's 'organization role', the org role set during creation is selected by default. If this is appropriate, then you can just click 'Assign' to grant access. However, you can override the default if desired, but you can only assign 'Member' type roles in this area.
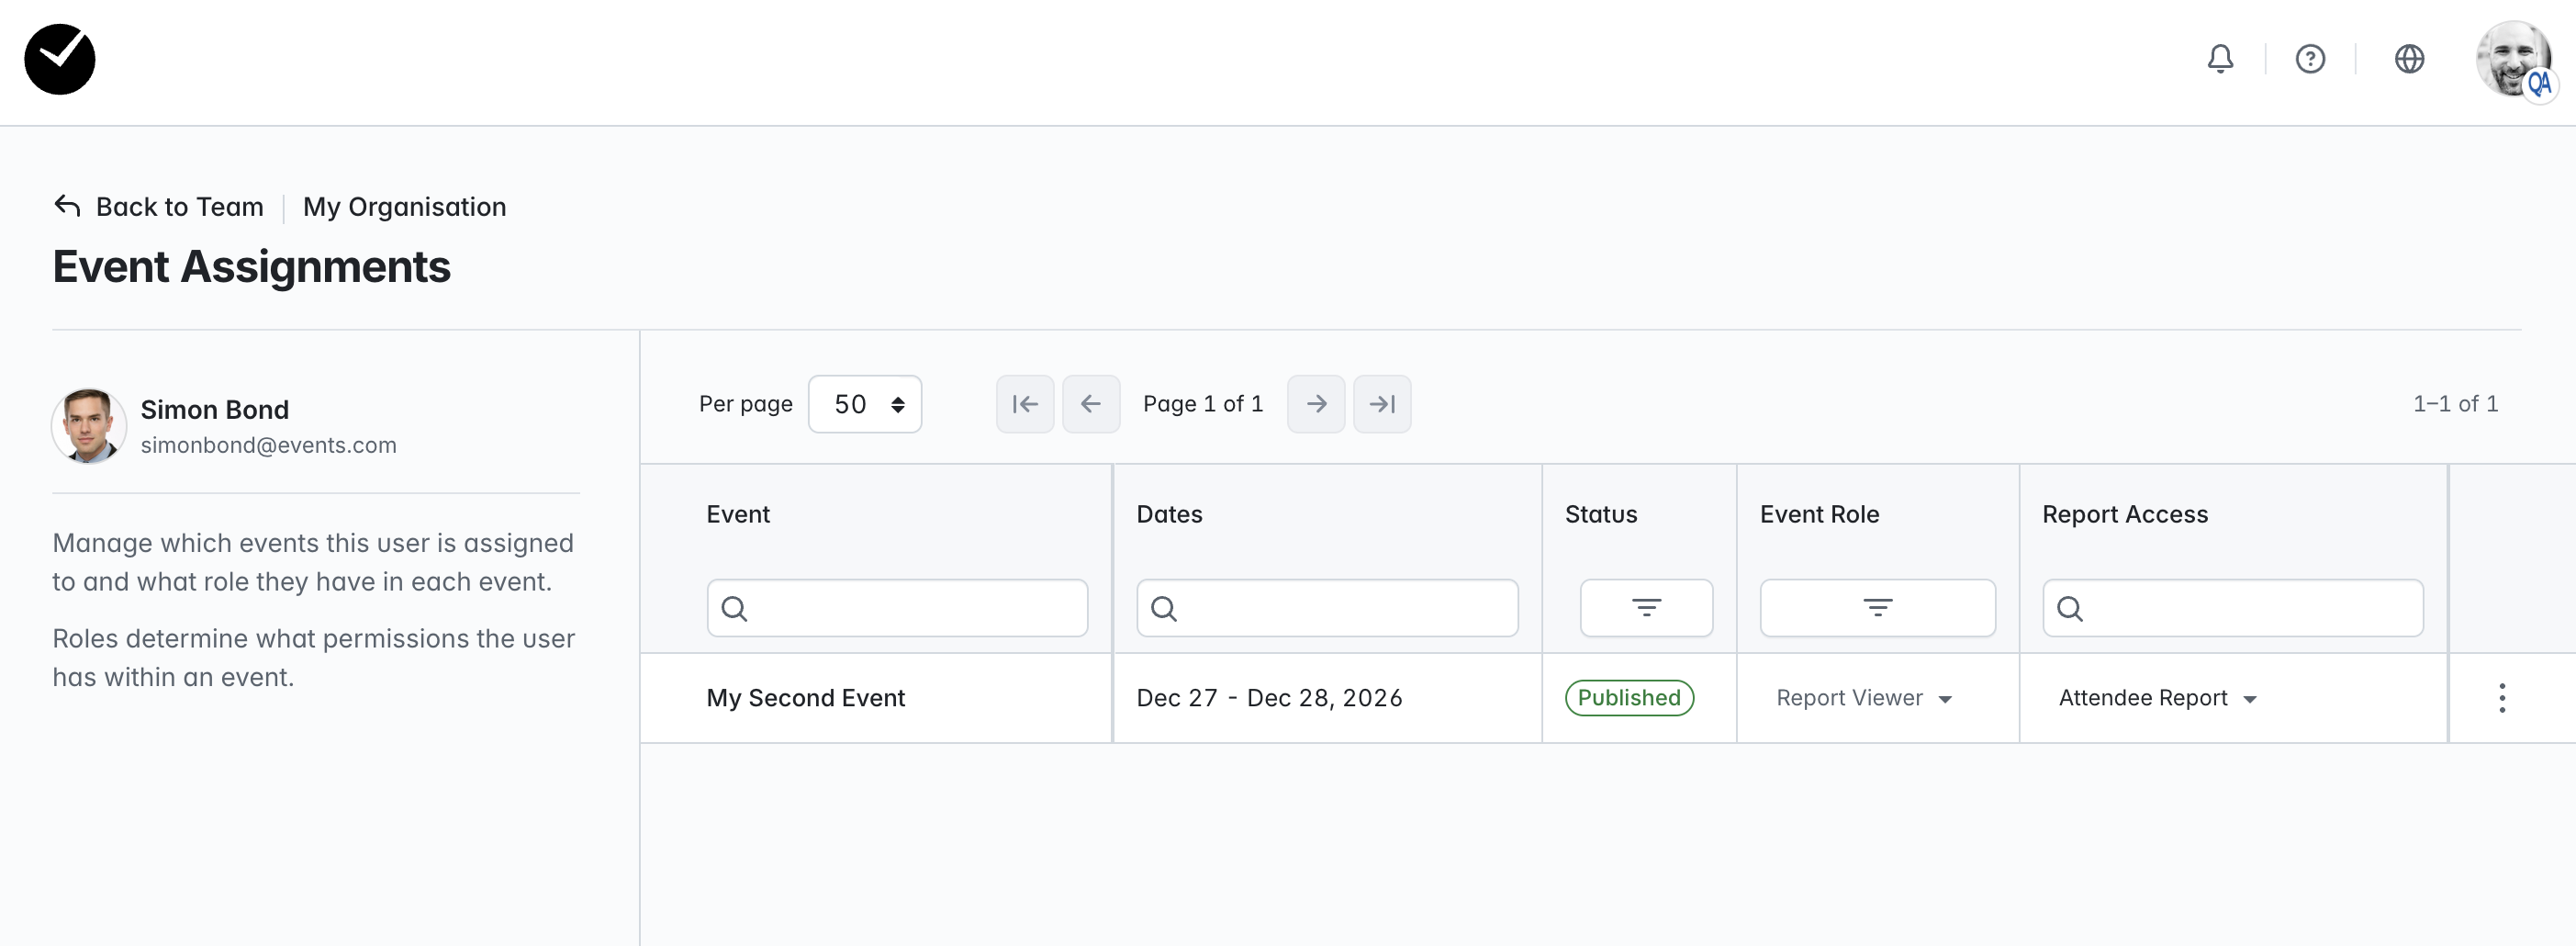
Once you have completed your event assignments, if the user's role permits access to Reports, you can now assign report access to them. This can be done by either clicking on the 'Assign Reports' option under the 'Report Access' column for the relevant event or clicking on the three dots at the end of the row for an event and select 'Assign Reports', which will then display a list of all reports available within the respective event:
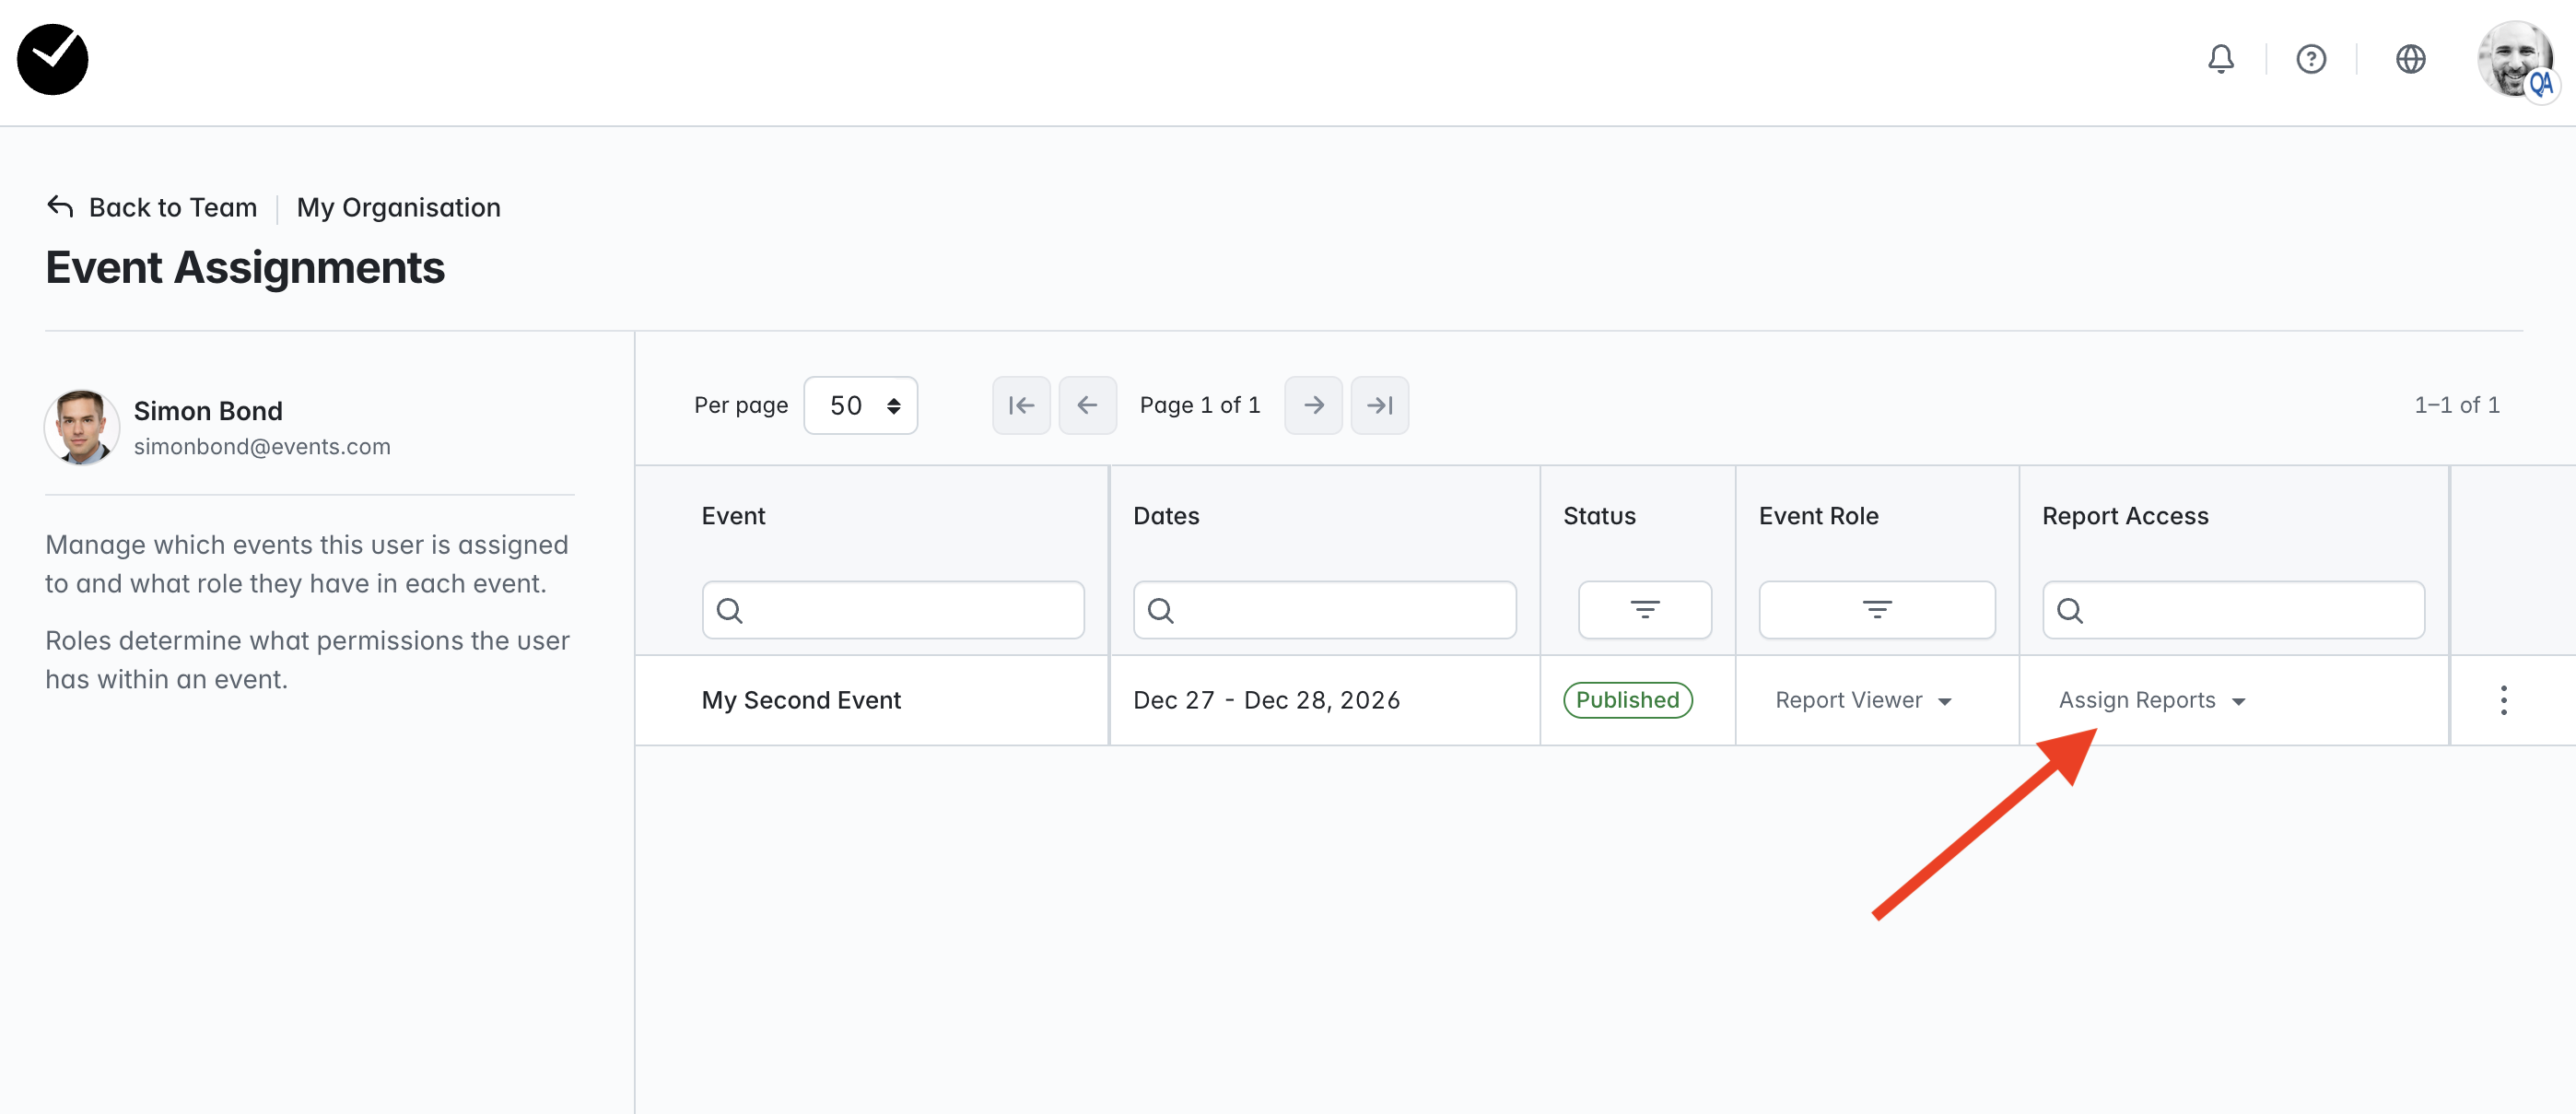
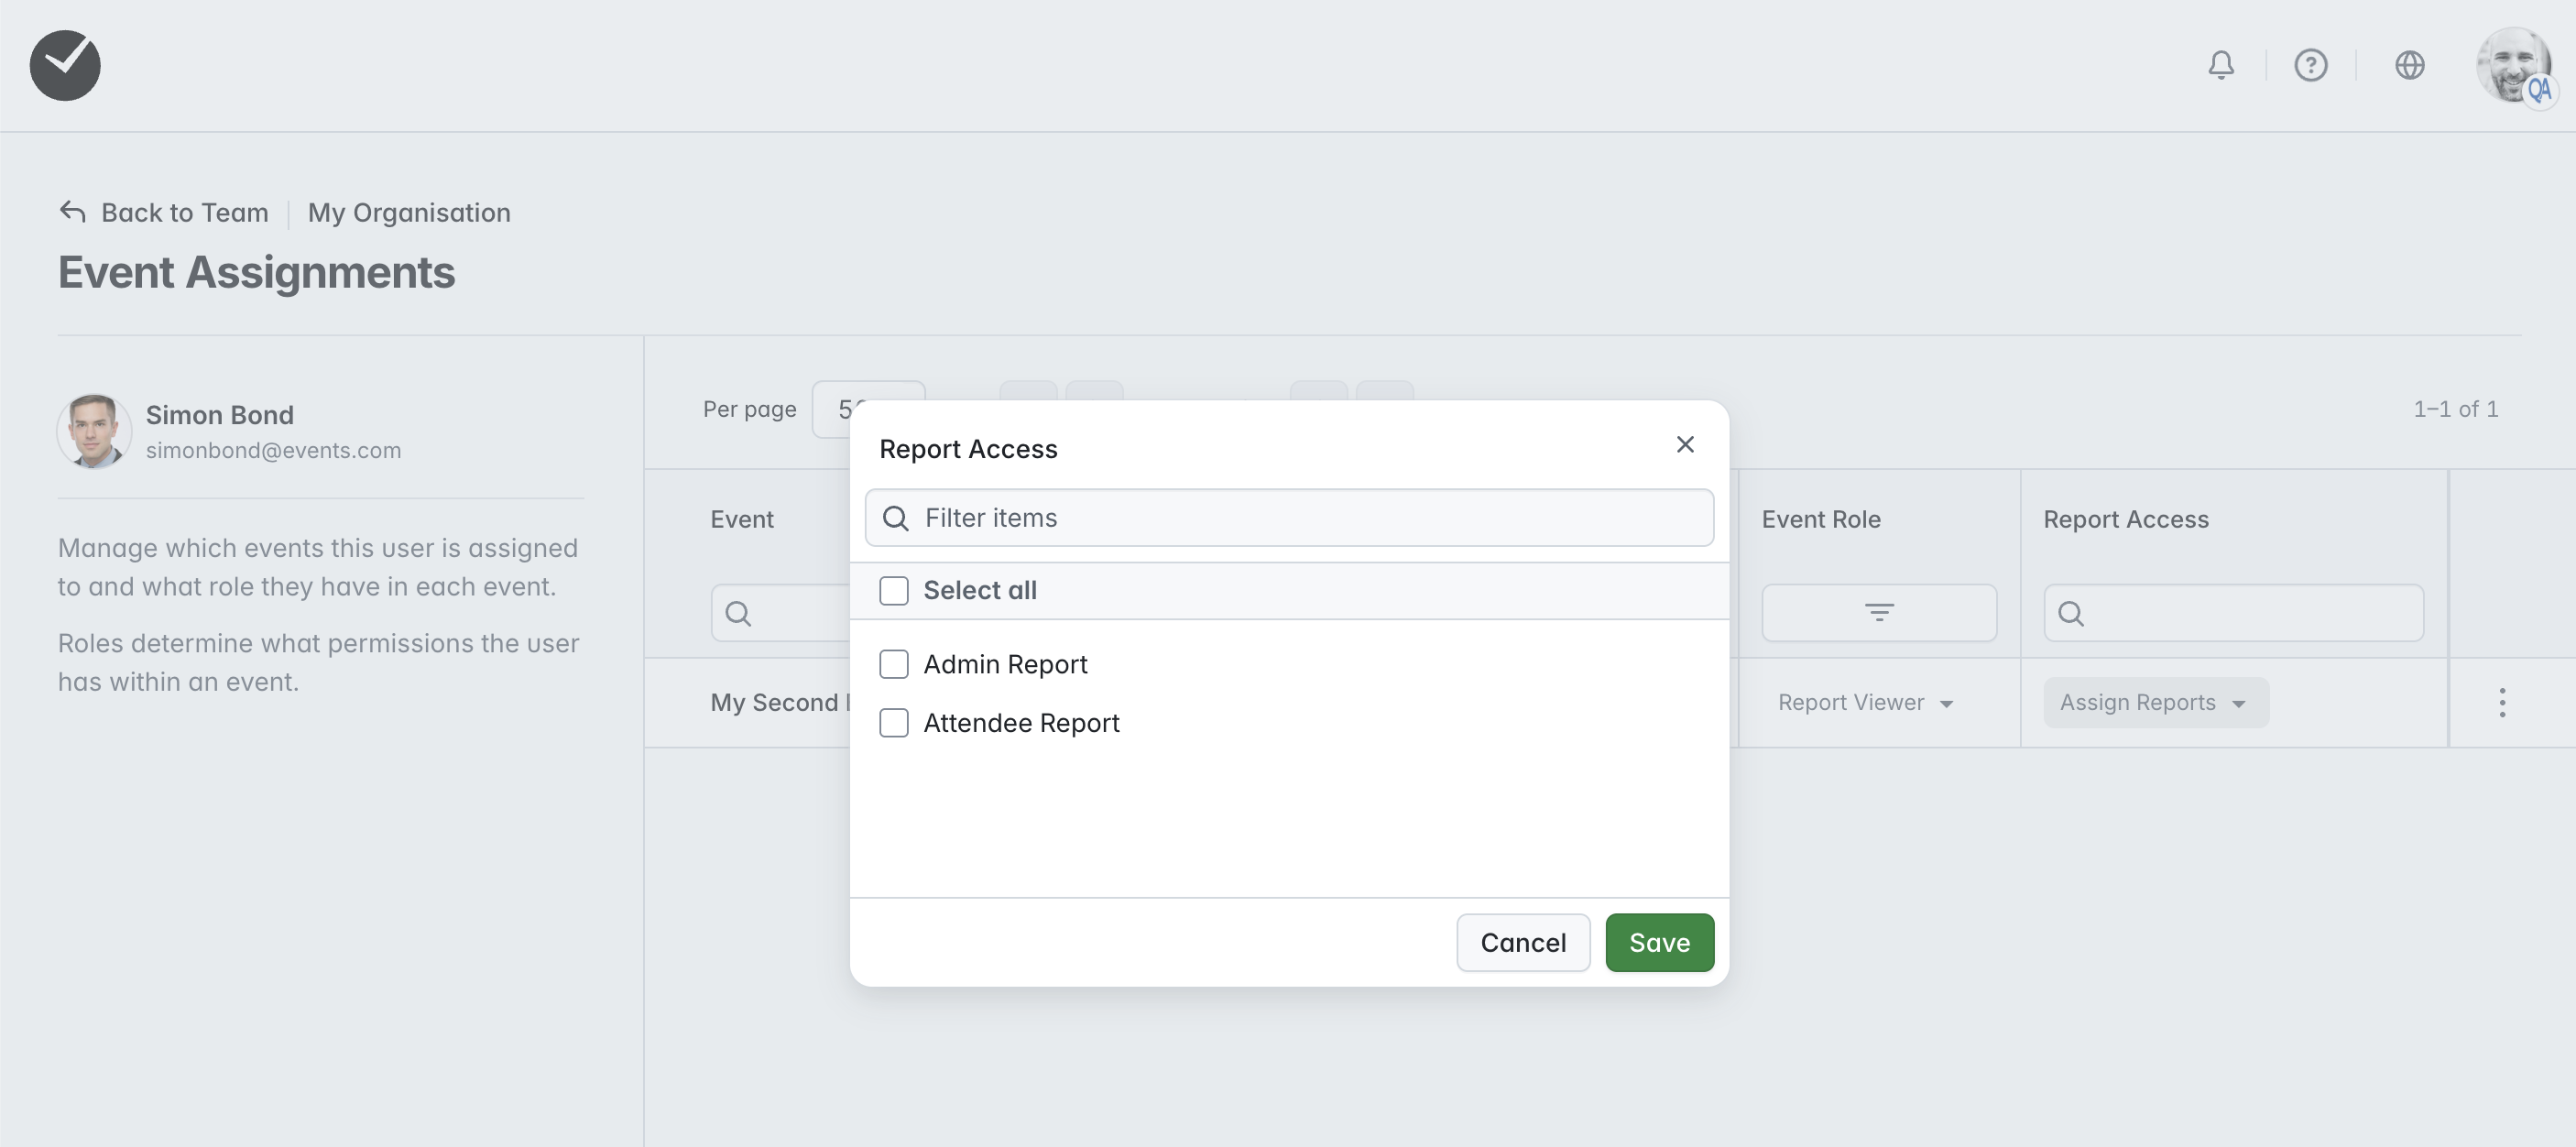
Simply select the checkbox/checkboxes for the reports you wish the user to be able to access and click 'Save'. If you have many reports available, the reports list can be filtered by entering a search term into the 'Filter items' field at the top of the window. When you are happy with your selection, click 'Save'.
Once saved, your configuration is now complete, and once the user activates their account, they will be able to access your organization's events as permitted.
Managing your Event Users
As an Administrator, you can manage any event user type in your organization from the Manage Users/Team area. In here, you have the following managerial options:
- Manage an Event User's 'Organization Role'
- Manage a Member Event User's event and report access
- Resend an activation email
- Remove an Event User
You cannot edit any Event Users email address/name/phone number/avatar once they have activated their account.
To resend an activation email to an Event User displayed in the 'Event Users' area:
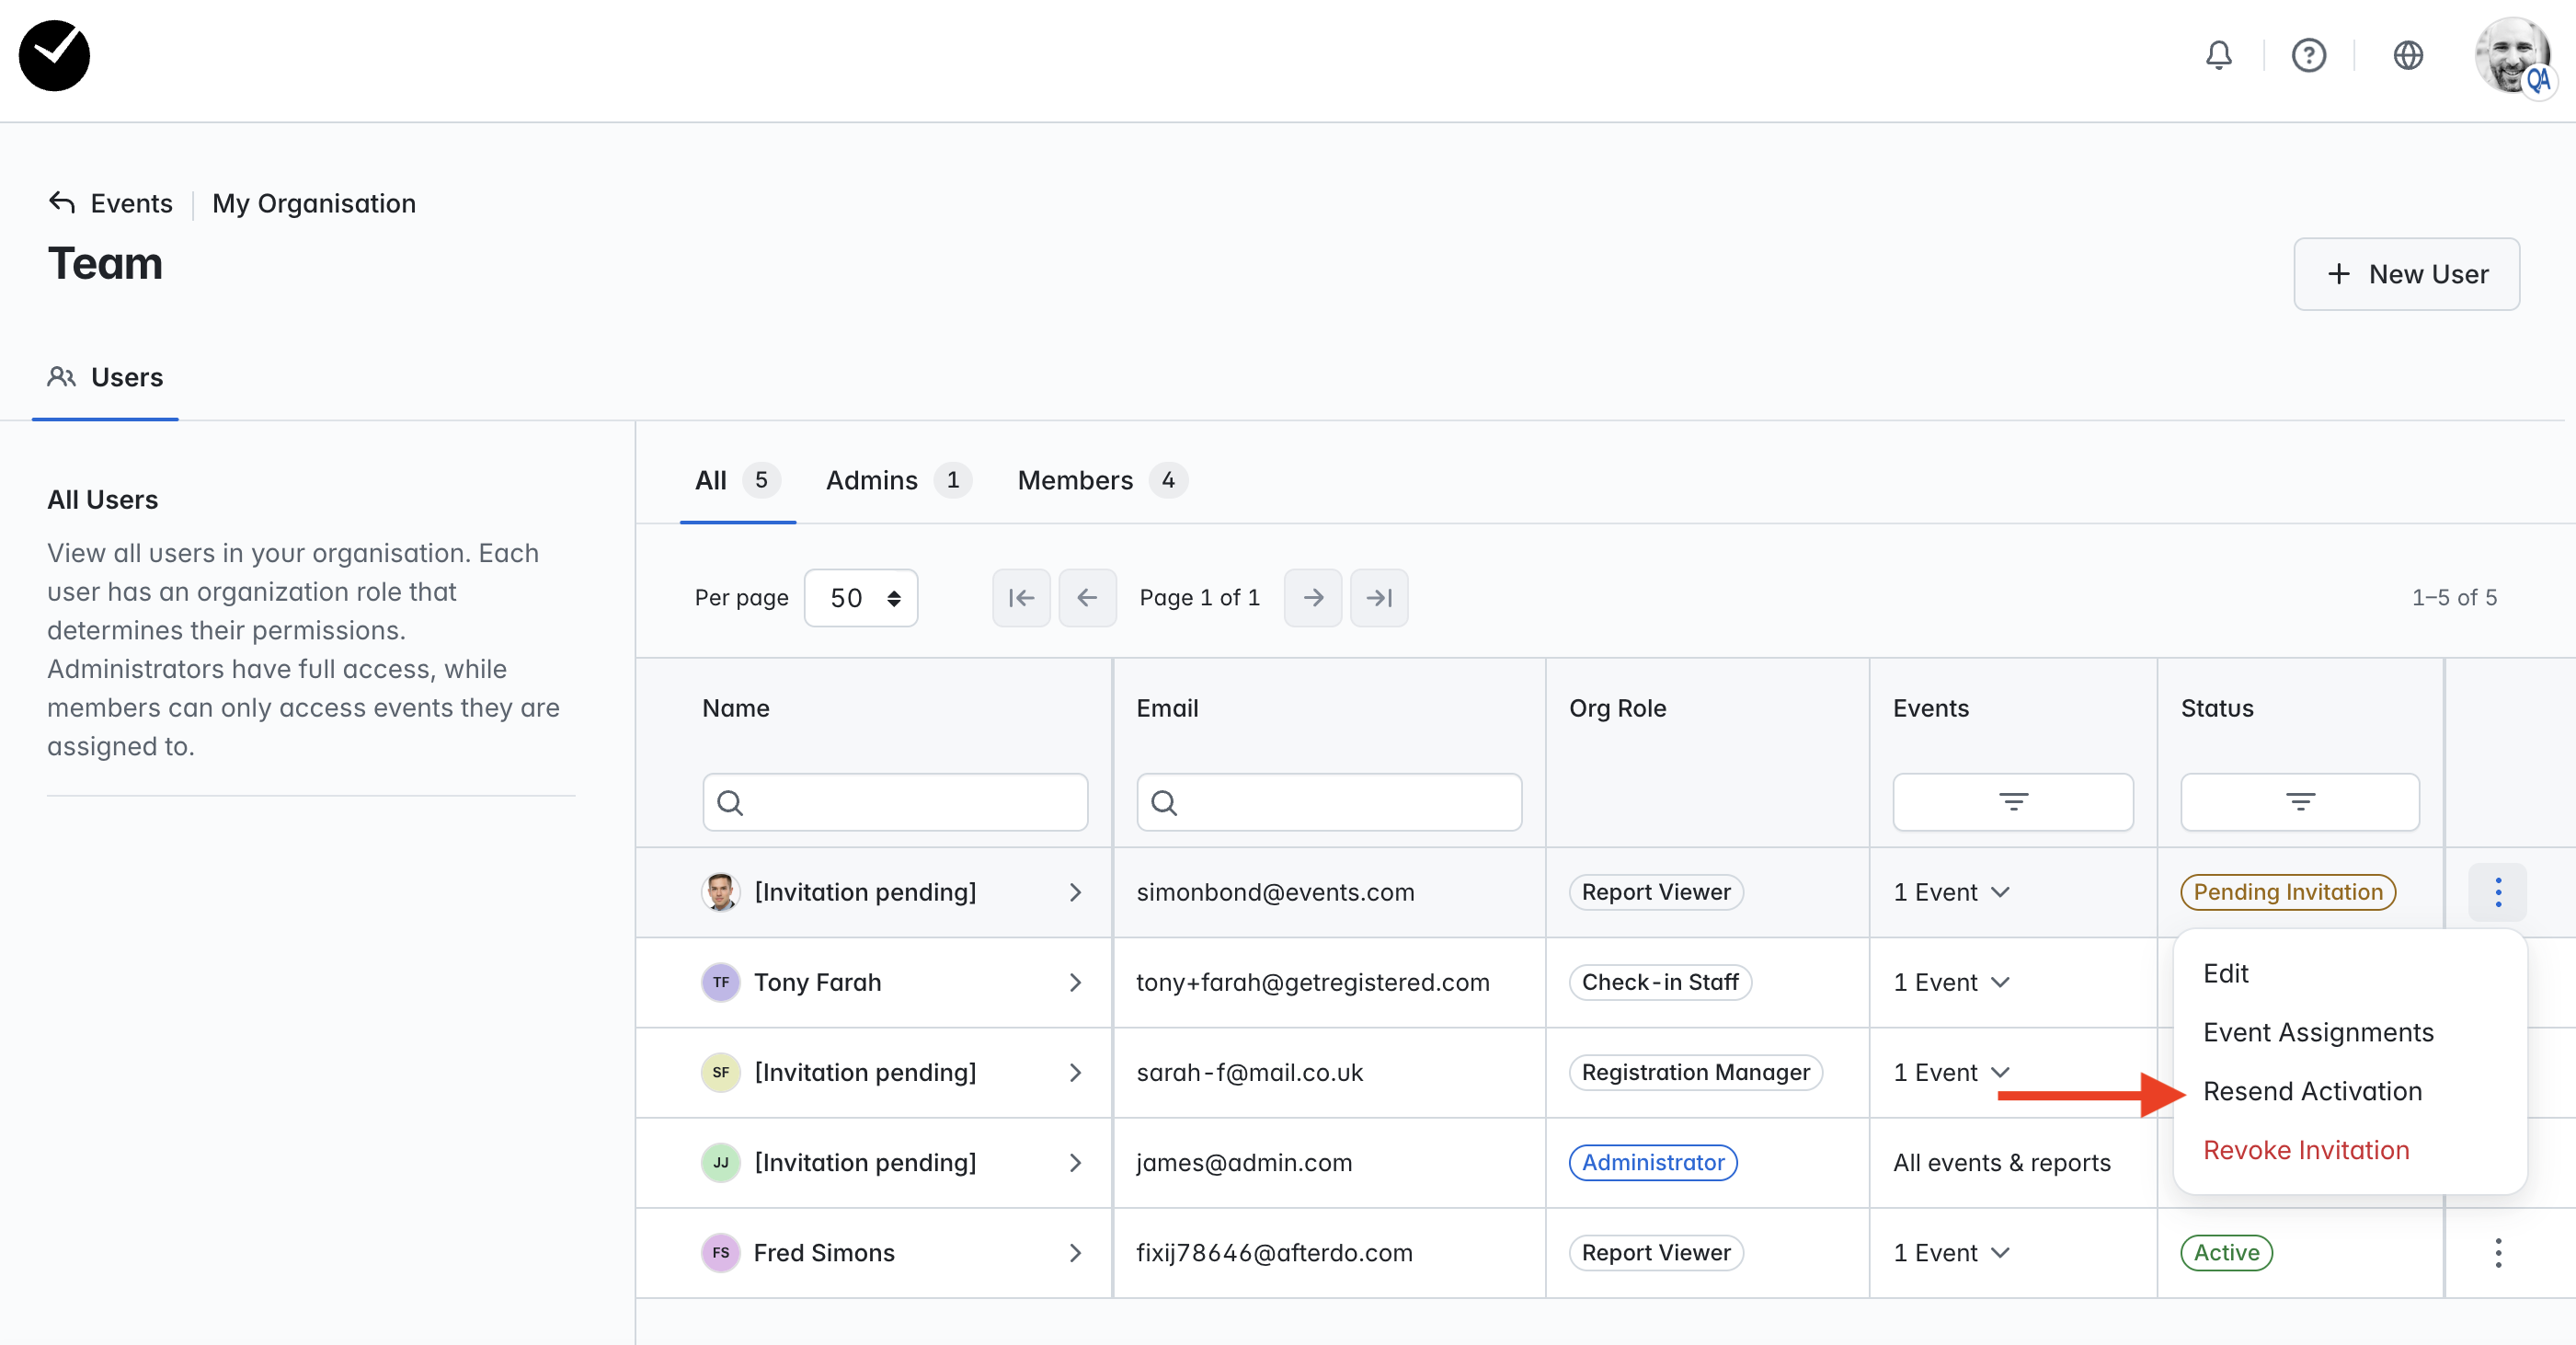
- On the 'Team' page, click on the 3 dots at the end of the row for a non-activated user and select the 'Resend Activation' button displayed. You can also revoke the invitation if required.
To edit the organization role of an Event User:
Note: when editing the role of 'Admin' Event User, please be aware that changing their role to a 'Member' Event User role will remove their access to all other events in your organization, as well as their ability to edit your organization's events. Please only change the role of an 'Admin' Event User if absolutely necessary!
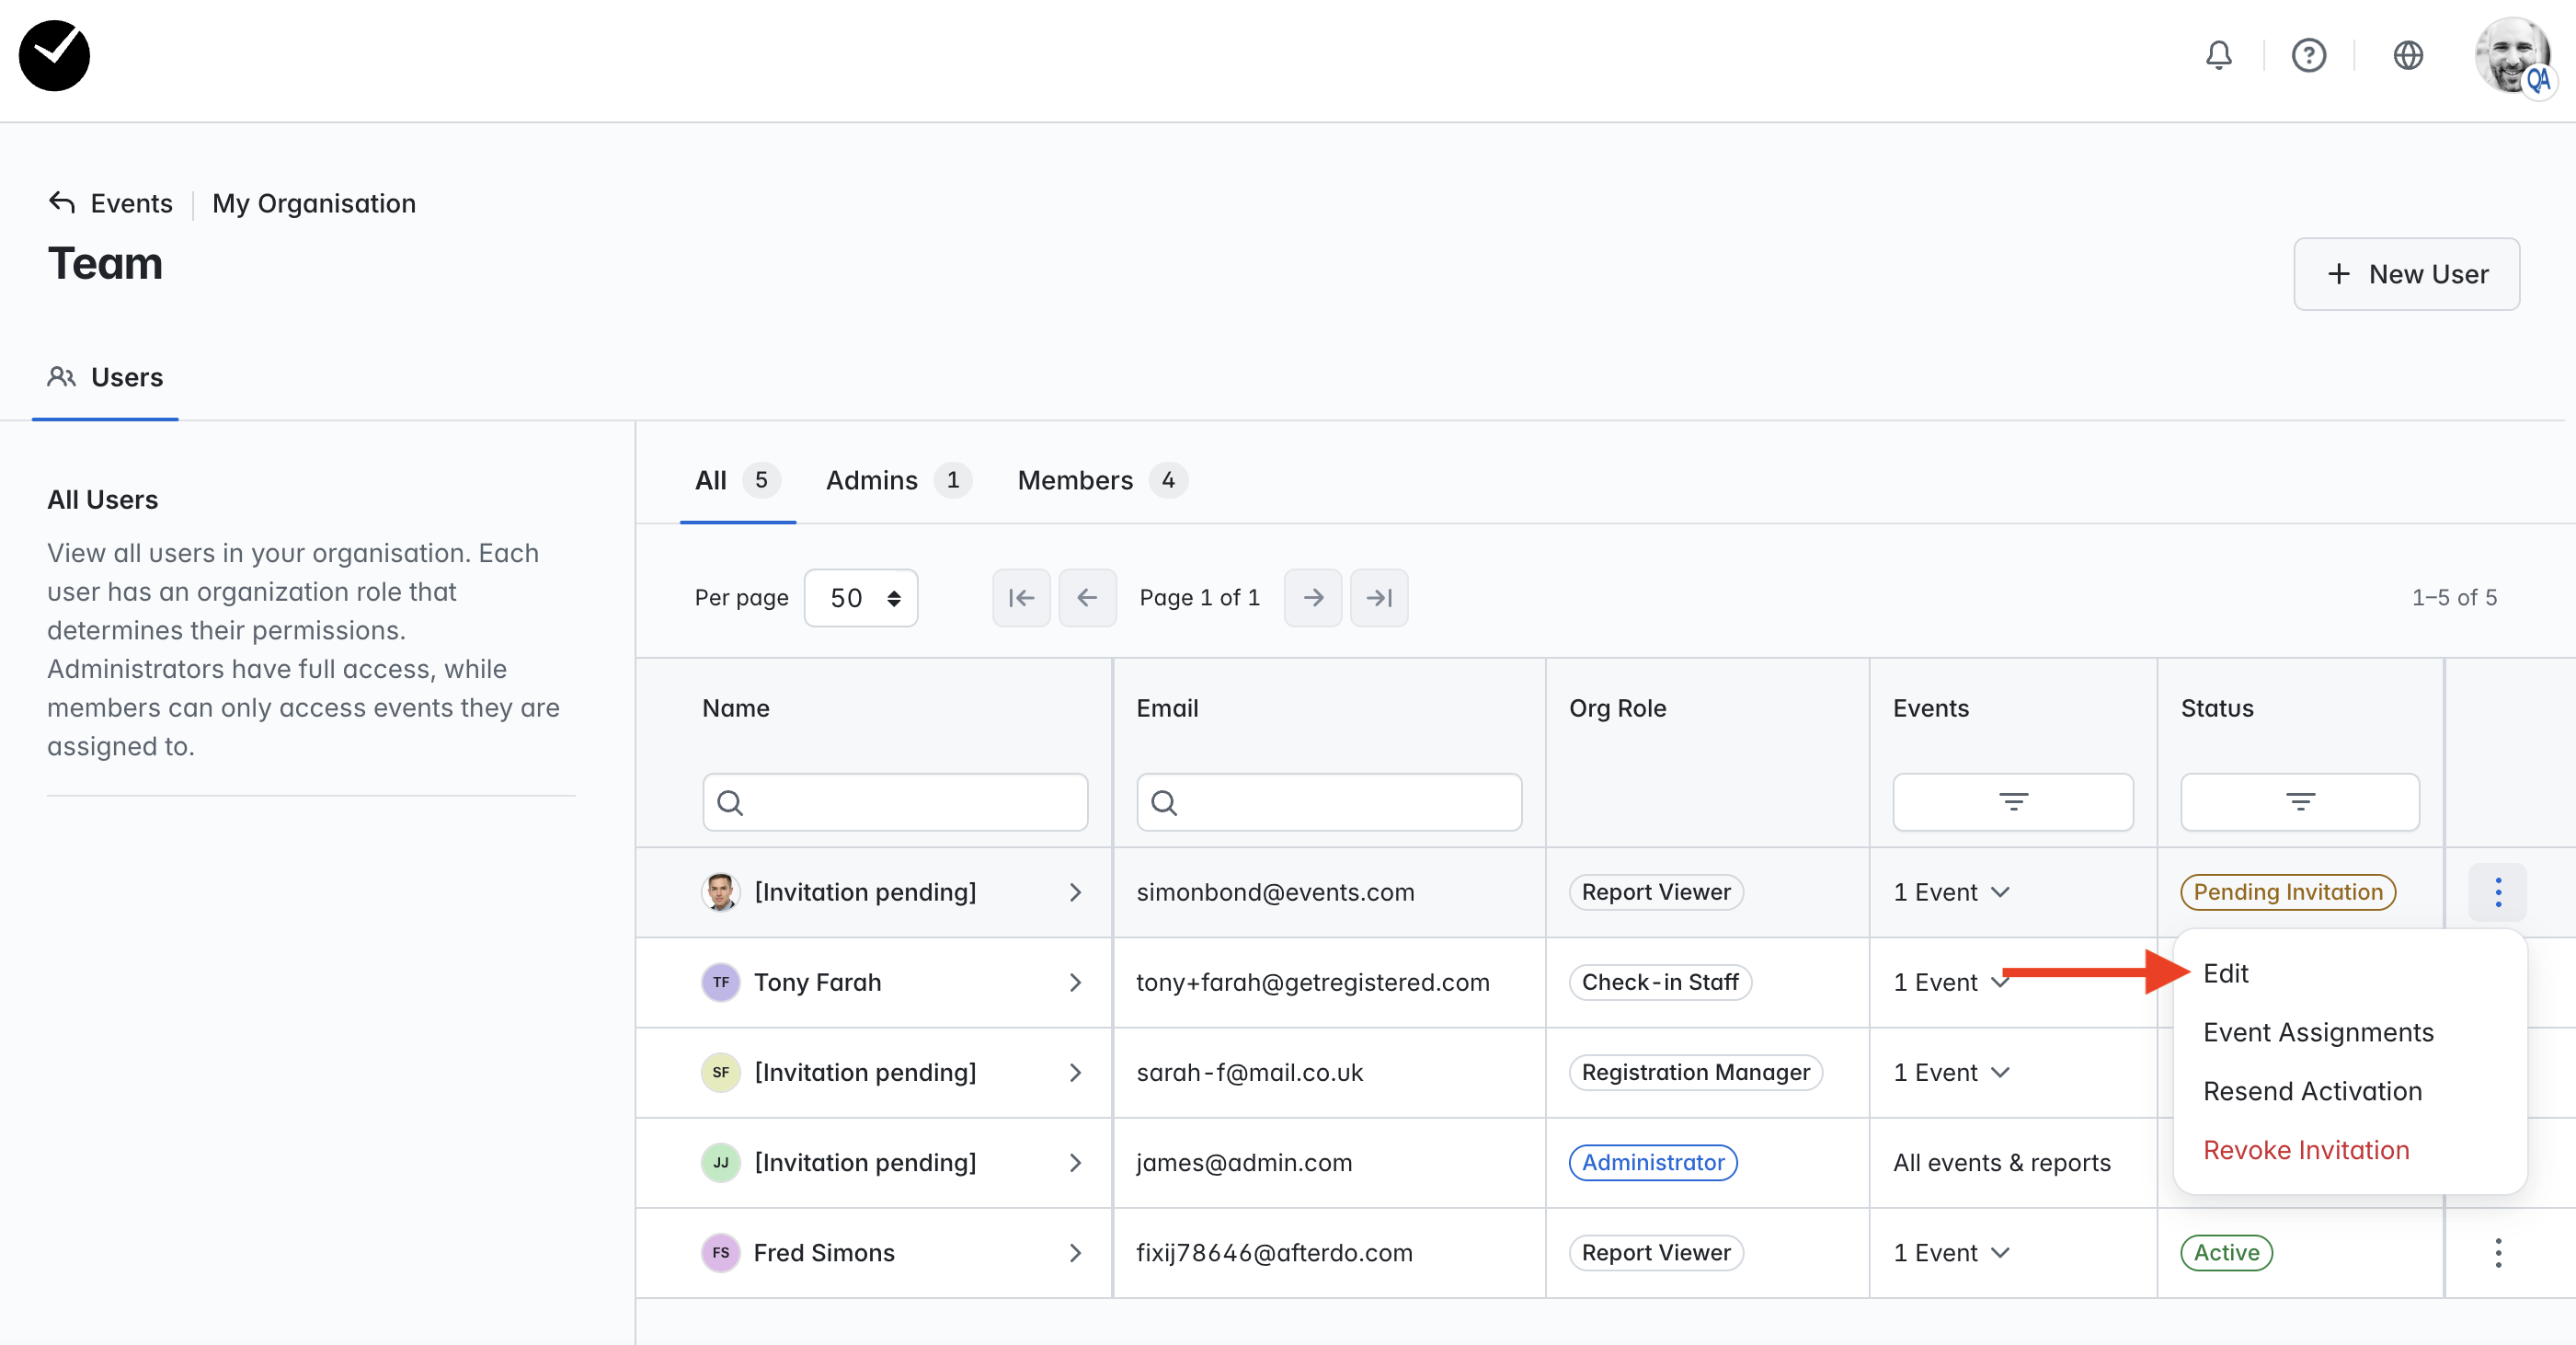
- On the 'Team' page, click on the 3 dots at the end of the row for a user and select the 'Edit' option displayed.
- On the following page, select the 'Organization Role' you wish to set for the user and select the 'Save User' button at the bottom of the form.
To edit a Member Event User's Event and Report Access:
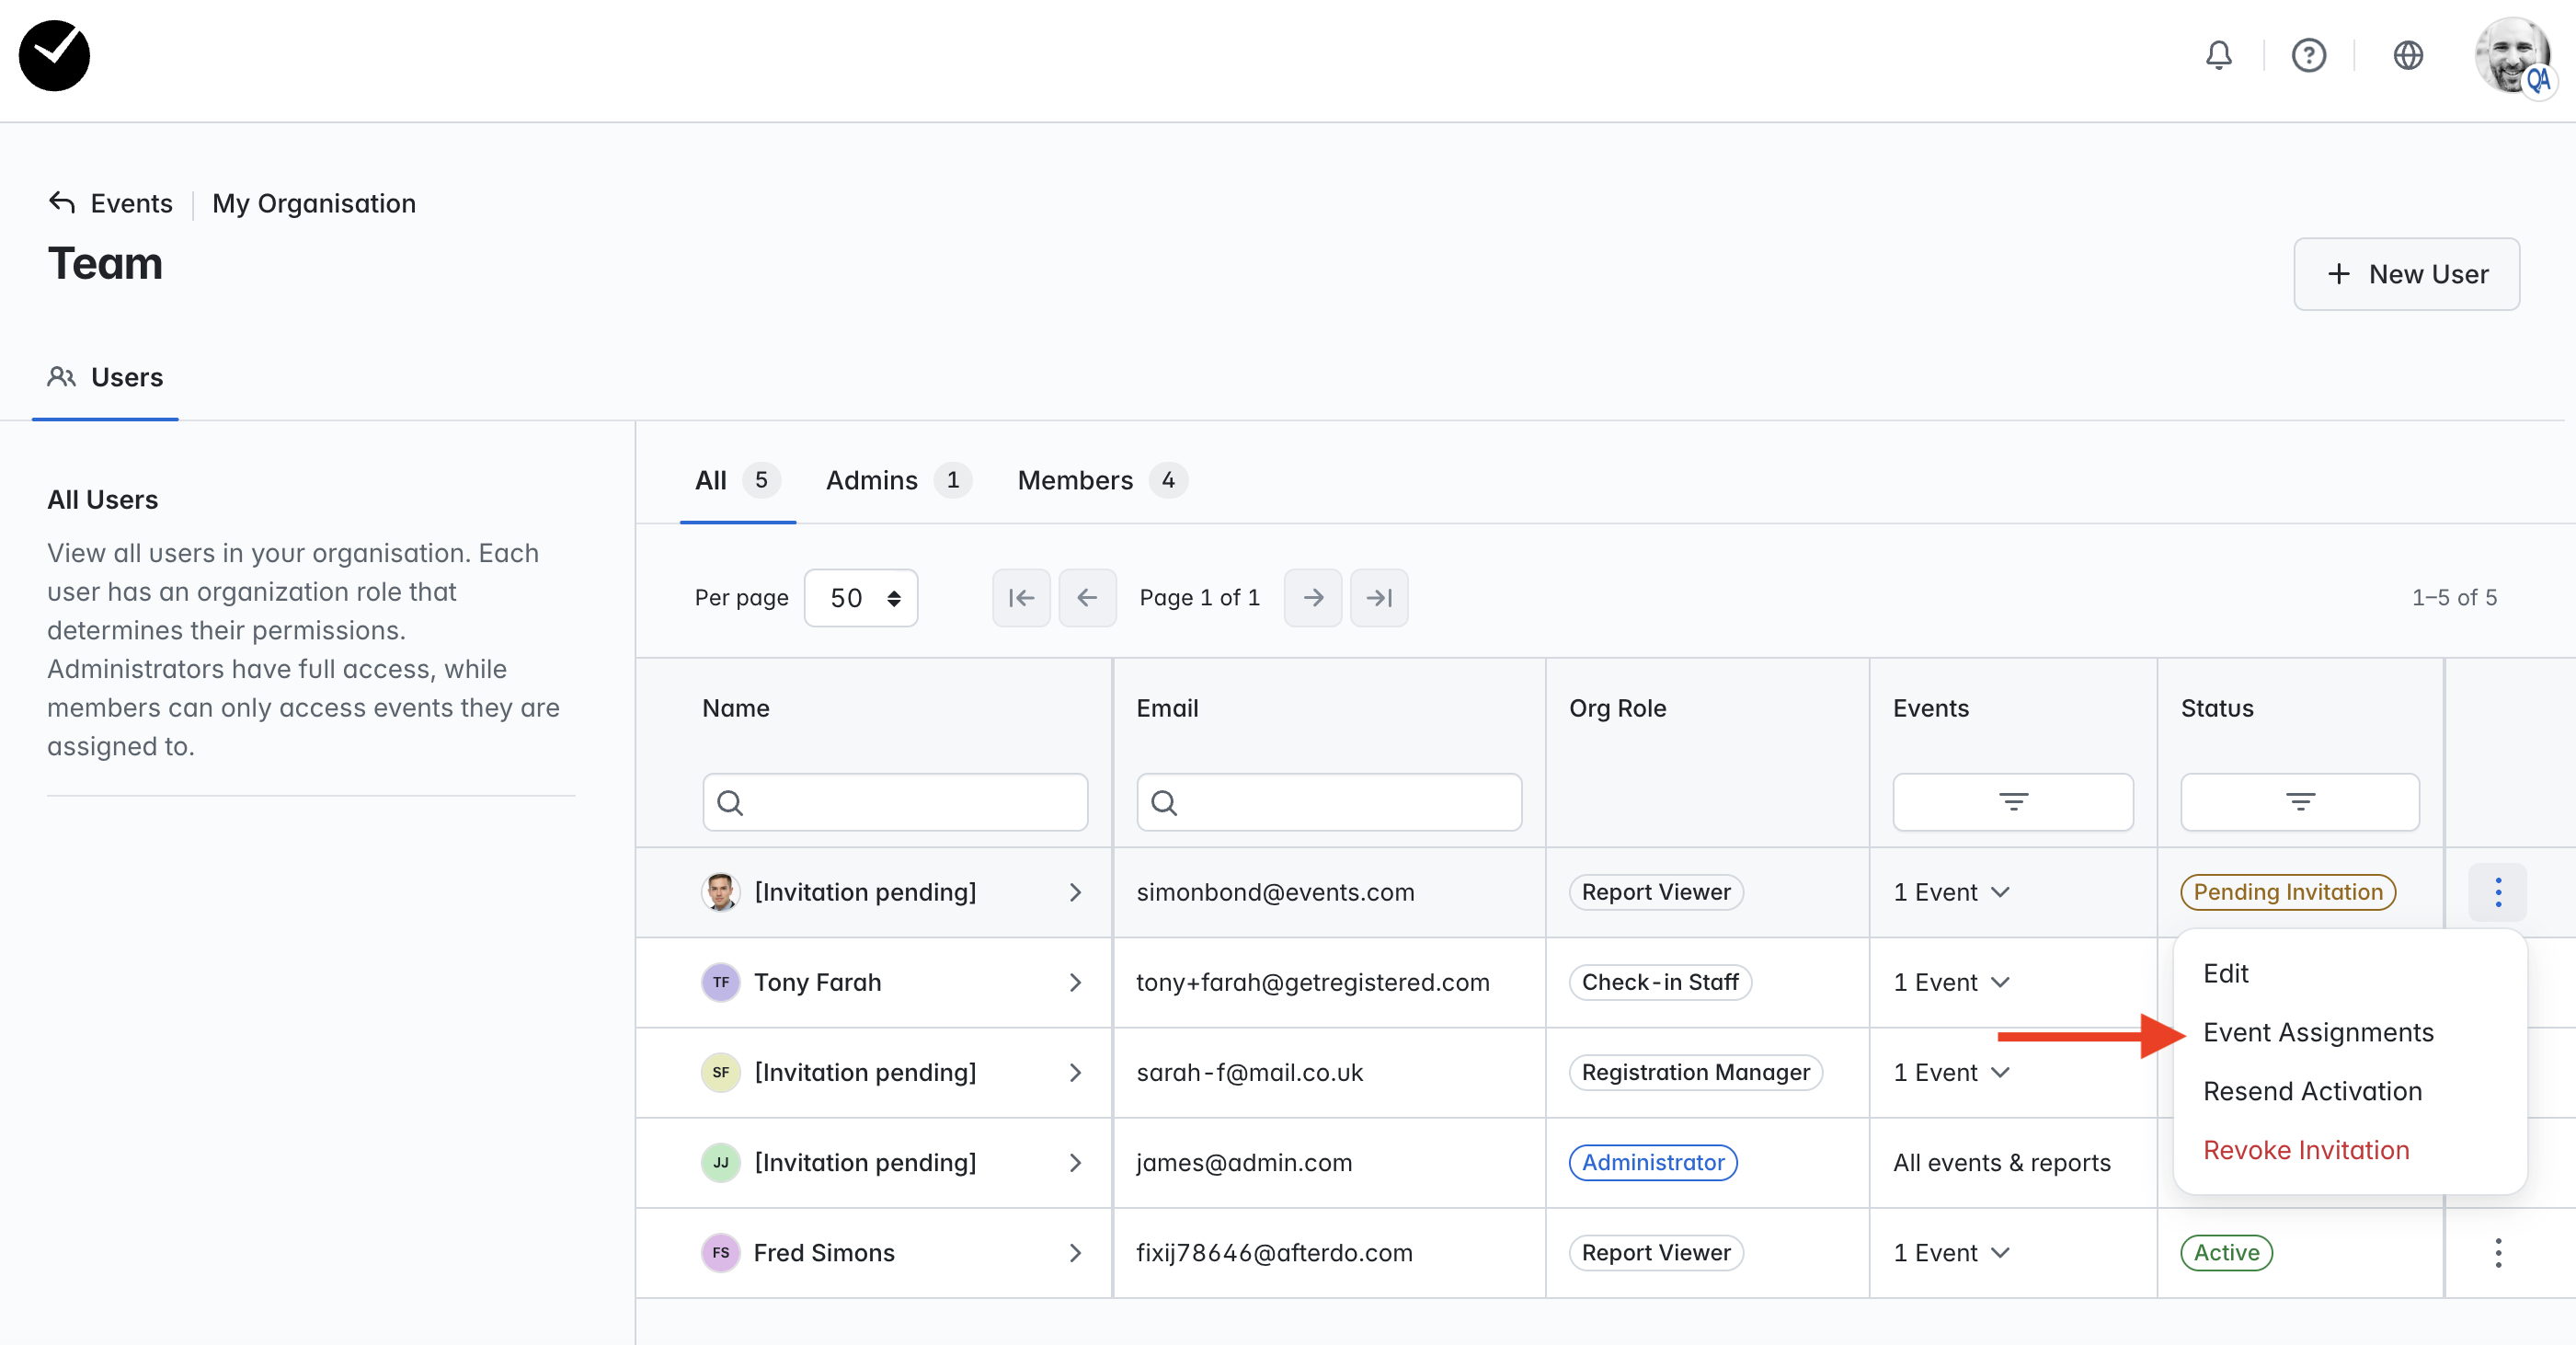
- On the 'Team' page, click on the 3 dots at the end of the row for a user and select the 'Event Assignments' option displayed.
- On the following page, click on the 3 dots at the end of the row for an event and select the appropriate action from the menu (Assign Role/Assign Reports).
- Select the appropriate role/report access and click 'Save' to complete.
To remove a 'Member' Event User from a single event:
- On the 'Team' page, click on the 3 dots at the end of the row for a user and select the 'Event Assignments' option displayed.
- On the following page, click on the 3 dots at the end of the row for an event the user has access to and select the 'Remove from Event' option. This will remove all access to the current event for the user, but any access they have to other events in your organization will be unchanged
To remove any Event User from your organization:
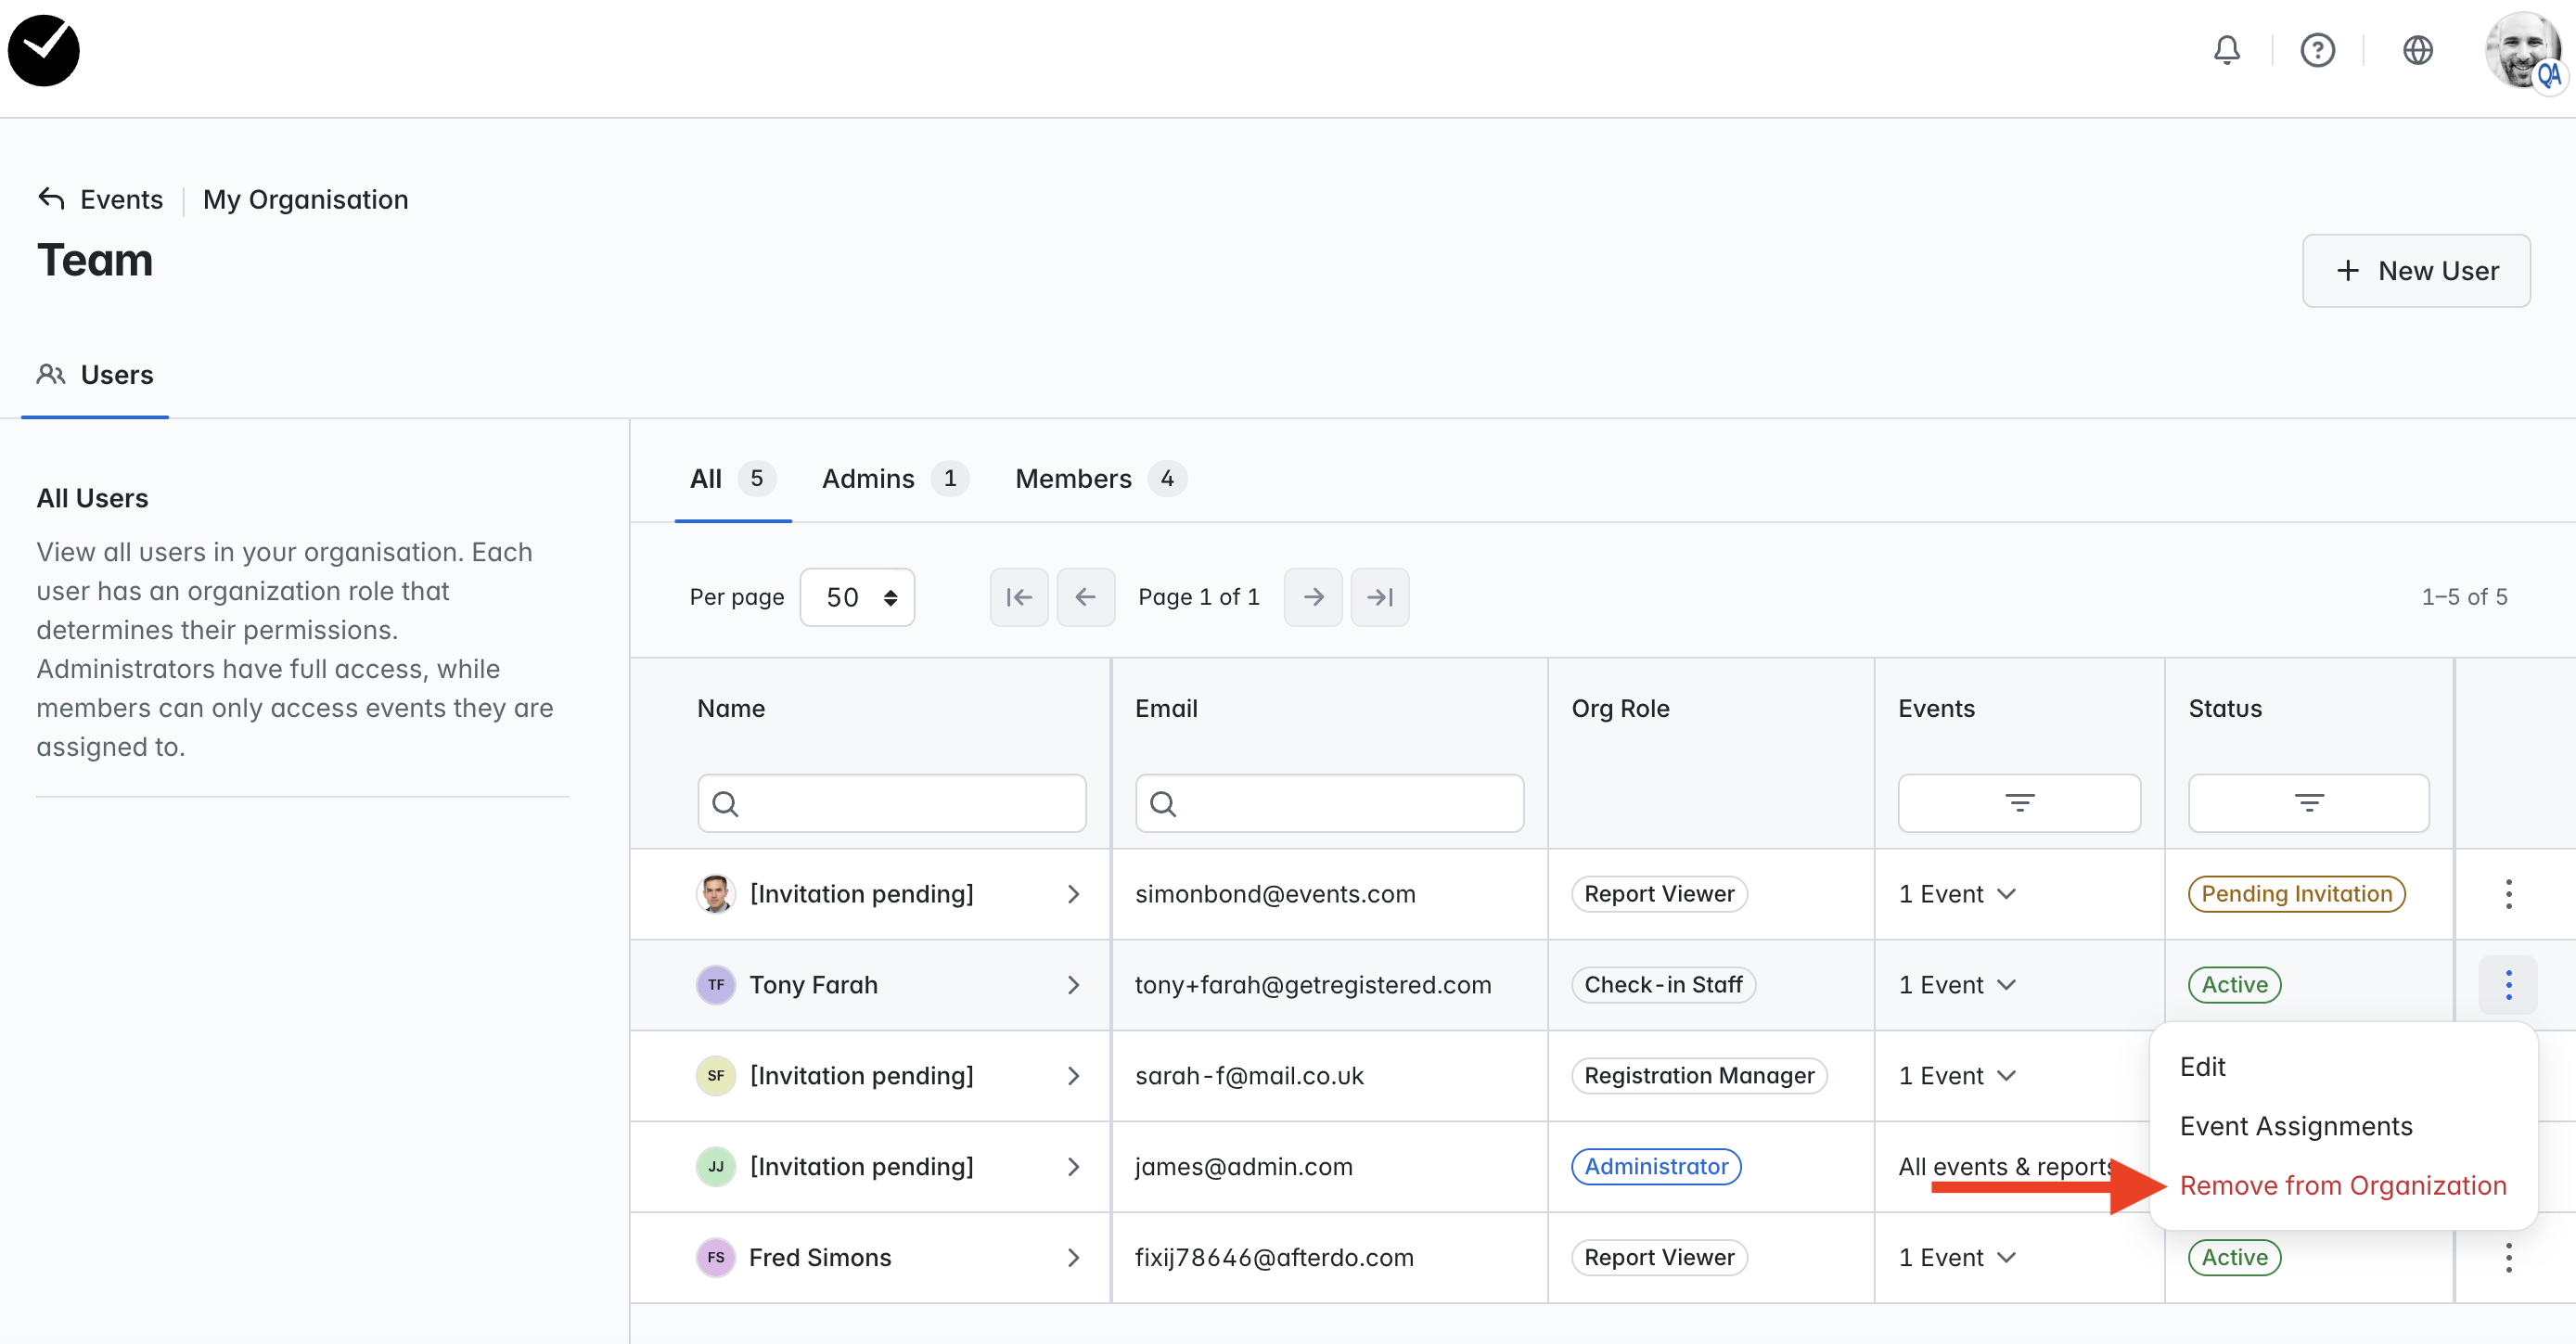
- On the 'Team' page, click on the 3 dots at the end of the row for a user and select the 'Remove from Organization' option displayed.
- Once selected, all access to your organization for the selected will be revoked.