How do I create multiple pages on an event registration form?
Please note that the following article shows functionality for the new version of our form editor (v2). If you are using our legacy form editor (v1), you can still follow the steps in the article below, but the location of the options noted may be different. If you wish to switch to the new version of our editor, please contact us at getregistered® support.
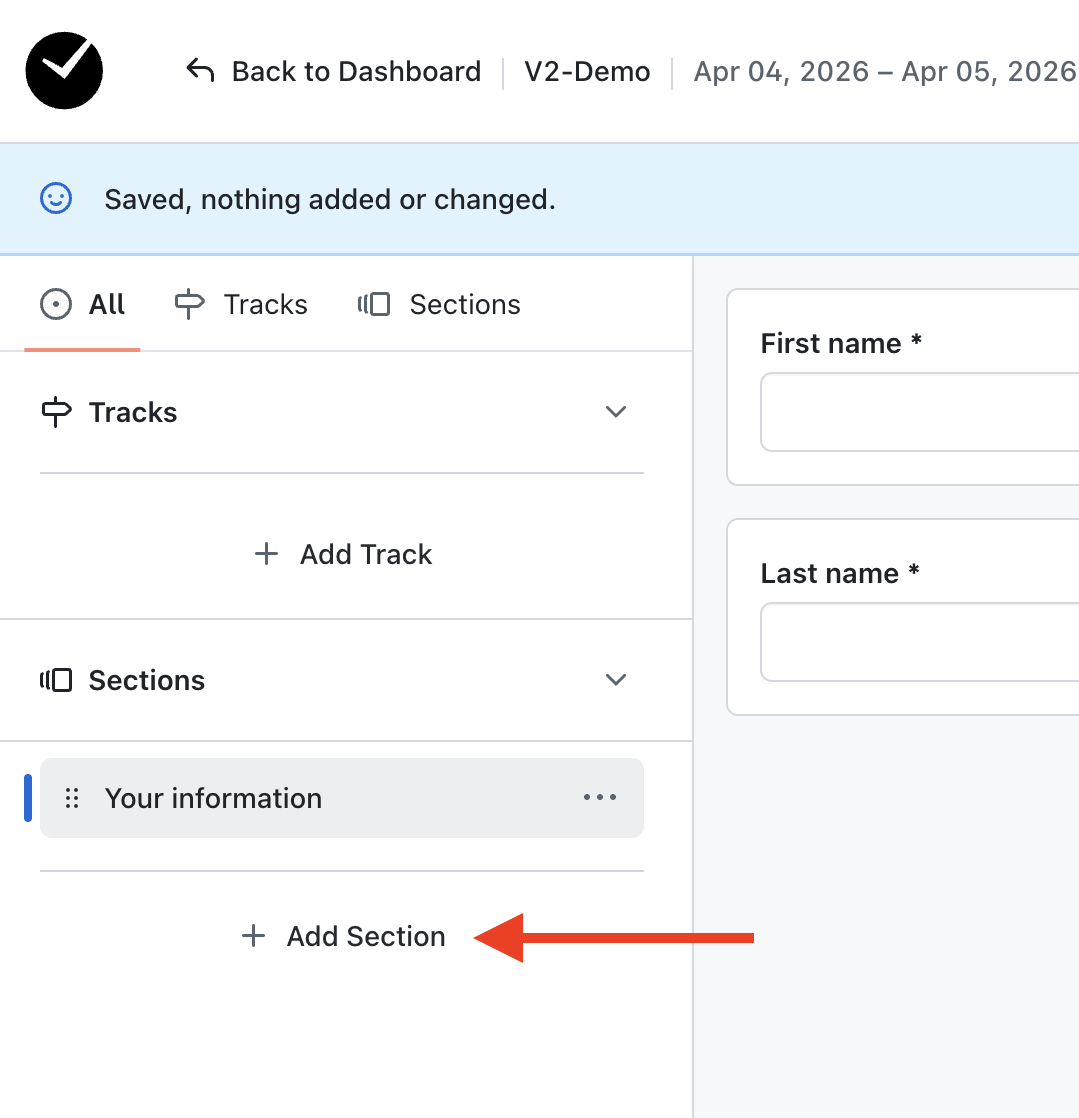
You can add pages (known as 'Sections' in getregistered®) to a form using 'Add Section' on the left-hand side of the Registration Form Editor.
Once selected, you'll see the following window displayed on the right side of the page.
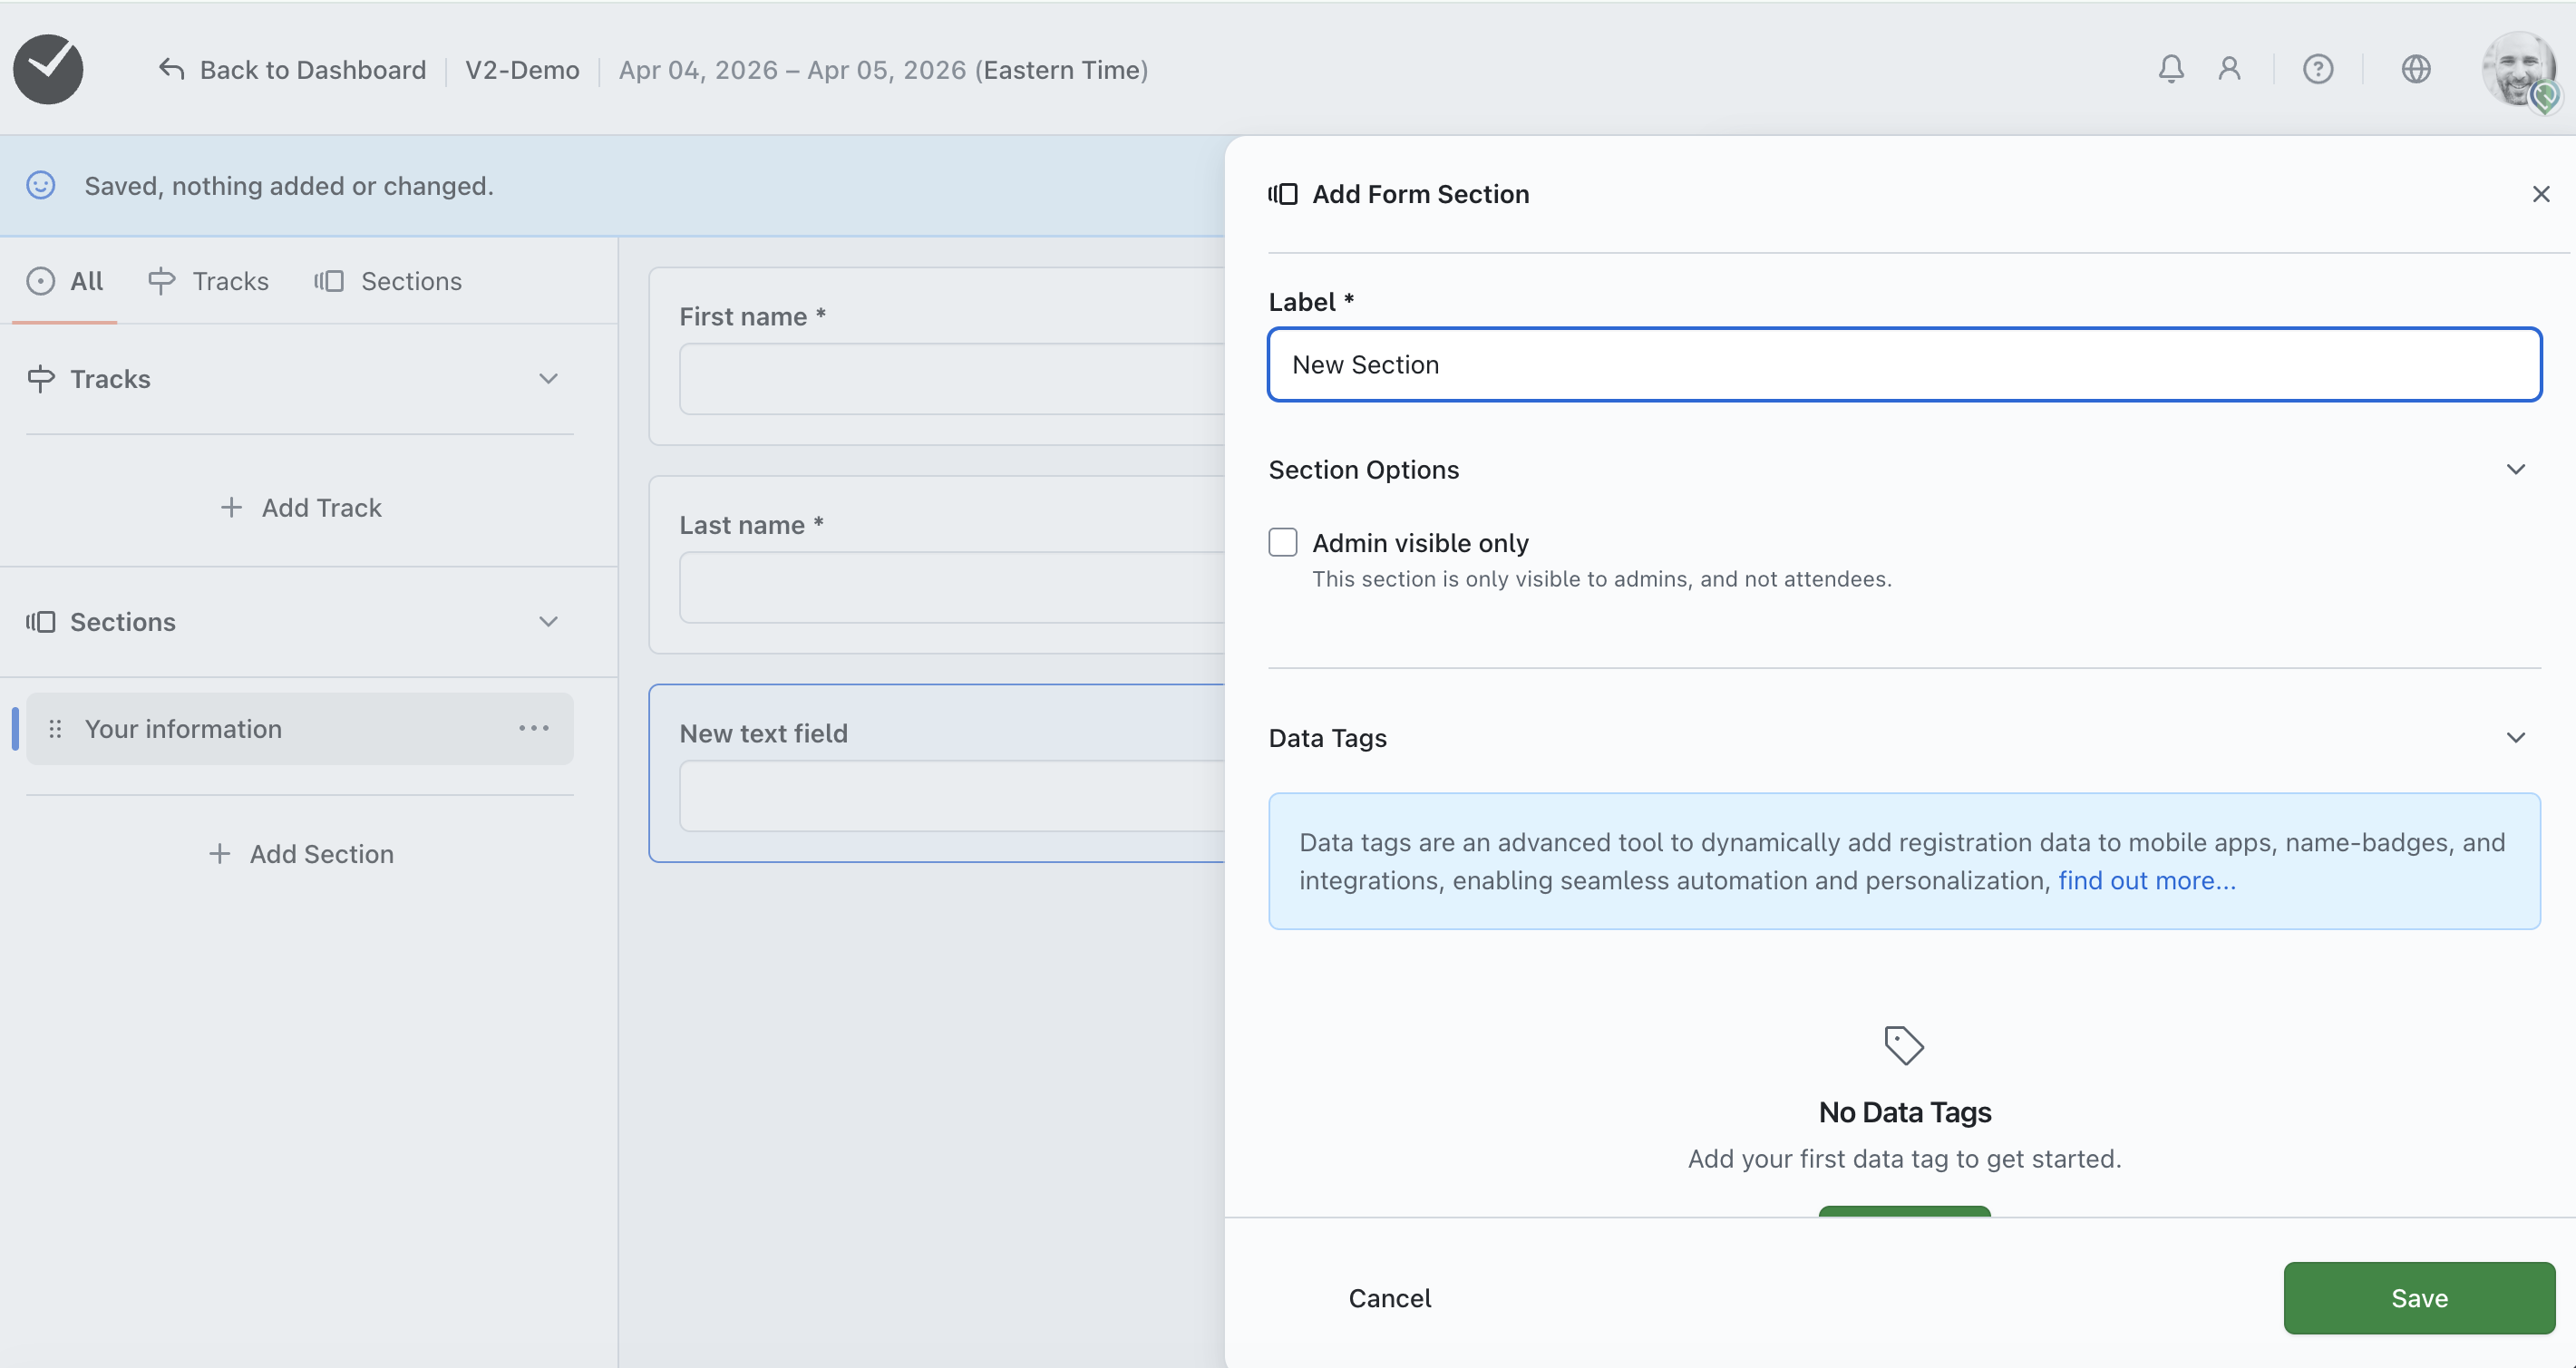
You can now add a 'Label' for your Section, making it clear to attendees which section they are interacting with. If you have tracks added to your registration form, you can also set which tracks can see the page by clicking on the 'Track Visibility' dropdown and toggling the tracks you'd like to be able to see the page.
Once you're happy with your changes, hit 'Save' - voila, your first page is now ready to have some fields added to it!
Multiple sections allow an attendee to skip to different parts of the registration form where a lot of data is required to be captured - they can do this by clicking on the section titles displayed down the left of the registration form when registering/editing their registration. You can order your pages by dragging and dropping them on the left-hand column of the editor - don't forget to save your changes!