How do I create and manage custom reports in my my event?

To begin interacting with 'Reports', simply click on the 'Reports' tile displayed on your event dashboard.
As an Admin user, you can create, view and download custom reports based on registrations made specifically for your events. Only Admin and Event Admin event users can create Reports for an event - as any other Member event user, you only can view Reports created for your event, and these are specified in your permissions by an Admin event user.

Once you have entered the 'Reports' area, you will see an index of all reports that have been created for your event - as any Event User role, you can view a report by clicking the 'View' button displayed inline with the report you wish to view, or download a copy of a report by clicking the inline 'Download XLSX'/'Download CSV' option according to your preferred format.
As an Admin event user, you will see additional options available - the most obvious one being the 'New Report' option. By clicking this, you will be taken to a new page and be asked to create a name for your new report - this is what will be displayed when viewing the 'Reports' index and when setting reports access for Member event users.

Below this you will see a list of all sections and fields available on your event's registration form - by clicking the checkbox displayed to the left of a field, all attendee information registered for this field will be displayed on your report when saved. If you wish to gather all attendee information for a specific section of your event's registration form, click the 'Select All' checkbox displayed to the right of the section title - this will add all fields within the section to your report when saved.
Once you are ready to save your new report, click the 'Save Report' button at the bottom of the page. You will be taken directly to your new report and can return to the 'Reports' area by clicking on the blue 'Custom Reports' option displayed on your report title.

Interacting with your event custom reports
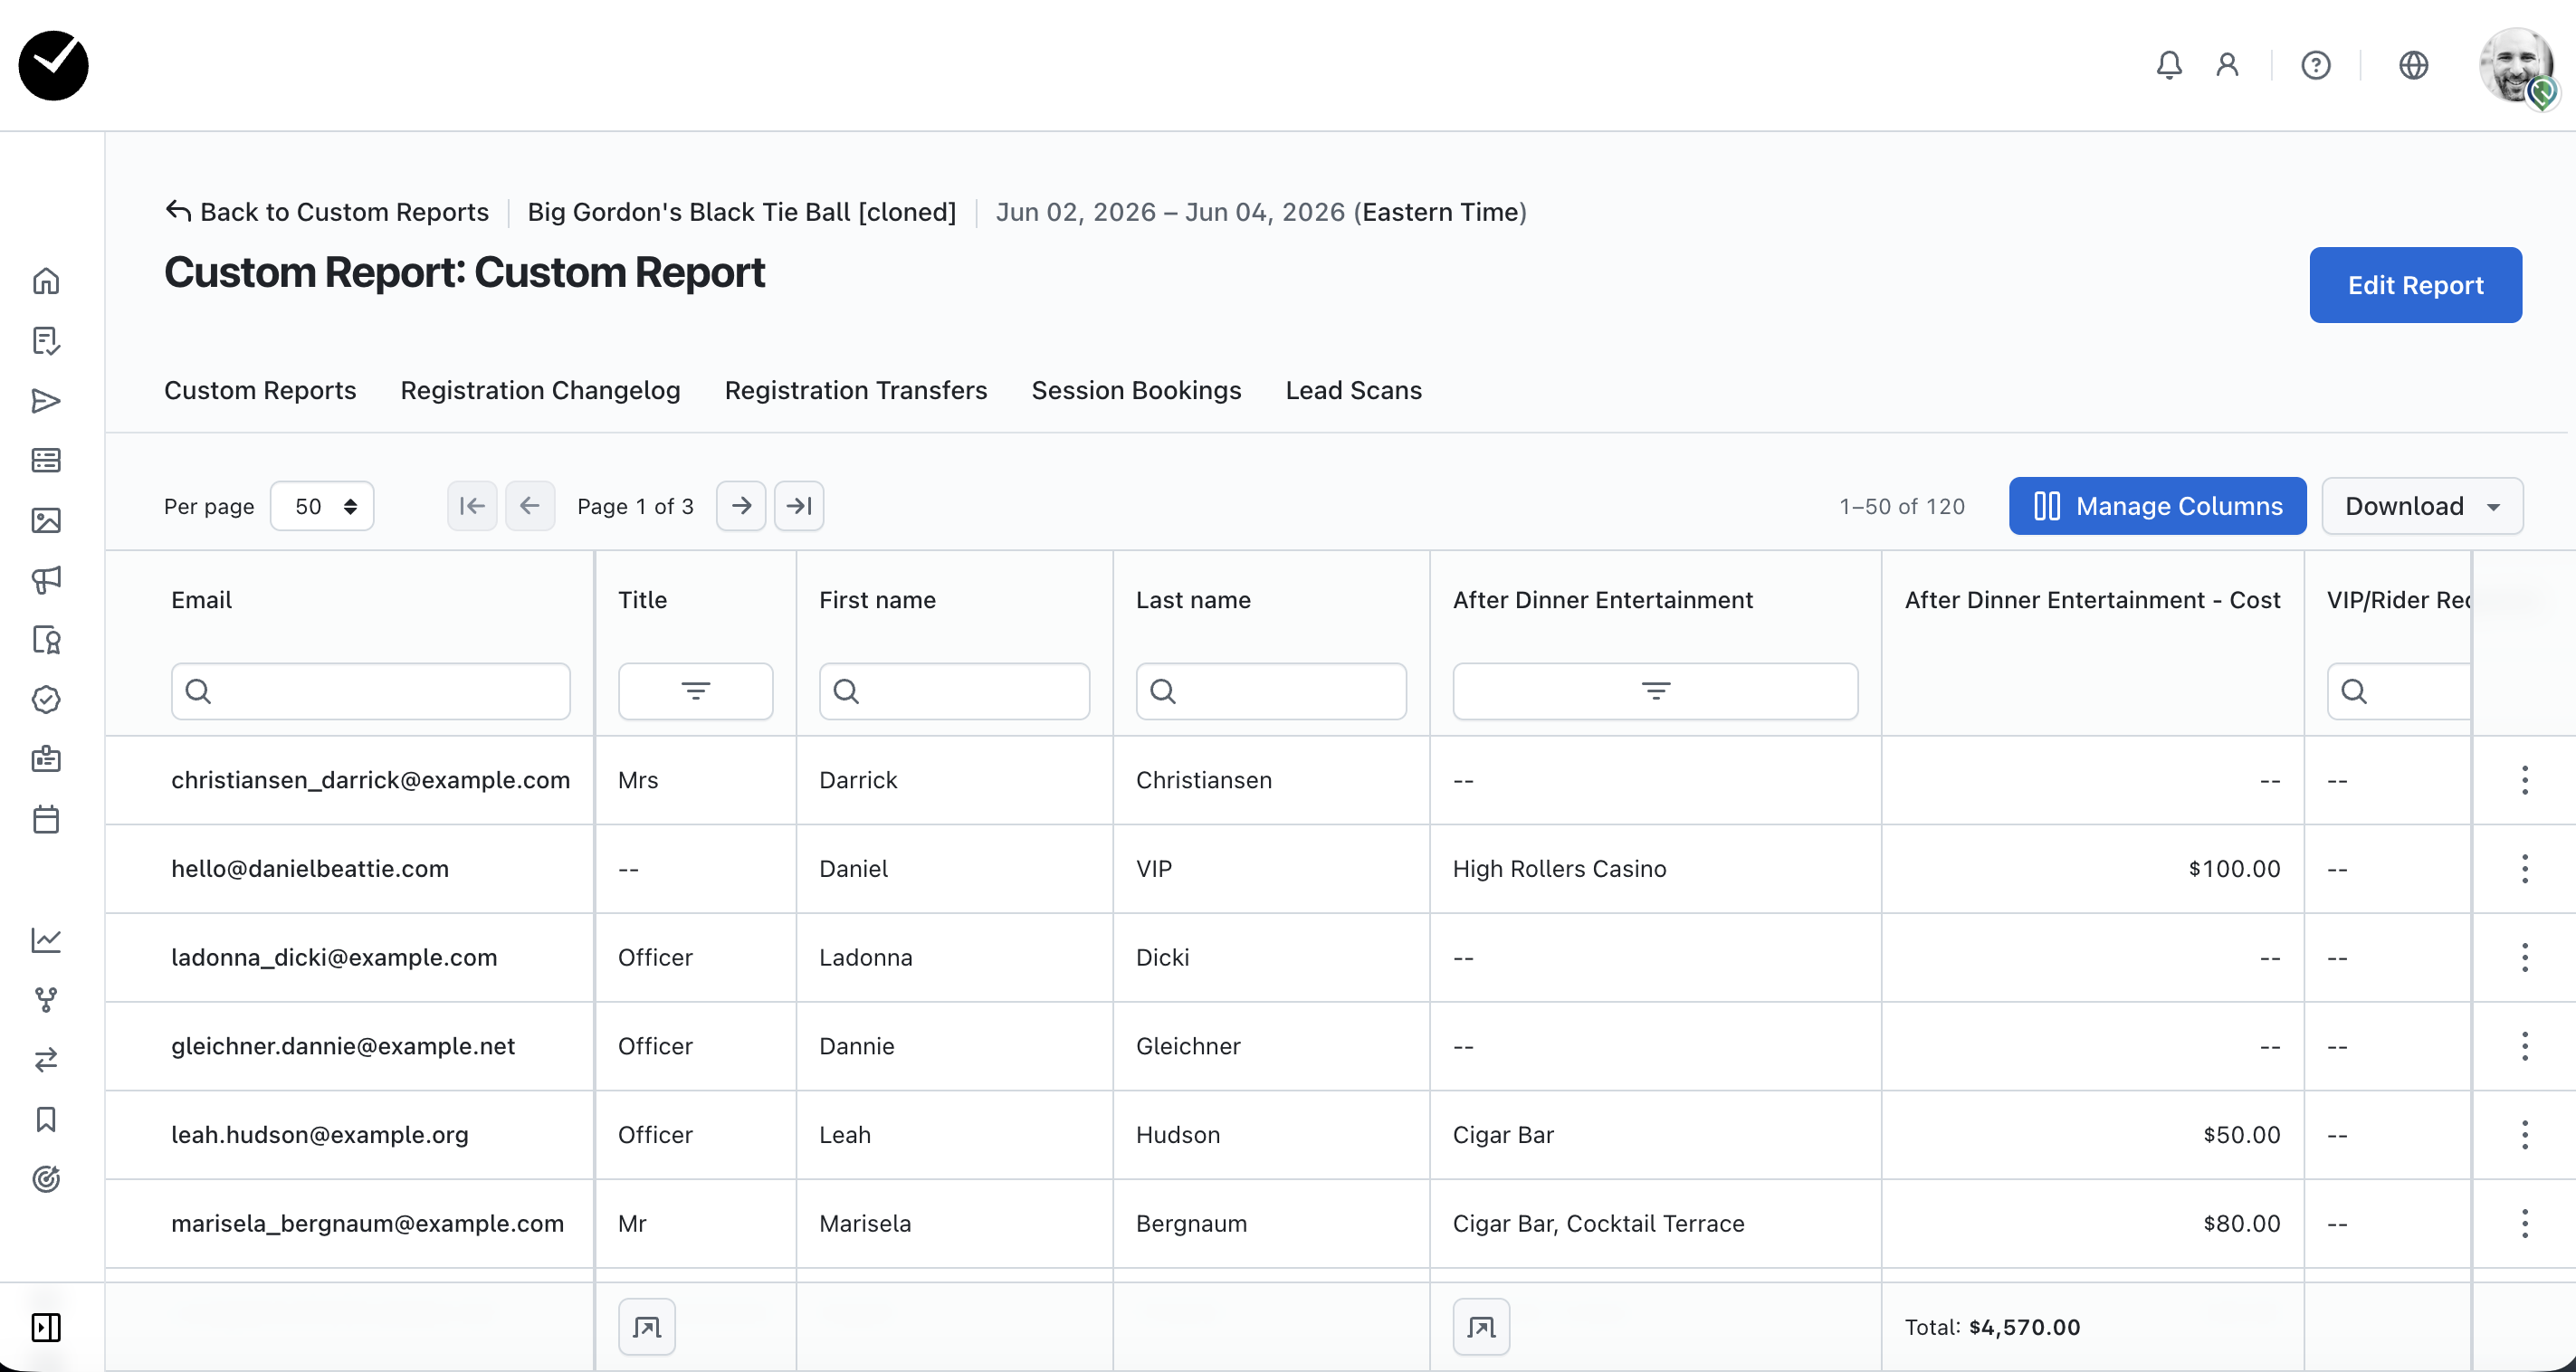
When viewing a custom report, you will see a number of different options displayed above each column that allow you to sort and filter your data. By clicking on the title of a column, you can sort the entire report by ascending/descending, which will apply the sort to the relevant column.
Columns that allow a 'text' search will have the following interface above them:
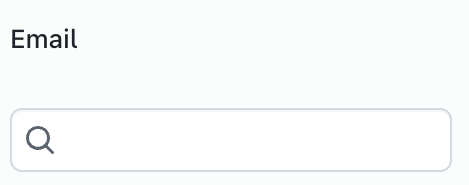
Simply enter your text, and any matching or partially matching results will be returned on the report.
Columns that allow a selection to be made will have the following interface above them:
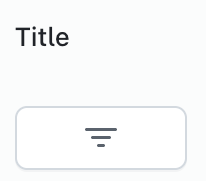
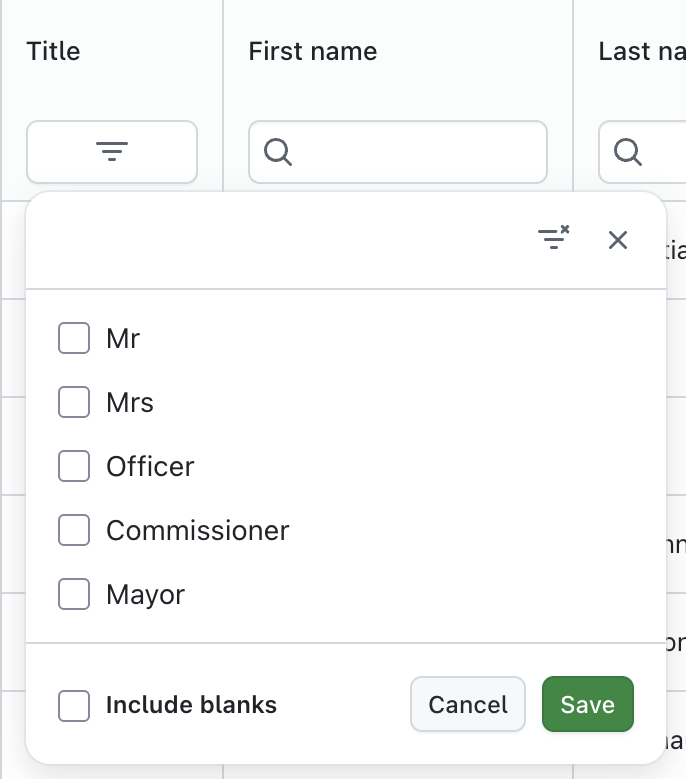
When you click on the button beneath the column title, a set of filter options are displayed - these will differ depending on the type of data you are filtering. For example, if the column data reflects something like a 'Title' (as shown in the screenshot below), you will see a set of checkboxes. If you select to filter a column containing dates, you will be provided with a set of date fields to create a ranged filter, and if there is a numerical value involved (eg fees or invoicing), you will also see a ranged filter available.
When interacting with your custom report, you may see a 'breakdown' icon displayed at the bottom of the column:
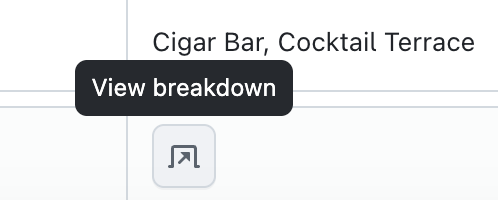
Selecting this will display a table in a new tab on the page, showing a collected breakdown of all data in captured for the column in the report.
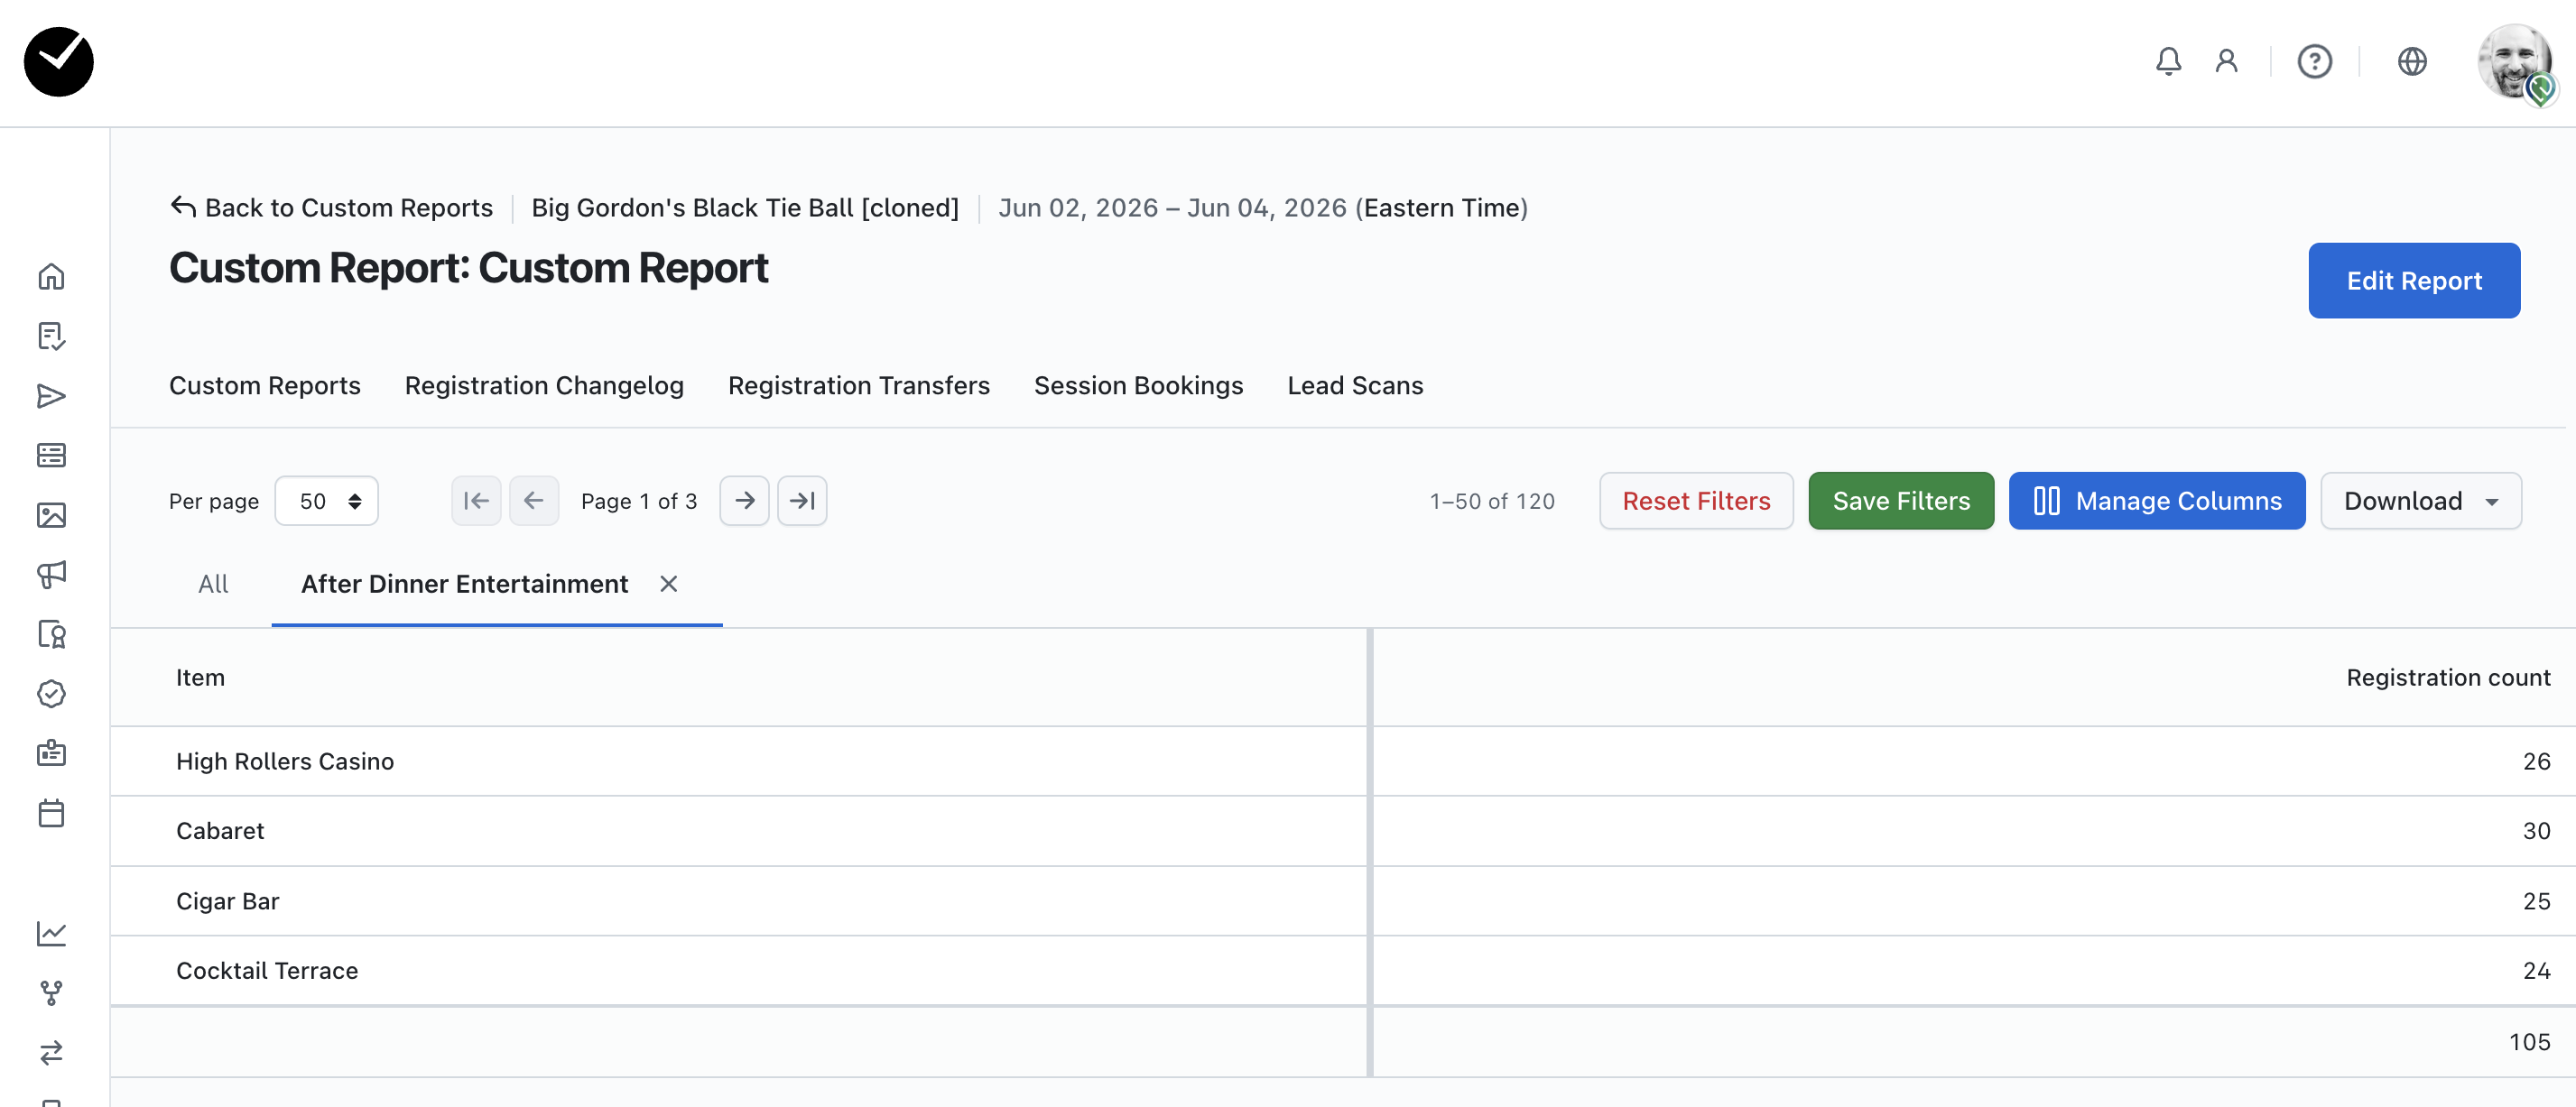
To close the breakdown and return to the main report, click on the 'X' icon after the breakdown name on the new tab.
Managing your event custom reports
Once you have built a custom report, you have further options available. When viewing your report in getregistered®, you can also save report filters, manage report columns and amend your report fields if required.
To edit your report, click on the 'Edit Report' button displayed at the top right of the page. This will take you to a similar form as the one presented when you initially created your report - simply check/uncheck any fields you wish to add/remove, edit the name if desired, and then click 'Save Report' when you are ready to proceed.
When you filter any column on your custom report, you will see the option to 'Save Filters' and 'Reset Filters' appear above the report to the right of the page.
If you select the 'Save Filters' option, this will keep the filter applied to your report whenever you choose to return to it, and if you choose to download a report with 'saved filters', the report received will have the filters applied. You can add as few or as many filters as you like, and if you wish to remove your saved filters, simply deselect/clear them on the relevant column and select to 'Save Filters' again.
If you wish to rearrange the ordering of your report columns or edit your column names, click on the blue 'Manage Columns' button.
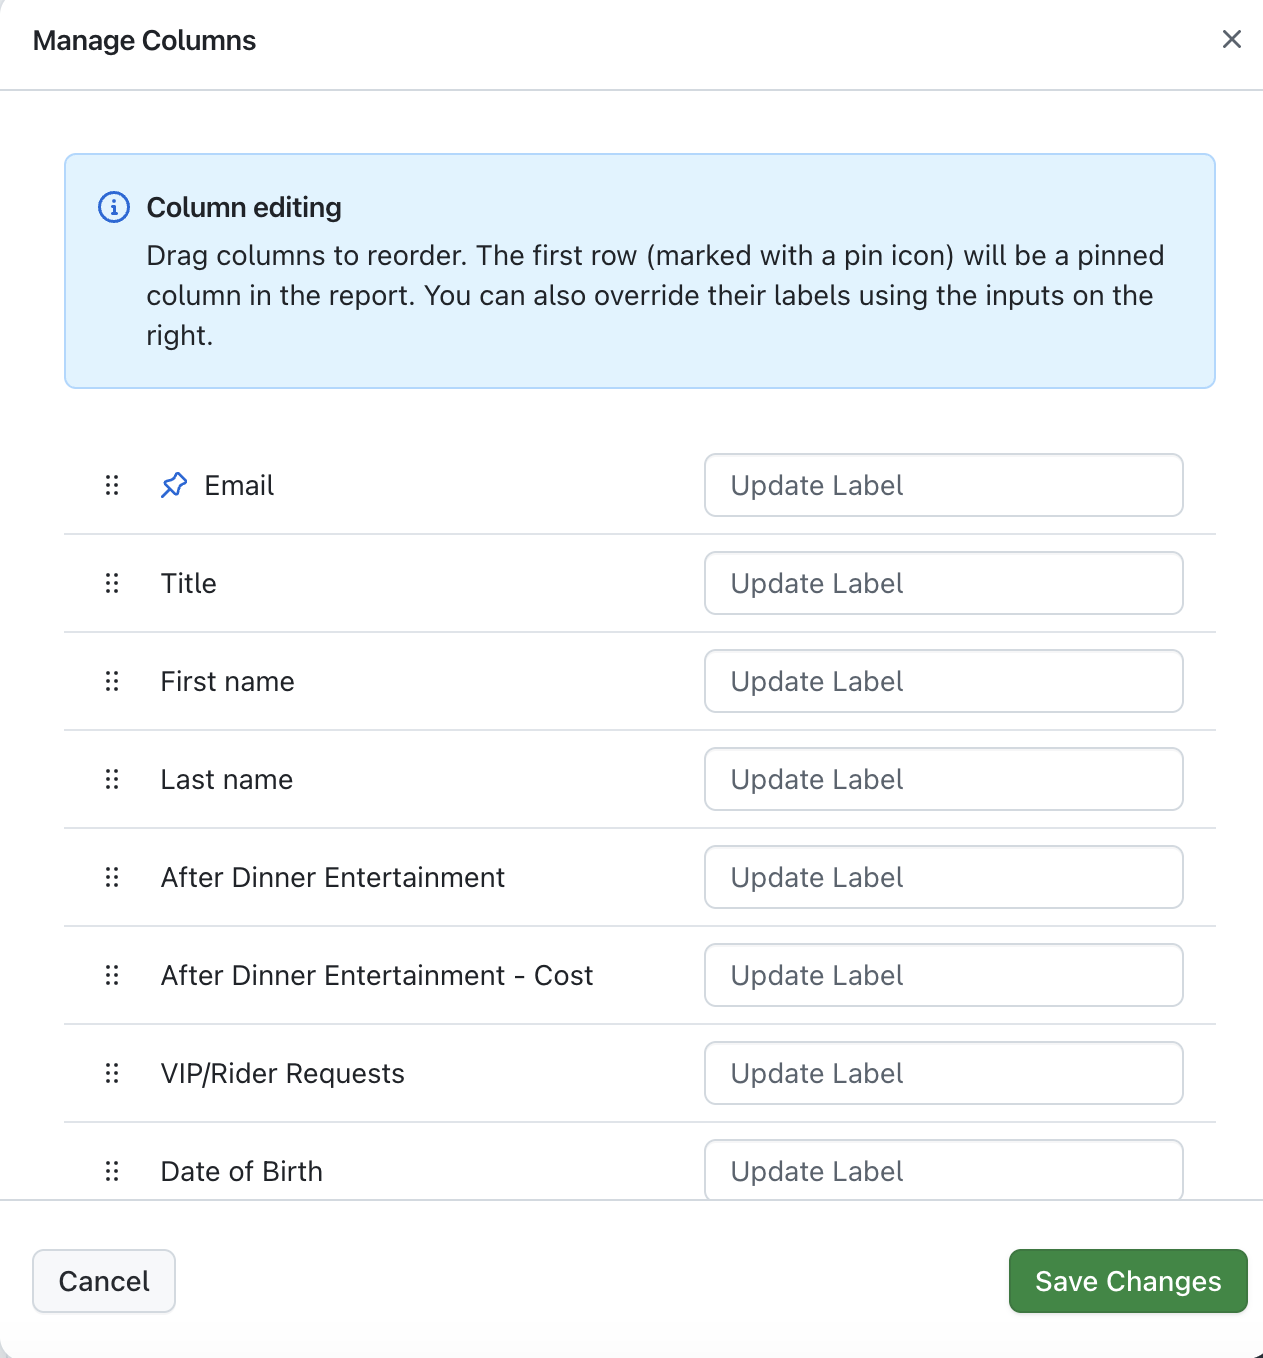
A new window will be displayed, and in this window, you can add new labels for your columns, as well as drag them into the order you wish them to be organized by. Just make your desired changes and click 'Save Changes' to have your changes applied to the report. iI you choose to download a report with columns that have been renamed/re-arranged, the report received will have the saved changes applied.
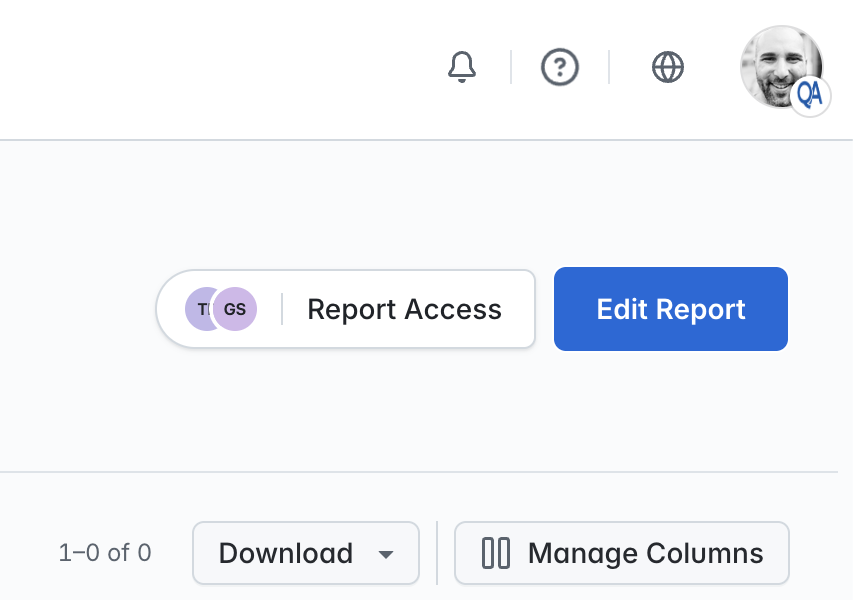
Managing access to your event custom reports in your Reports area
When viewing your report in getregistered®, if your user role permits you to, you can also view and grant access to your report using the 'Report Access' feature, located at the top right of your Report page:
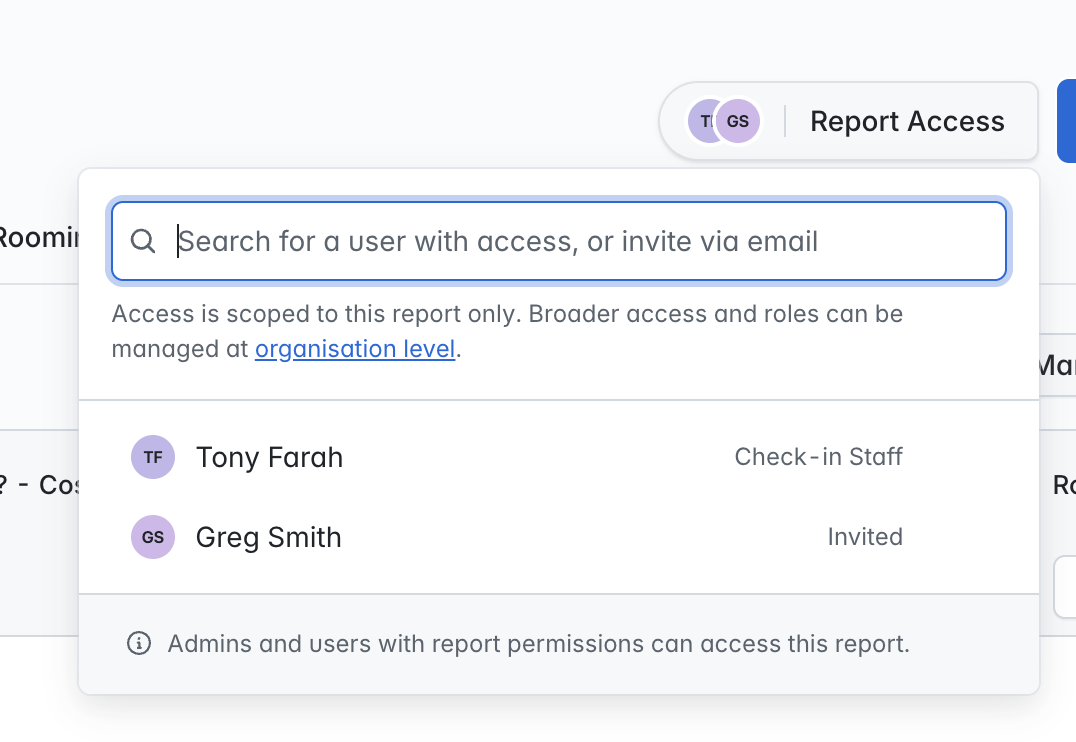
By clicking on this option, you will see a list of all users that currently have access to the current report, as well as a field above that allows you to search for users by name or email address:
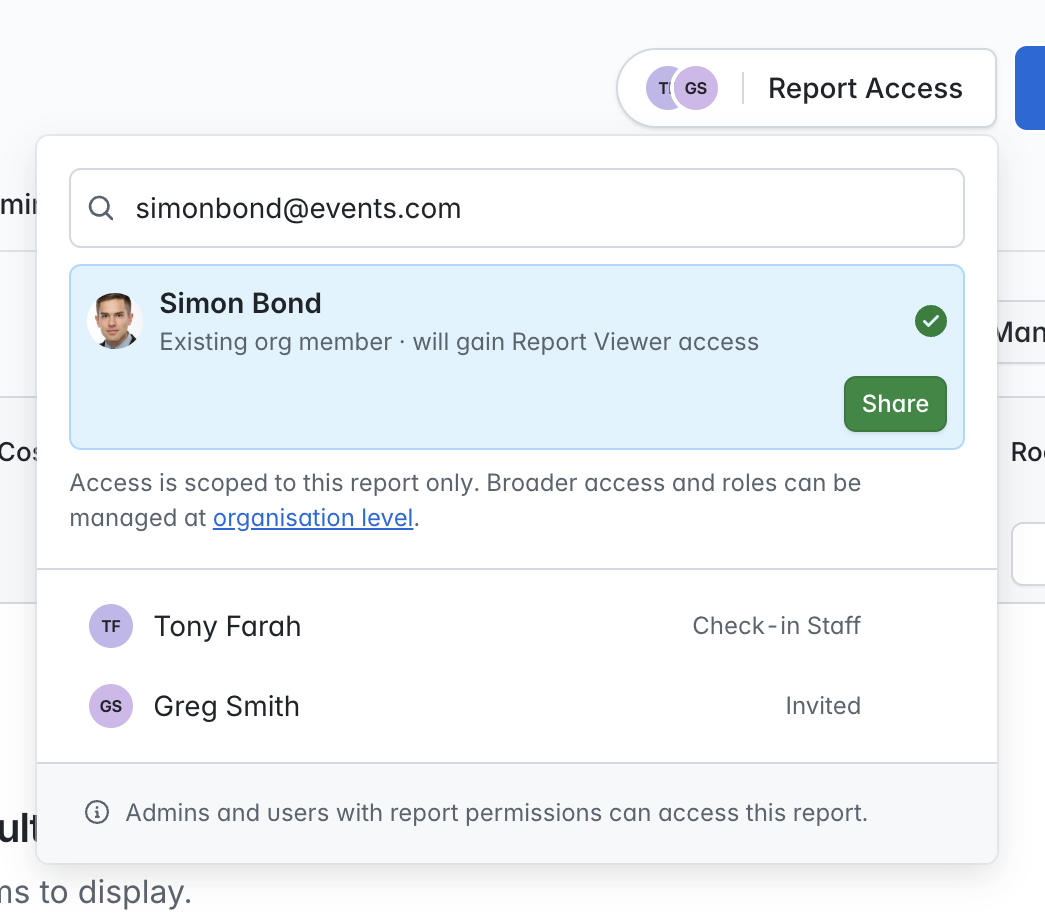
If your user role permits you to, when you search for an a user that does not have access to the report but is part of your event or organization, you will have the option to grant access to the report (as can be seen in the screenshot below) - just click on the 'Add' button and they will be granted access. If the user did not have access to the current event previously, they will be now be permitted to access it, but only as a 'Report Viewer'.
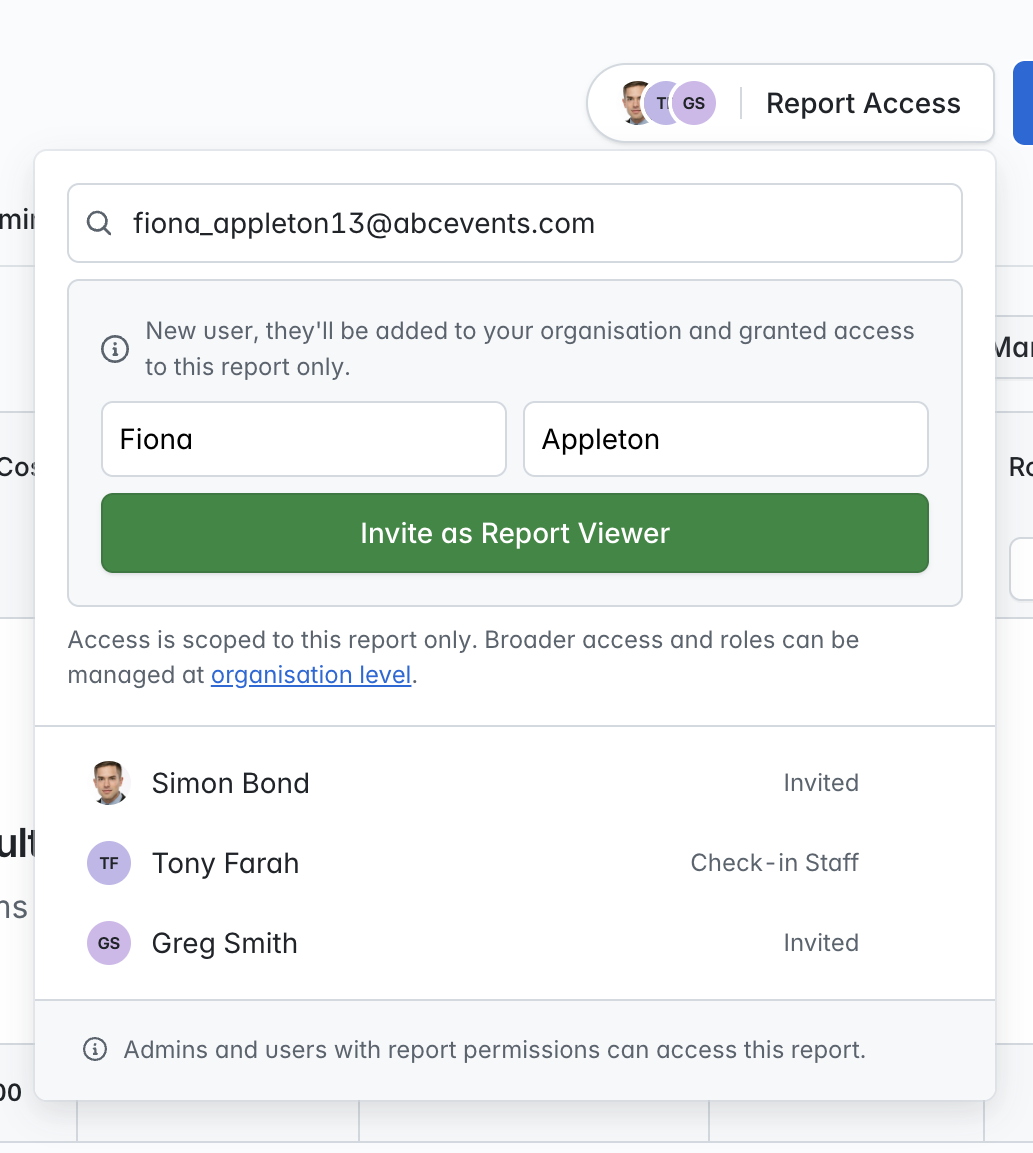
If the email address entered does not match any of your organization event users in our database, you will see the option to invite the person as a new user as a 'Report Viewer'. You will be asked to provide their first and last name, and once you click on 'Invite', they will receive an invitation to join your organization. Once they have accepted, they will be able to access both the event and permitted report as a 'Report Viewer' only.
If you wish to grant permission to access multiple custom reports within an event, it may be quicker and easier to use the 'Manage Users'/'Event Assignments' area (as you can grant access to multiple reports in one go), but this tool is very handy for access management on the fly!