How do I create an agenda for my event?
Note - your organization must have the 'Schedule' feature enabled to be able to access the 'Schedule' area and build agendas. Please contact support if you'd like to to see this feature activated in your organization's events
To begin to prepare an agenda for your event, you must first navigate to your 'Schedule' area on your Event Dashboard.

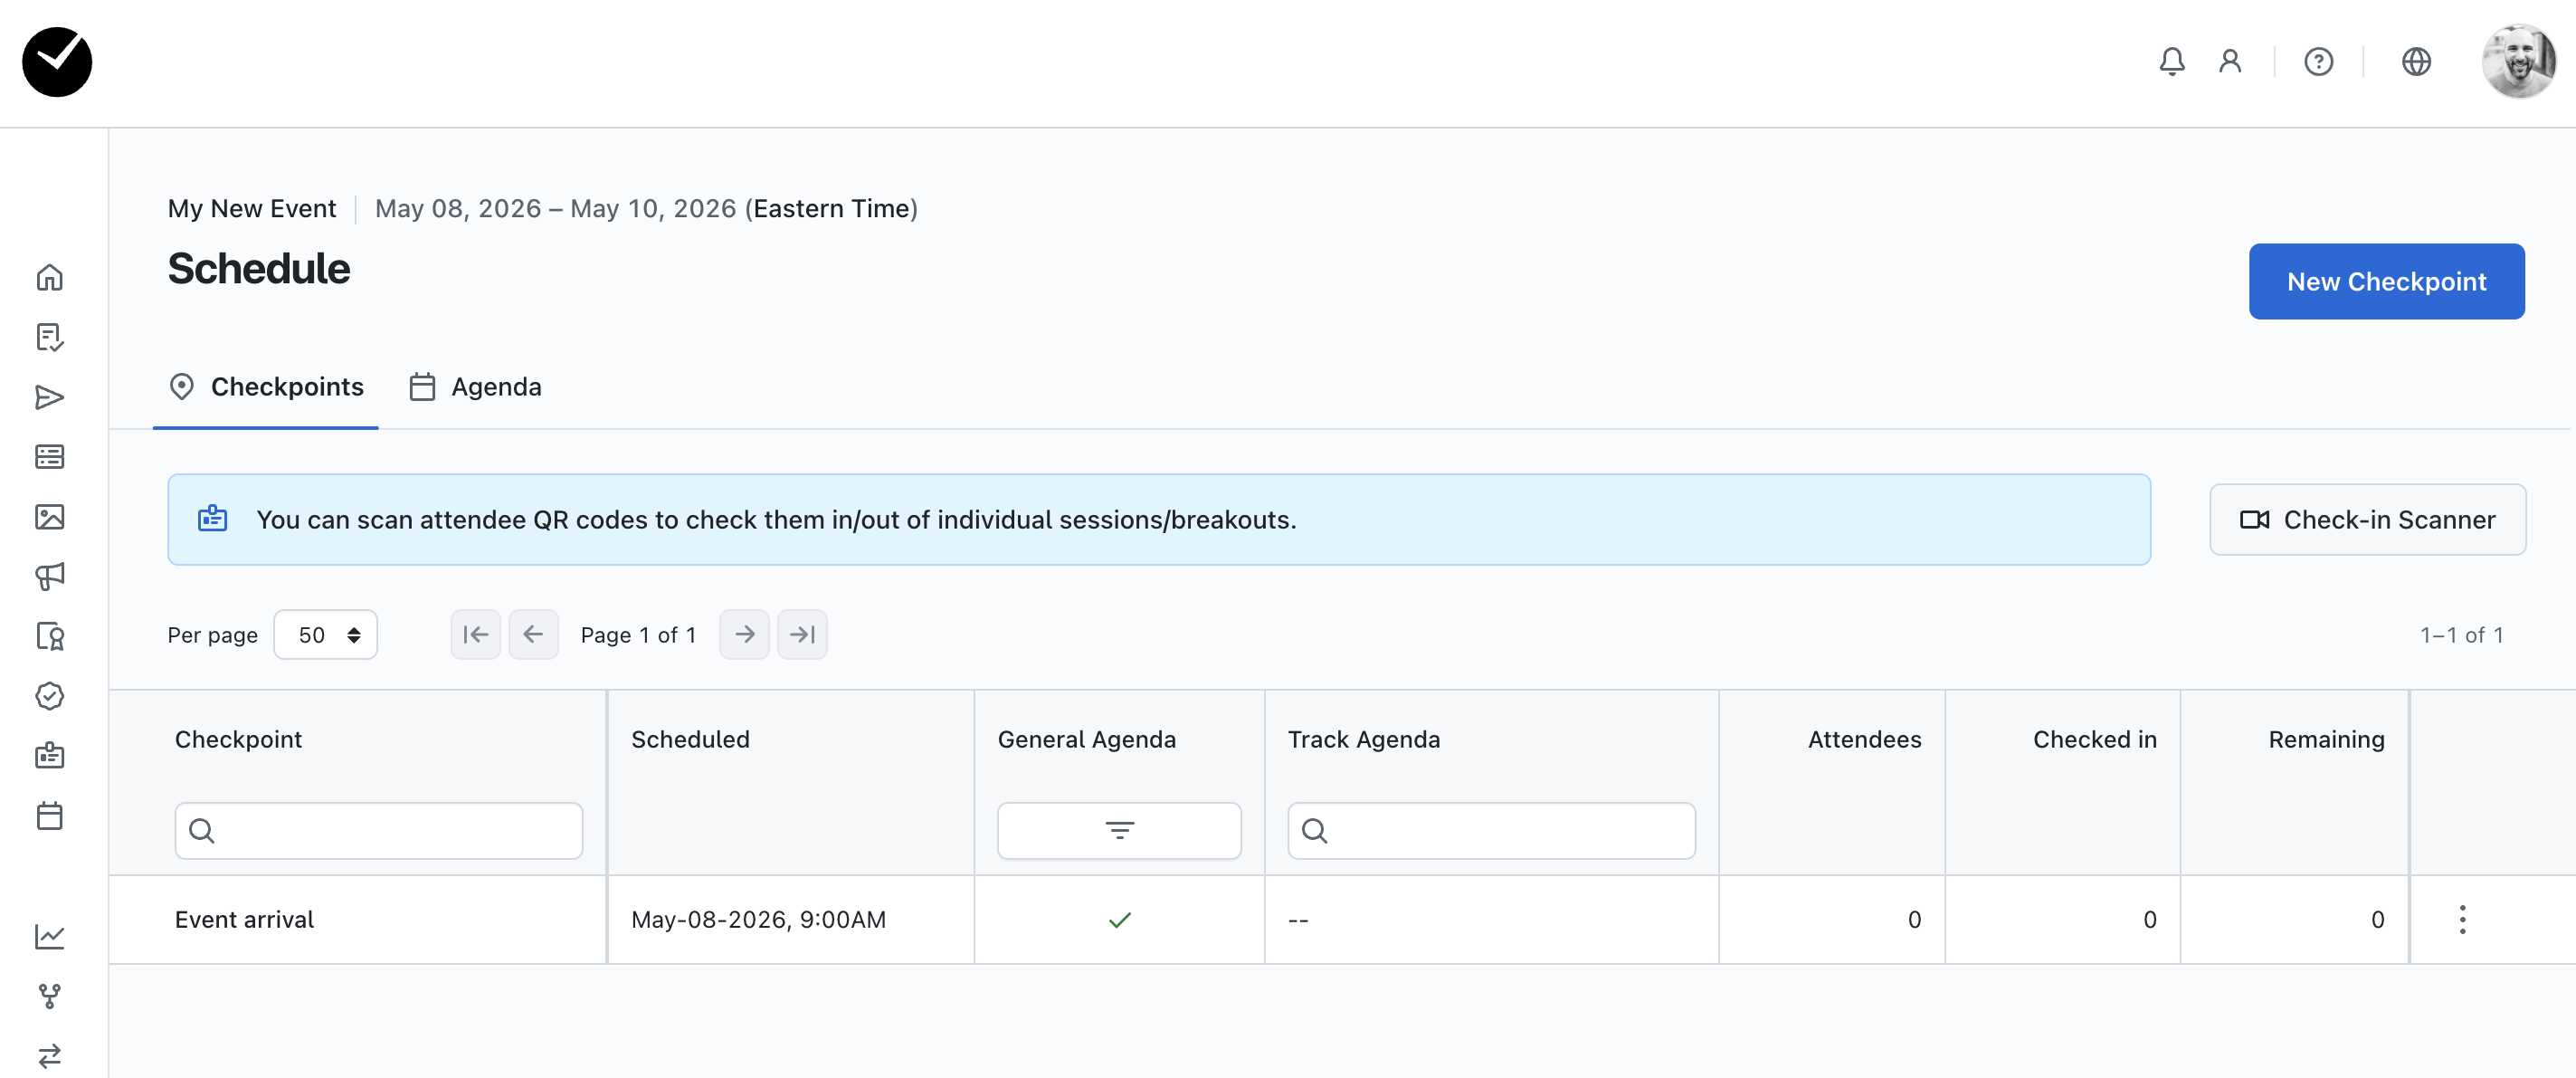
When you enter here for the first time, you will see a single checkpoint ('Event Arrival') which is created automatically for you when you create your event. Any checkpoint added to this area can be added to your event Agenda, including checkpoints created from session bookings.

Creating your first Checkpoint as an Agenda item
To begin building your event agenda, select the 'New Checkpoint' option at the top right of the page. Following this, you will now see the 'New Checkpoint' page:

On the page you will see the following fields/options:
- Name - this is the name of your checkpoint and is a mandatory field. The 'Name' you enter here will be displayed as an agenda item for attendees. Names must be less than 400 characters.
- Start Date/Time - this field allows you to choose the starting date and time of your checkpoint. The selected time will be displayed under the agenda item for attendees. This is a mandatory field.
- End Time - this field is optional, and allows you to set an end time for your checkpoint. The selected time will be displayed under the agenda item for attendees.
- Venue/Location - another optional field, that allows you to provide attendees with a location related to the checkpoint (eg Main Hall, Breakout Room 1etc).
- Description - this text area allows you to add a description of the checkpoint, which will be displayed under the agenda item for attendees.
- Visibility - under this section, you will see the option to select whether the check point is added to an agenda or not. You should see the following options depending on whether you have tracks added to your event:
- General Agenda - selecting this will display the checkpoint as an agenda item for all attendees.
- Track Specific - this option is only displayed in events with tracks created. Selecting this option allows you to select specific tracks that can see the agenda item, you will also have the option to show on the 'General Agenda' if required.
- Not on Agenda - selecting this will not show the checkpoint as an agenda item for attendees, and will merely function as a checkpoint for you to manage check-ins/outs.
- Add to all attendee schedules - this option will automatically add the checkpoint as an agenda item that appears on every attendee's personal schedule (this will be filtered by track if Track Visibility is set).
So, to proceed, populate the form to fit your requirements and then click 'Create Checkpoint' to proceed. You will then be returned back to the 'Schedule' area.

In the above example, you can see that we have created the Checkpoint 'Welcome Breakfast'. It has been set to be on the General Agenda only, which is indicated by the tick in the 'General Agenda' column. You'll also see that the 'Track Agenda' column is empty, this is because no track specific visibility has been set.

An example of a 'Track Specific' checkpoint can be seen above. As you can see from the grid, the checkpoint 'VIP Brunch' has been added - this checkpoint has not been added to the 'General Agenda' (indicated by the cross icon), and is visible only to the 'VIP' track (as displayed in the 'Track Agenda' column).
Editing a checkpoint's agenda parameters
While building your Agenda, you may wish to add or amend some agenda-related parameters to ensure the checkpoint is on the agenda and also visible to the right audience. If you wish to amend or add agenda parameters on a pre-existing checkpoint, enter the 'Schedule' area, click on the 3 dots on the end of the row of the checkpoint that you wish to edit, and select 'Edit'.

You will then see the 'Edit Checkpoint' page, which contains exactly the same fields/options as the 'New Checkpoint' form. From here, you will be able to add/remove agenda-related parameters as you see fit, and when saved then the changes will be applied to the checkpoint.
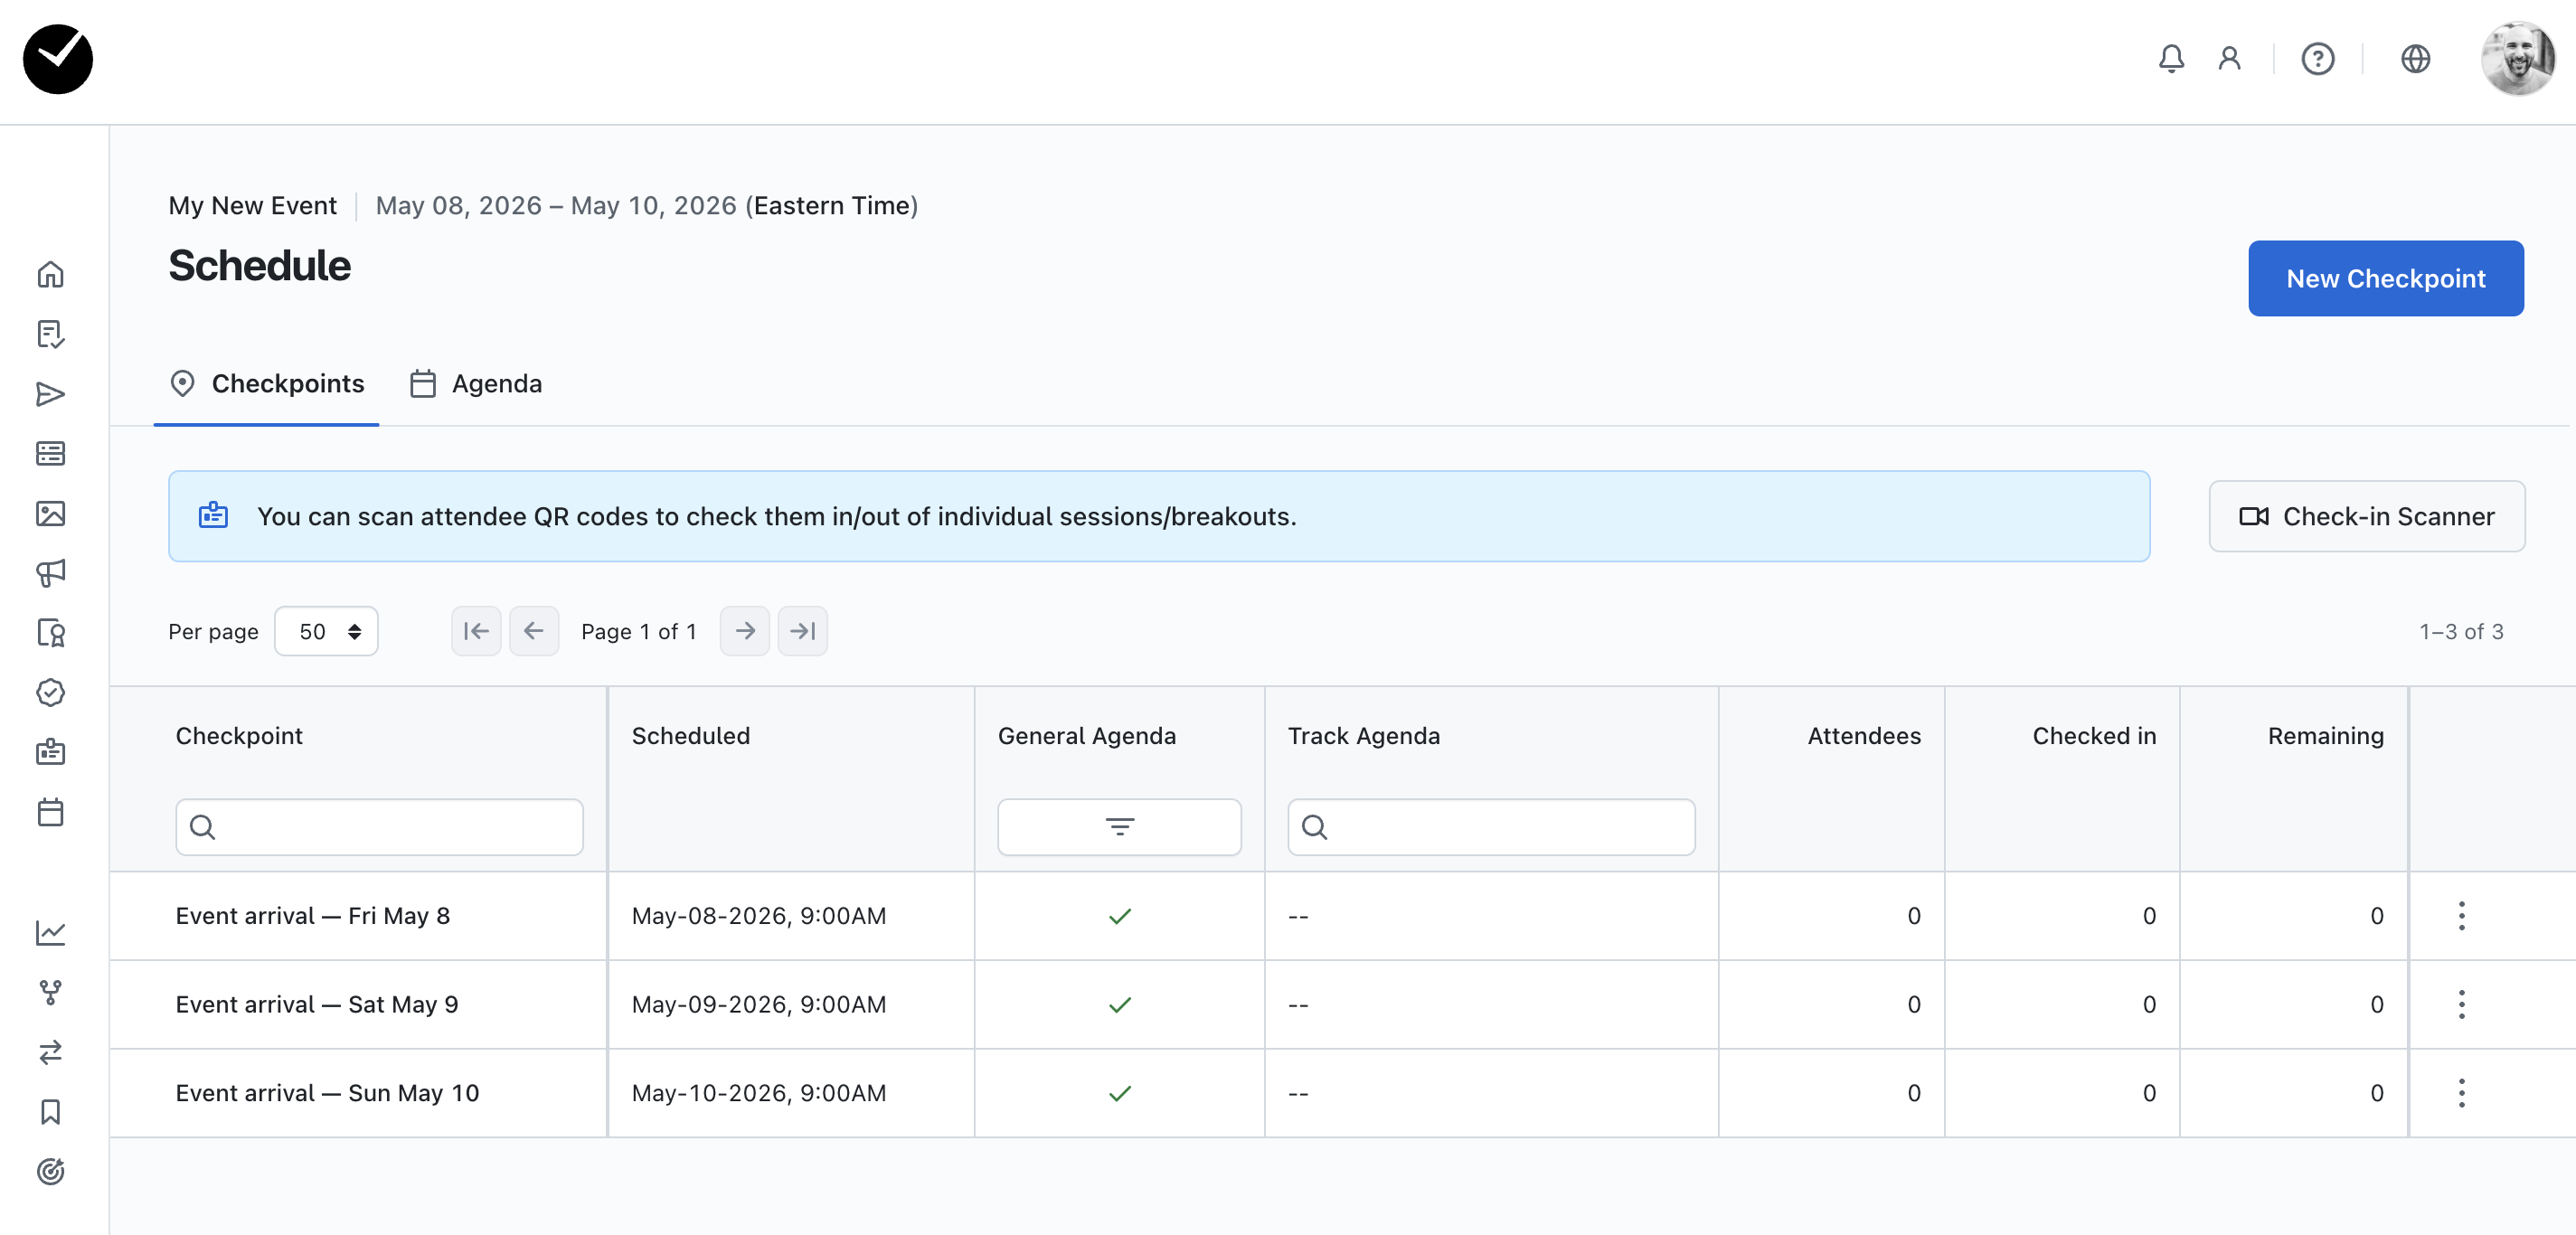
What are the system generated checkpoints I can see in my Checkpoints area?
When you are in the Checkpoints area, you will see some system-generated checkpoints for 'Event Arrival'. Depending on the length of your event, you will either see a single system checkpoint for the first day of your event, or multiple arrival checkpoints (per day).
These checkpoints can be edited, but cannot be deleted. If you wish to manage your 'per day' checkpoints (eg enable or disable), enter your Event Settings area, select the 'Advanced' tab and scroll down to the 'Per-day Arrival Checkpoints' area:
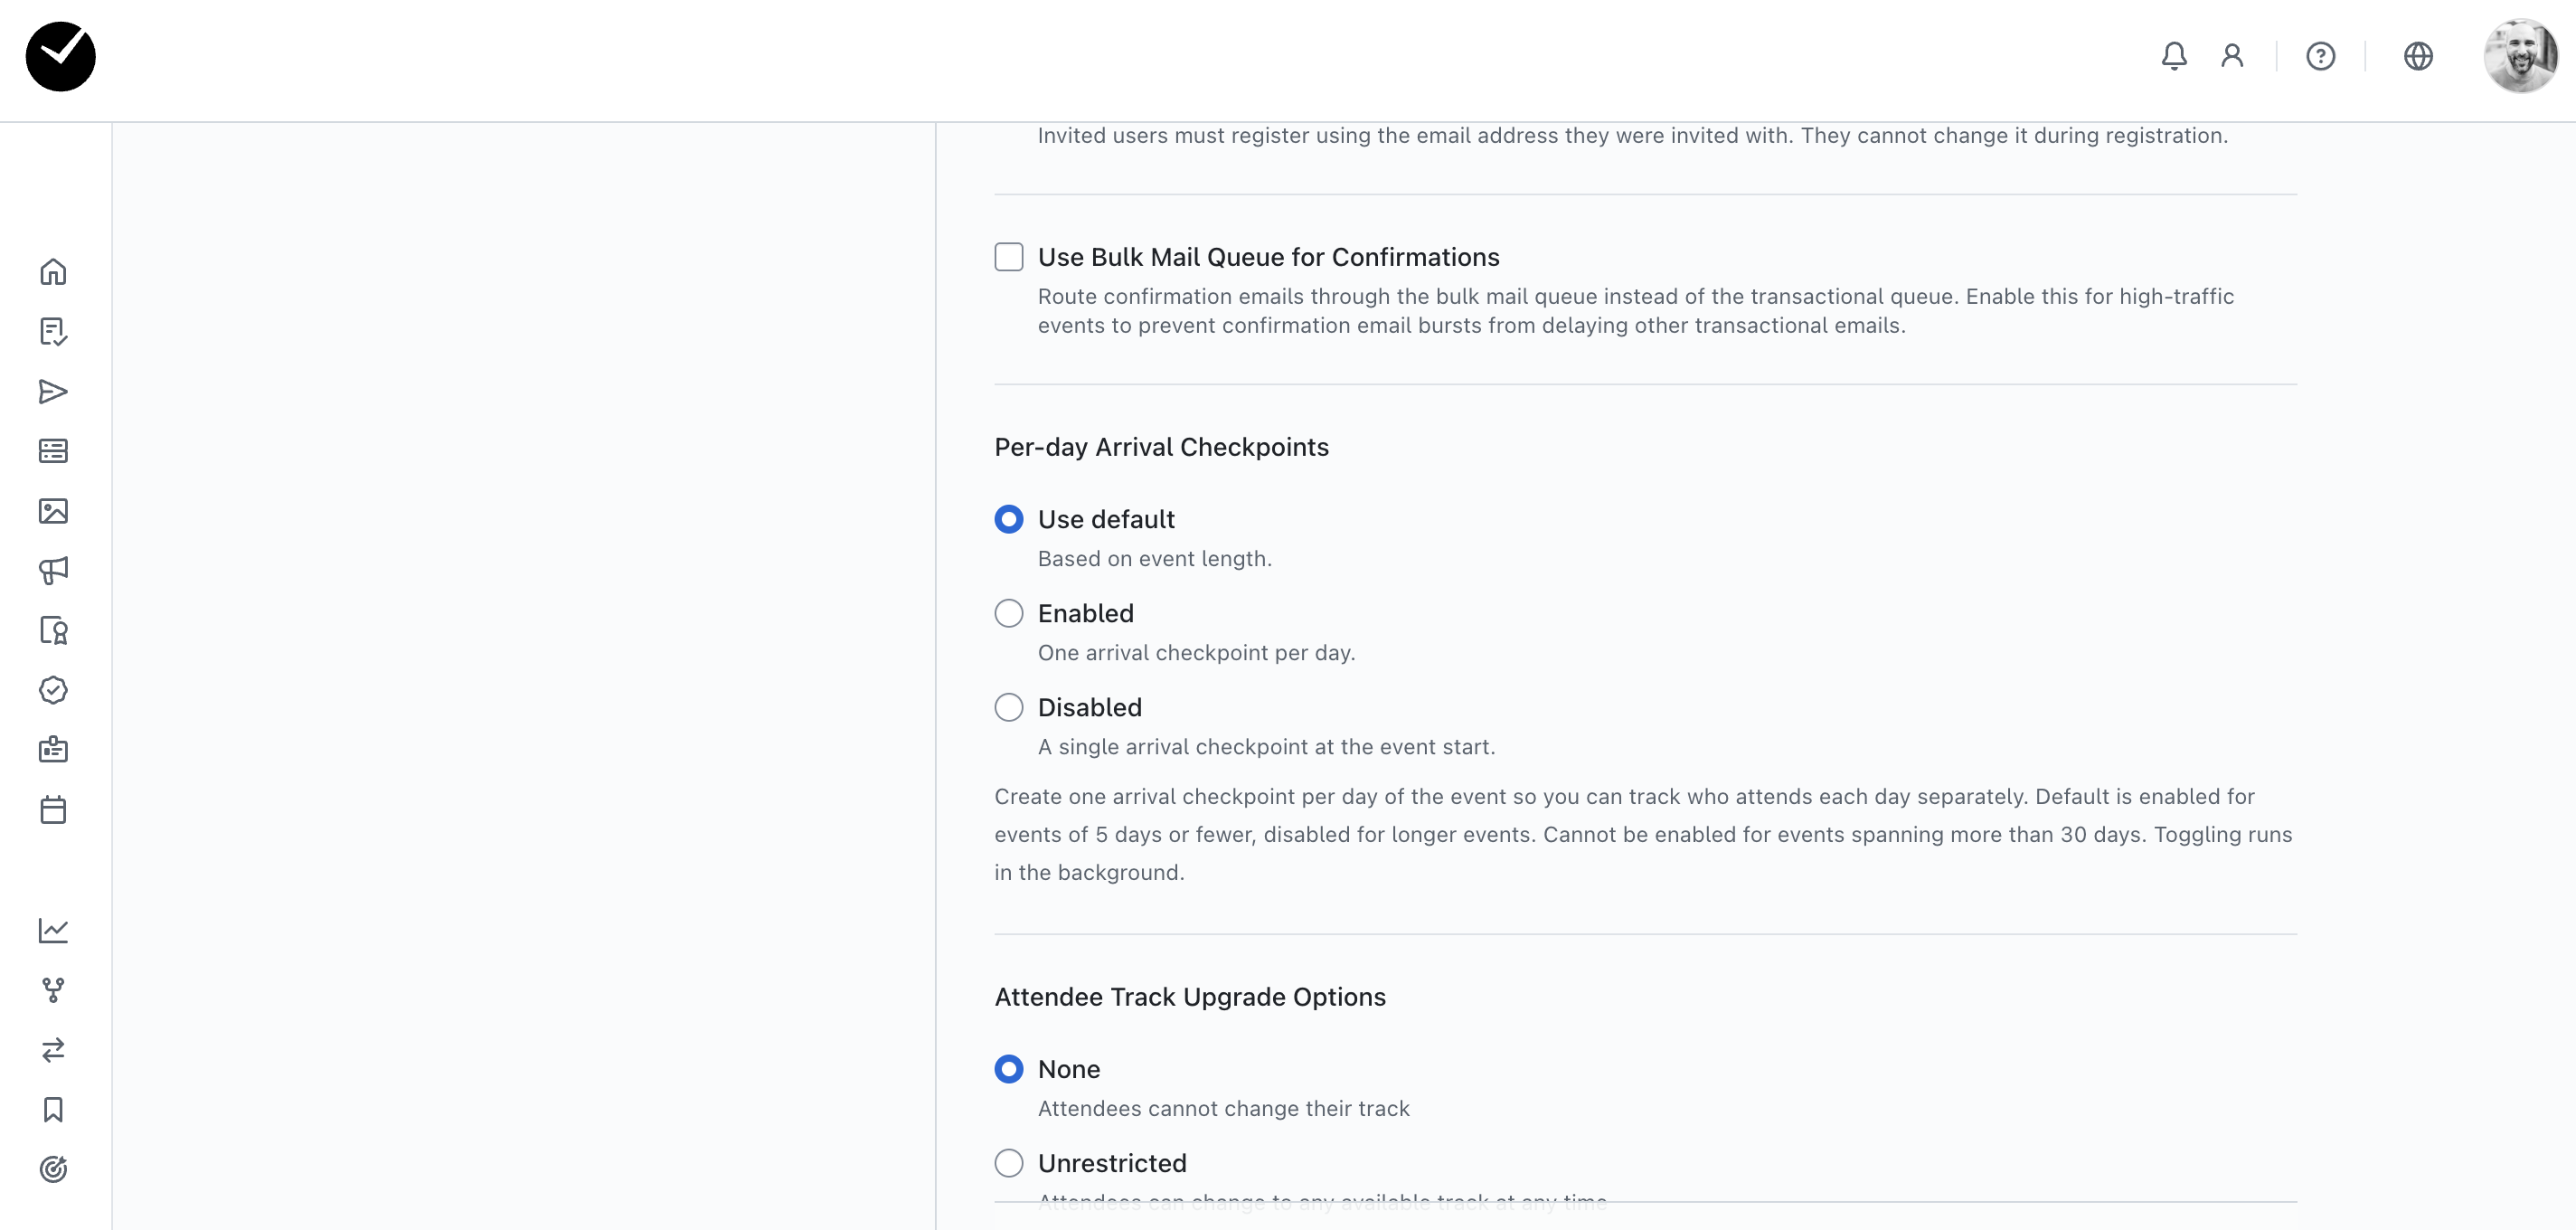
By default, any event less than 30 days will have an arrival checkpoint added per day, but this can be changed to a single checkpoint by selecting the 'Disabled' button and saving. And obviously, if you wish to restore per-day arrival checkpoints, simply select either 'Use default' or 'Enabled' and save to re-add them to Checkpoints area.
Events that span over 30 days will not have the ability to enable per-day arrival checkpoints, they will always only have a single system checkpoint for the starting day of the event.
How do I preview my event agenda?
By selecting the 'Agenda' tab at the top left of the page, you will see the 'Agenda' page displayed:

In the example above you can see the page is broken down into the following:
- Agenda card (left side of the page) - in this area you can see all the details about the currently selected Agenda. This provides you with a collection of information about the currently selected Agenda such as the amount of 'Schedule Items' and track visibility
- Add Agenda Item (top right of the page) - this button allows you to quickly add an additional checkpoint as an Agenda item to your Agenda, so that you don't have to return to the Schedule page to create a new item. New items added here will appear both in the Schedule and Agenda pages.
- Agenda Previews (main body of the page) - this area displays all your Agenda items as they will appear to your attendees. If you have just a single 'General' agenda, there will be a single tab displayed, showing only agenda items set to 'General Agenda'. If you have track-specific agendas created (as shown in the example screenshot above), you will see additional tabs available with a lock icon next to them. Selecting any of these will allow you to preview the agenda specific to the track selection on the agenda items, so you can see exactly what each attendee type will see when viewing your agenda.
As you can see in the Agenda preview, the agenda items are ordered by time and grouped by the day they occur, making it clearly visible to your attendees as to when the items on the agenda schedule will be beginning and ending, and where (if a location has been added).
How do I add my event Agenda to the event website?
To add your event Agenda to your event website, navigate to the Event Website Editor area:

Click on the 'Add' option on the top right of the page, and select 'Add Agenda Section':

Once you have clicked on that, you will see that there is a new section added to the main area of the form editor, with placeholder text displayed - this is only present when using the editor, the event Agenda will be displayed in full when viewing your event website:

You still have the ability to restrict visibility of this section if required, the choice is yours. This may be required if you want to test the Agenda prior to going live with your registration, your Agenda is not fully confirmed, or you wish for attendees to only view the agenda once they have registered.
If you wish to preview how the Agenda will appear to all attendees, select to 'View event website' from either the top of your Event Dashboard or using the option in the navigation sidebar.

Please note that only the 'General Agenda' will be displayed when viewing your event website directly from your browser when logged in to getregistered, and any restrictions applied will not be visible to you. To view the event website as an attendee will see it (track specific agendas and section visibility restrictions), you will need to open the link in an incognito tab or a browser where you are not currently logged in to getregistered with.