How do I enable a 'Waitlist' for event tracks that have sold out?
Please note that the following article covers functionality using the new version of our form editor (v2). This feature is not available if you are using our legacy form editor (v1) - if you wish to switch to the new version of our editor, please contact us at getregistered® support.
When creating or editing tracks in your event's registration form editor, you will see the option 'Enable Waitlist' displayed under your Track Settings.
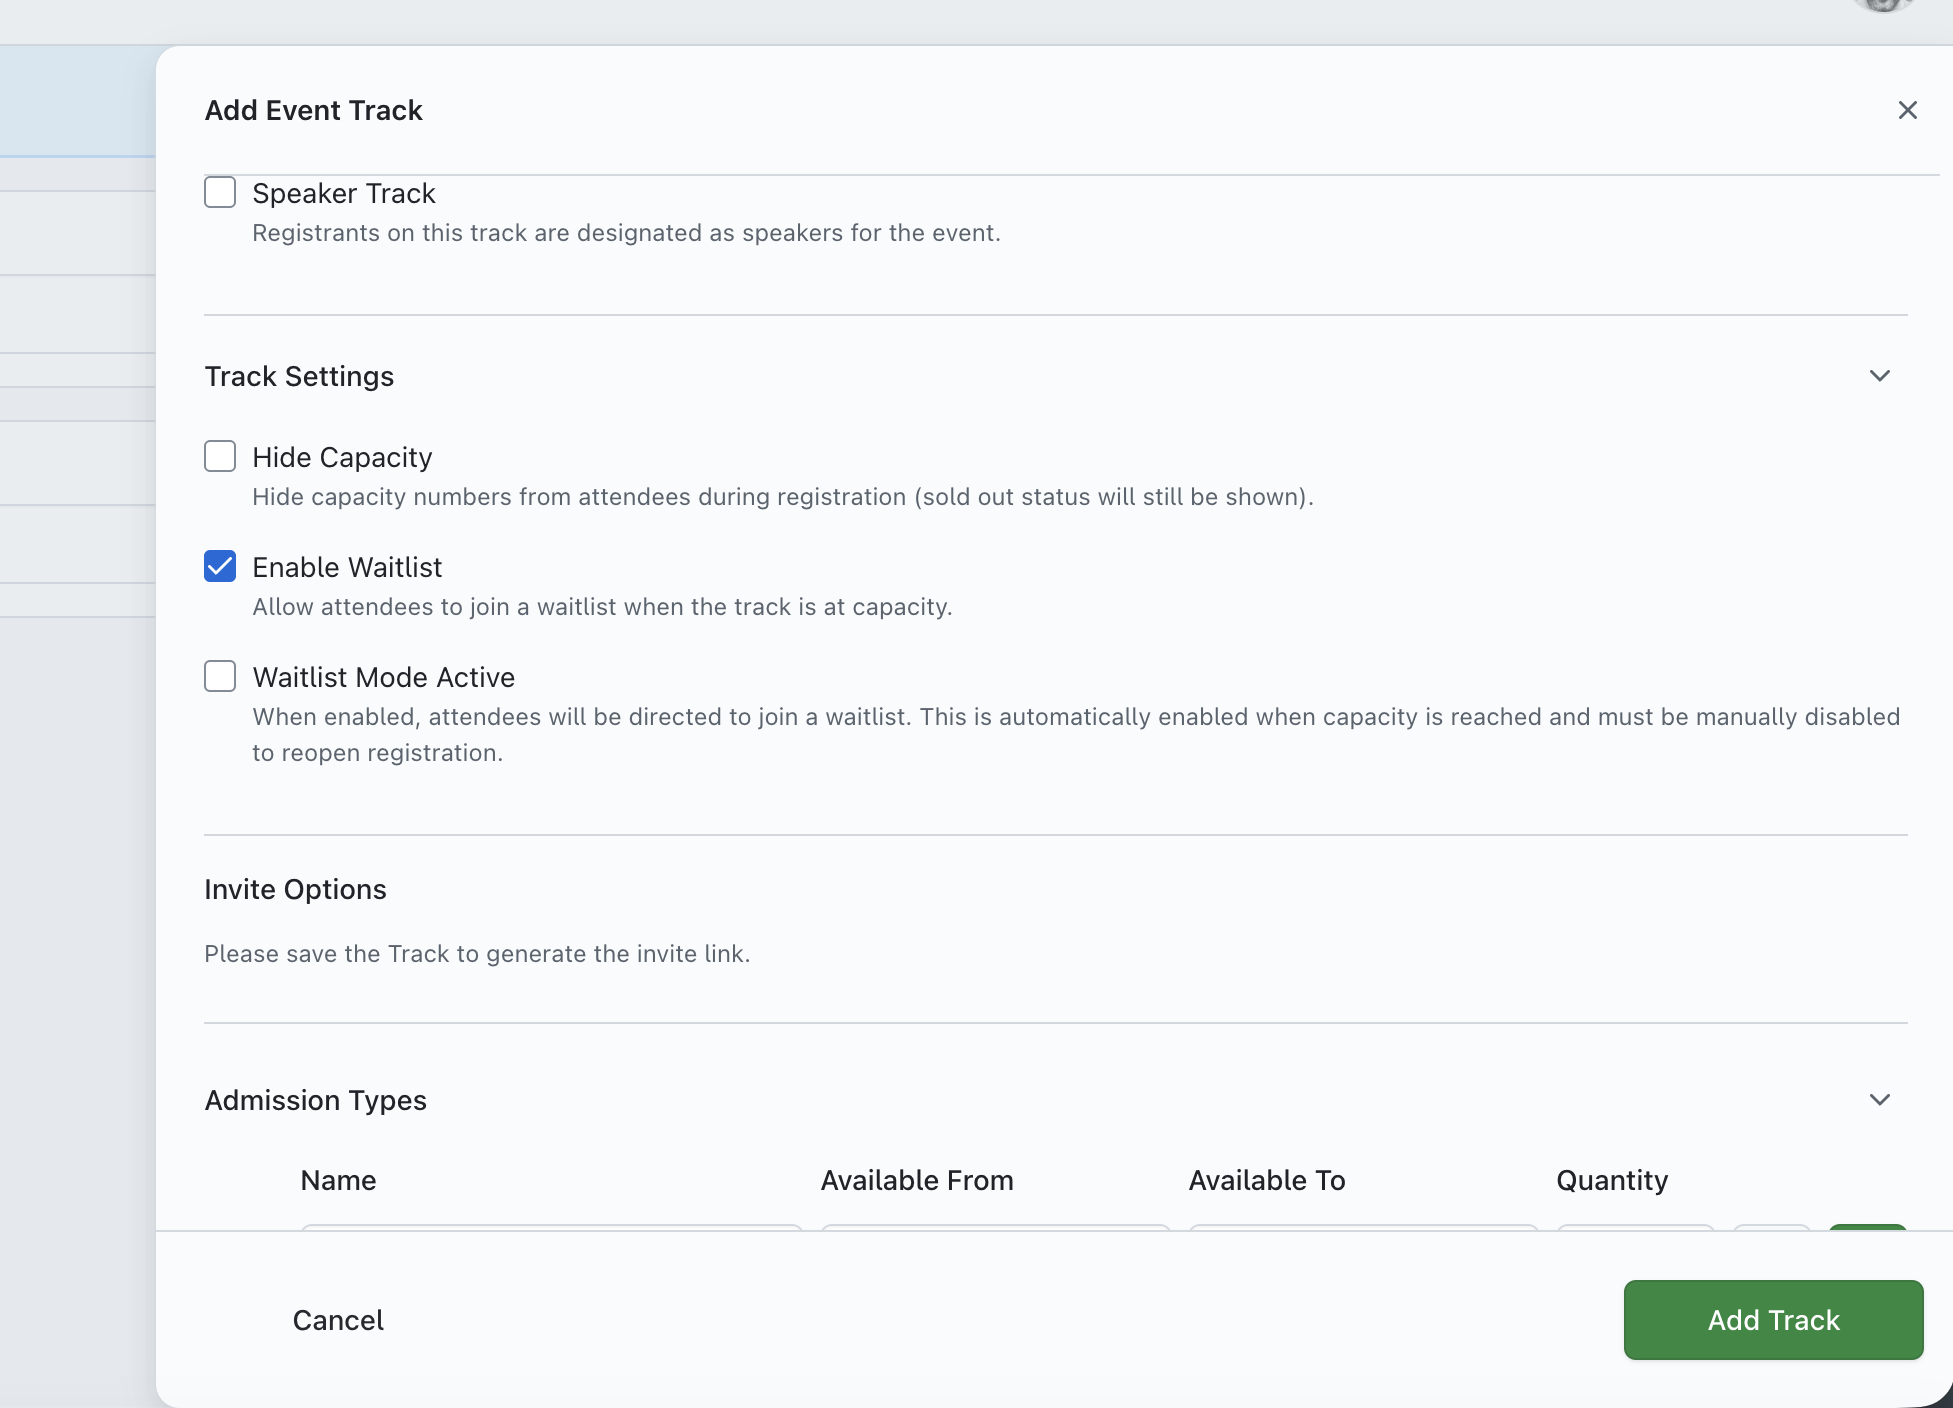
Selecting this option will enable the 'Waitlist' feature for the selected track in your event, but it will remain inactive until track capacity is reached and the additional 'Waitlist Mode Active' checkbox is also selected.
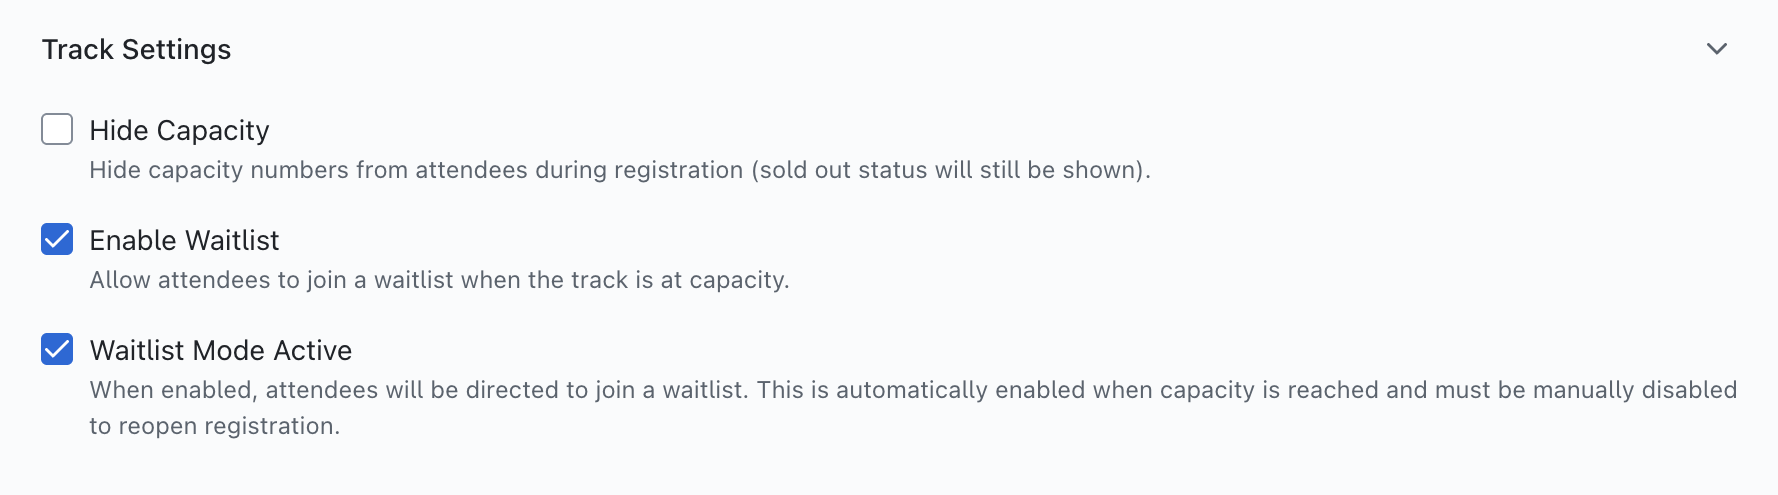
The 'Waitlist Mode Active' toggle will automatically be enabled once the track reaches capacity, but you also have the option to disable if for example, you wish to increase your track capacity by more than the amount of pending attendees on your waitlist (and therefore want to extend capacity beyond the extent of your current waitlist).
How does the 'Waitlist' feature work?
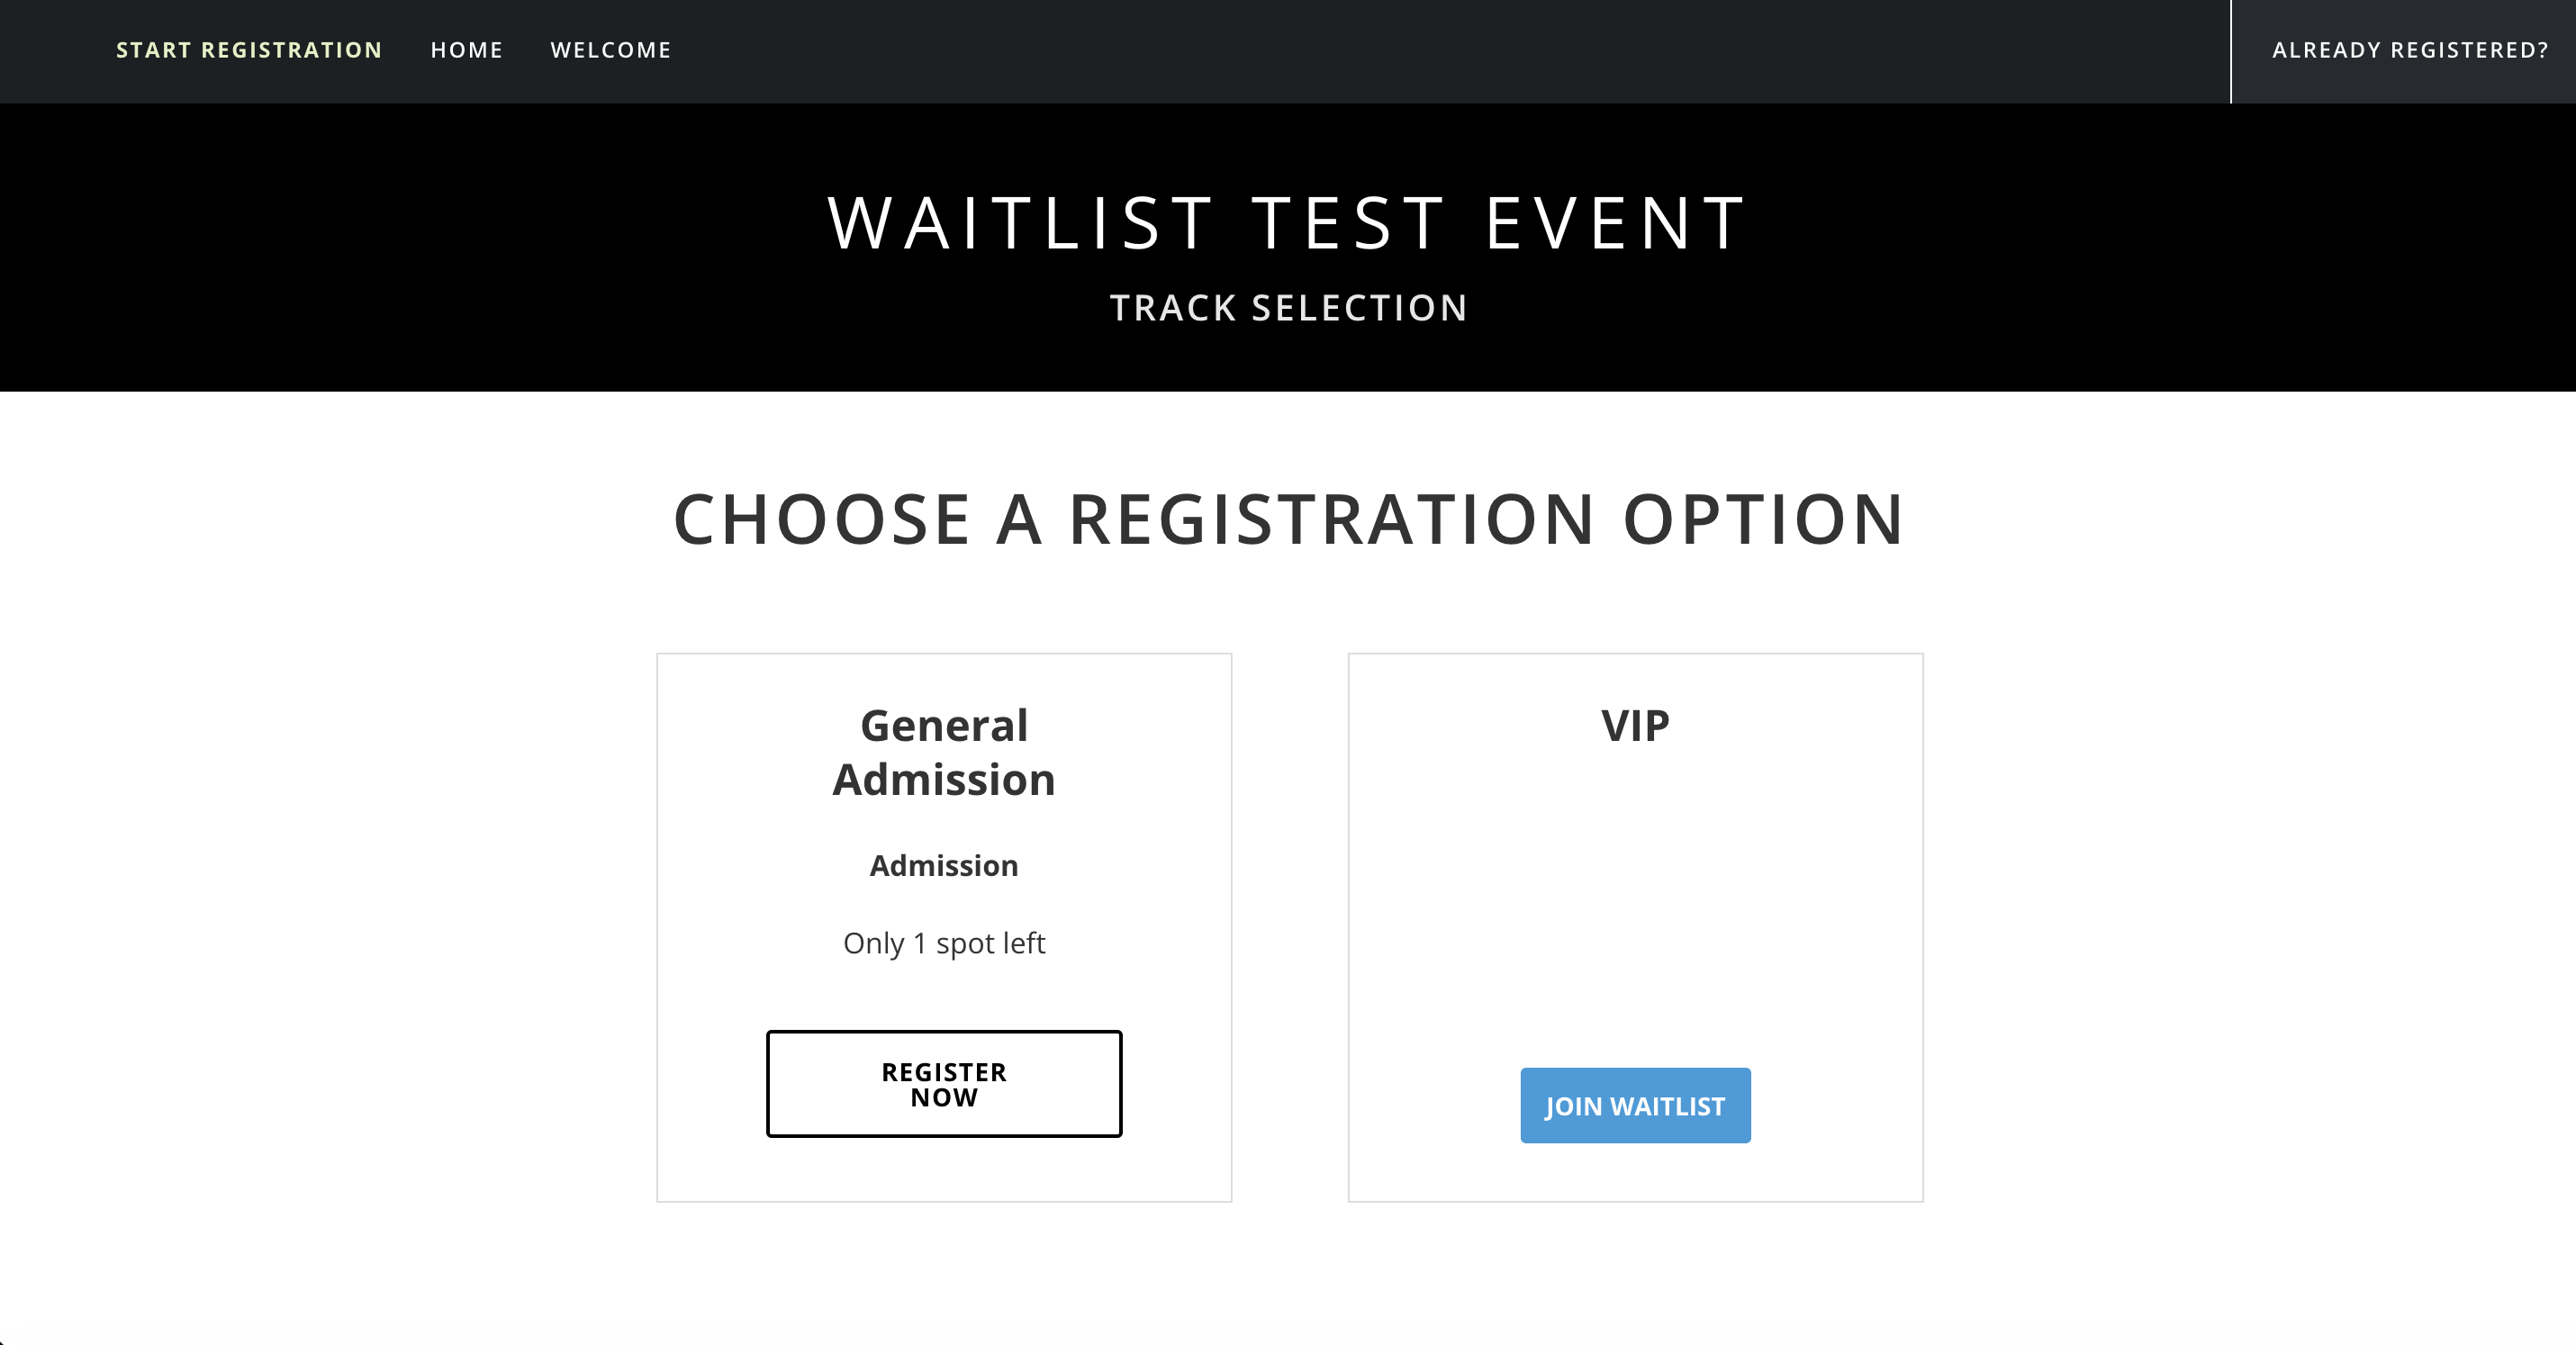
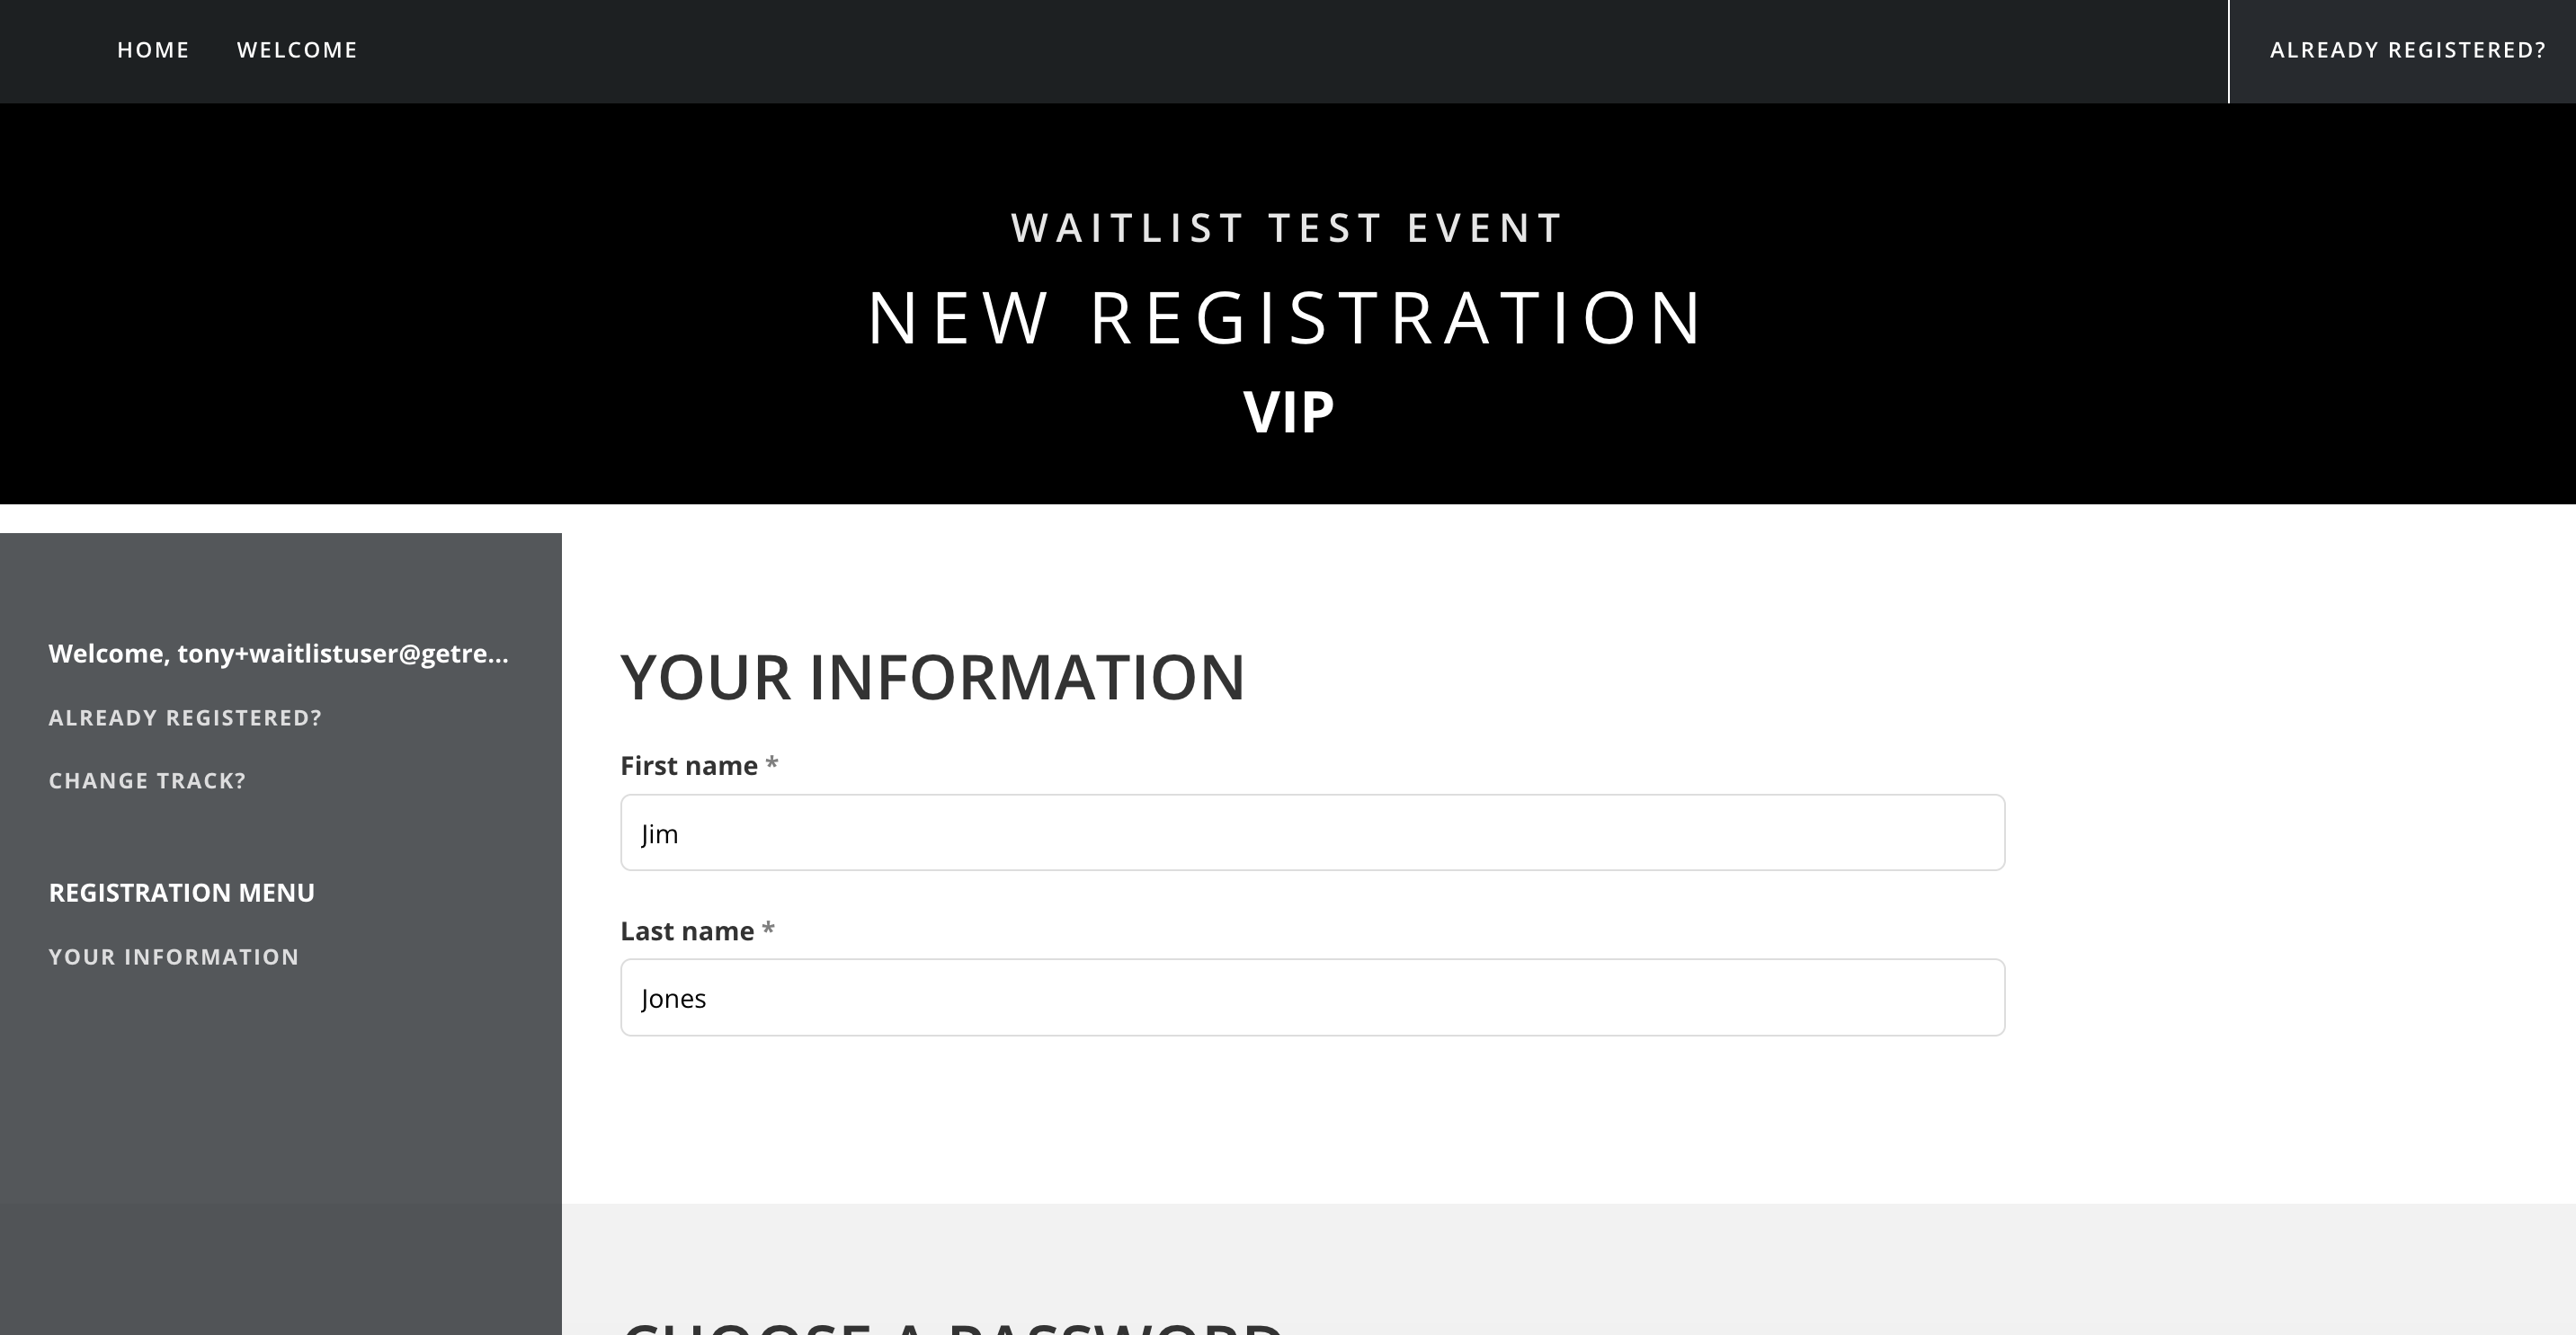
By clicking on 'Enable Waitlist', you are enabling the ability for your attendees to select to join a waitlist for the track when the current track is at capacity when they are attempting to register for your event. When the feature is set to 'active' (either by allowing the track to reach capacity, or manually toggling the option 'Waitlist Mode Active' under your track settings), when someone attempts to register and lands on the track selection page, they will see the option 'Join Waitlist' displayed on the track if the track is at full capacity (no availability).
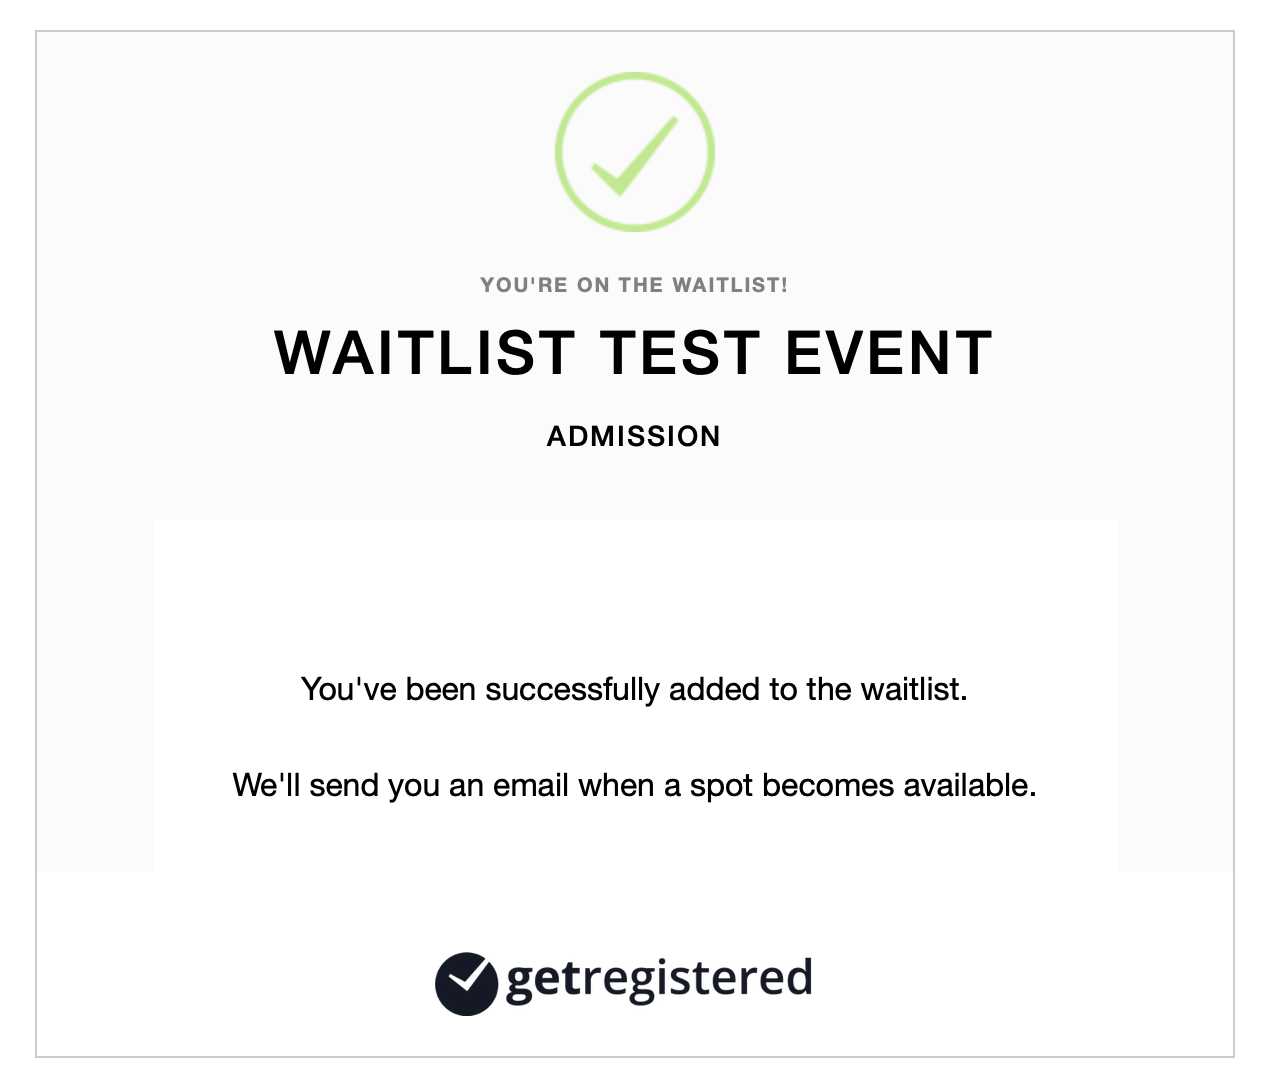
When the person clicks on the 'Join Waitlist' button, they will see a new page displayed asking them to provide their name and email address using the form provided, and when they submit, they will see a confirmation page displayed informing them that they are now successfully added to the track waitlist.
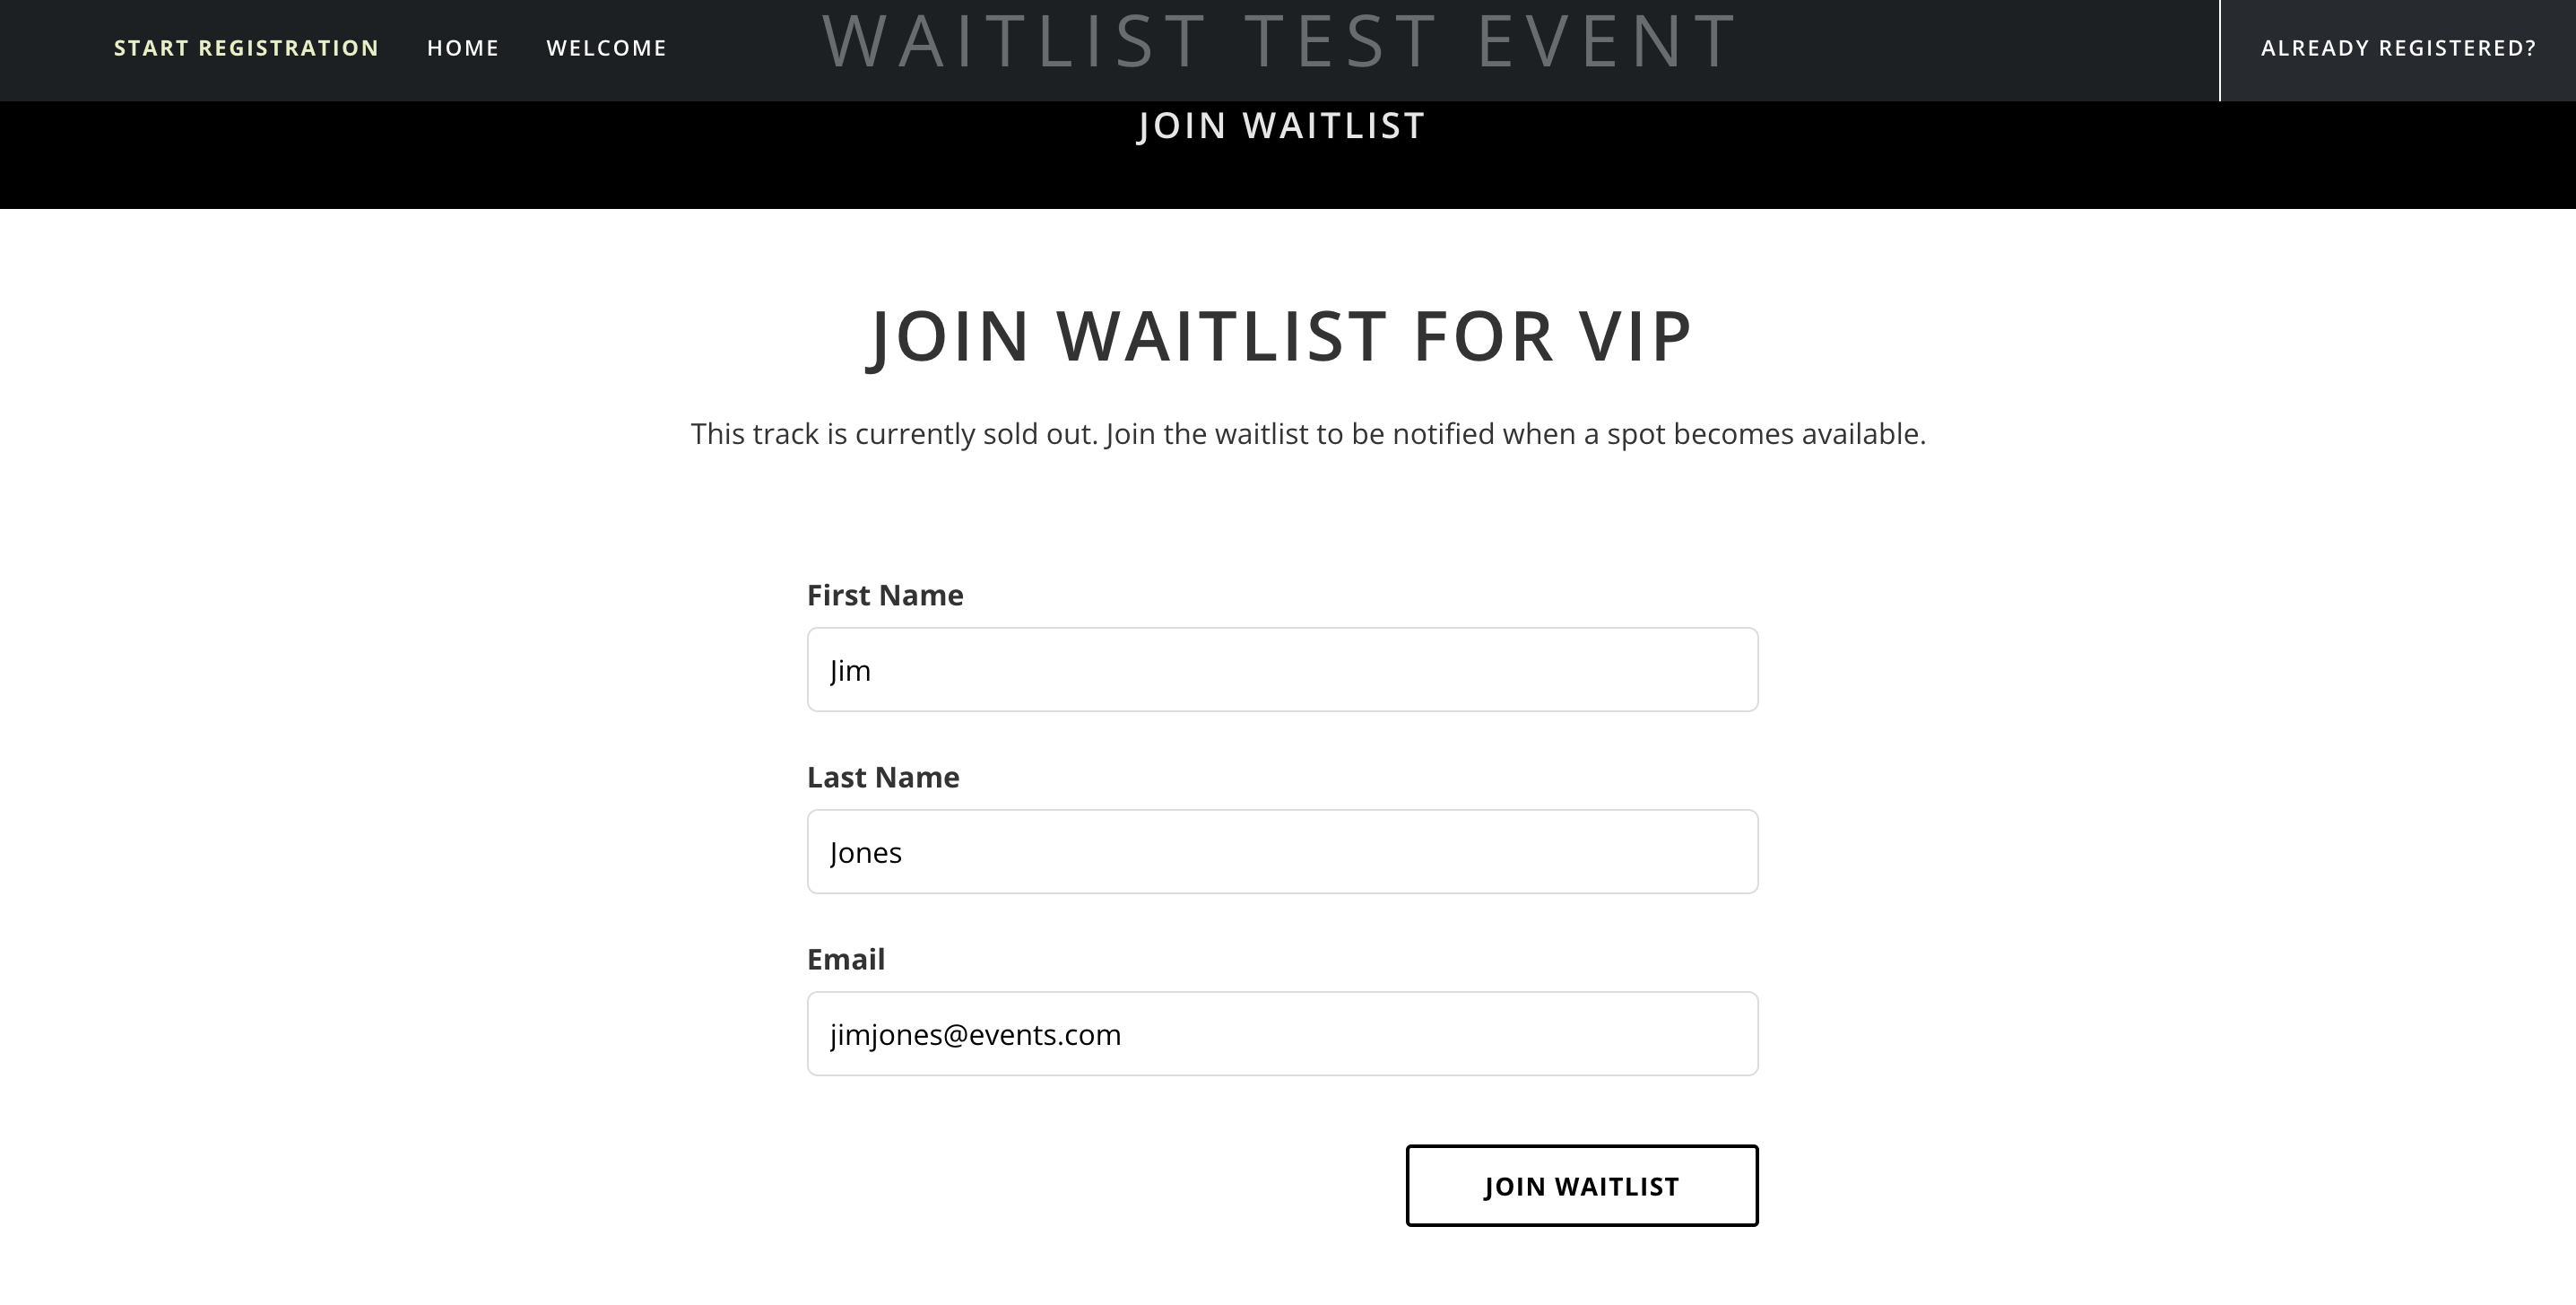
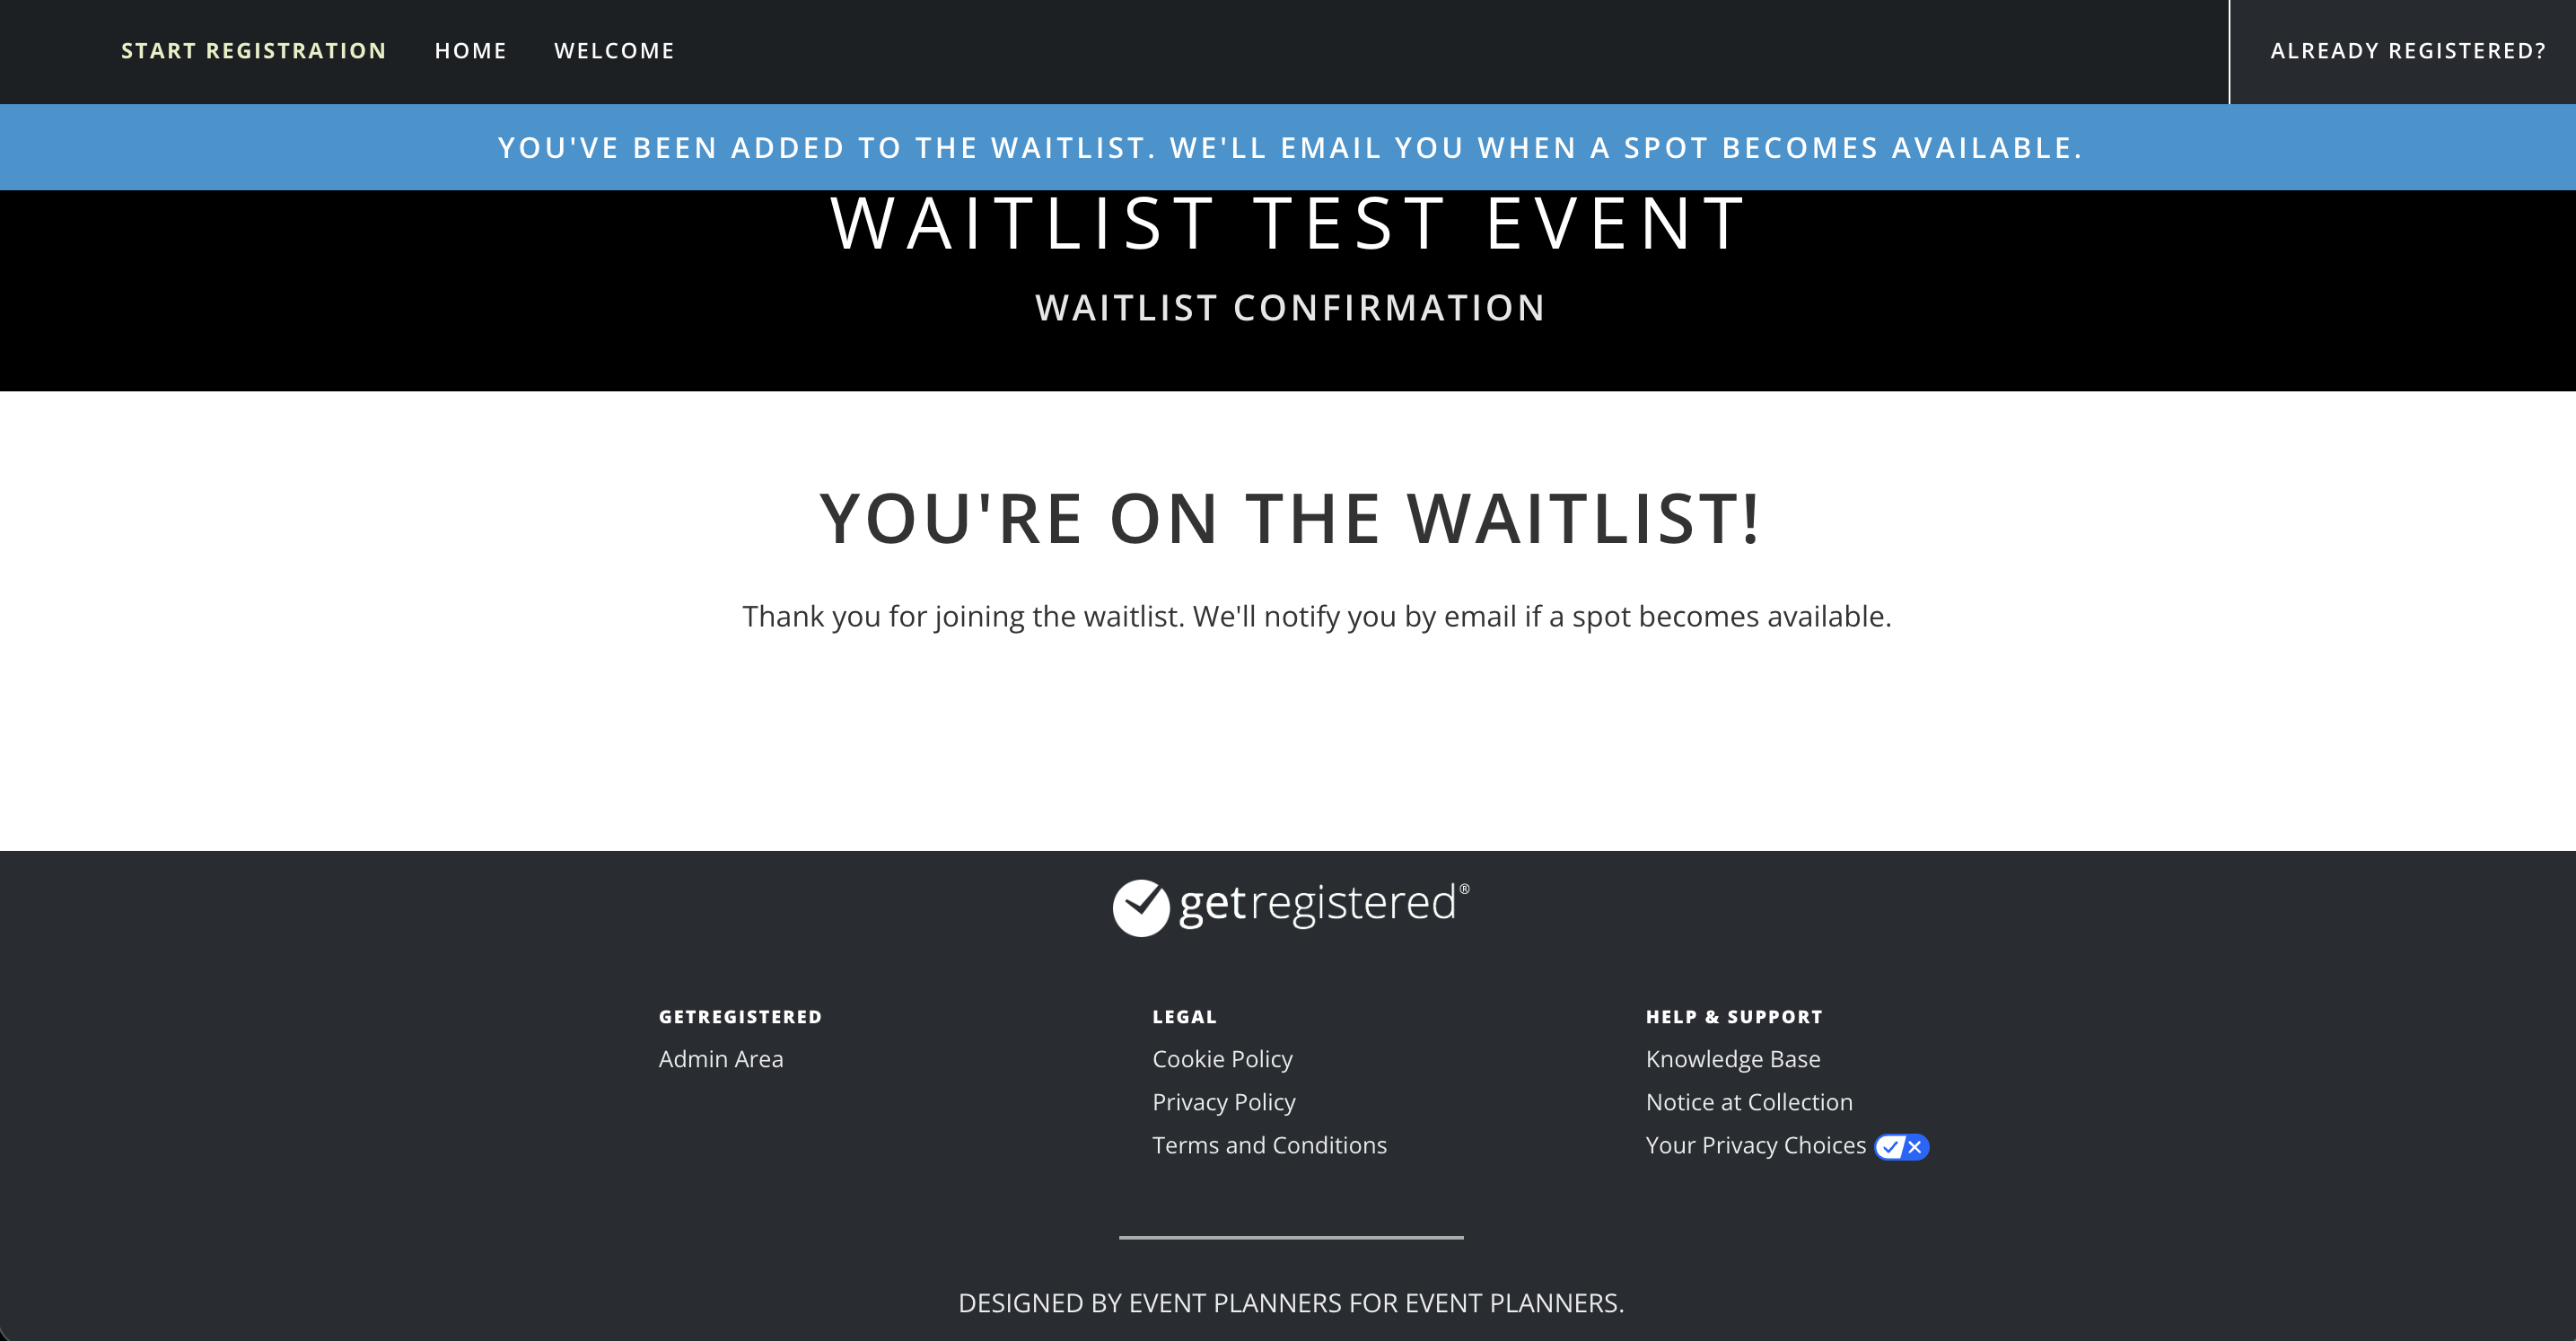
The user will also receive an email confirmation confirming that they have been successfully added to your event waitlist.
When at least one space/slot becomes available for a person registered on the waitlist, as an event admin, you will be able to invite them to register for your event on a waitlisted track. Spaces can be created by the following:
- If an attendee currently registered in your event under the 'waitlist' track cancels their registration
- If a currently registered attendee is changed to a different track from the 'waitlist' track
- Capacity is increased for the 'waitlist' track
Once an invite is sent out, the attendee can choose to accept or decline the invitation to register, and if accepted then will be able to complete registration under the waitlisted track. Please note that invitations are not triggered/sent out automatically when your track capacity changes, and will require actioning by an event admin for them to be sent to all waitlisted people.
How do I manage my event's 'Waitlist'?
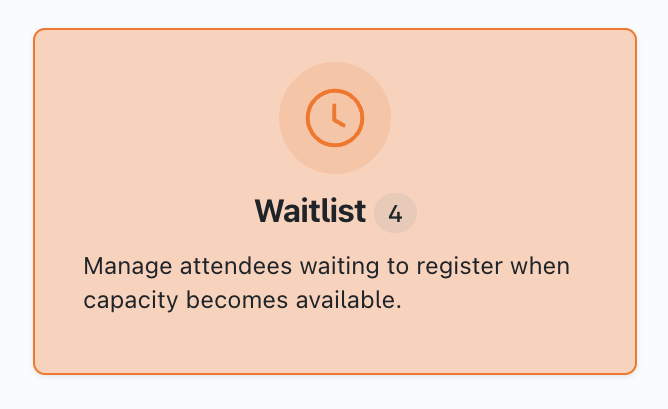
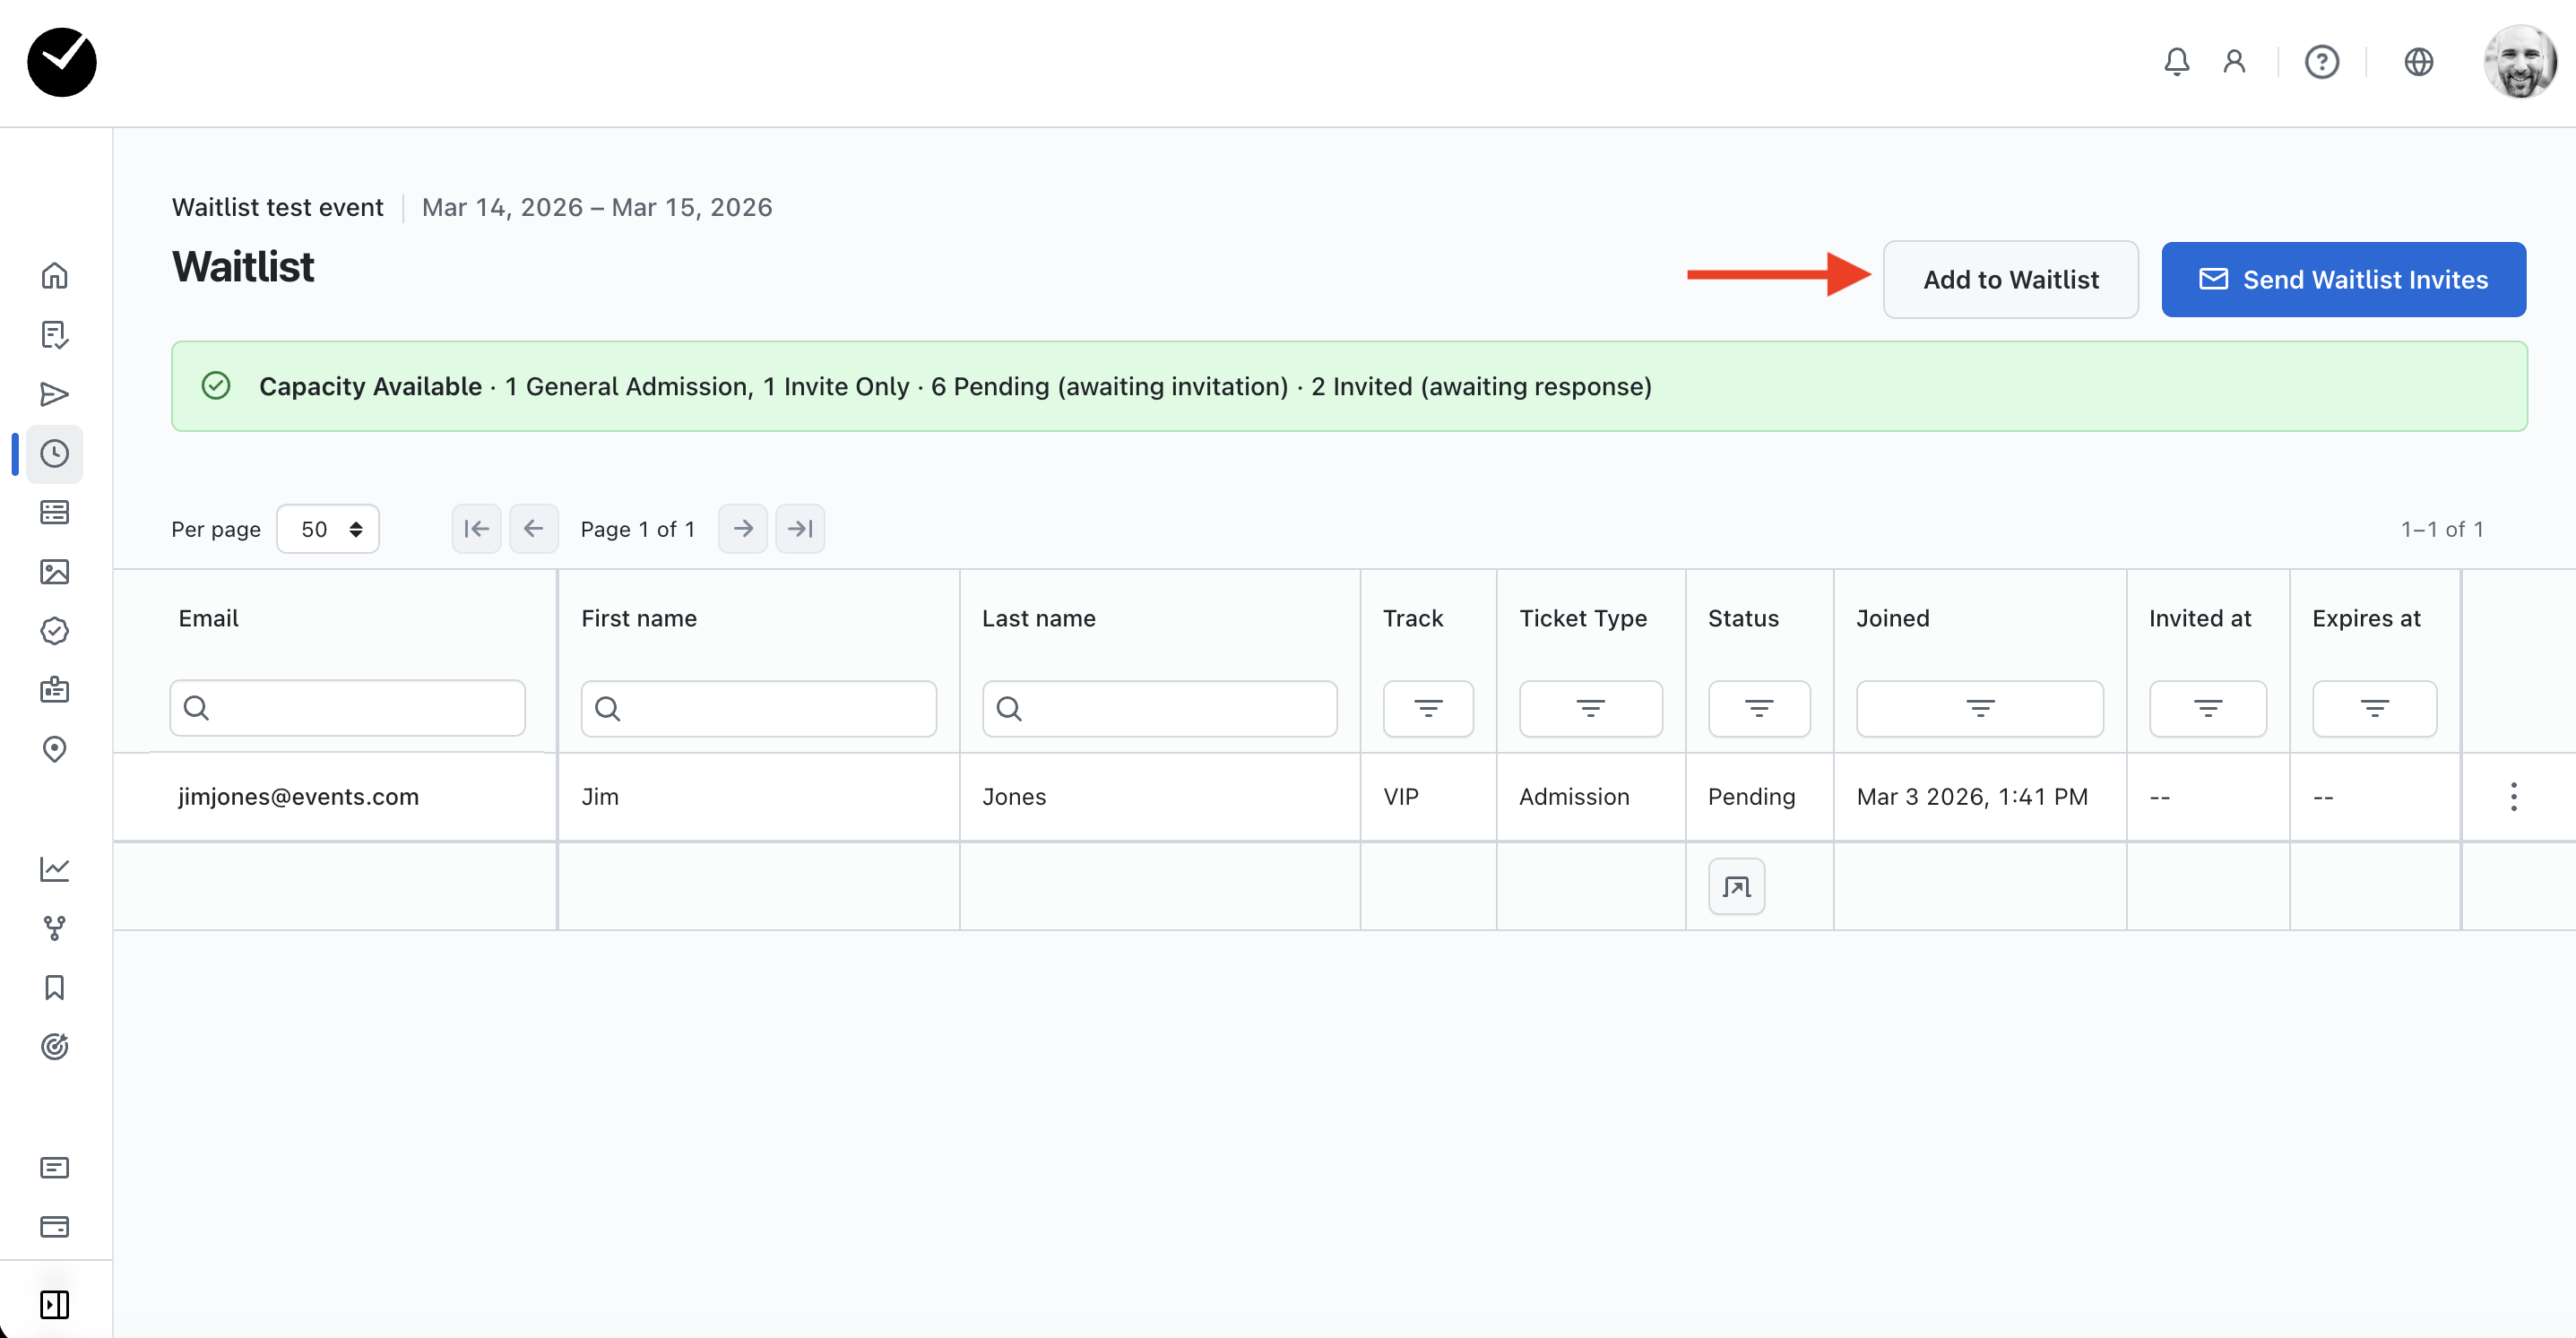
When you enable a 'Waitlist' for a track, you will see a new area on your dashboard labelled 'Waitlists'.
When you enter this area, you will see a high level list of all currently waitlisted tracks, including admission types, waitlist statuses (Registered/Pending/Invited/Declined) and current capacity. If there is no capacity available for any of the waitlisted tracks, you will be unable to invite attendees on the waitlist to register.
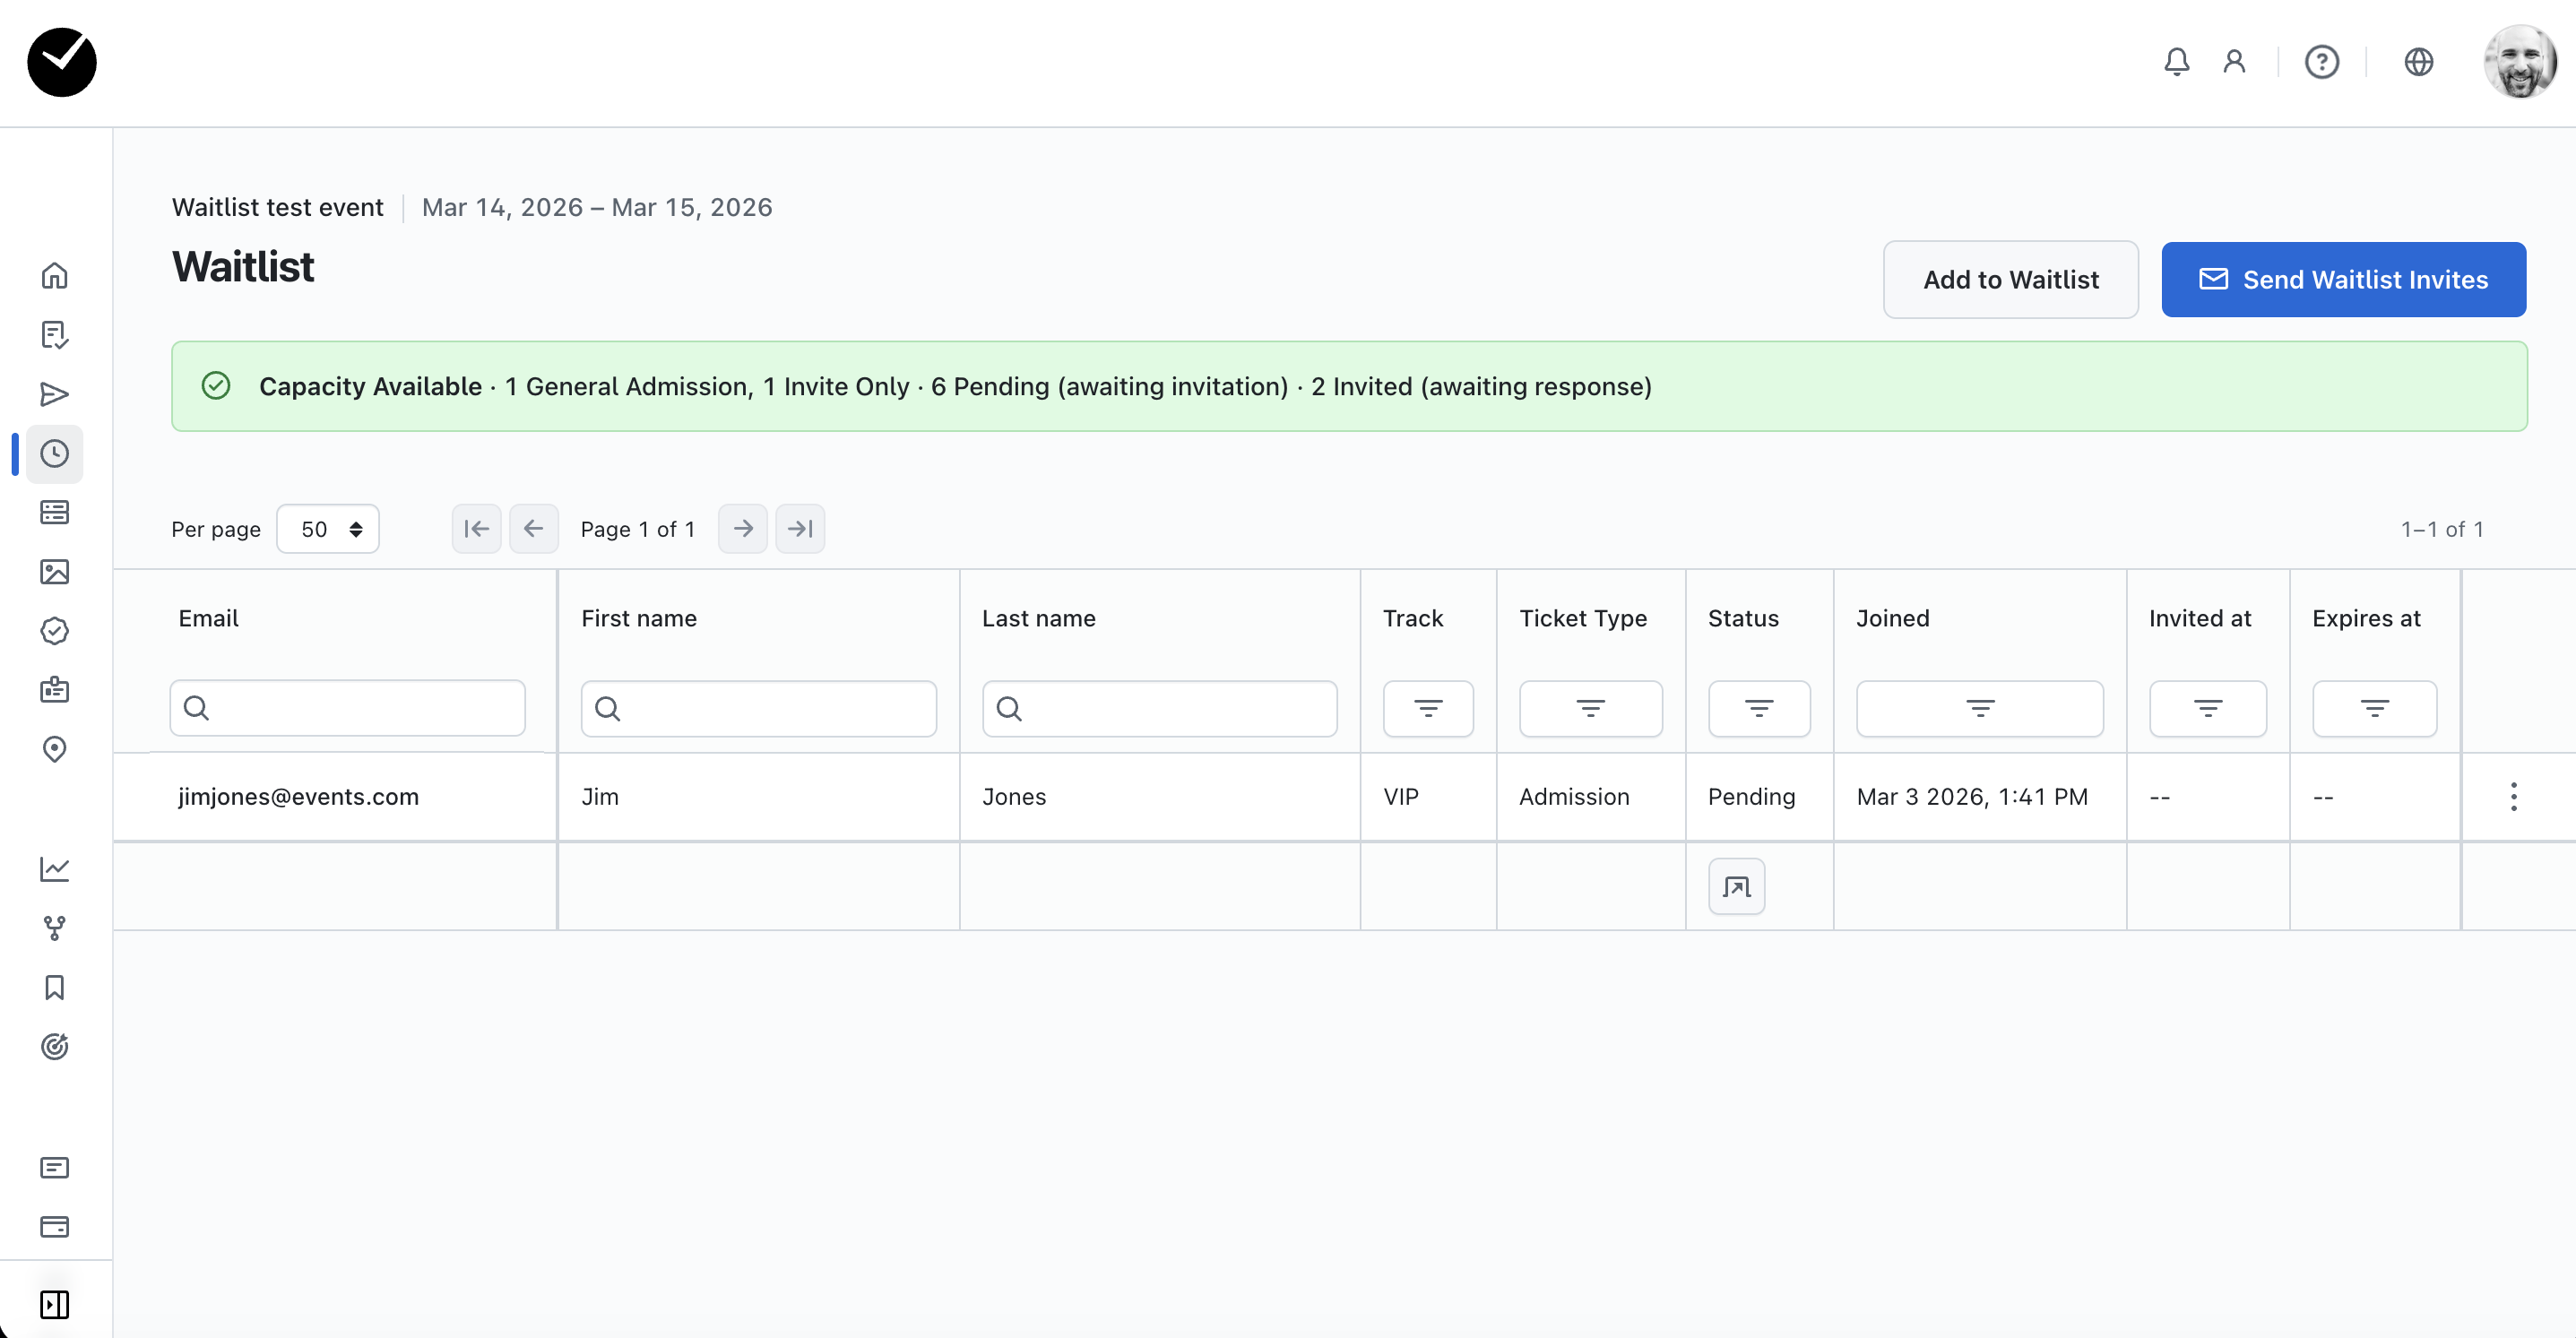
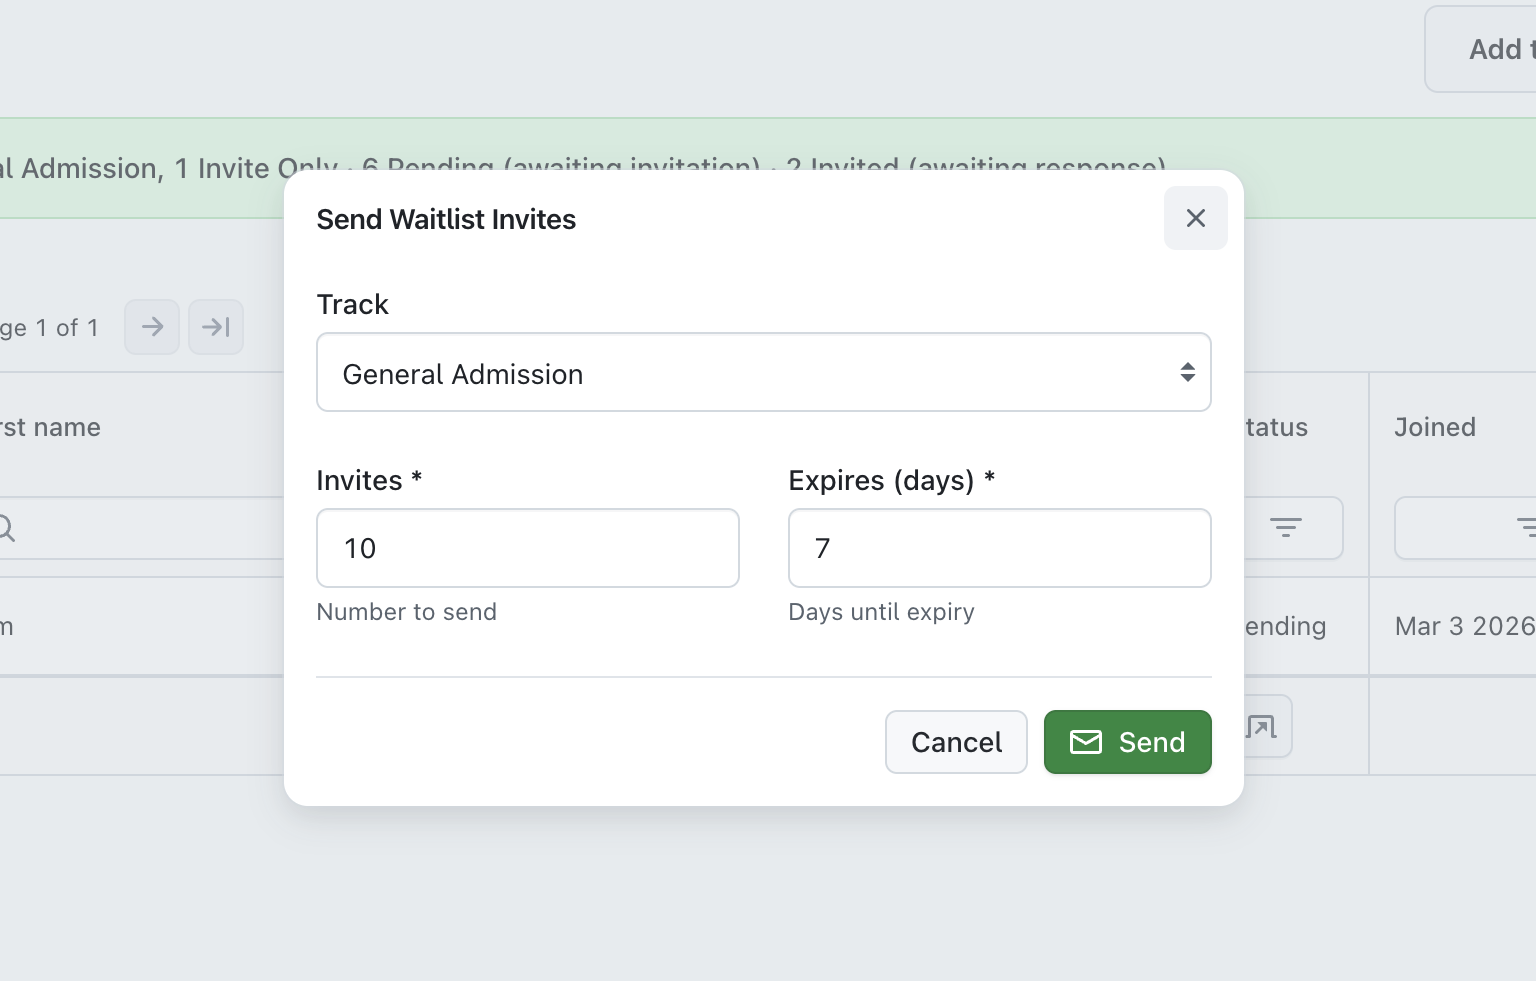
At the top right, you have the ability to send out invites using the 'Send Invites' button available. Selecting this will allow you to send out email invites to up to 60 people waitlisted for a track, informing them that there is now a slot available for them to register with. You can choose the track for them, and also set an expiry date for the invite if you desire.
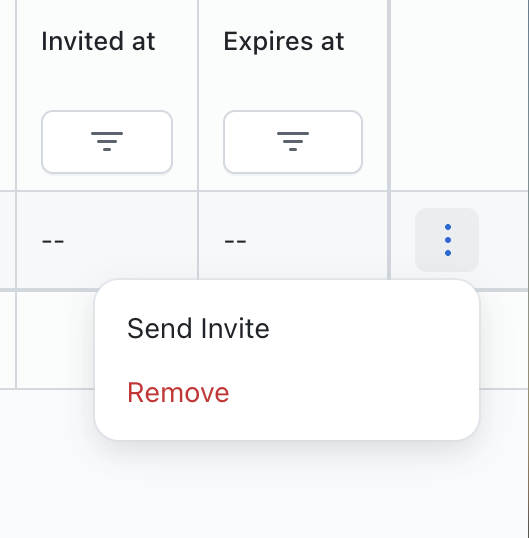
You also have the choice to send out invites per person by clicking on the 3 dots at the end of the row and selecting the 'Invite' option. You also have the ability to remove the attendee from your Waitlist by selecting the 'Remove' option.
When the waitlisted person receives the invitation, they will have 2 options available - 'Register Now' or 'Decline This Invitation'.
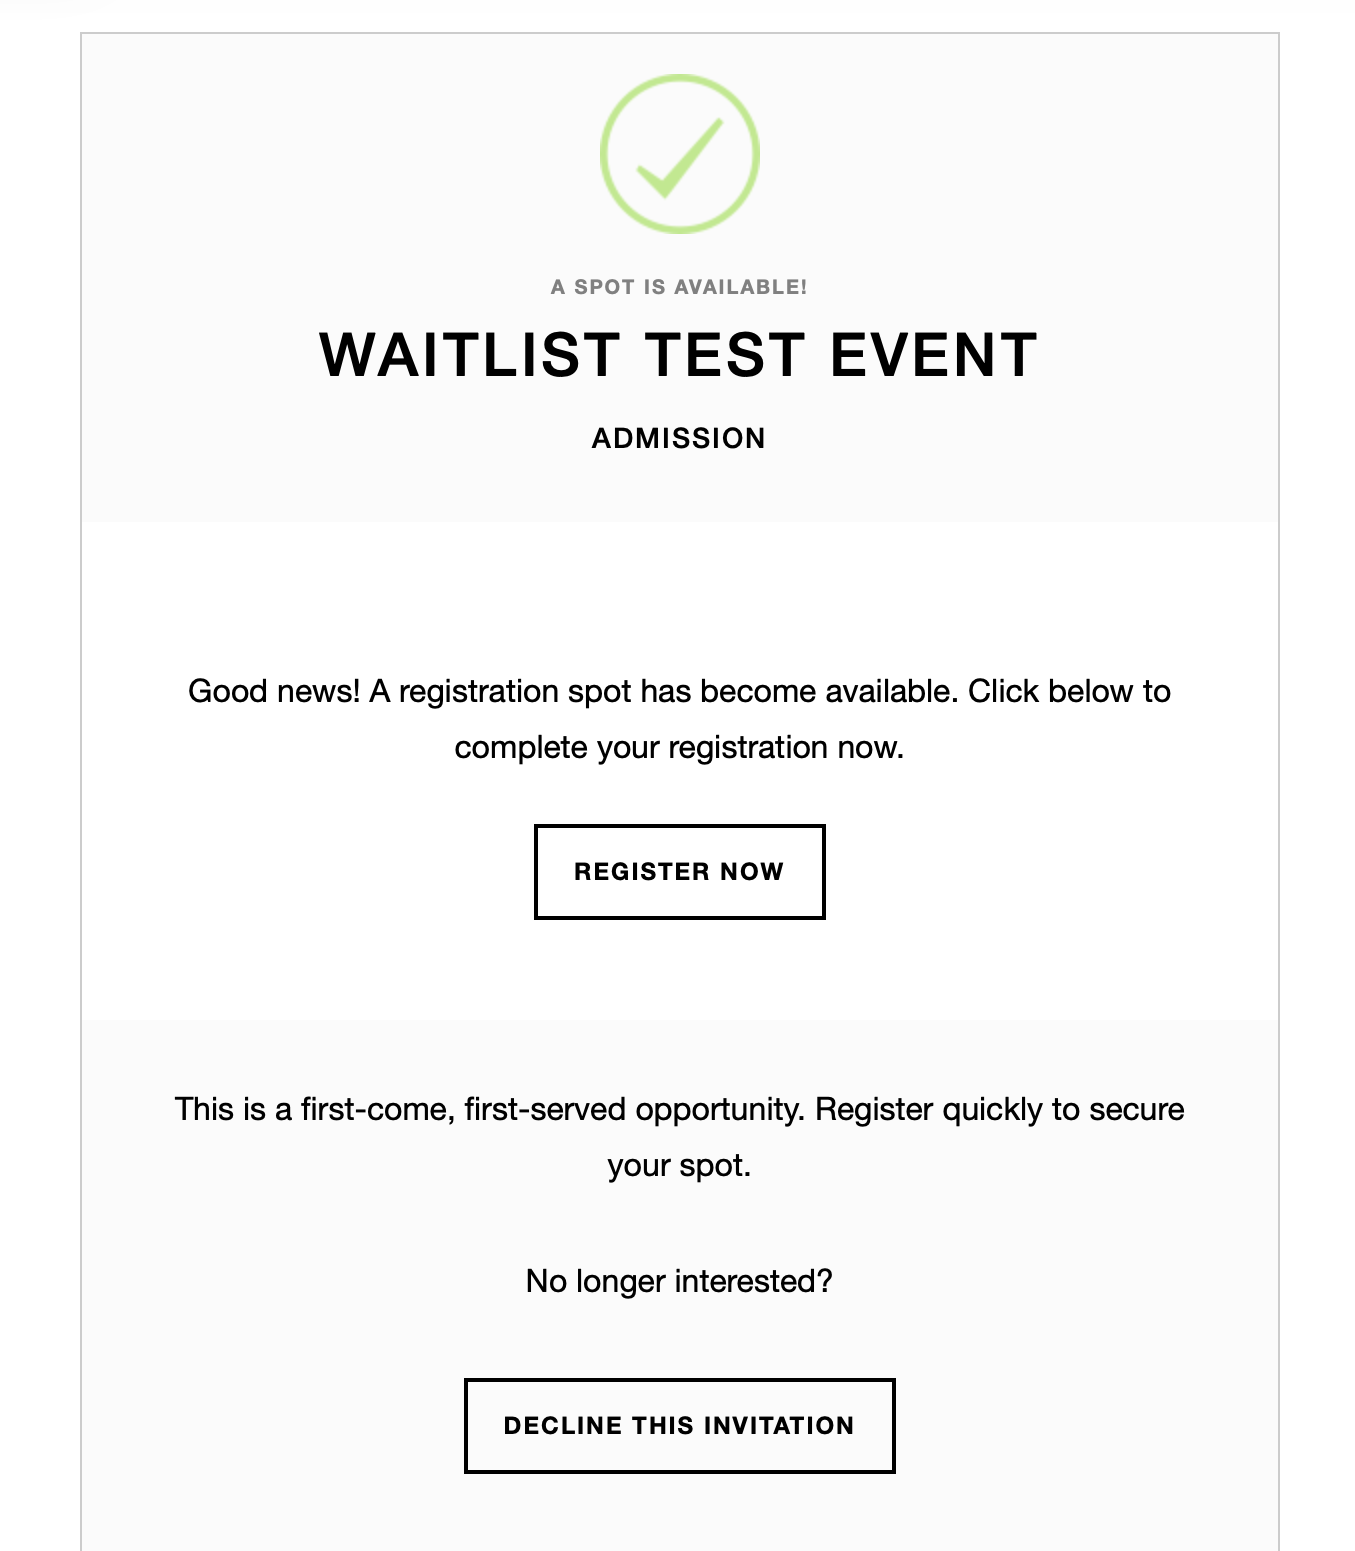
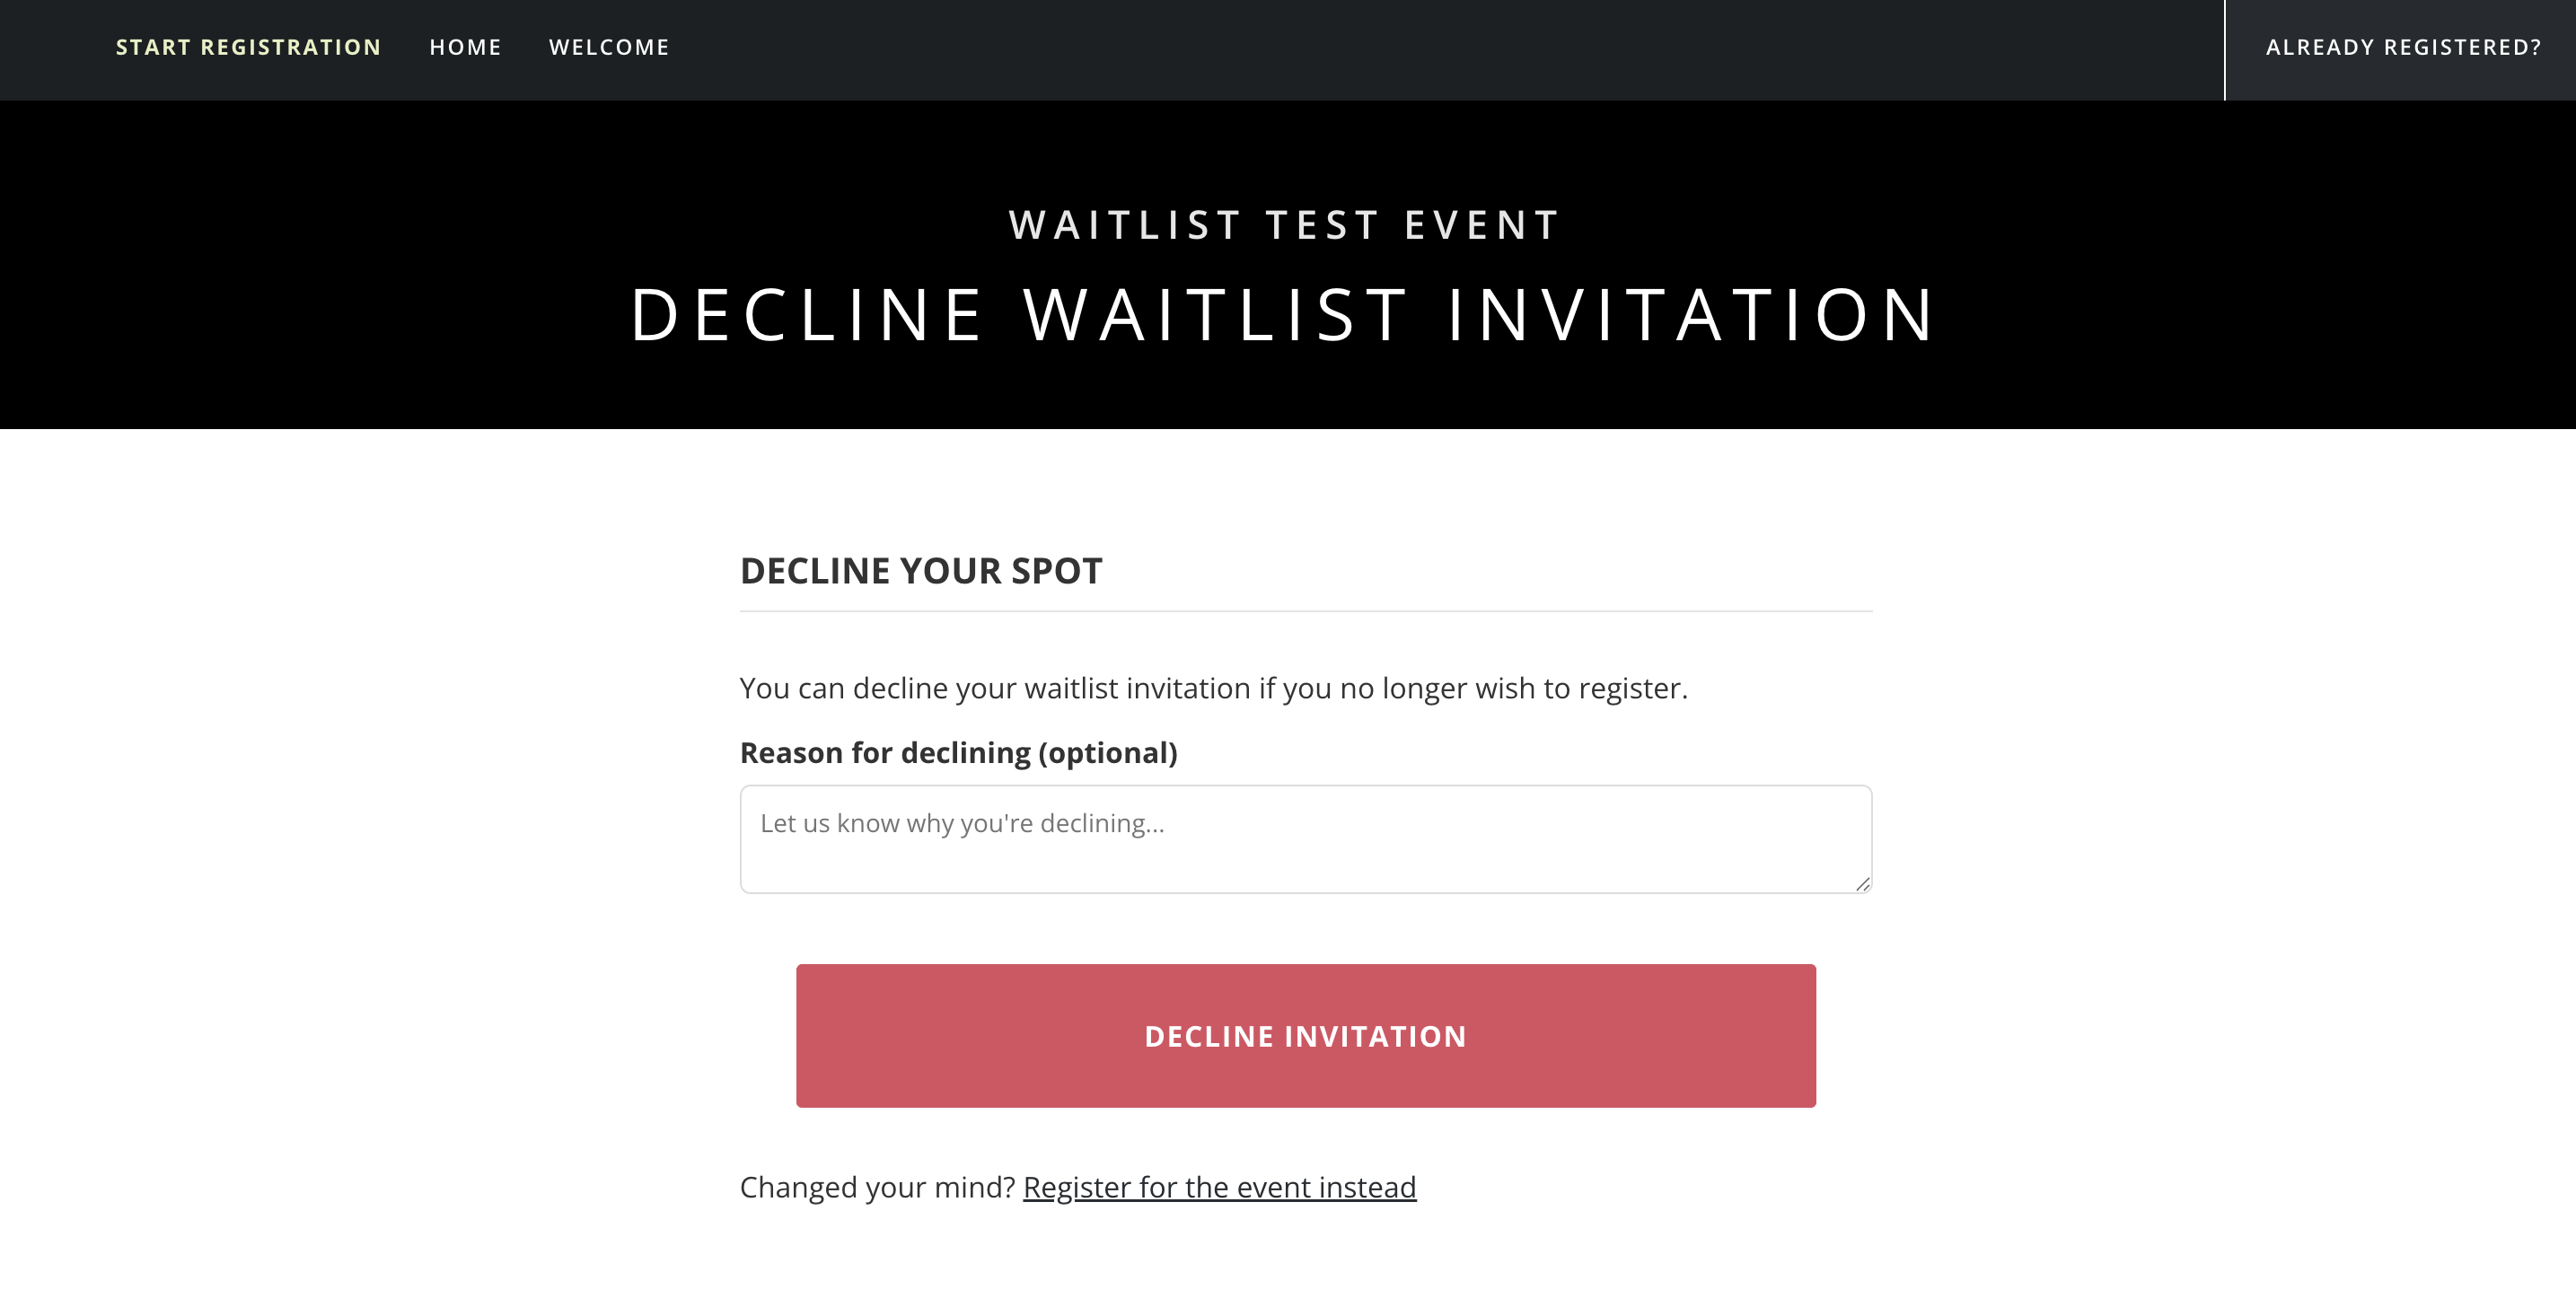
Users selecting the 'Decline This Invitation' option will be taken to the 'Decline Invitation' page, where they can select to decline and also provide a reason (this is an optional text area). They also have the option to change their mind and register by clicking on the link displayed at the bottom of the page.
By following the 'Register Now' link in the email, users will be taken directly to the registration form of your event with the 'waitlist' track pre-selected, and from there they can continue and complete registration as expected.
Registration is handled on a 'first-come, first-served' basis, to ensure that your track does not exceed capacity. Once capacity is reached, your waitlist will be enforced again, and new potential attendees with need to join the waitlist. Any waitlisted users attempting to register who received an invite and did not manage to register in time will be informed that there are no slots available, and will remain as invitees on your waitlist.
Can I add attendees to an event 'Waitlist'?
When entering the Waitlist area, at the top right of the page, you will see the 'Add to Waitlist' button at the top right of the page.
Clicking on this will display the following form:
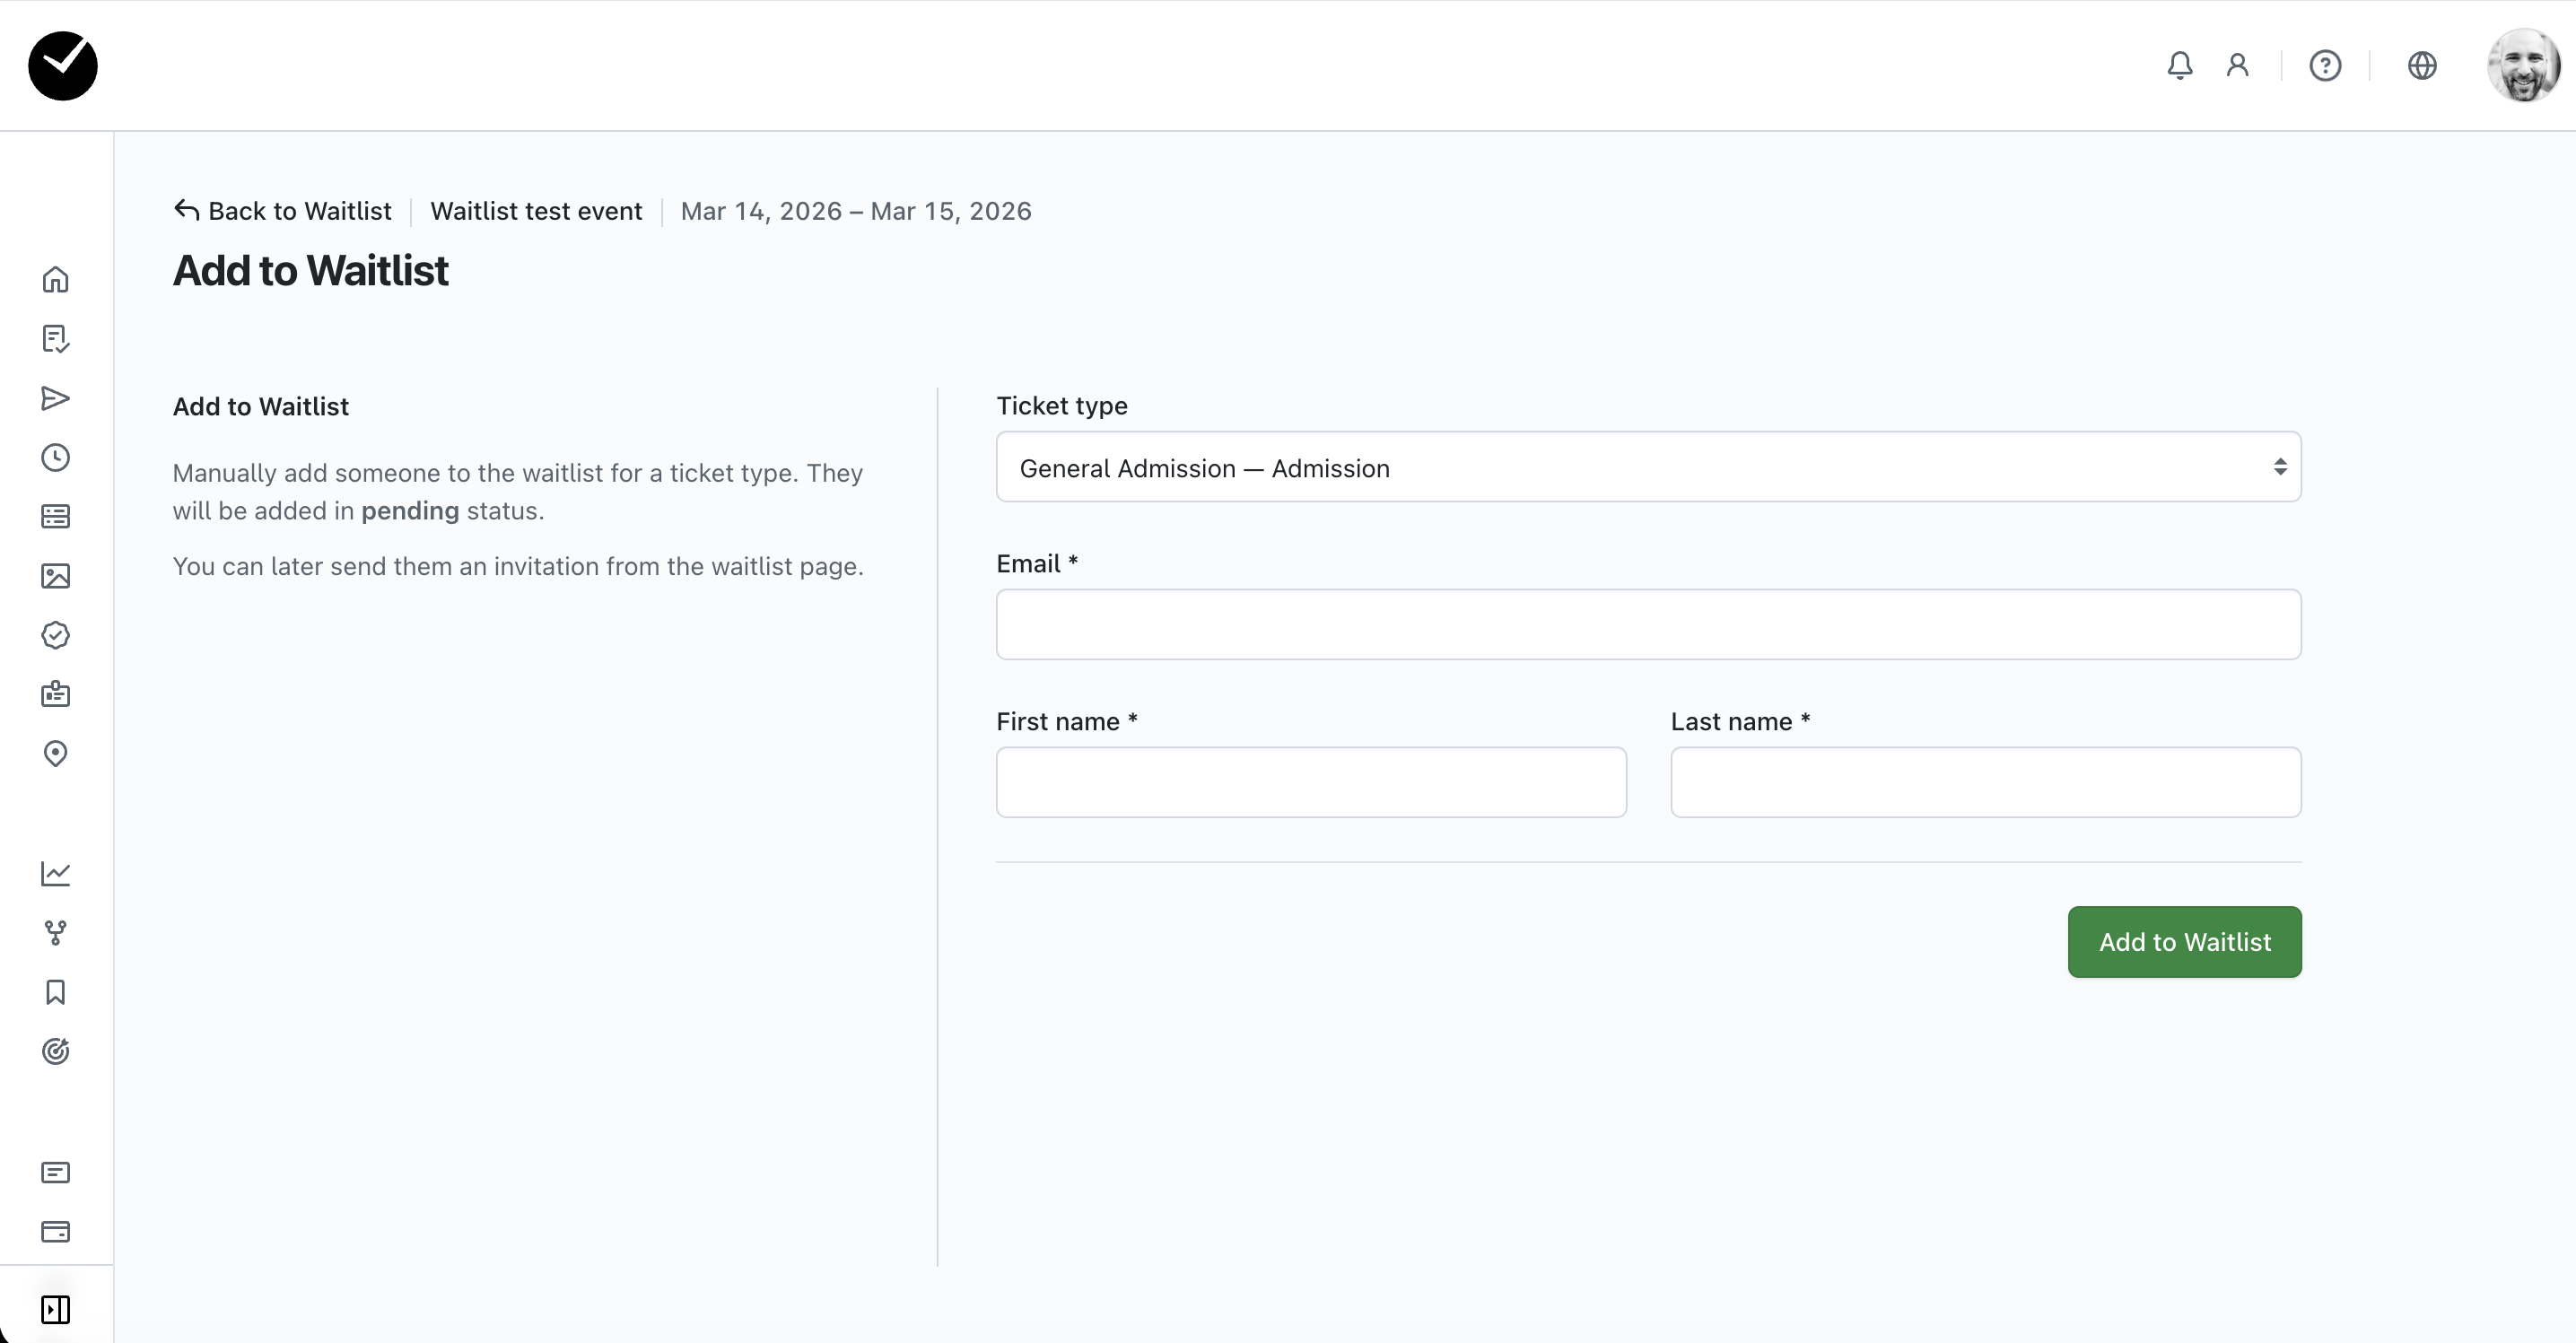
Simply select the ticket/track type, enter the attendee's name and email in the fields provided, and then click 'Add to Waitlist'. The attendee will then be added to your Waitlist grid, and from there you can choose to invite the attendee when your event is ready to accept more registrations.