.png)
How do I create and manage lists for an event website?
Note - the 'Showcase' feature is only available to organizations that have the new v2 event website editor enabled. Organizations using the legacy event website editor cannot access or use the 'Showcase' feature.
When building your event website, you may wish to add tiered lists that display your event sponsors, exhibitors, speakers or anything you feel might be pertinent to show your attendees in this format. In getregistered®, we provide the ability to create tiered content in your event's 'Showcase' area.
The 'Showcase' area is available from your Event Dashboard or using the navigation sidebar. To begin creating a tiered list, select the 'Showcase' tile/option, and you will land in the 'Showcase' area.
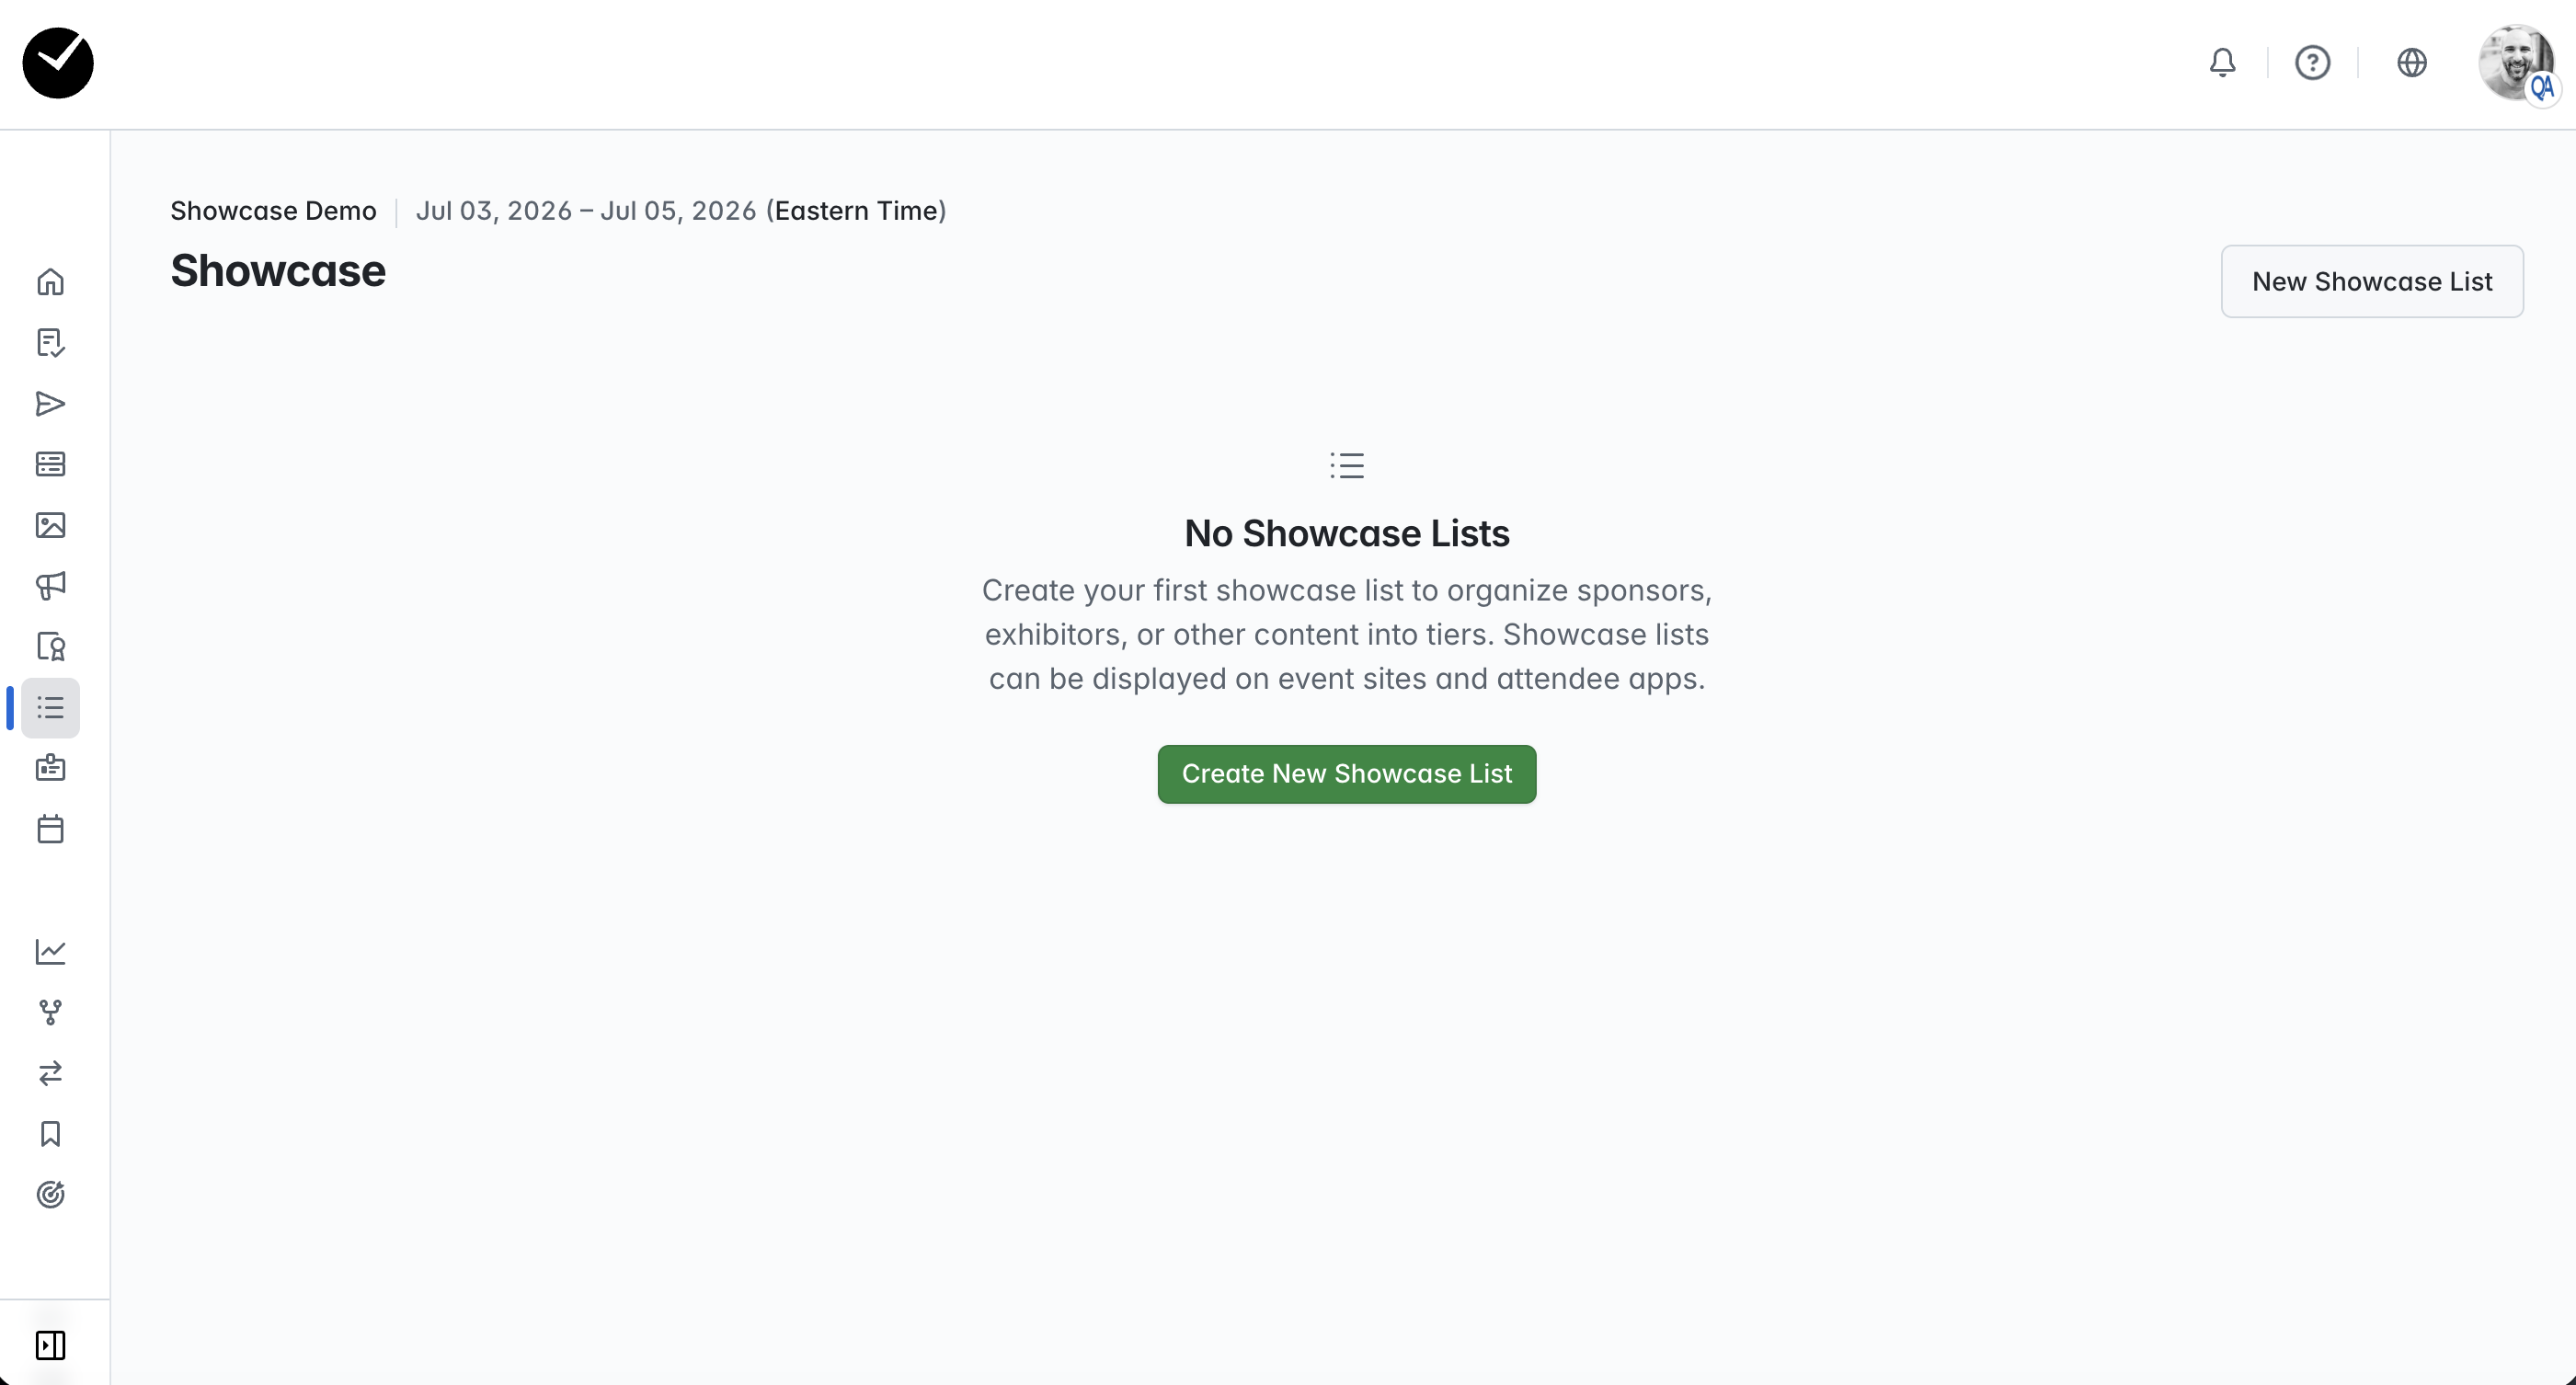
How does the 'Showcase' feature work?
When building your tiered lists using the 'Showcase' feature, your lists will be composed using the following structure:
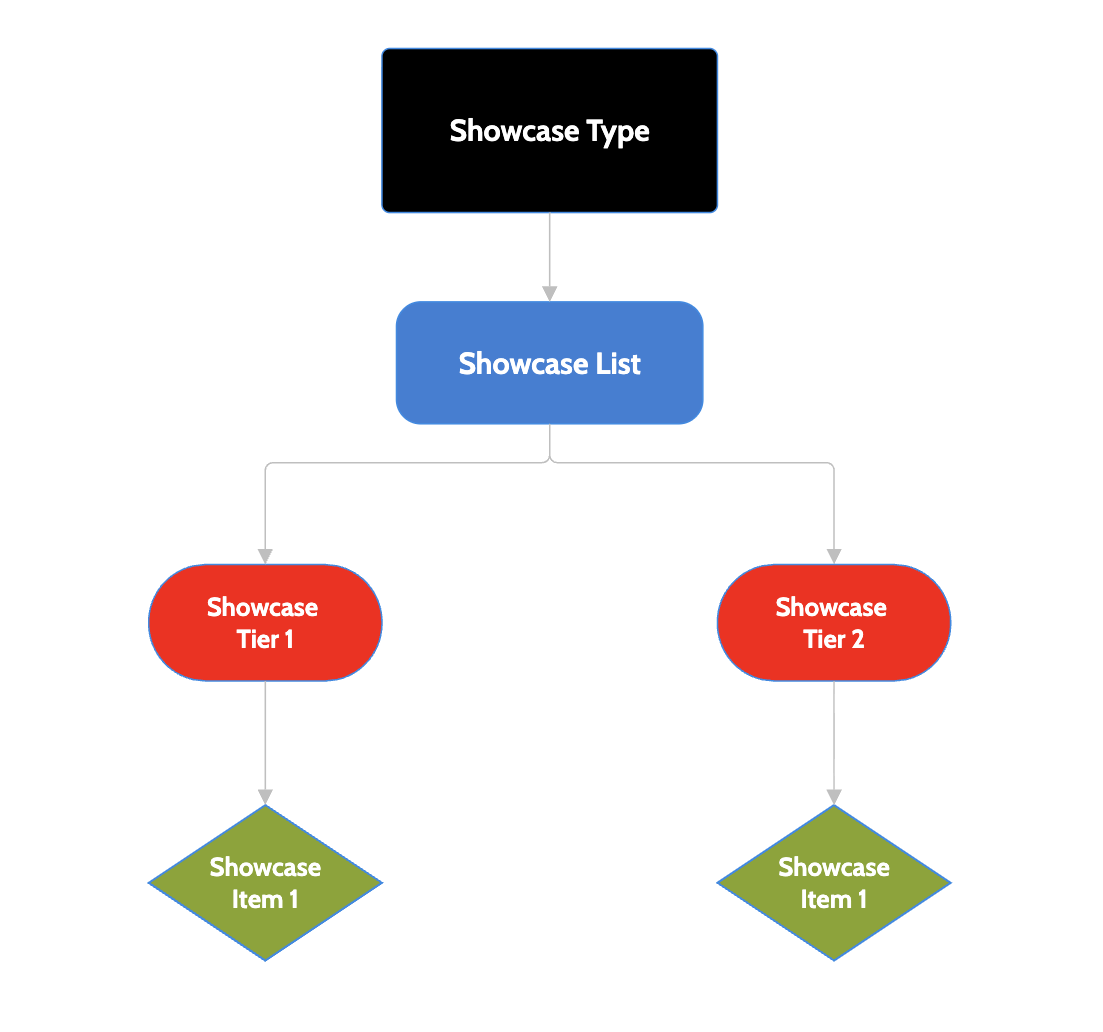
Building a tiered list is fairly straightforward, but it's important to understand the hierarchy/definitions we will be referring to later in this article:
- Showcase Types - 'Showcase Types' are the core of your tiered lists. All Showcase Lists require a Showcase Type.
- Showcase Lists - 'Showcase Lists' are where you will be building your tiered lists. Once you have selected a Showcase List, you will be able to add Showcase Tiers, and from within your Showcase Tiers, you can then add Showcase Items.
- Showcase Tiers - 'Showcase Tiers' are where you will be adding your Showcase Items. You can create as many tiers as you like, but you must have at least one Showcase Tier in Showcase List.
- Showcase Items - 'Showcase Items' are the list items you'd like to display in your tiered list. You can create as many items as you like, but you must have at least one Showcase Item in Showcase Tier.
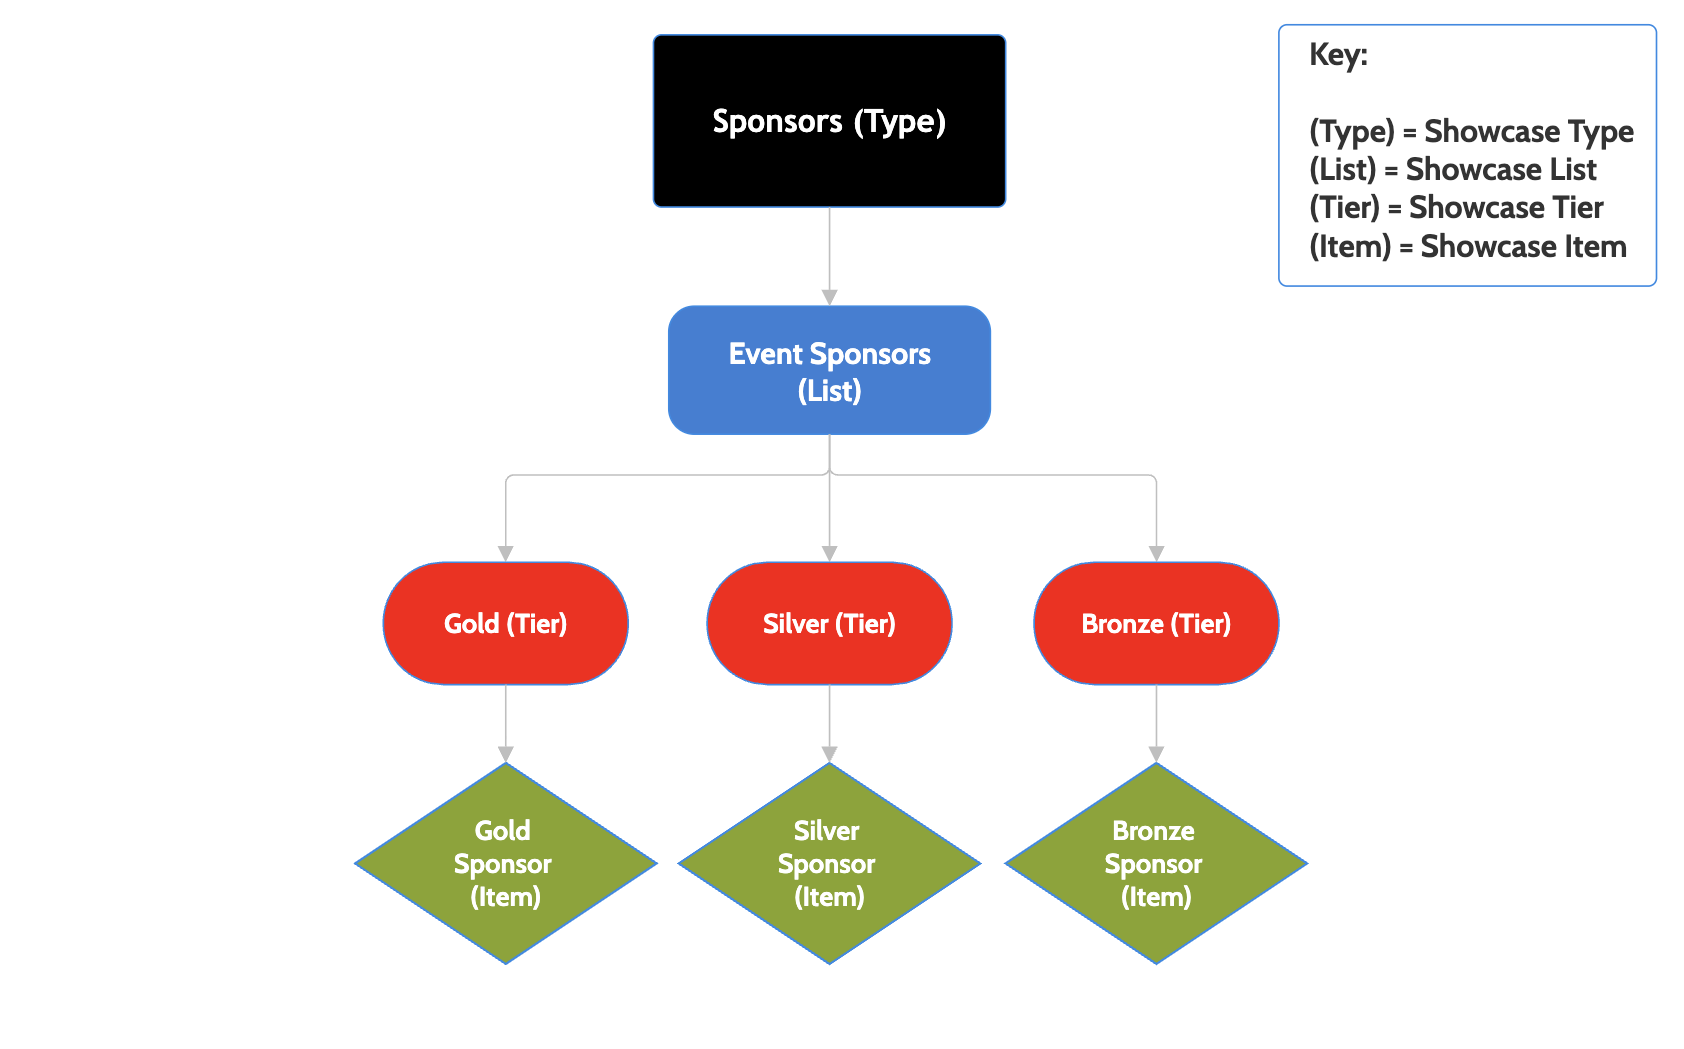
This may sound complex, but as long as you understand the hierarchy then you'll be building your lists in no time! Below is an example of how the hierarchy may look for a 'Sponsors' tiered list:
Creating and managing your Showcase Lists
When you are ready to begin creating your first Showcase List, navigate to the main Showcase page and select to create a New Showcase List.
You will then be presented with the following form:
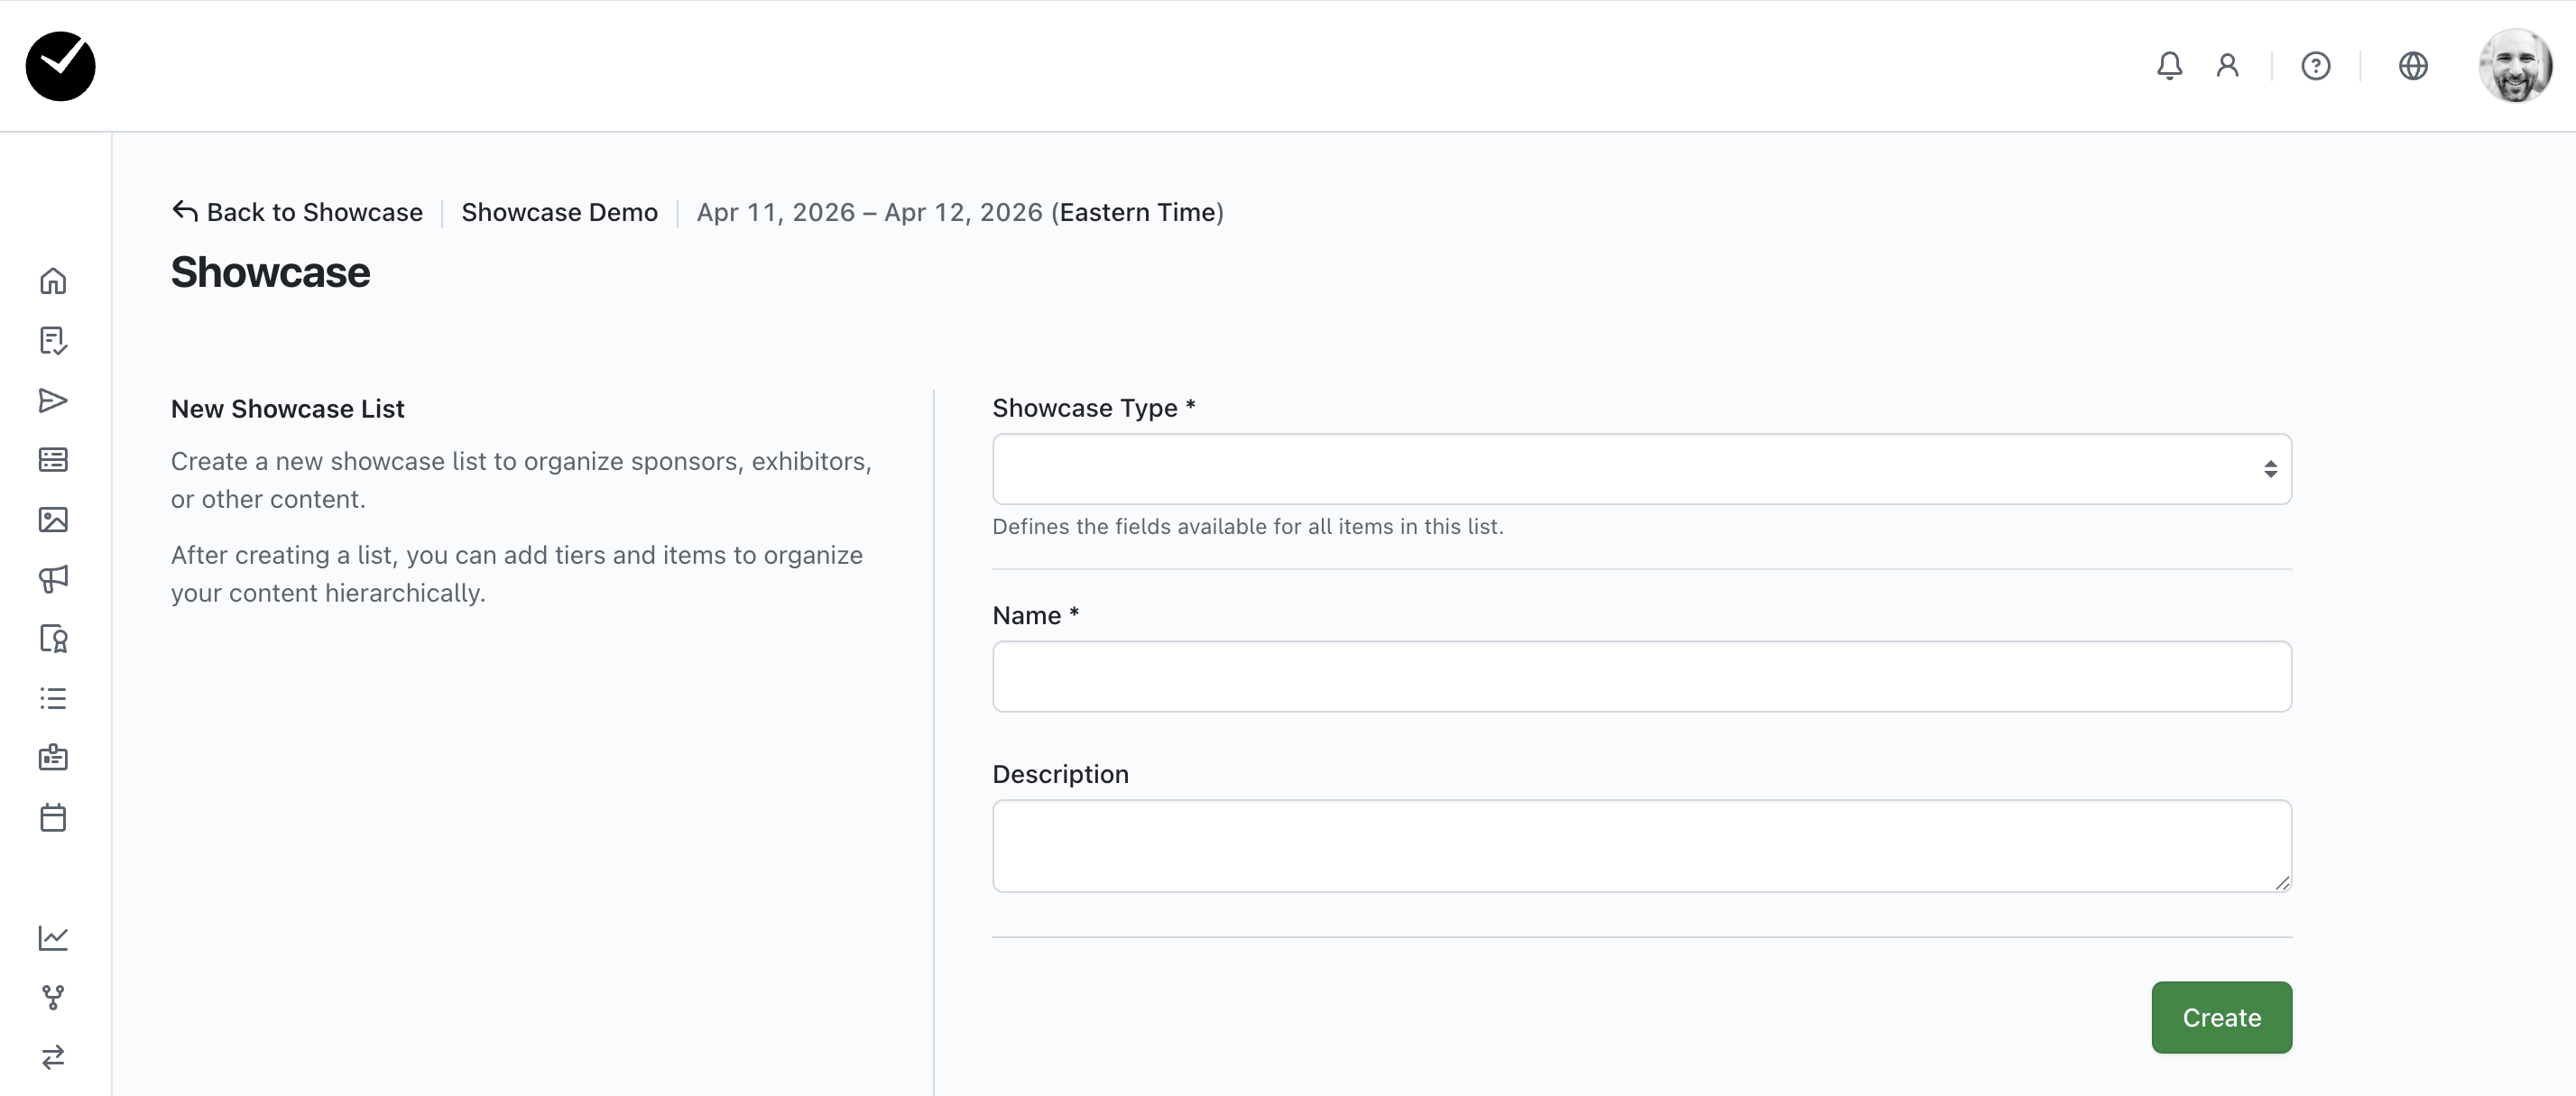
- Showcase Type - this selector allows you select the Showcase Type you wish to use for the Showcase Items in your tiered list, this is a mandatory option. We have 3 default Showcase types available for selection as standard:
- Sponsors
- Exhibitors
- Speakers
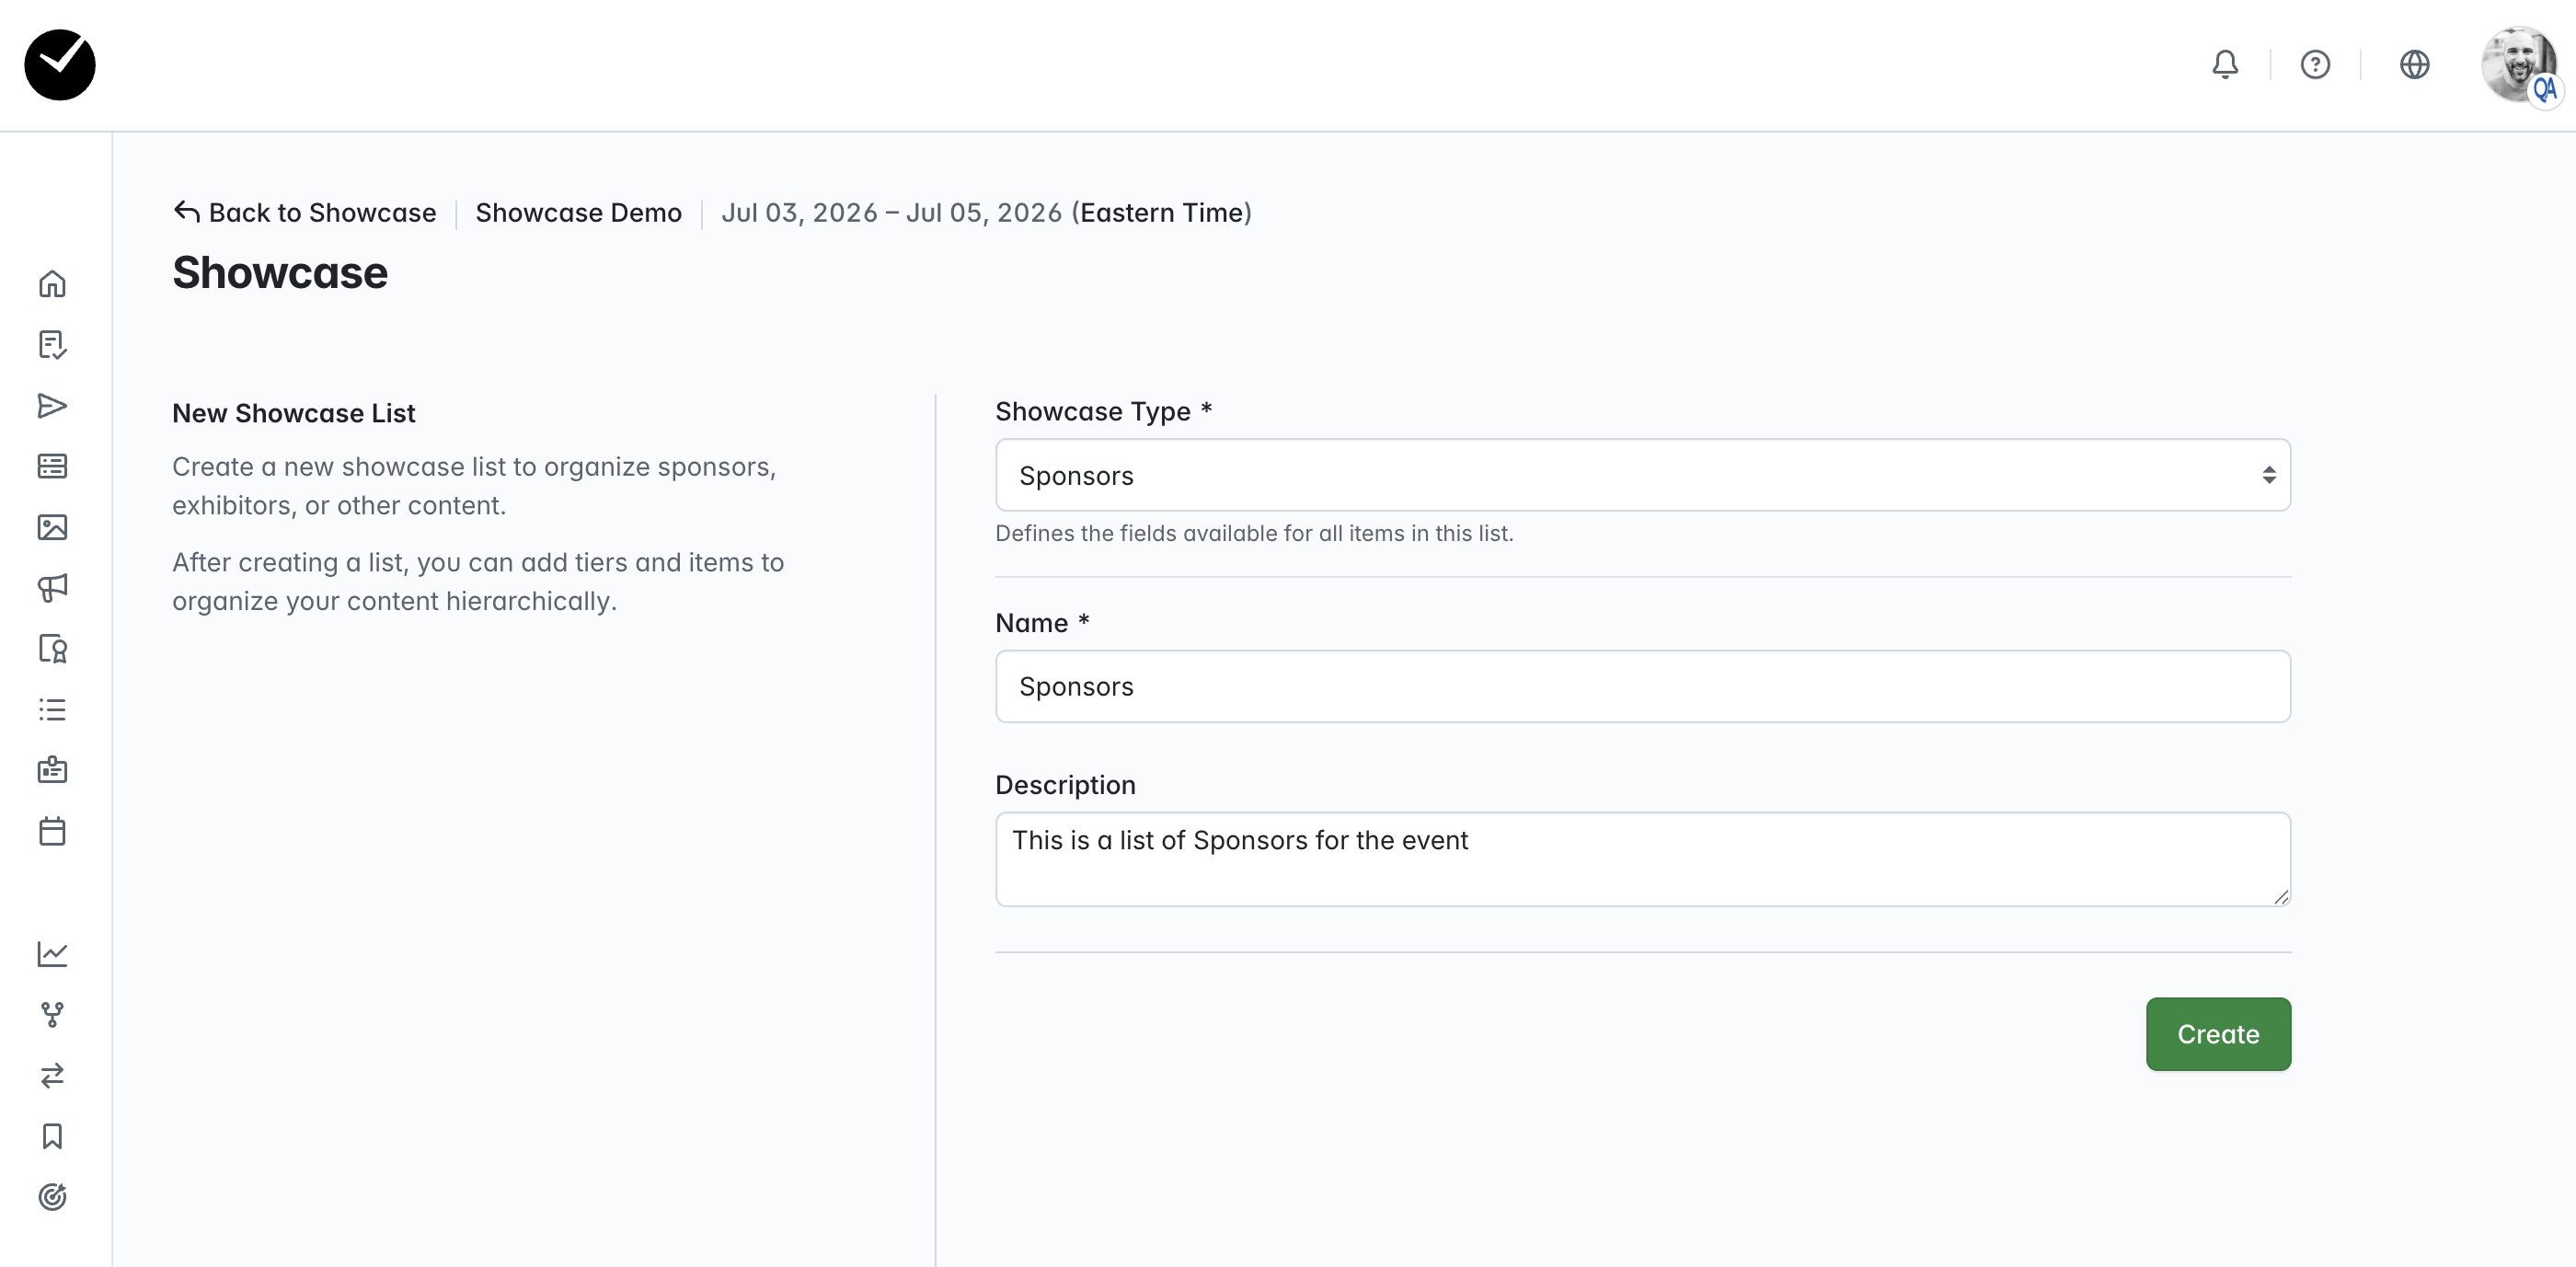
- Name - this field is the name that will be displayed for your list when viewed by attendees. When you select a 'Showcase Type', this field will be pre-populated with the name of the Showcase Type selected, but you can amend as you wish. This is a mandatory field.
- Description - an optional field that allows you to provide a description of your list when viewed by attendees.
In this section of the article we will use the Showcase Type 'Sponsors' as an example - click on the 'Create' button to proceed:
You have now created your first Showcase List! You will now be returned to the main Showcase page, and your list will be displayed on the main area of the page. Next we will begin adding Showcase Tiers :
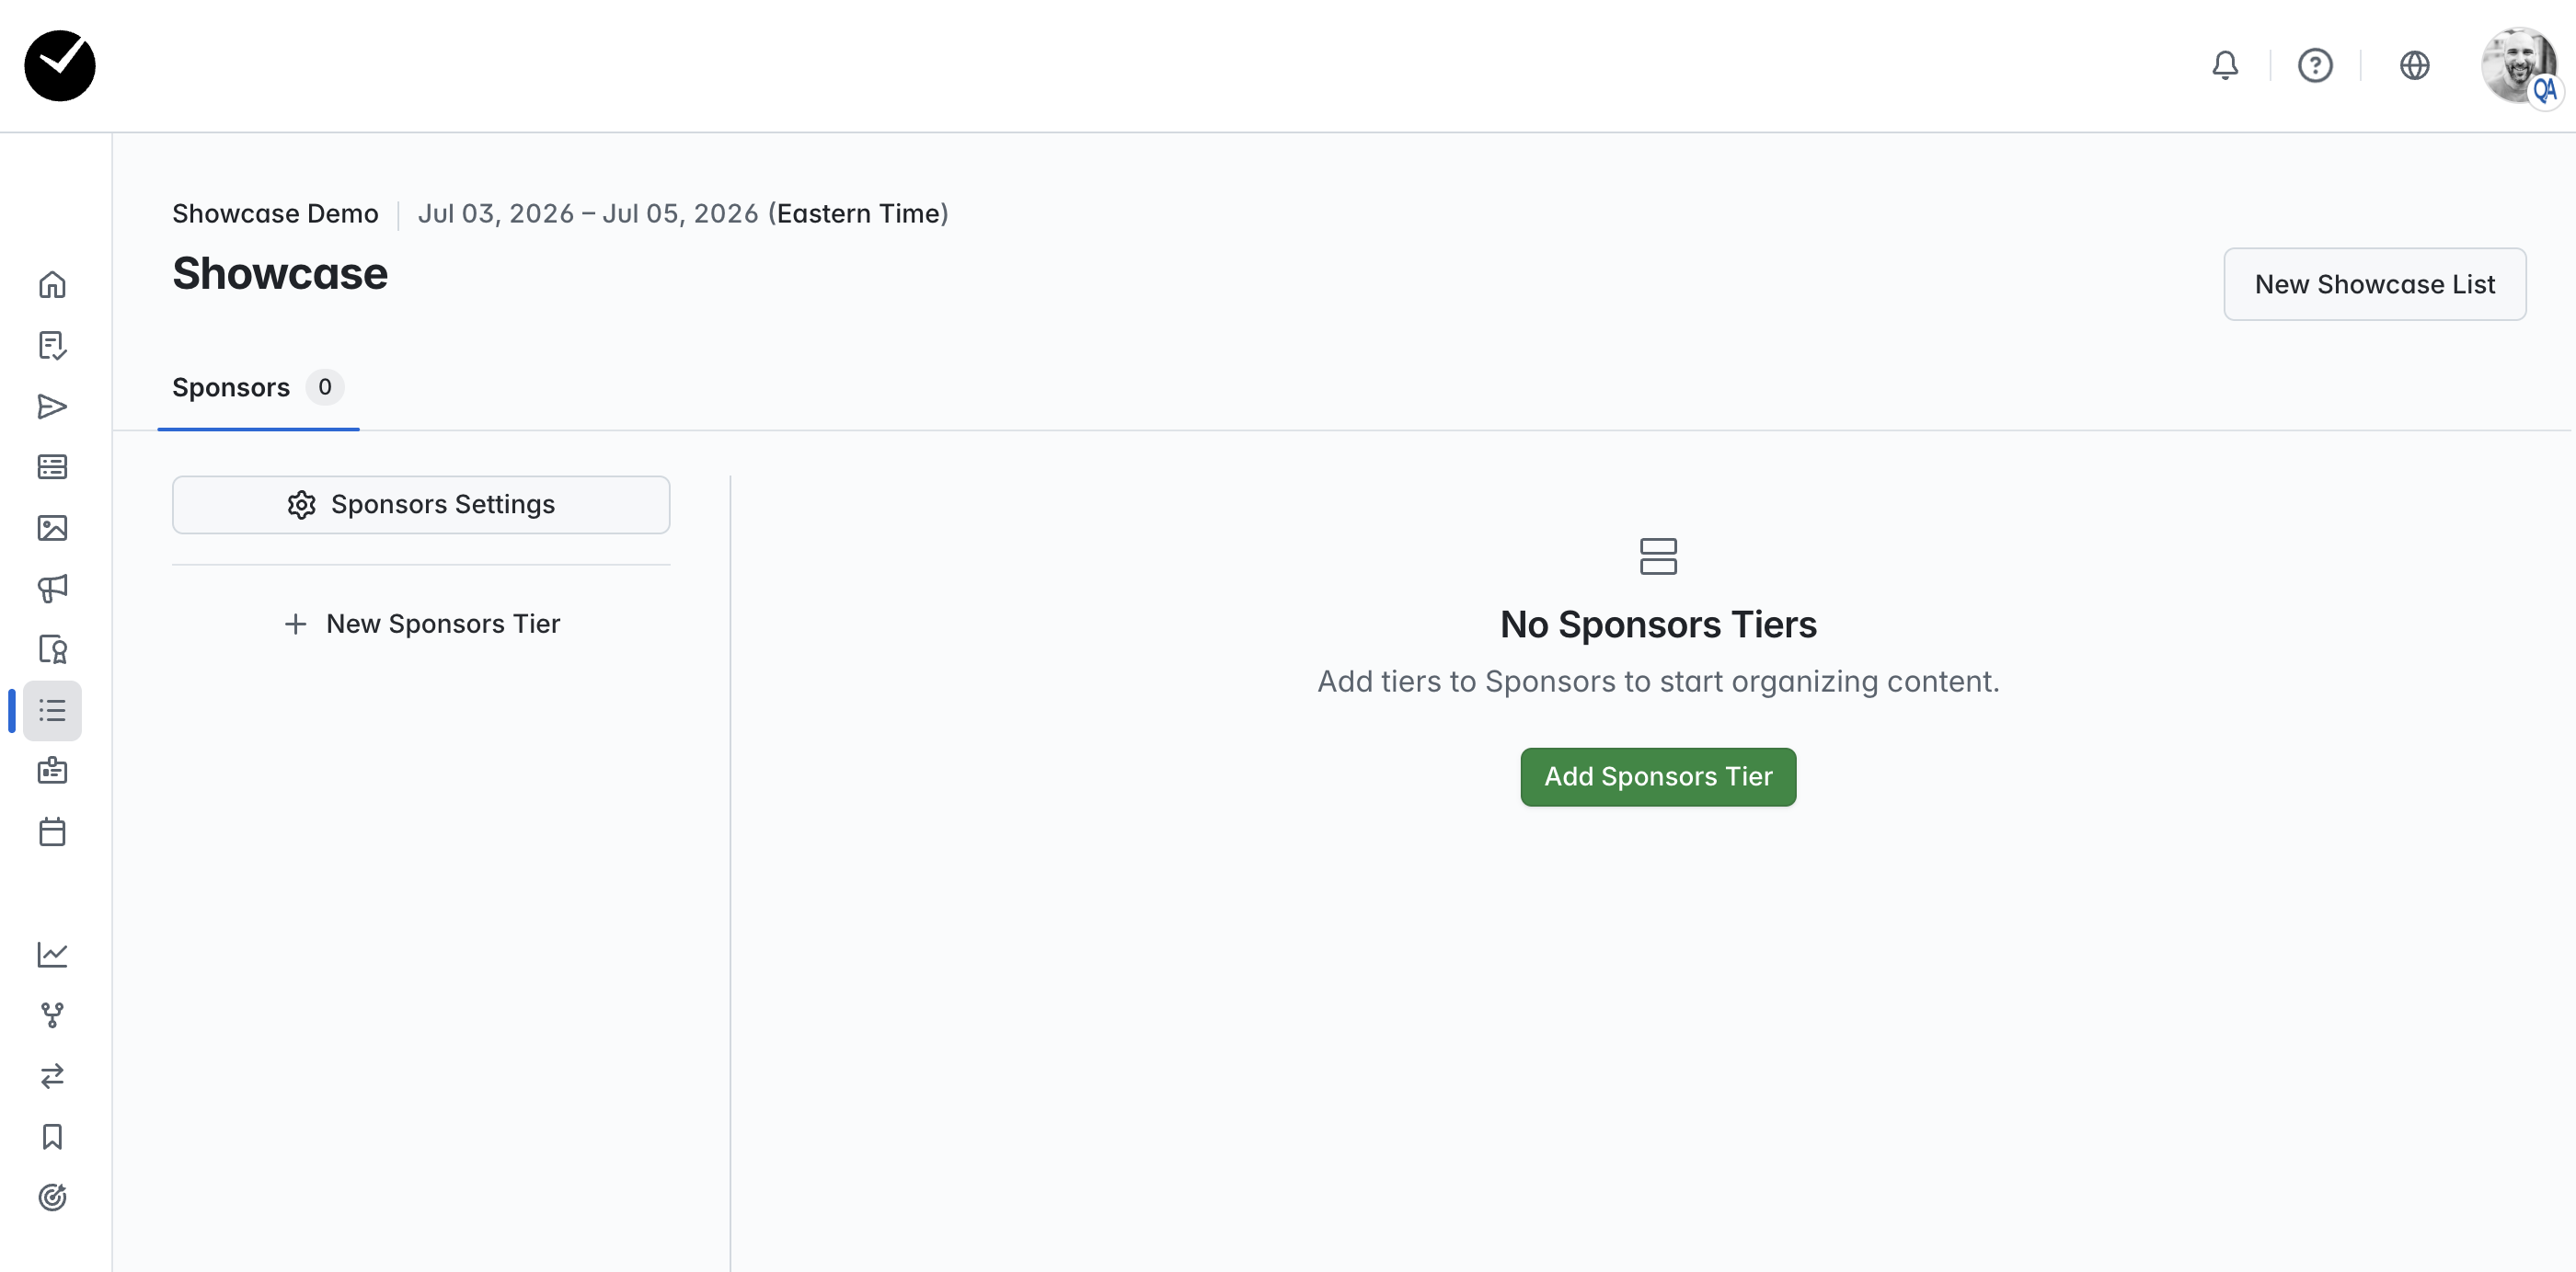
To begin creating Showcase Tiers, click on the green 'Add {SHOWCASE LIST NAME} Tier' button on the center of the page. You will then see the following form:
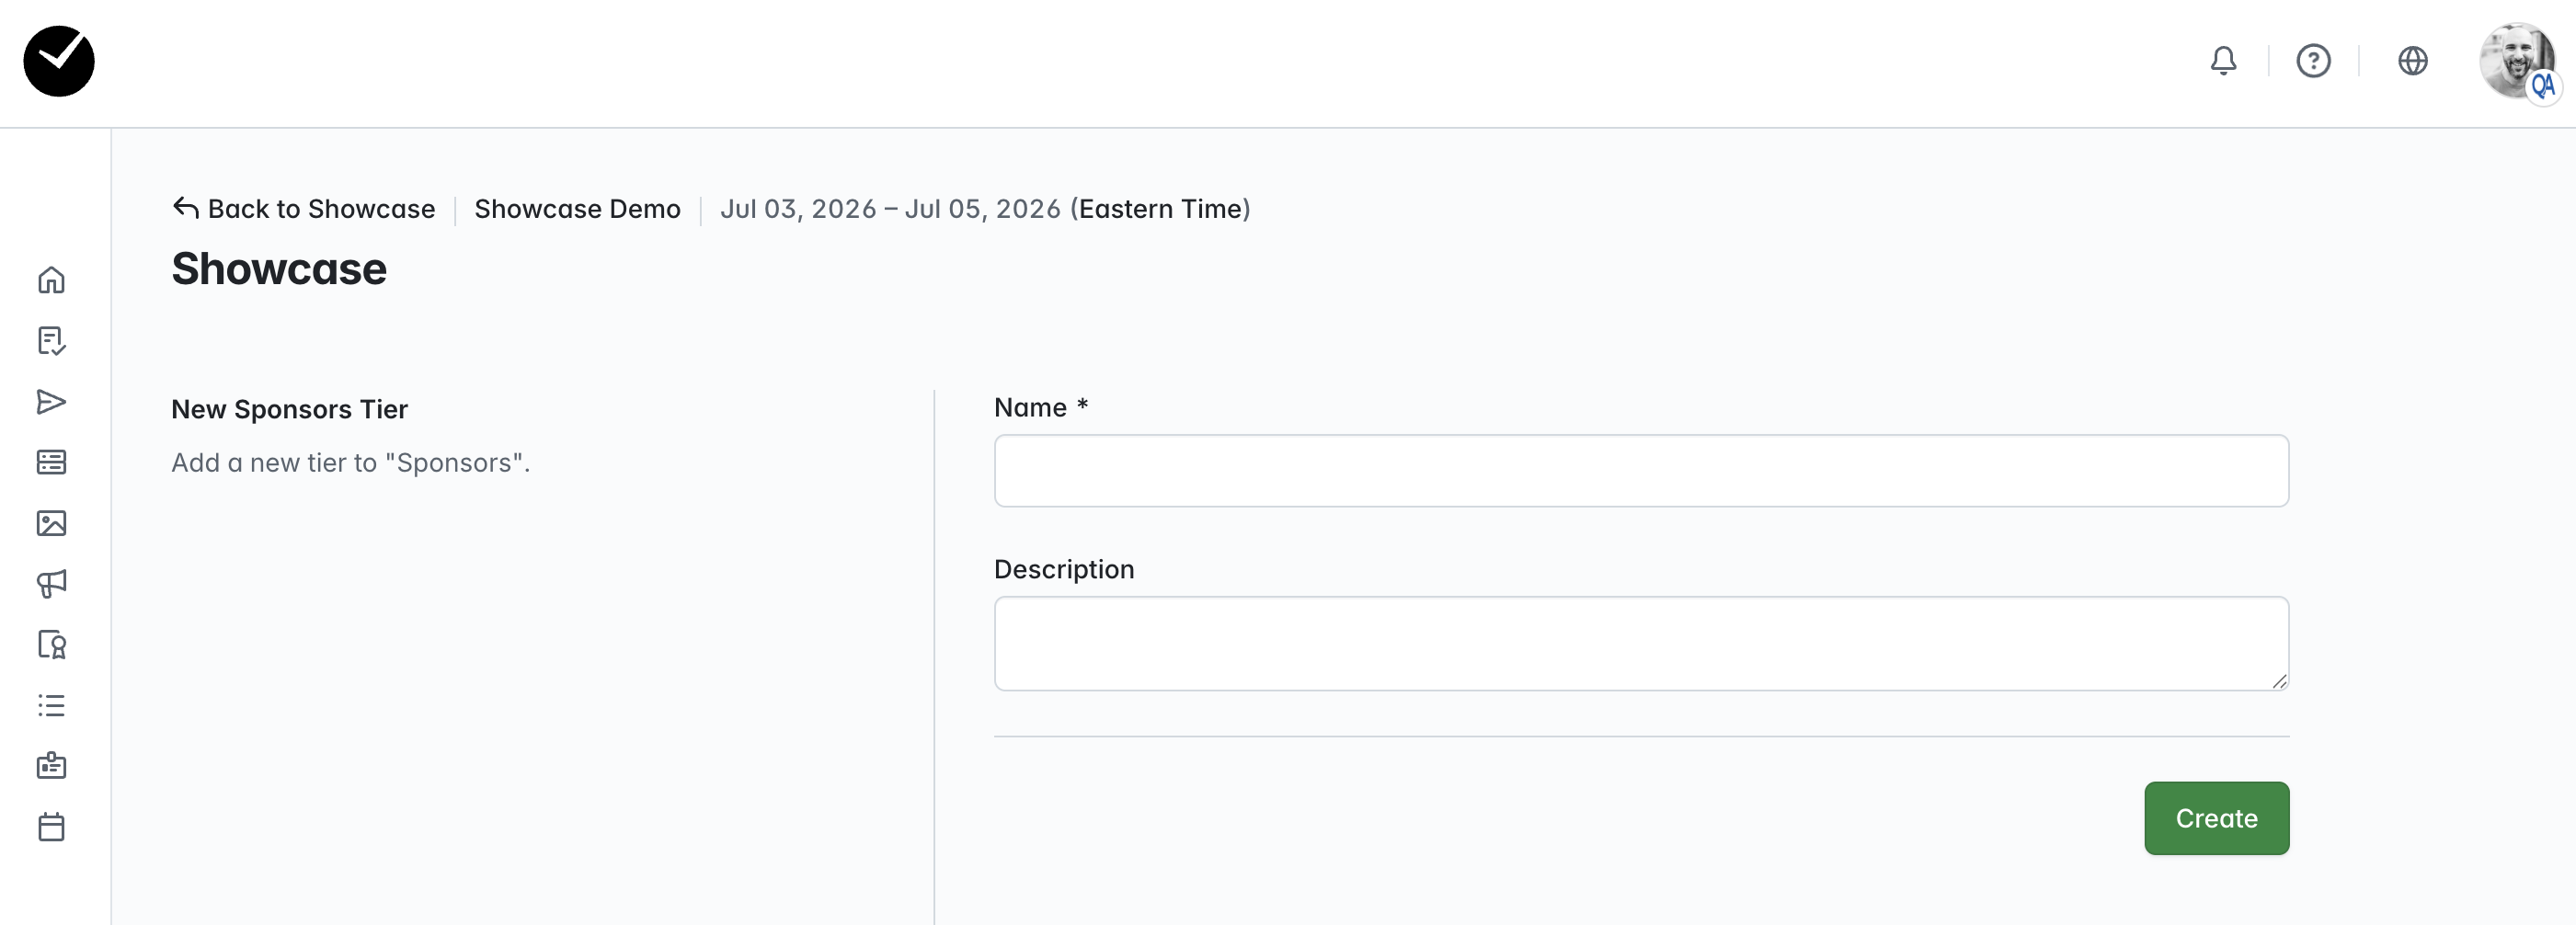
- Name - the name of the Showcase Tier, which will be displayed when viewed by attendees. This is a mandatory field.
- Description - an optional area for you to add a description, that will be displayed when viewed by attendees.
When you are ready to proceed, click on the 'Create' button to proceed. You will then be returned to the main Showcase page, and your new Showcase Tier will be displayed on the main area of the page.
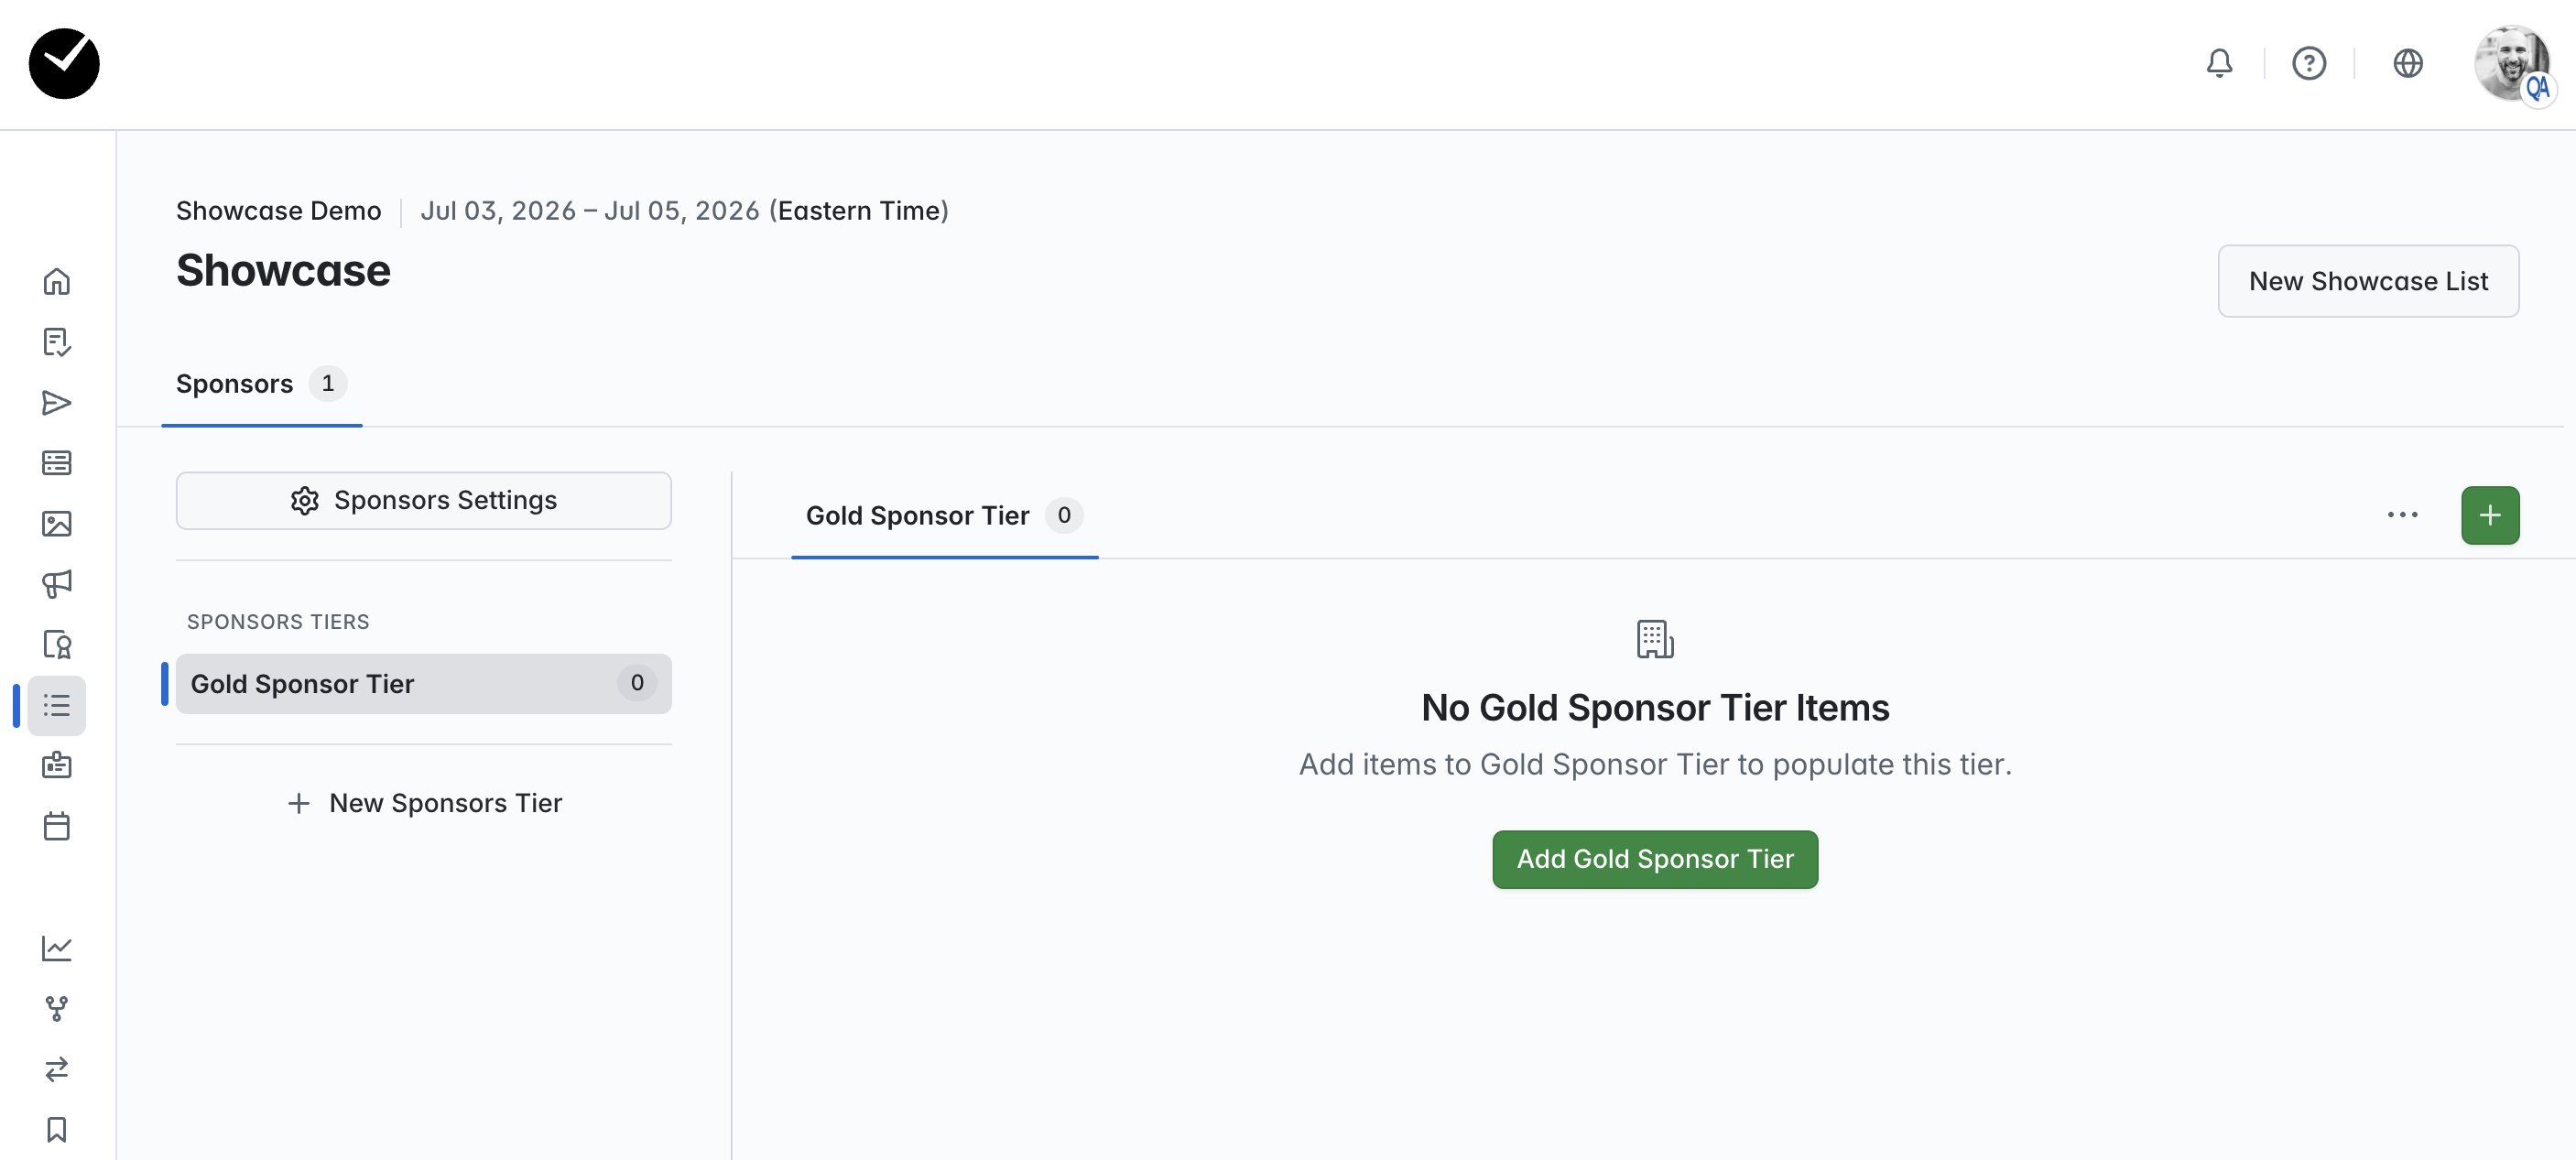
If you wish to create more tiers, click on the '+ New {SHOWCASE LIST NAME} Tier' button displayed beneath the currently active Showcase Tier tab. Also, if you wish to edit your Showcase Tiers, click on the '{SHOWCASE LIST NAME} Settings' button to the left of the page:
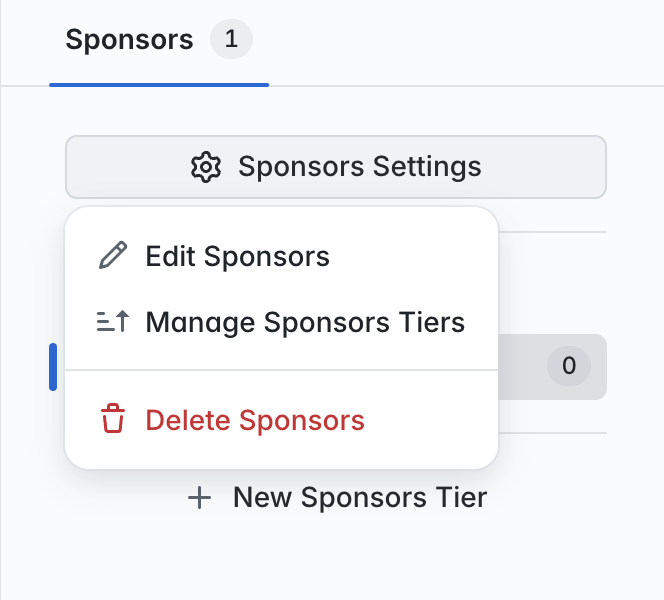
From here you can manage your list and tiers as required, just select the option you wish to interact with to proceed. For now, we will continue to add a Showcase Item to our 'Gold Sponsor Tier' Showcase Tier - click on the 'Add {SHOWCASE TIER NAME}' button or the green '+' button to proceed. You should now be presented with a form similar to the screenshot below:
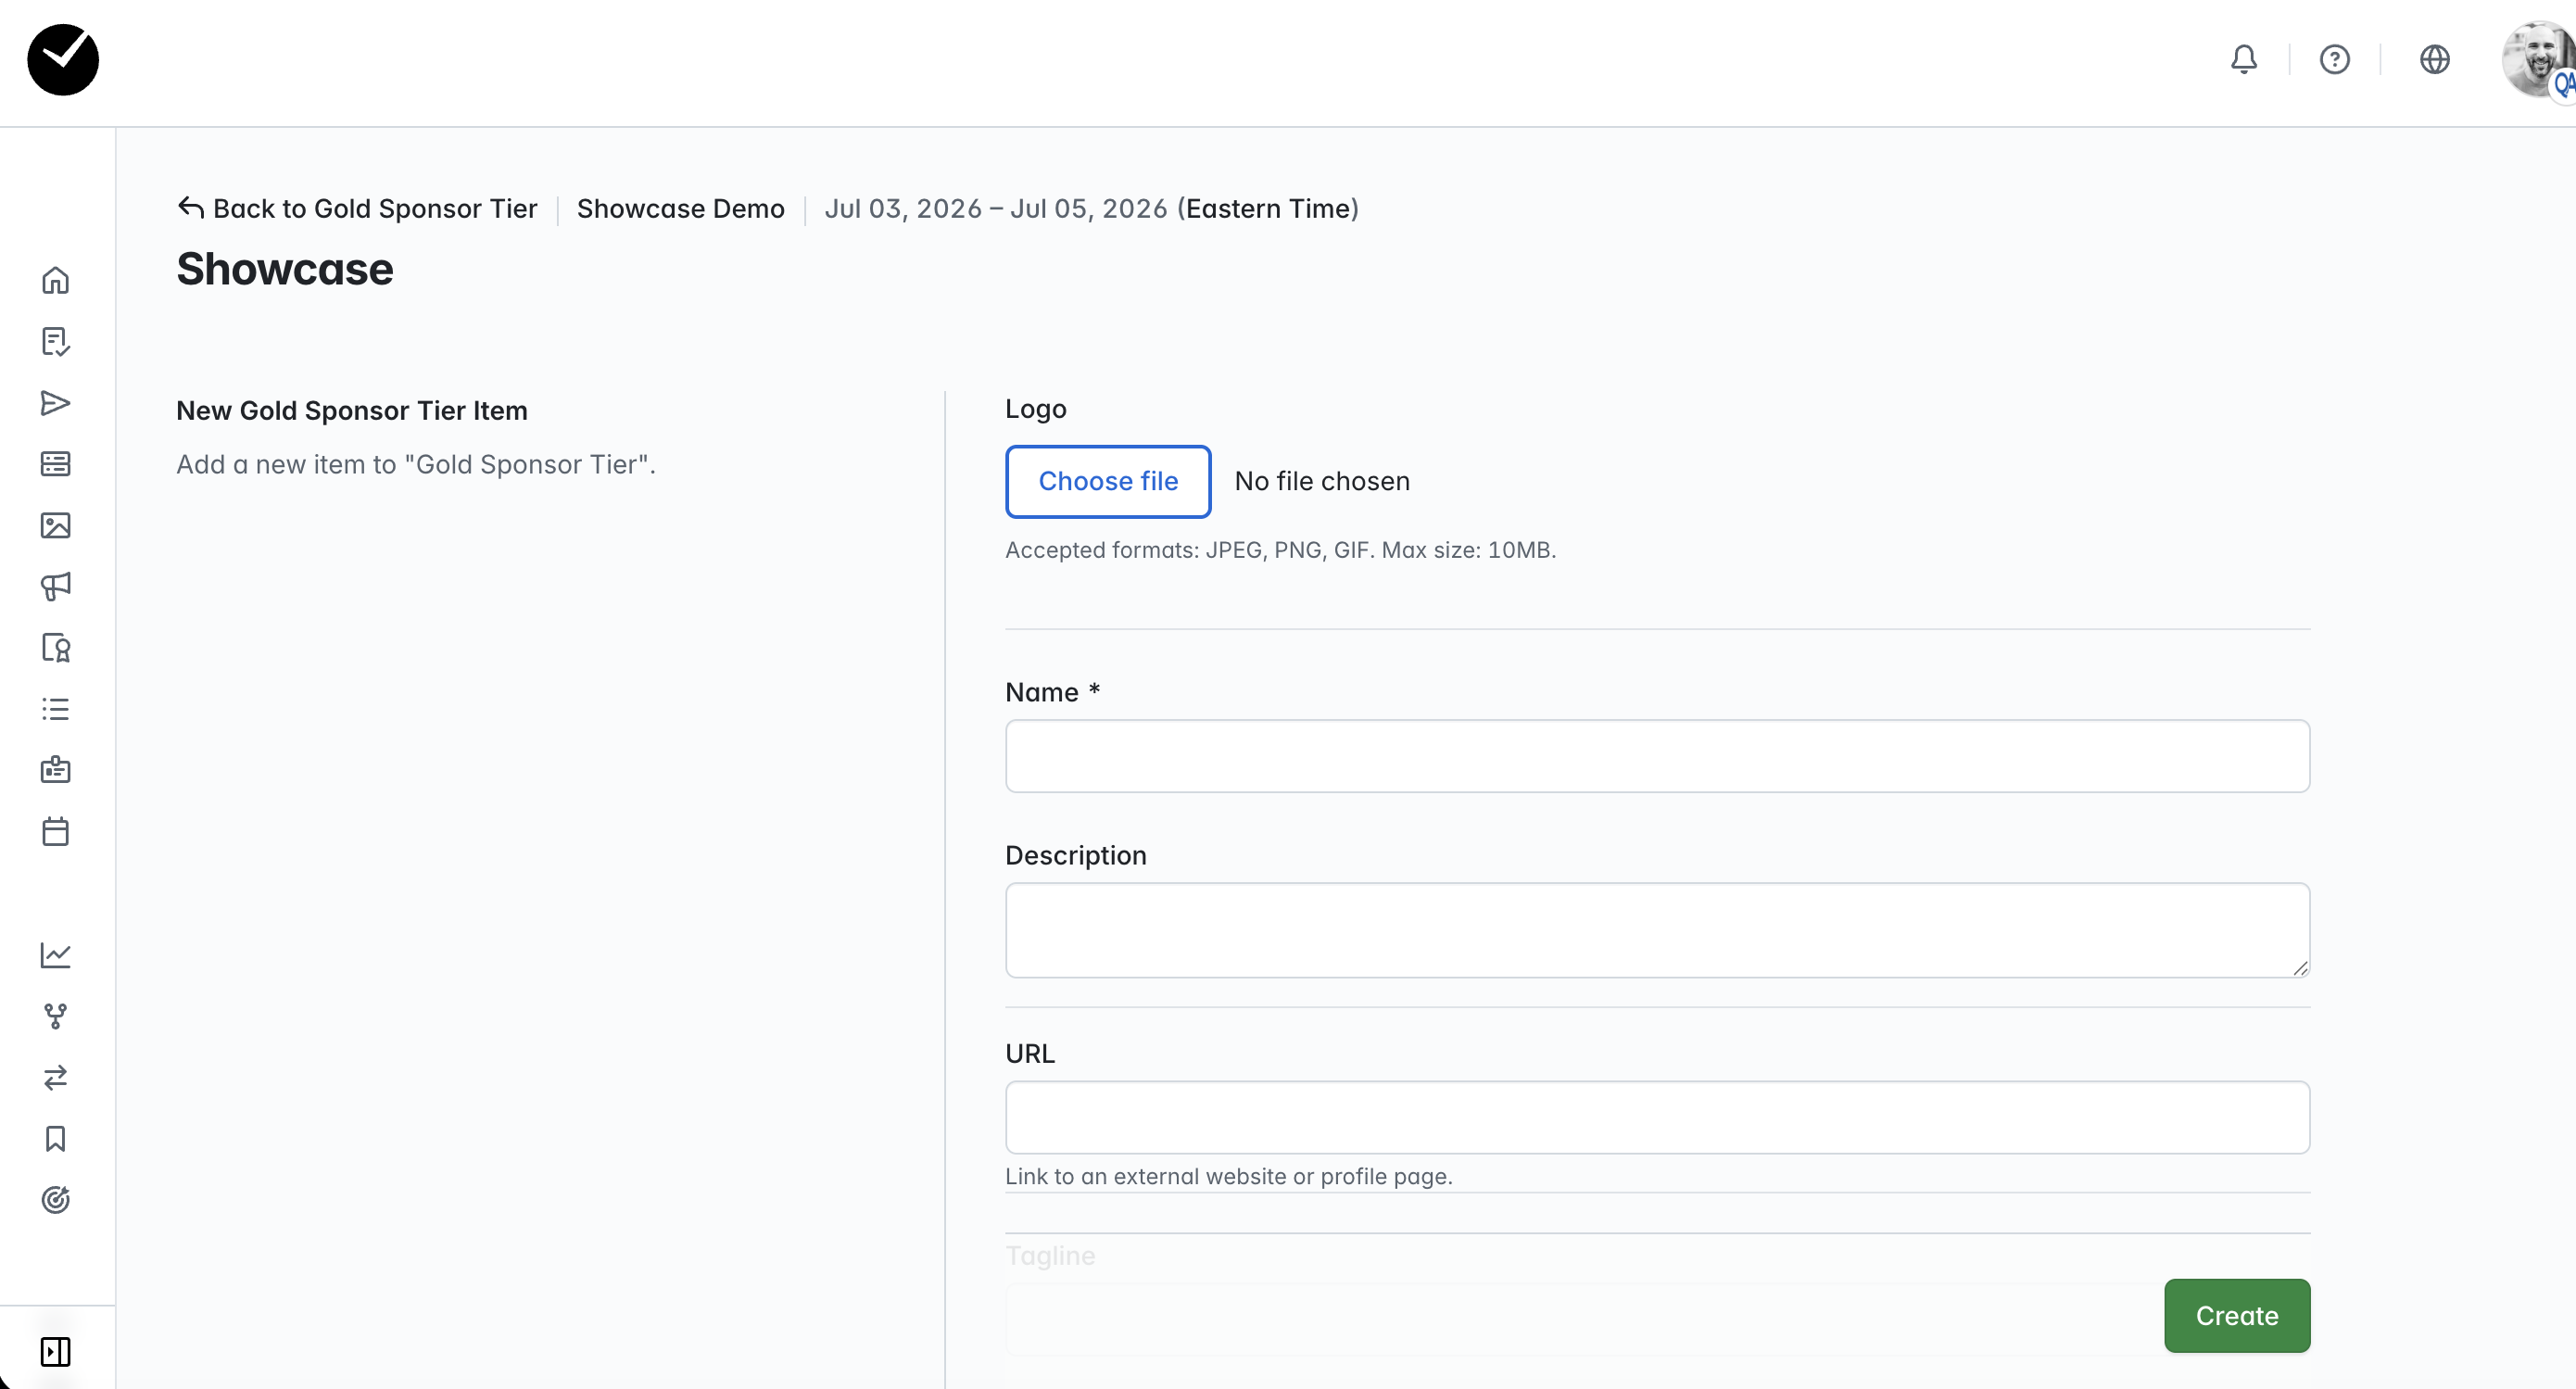
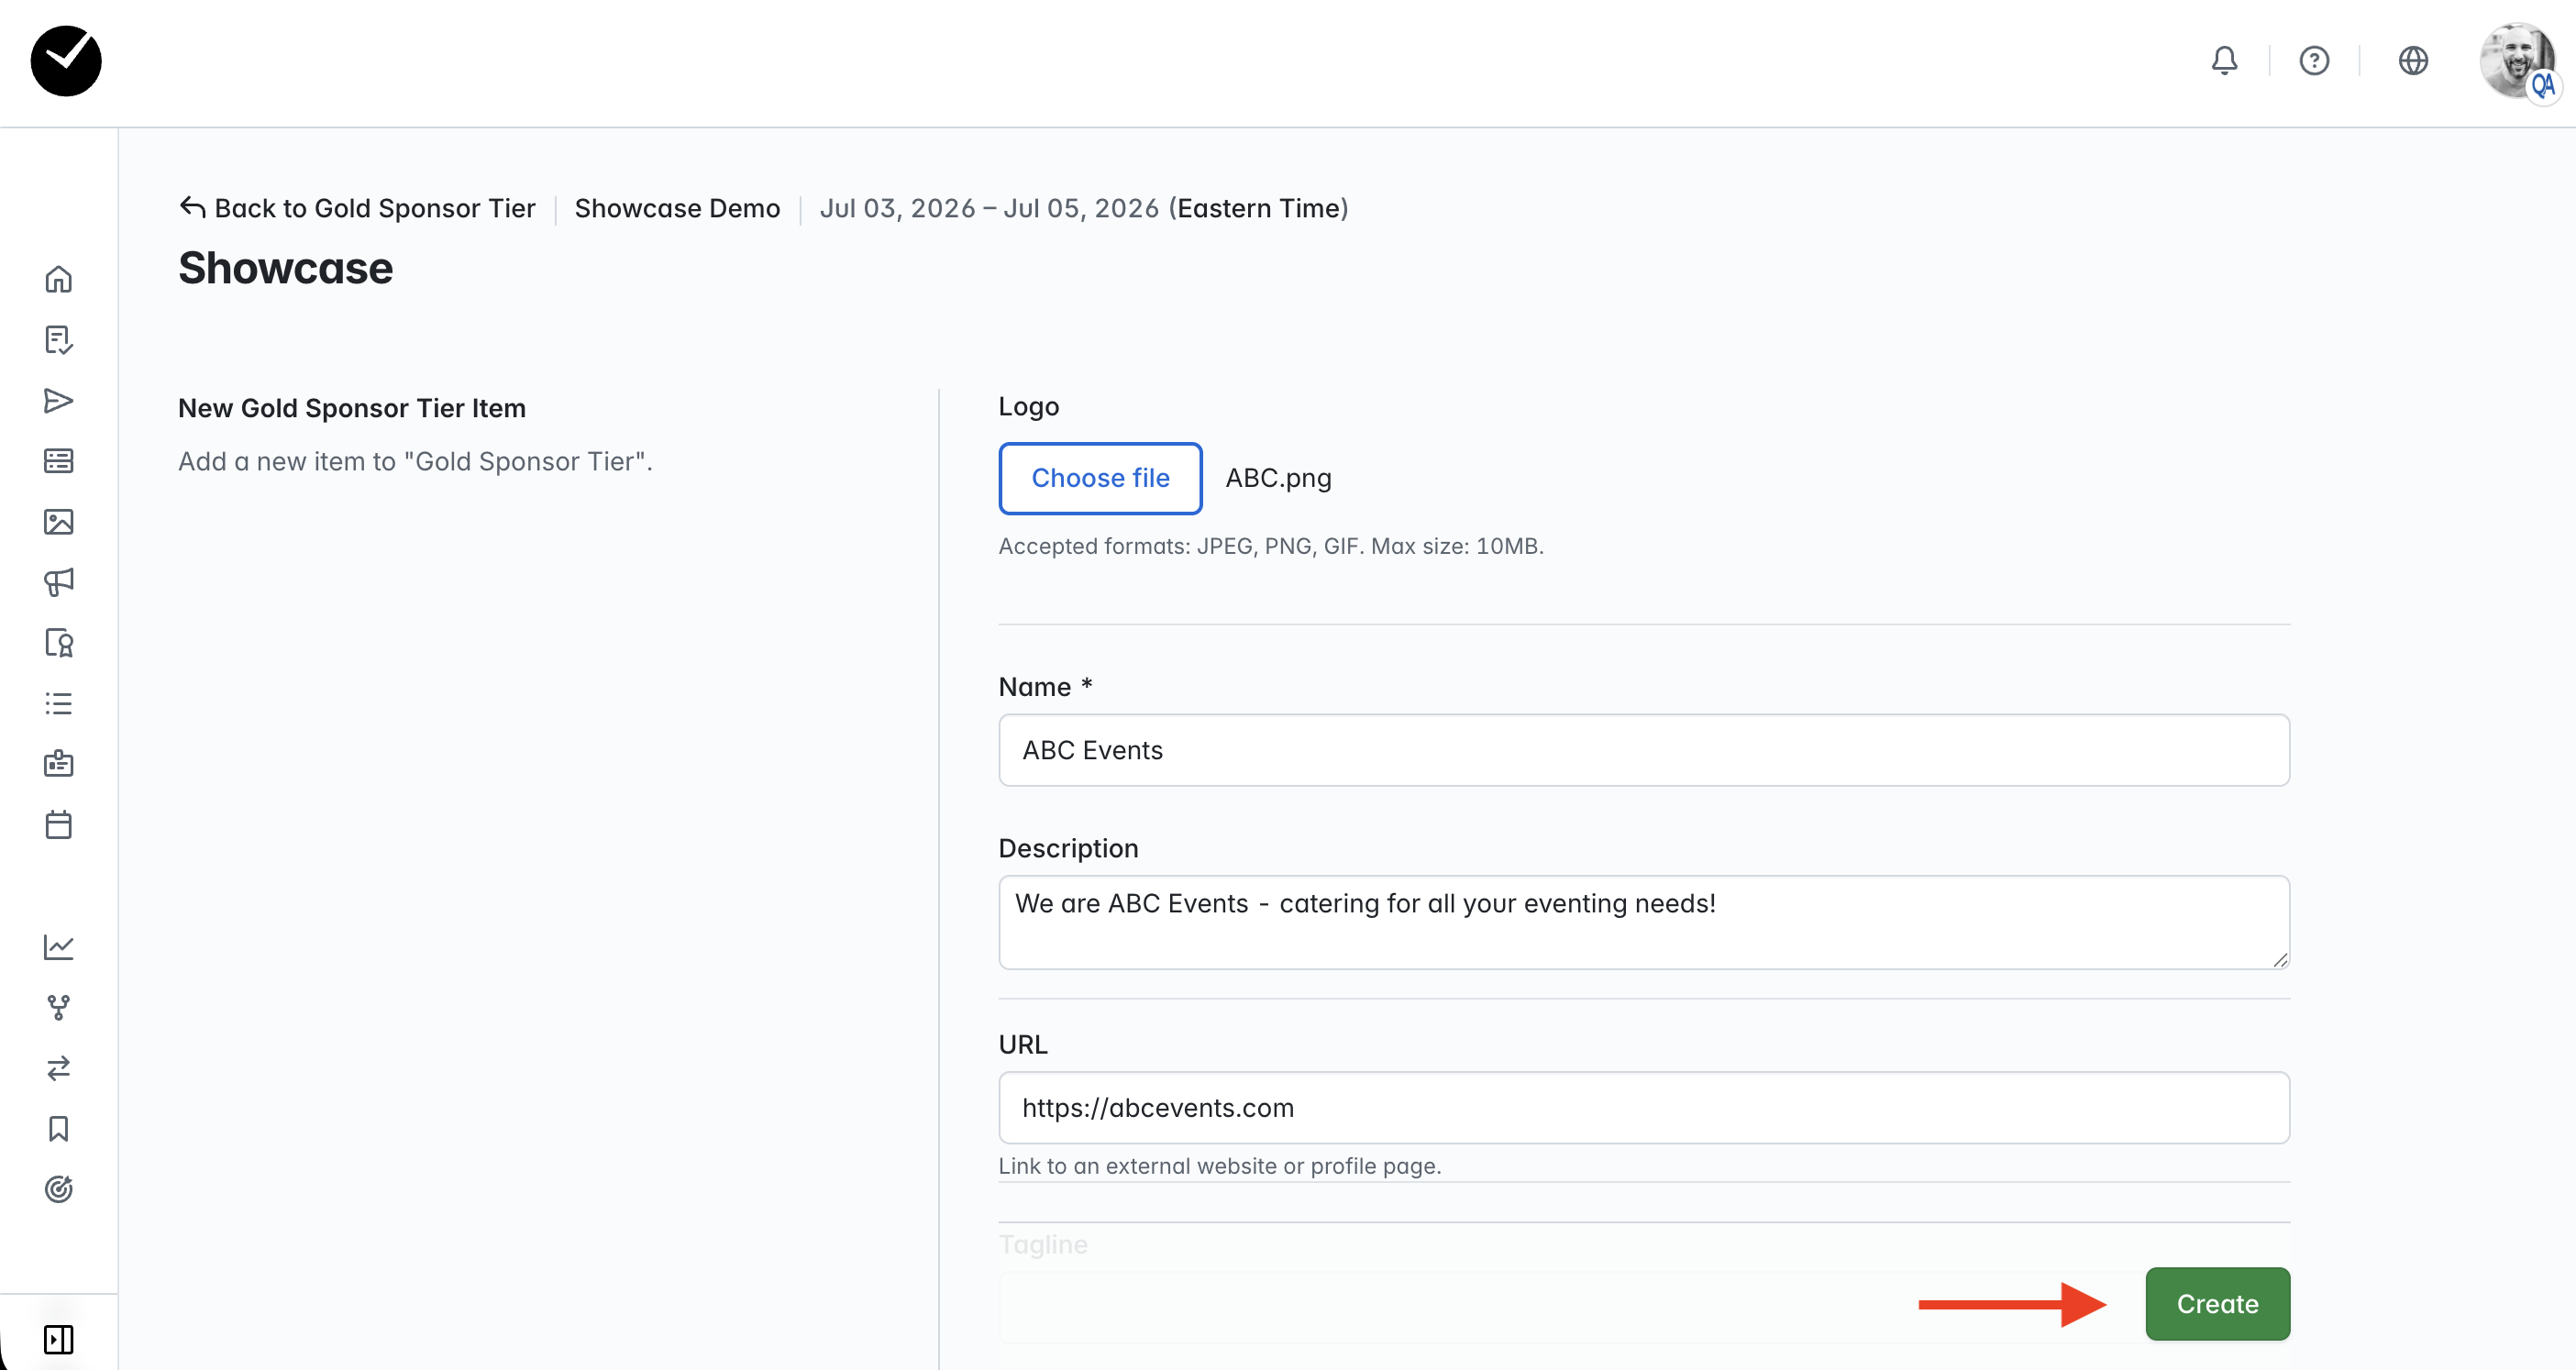
To proceed, populate the fields displayed (ensuring that all 'required' fields are filled), and the click the 'Create' button to proceed:
You will now be returned to the main Showcase page, and your list item will be displayed on the main area of the page under the Showcase Tier selected.
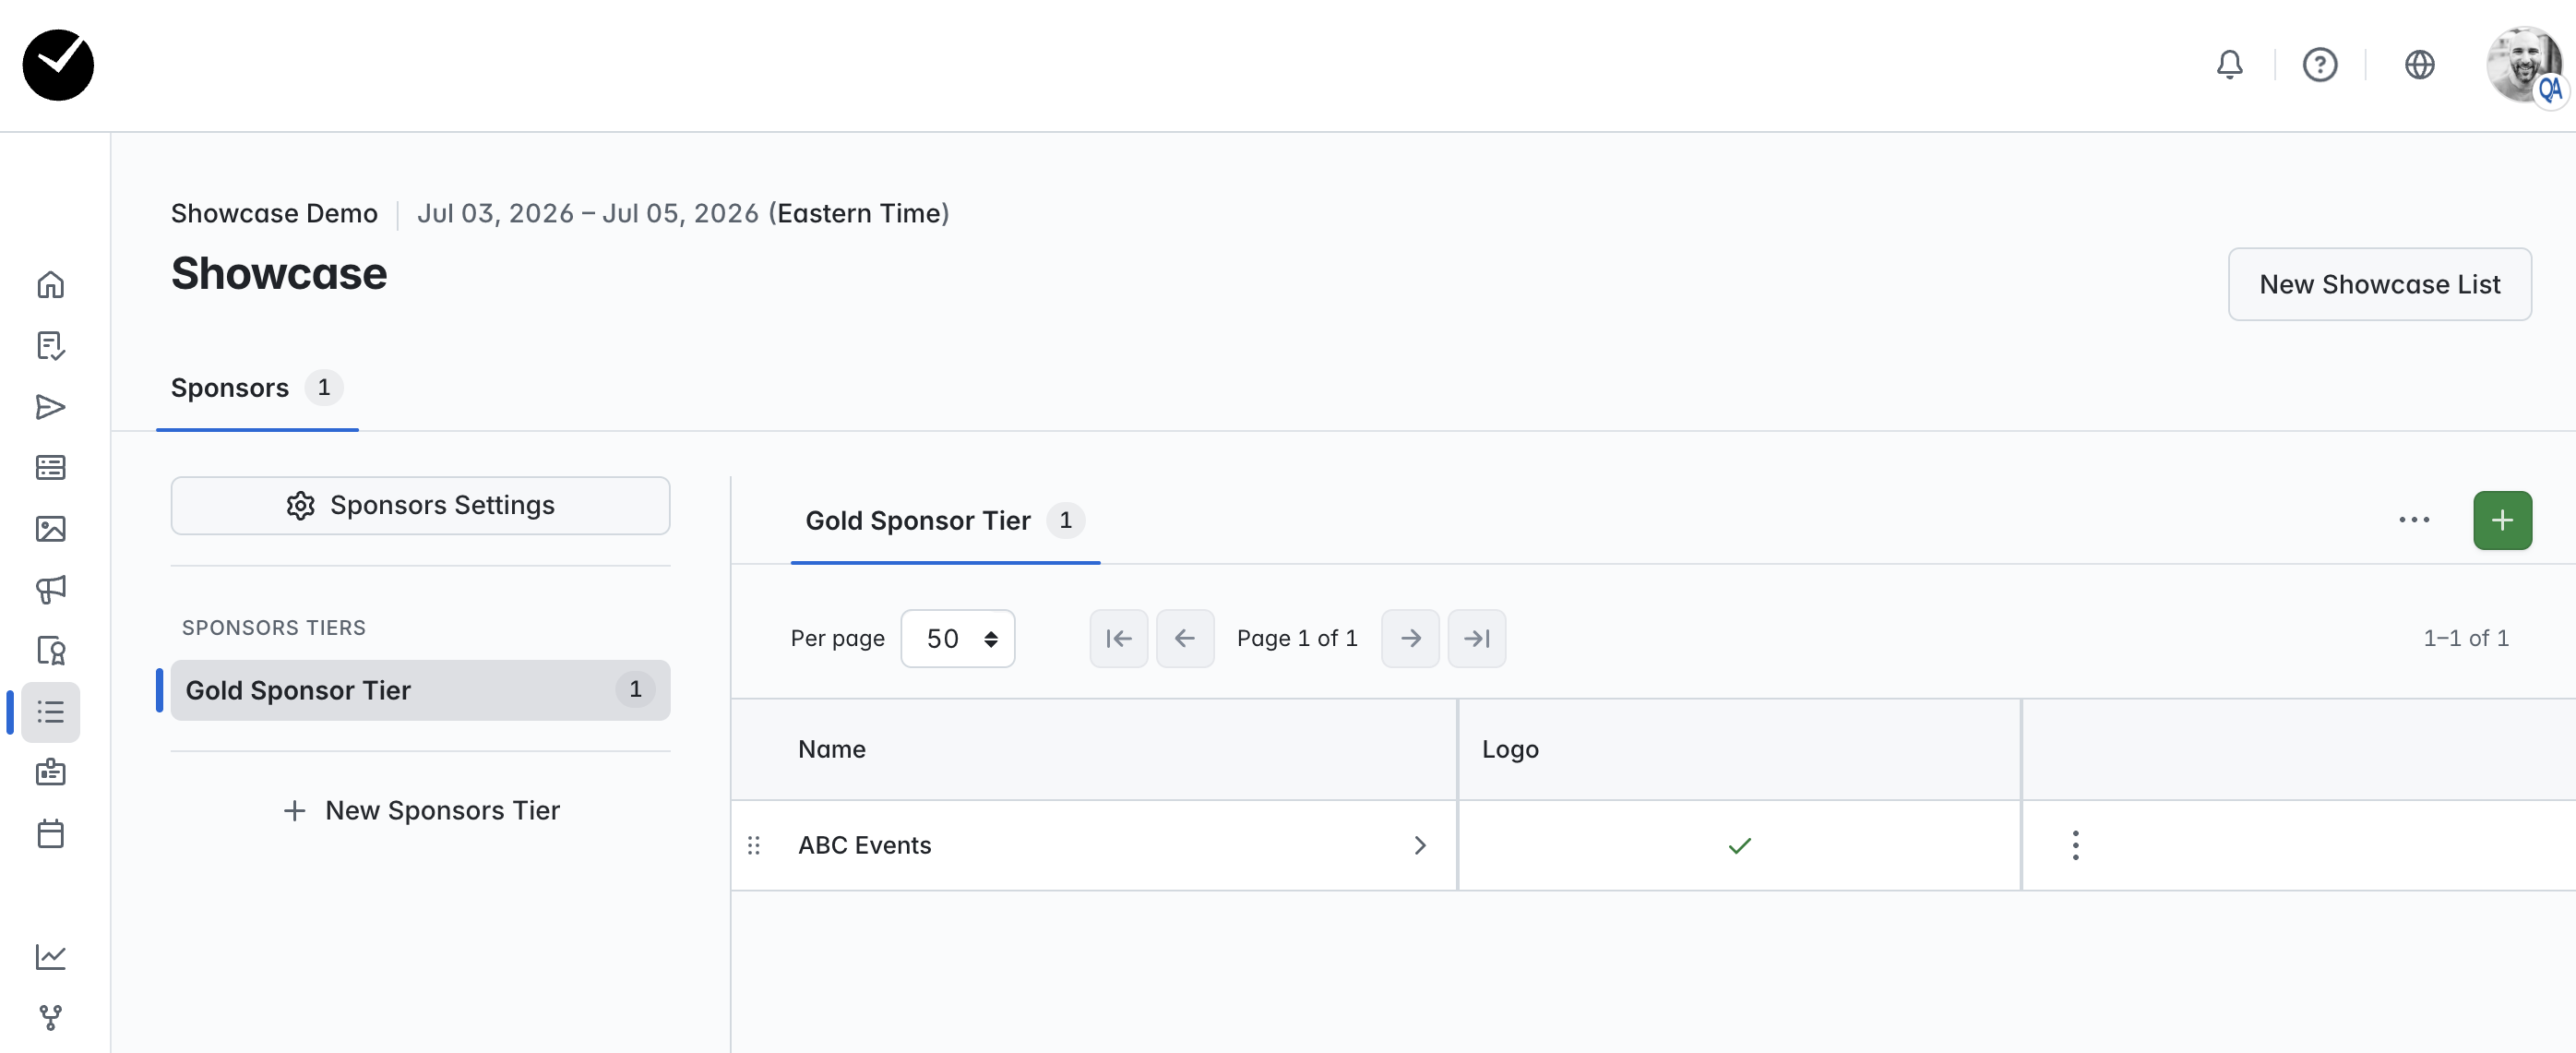
If you have added an image to the Showcase Item, a green 'tick' item will be displayed under the 'Image' column for the respective item, items with no image will display a red 'cross' icon. If you wish to edit or delete a Showcase Item, click on the 3 dots at the end of the row and select the appropriate option. To continue adding your Showcase Items for the current tier, click on the green '+' button to continue.
How do I add a tiered list to my event website?
Once you have completed your tiered lists and wish to add them to event website, head to the Event Website Editor from your Event Dashboard by clicking on the appropriate tile.
You will then see a page similar to the following:

To the right hand side, you will see a section titled 'Showcase', with a list of all your Showcase Lists displayed beneath. Click on the Showcase List you wish to add, and you will see a new section containing your tiered list added to the center of the page.
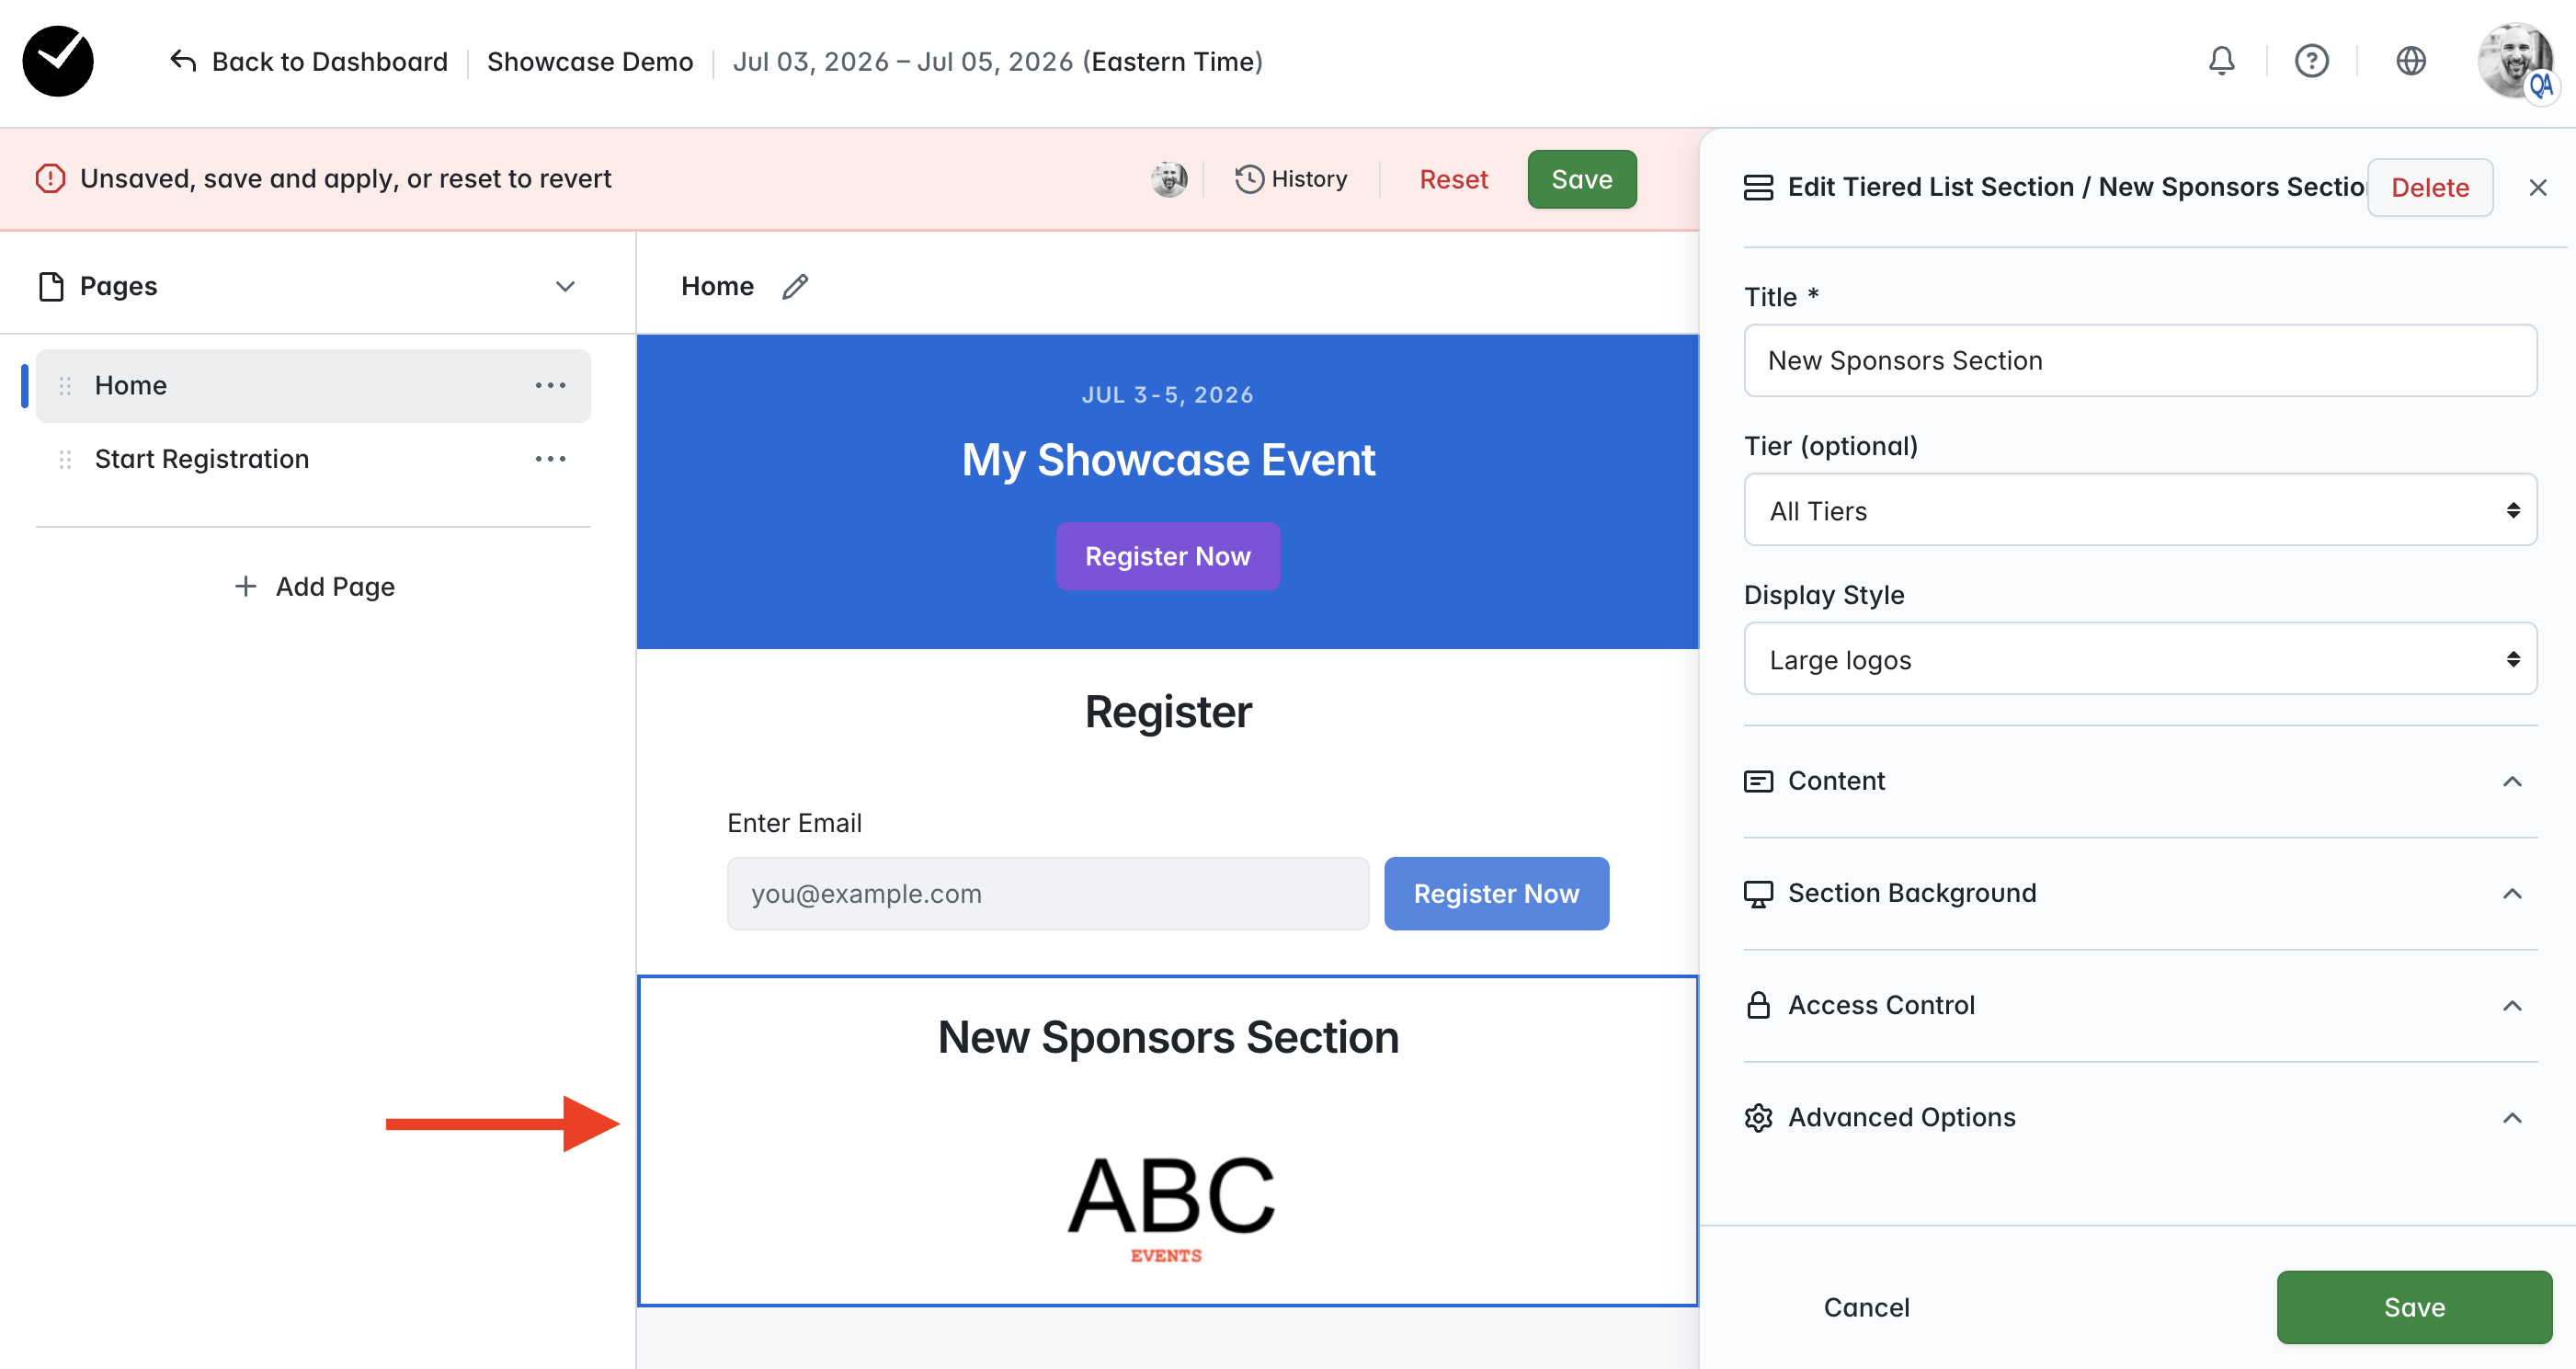
As can be seen in the screenshot above, the list we created earlier (containing the list item ABC Events) is displayed. To the right you can see an editor window where you can:
- Update the section title
- Select which tiers from list are displayed
- Choose a display style:
- Large logos
- Medium logos
- Logo and Name
- Listing
- Cards
- Add additional text content
- Add a section background image
- Control audience visibility via access controls
- Add custom section padding and CSS
Once you are happy with your changes, click on the green 'Save' button and your list will now be live on your event website!