.png)
How do I create and configure Custom Fields for Event Requests?
Notes: To use the 'Event Requests' feature, it must be enabled for your organization first. Please contact support if you are interested in activating the feature for your organization.
Only administrators can create and configure custom fields for Event Requests.
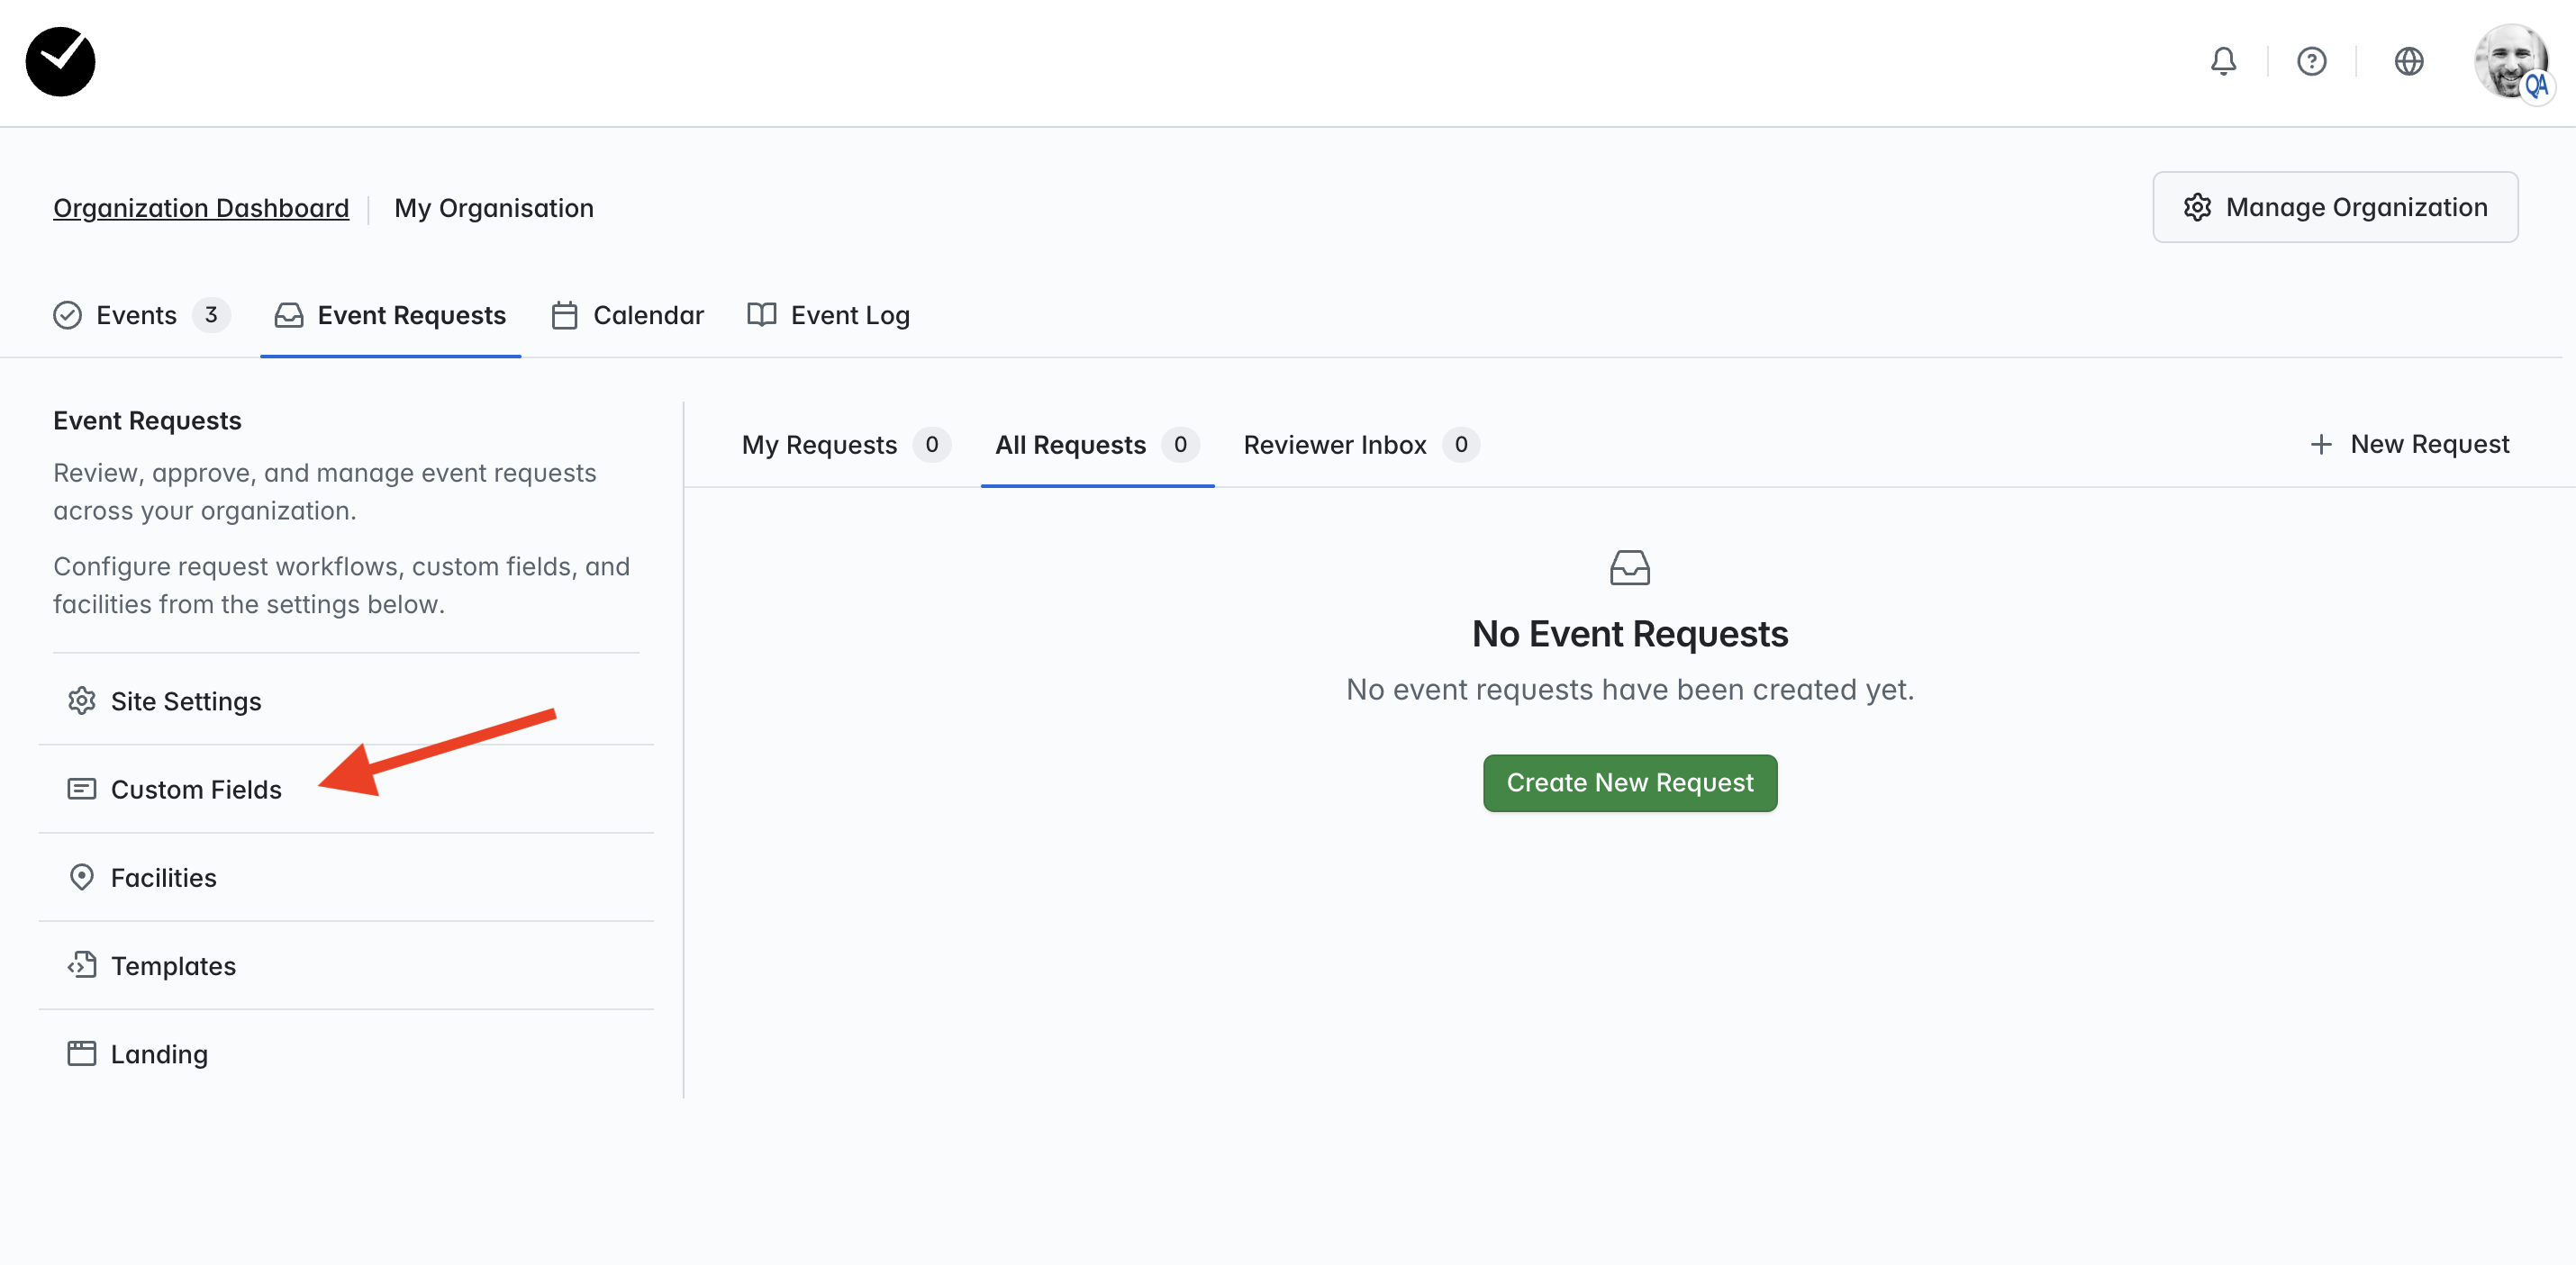
If you'd like to add some fields to the initial page of your Event Request form (Event Details) to gather important event details before the event requestor continues on to selecting venues and facilities, you can begin configuring this in your Site Settings -> Custom Fields area. This can be accessed from the left column in your Event Requests area or by selecting the 'Custom Fields' tab on your Site Settings page:
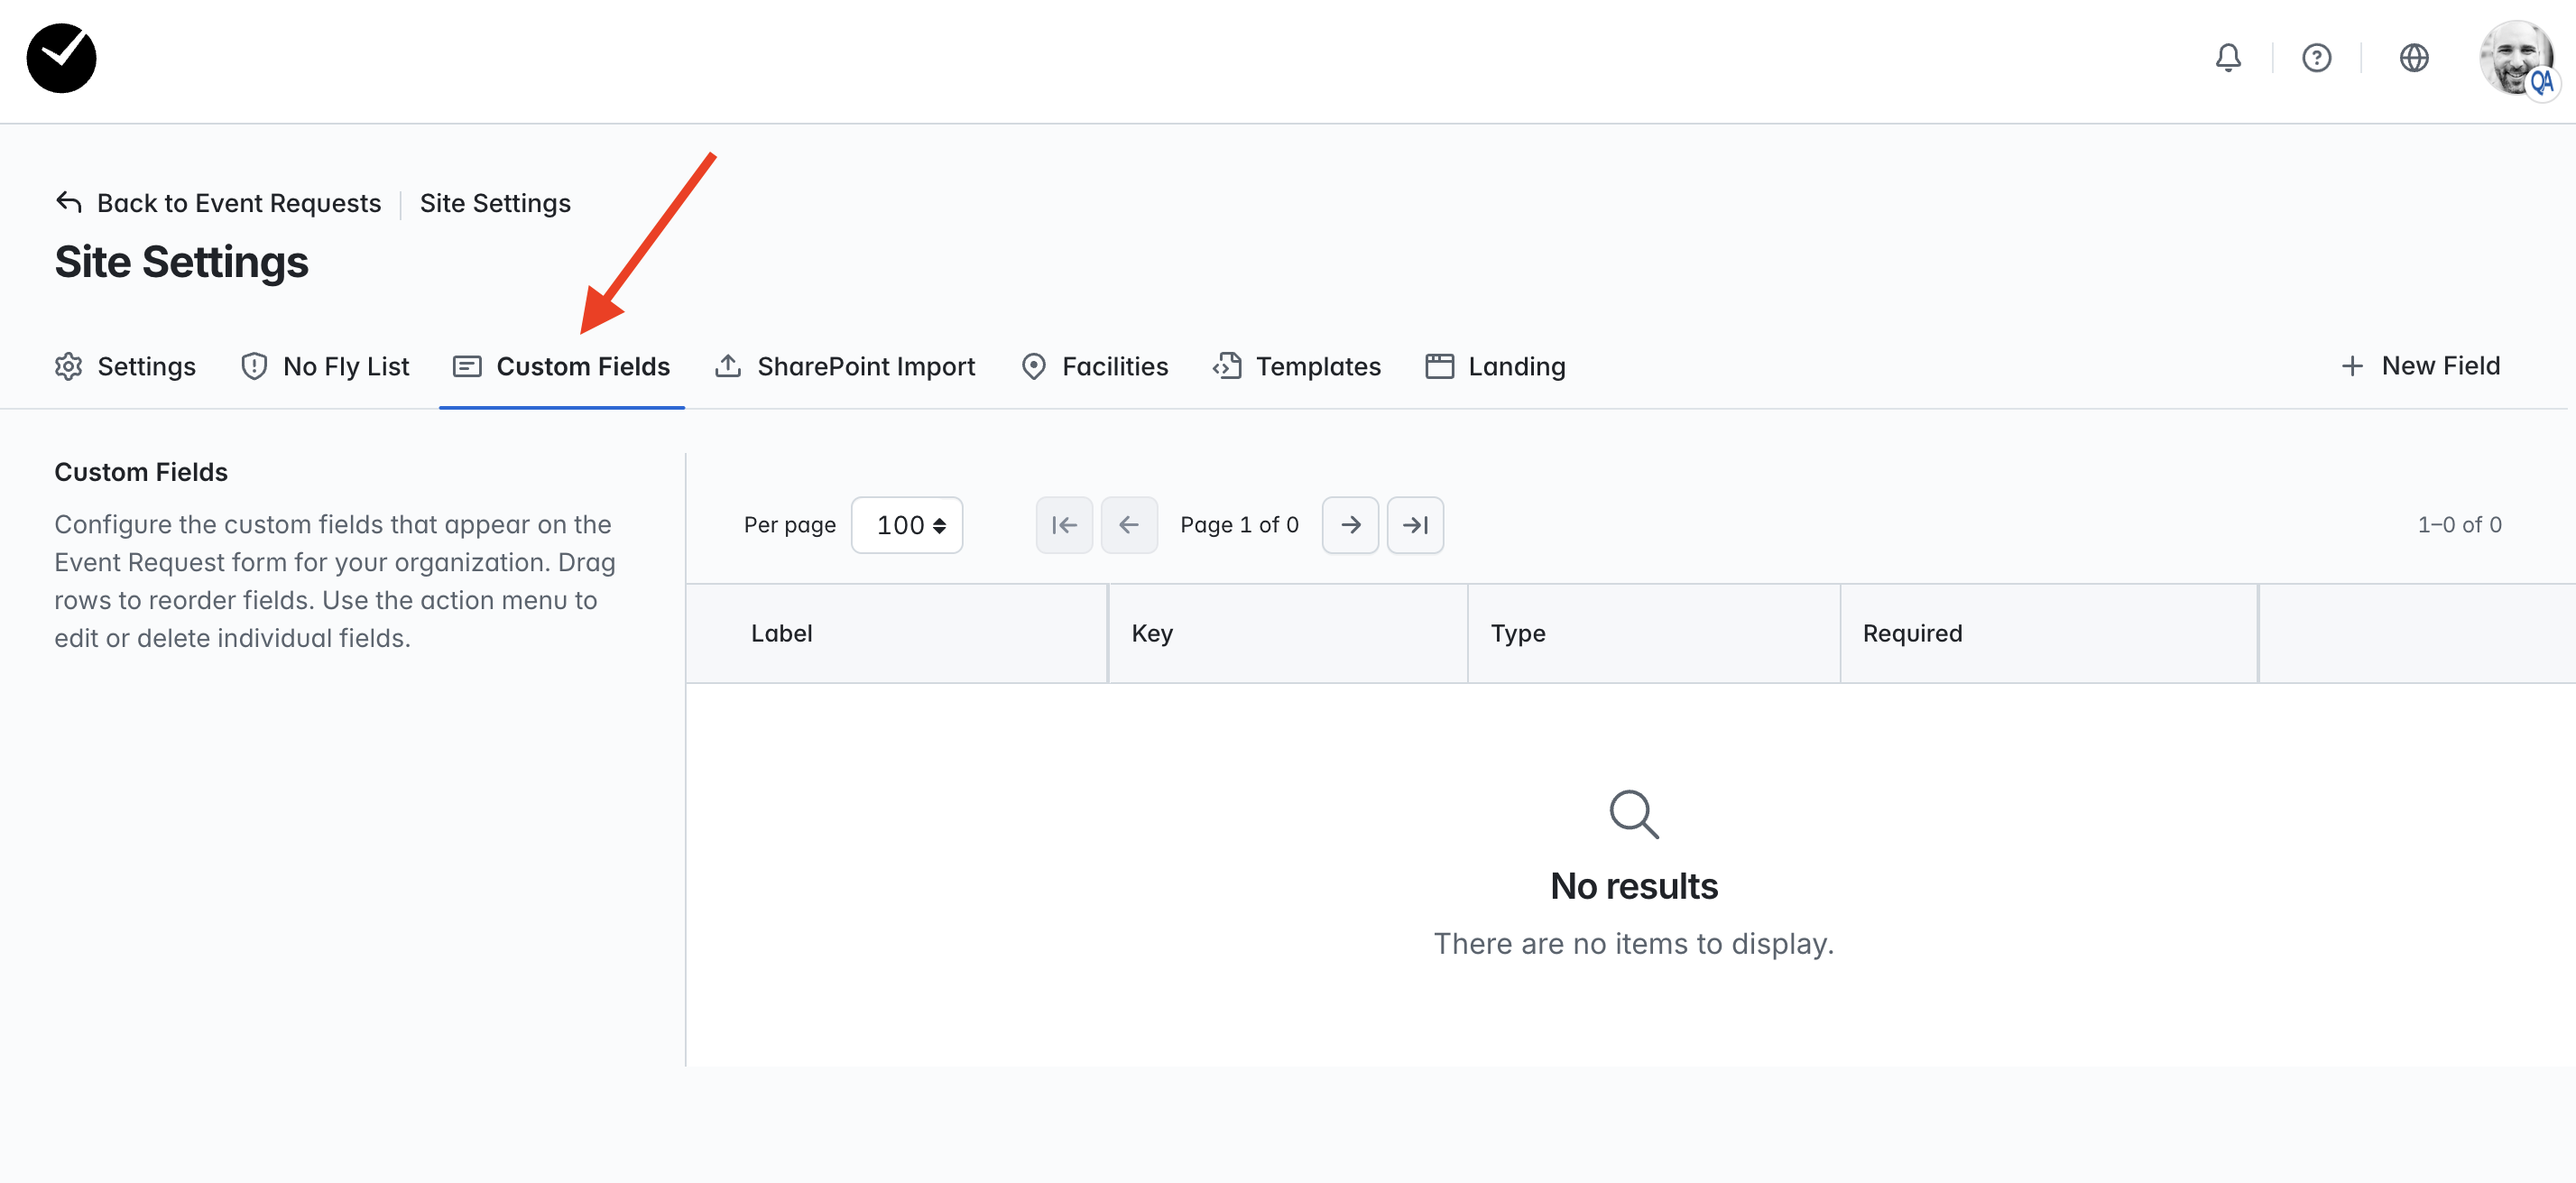
If your organization has not already added any custom fields then the area will look something like the above, and your form will only have default fields displayed on the 'Event Details' page of your Event Request form (eg Event Title, Description etc).
To begin creating new custom fields, click on the '+ New Field' button at the top right of the page. You will then see something like the following:
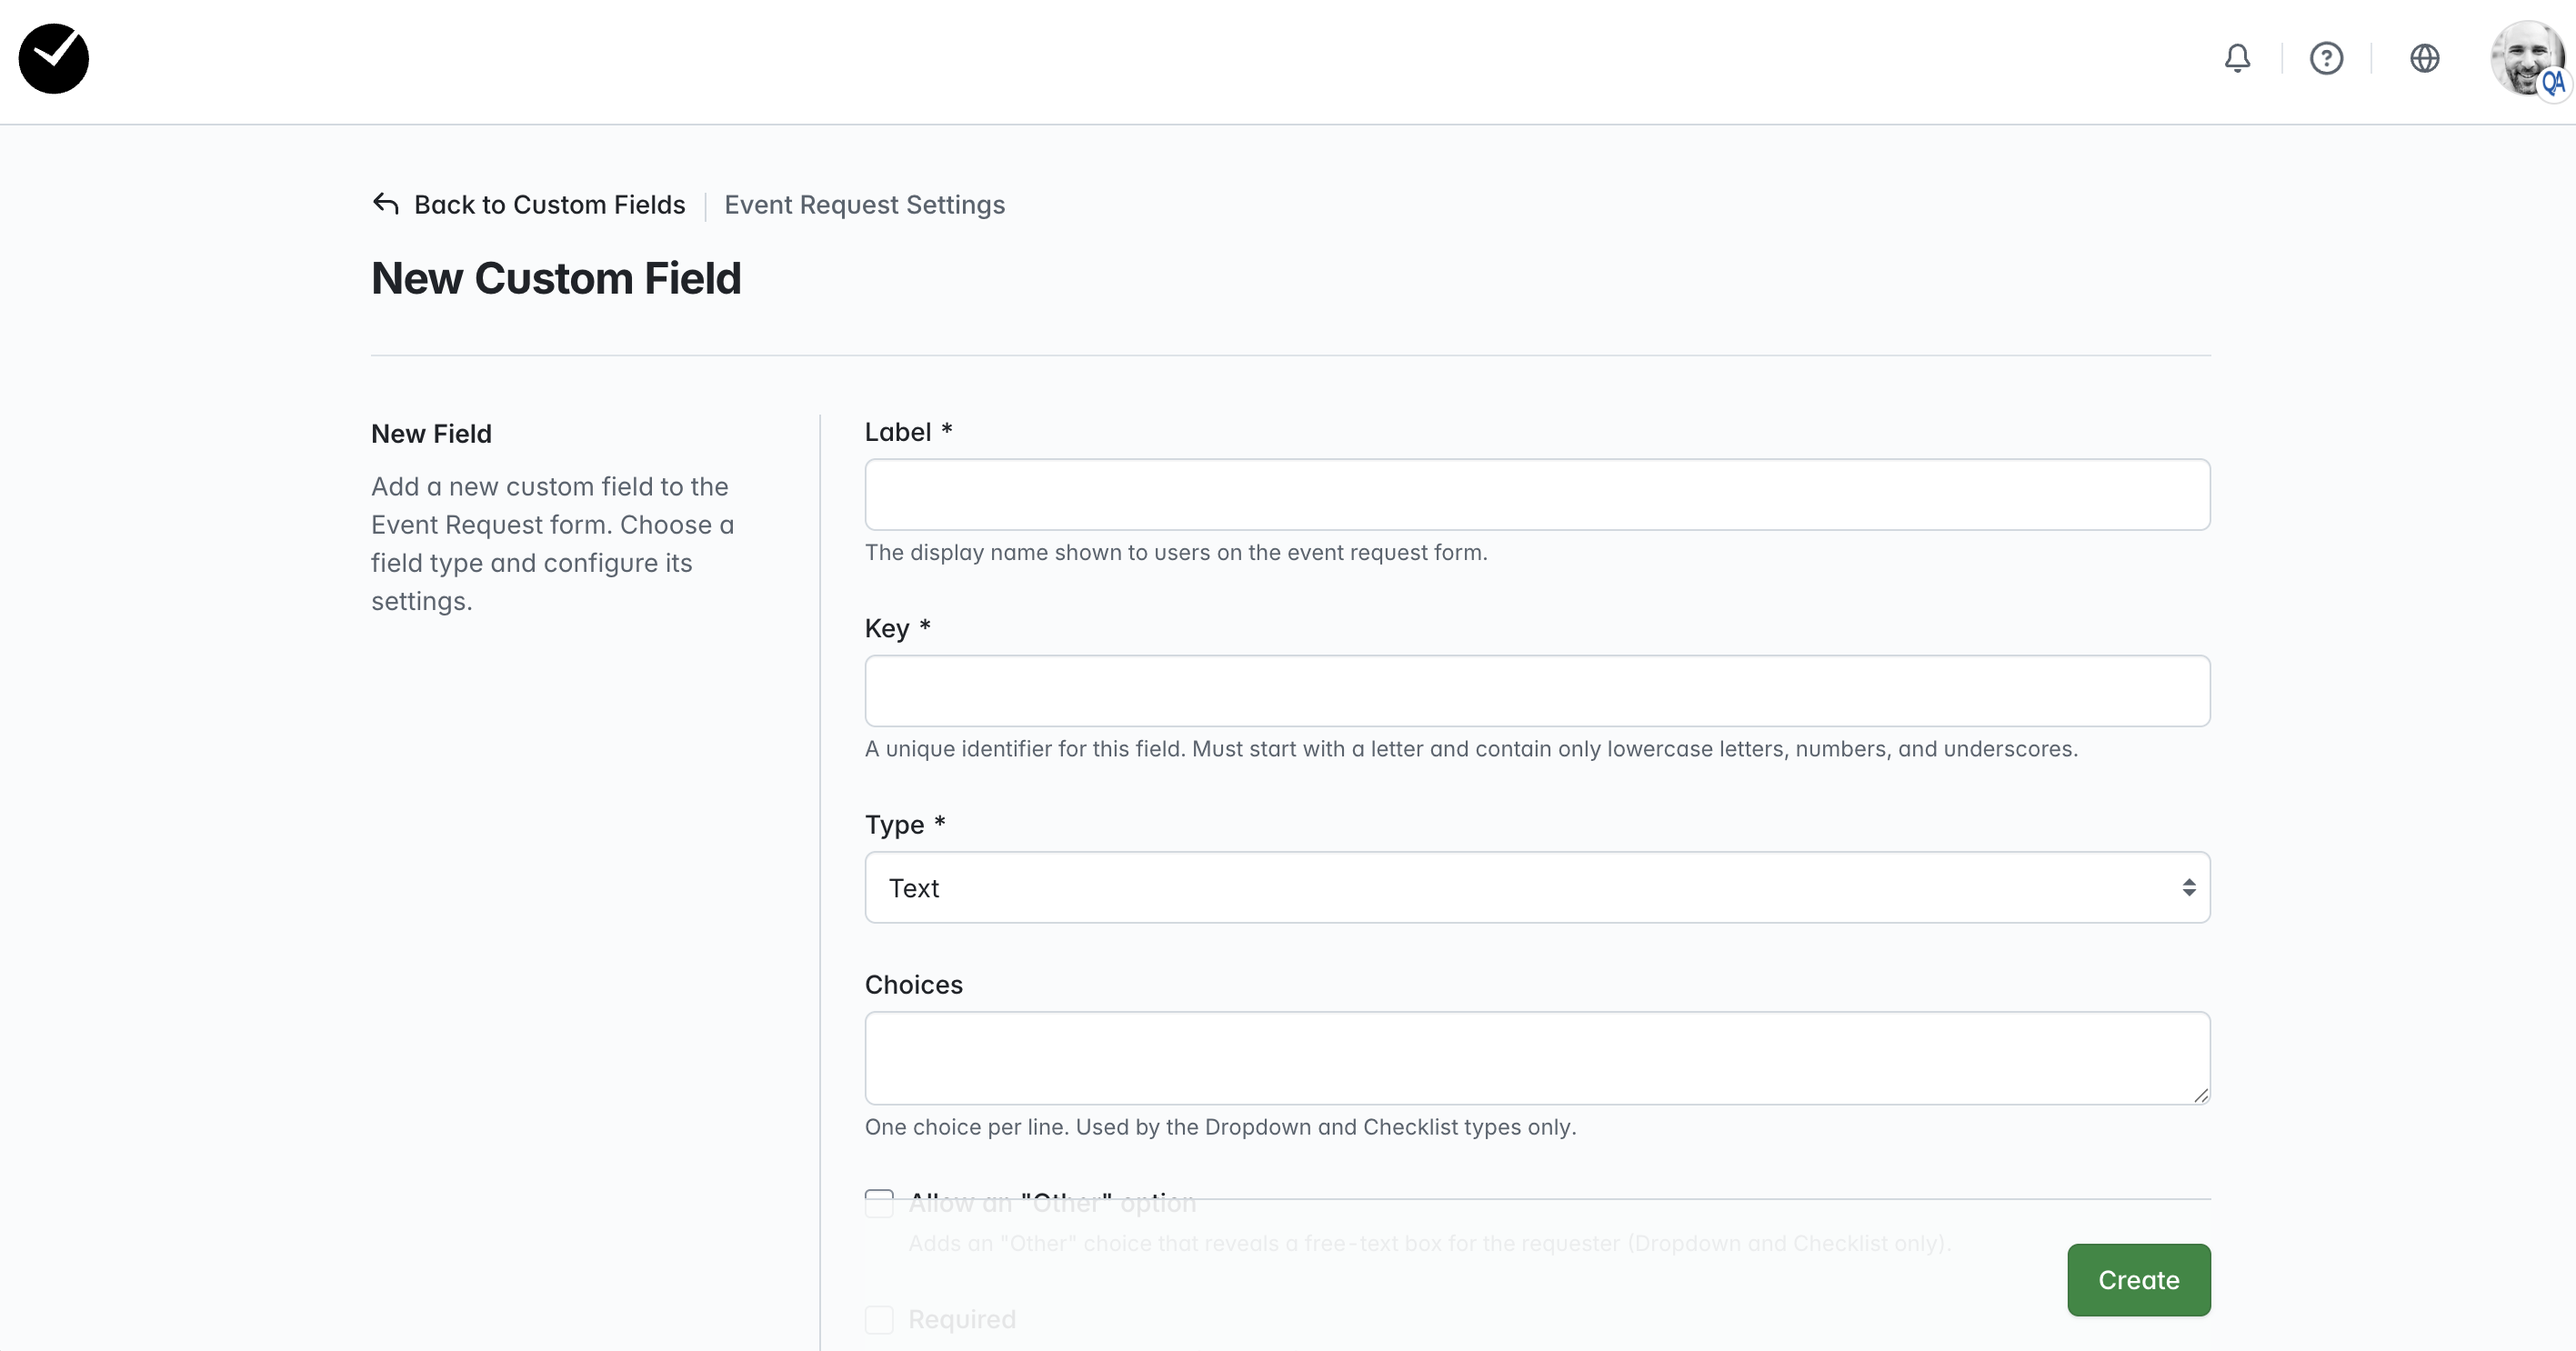
The following can be configured as follows, any field noted with an asterisk (*) is mandatory and must be completed to successfully save your field:
- Label - this is the label that will display for your custom field.
- Key - this is will be the unique identifier for your custom field. This is required as it assists us with identifying unique fields that may share the same name. It must be lower case and only letters/numbers, eg department_selection_1.
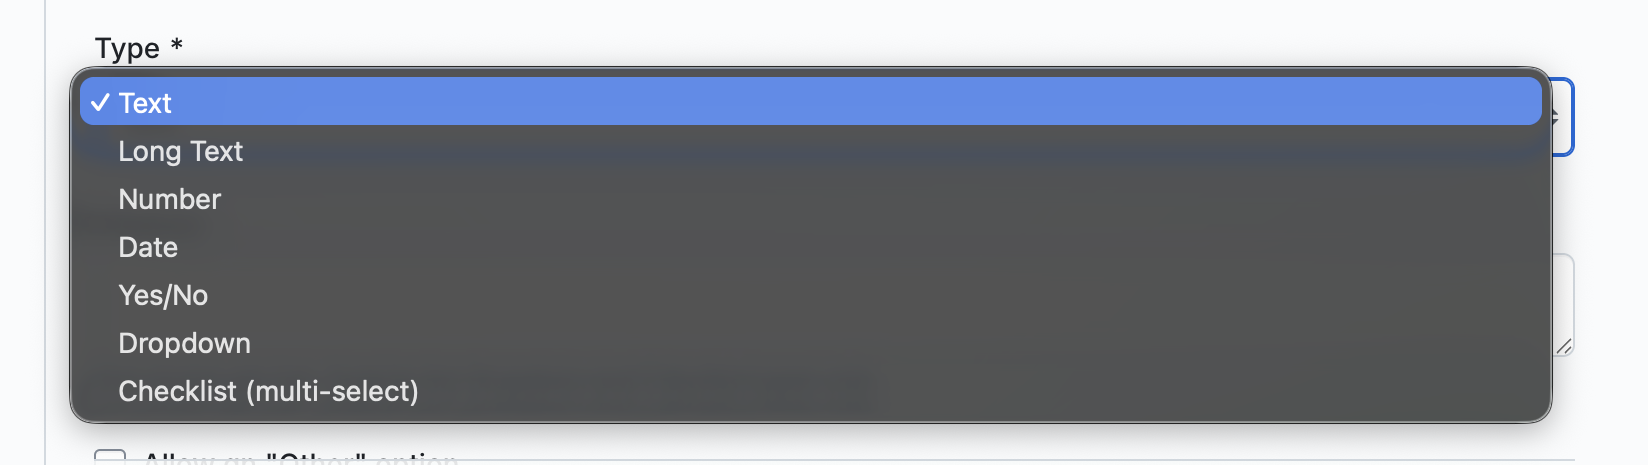
- Type - this allows you to select the type of field that will be displayed. We offer the following styles:
- Text - standard single line text input.
- Long Text - text area for larger amounts of text input.
- Number - accepts number input only.
- Date - accepts date-formatted input only.
- Yes/No - provides a single checkbox, 'Yes'=selected, 'No'=unselected.
- Dropdown - dropdown menu displaying multiple options, selecting a single choice.
- Checklist (multi-select) - displays multiple checkboxes, with the ability to select multiple choices:
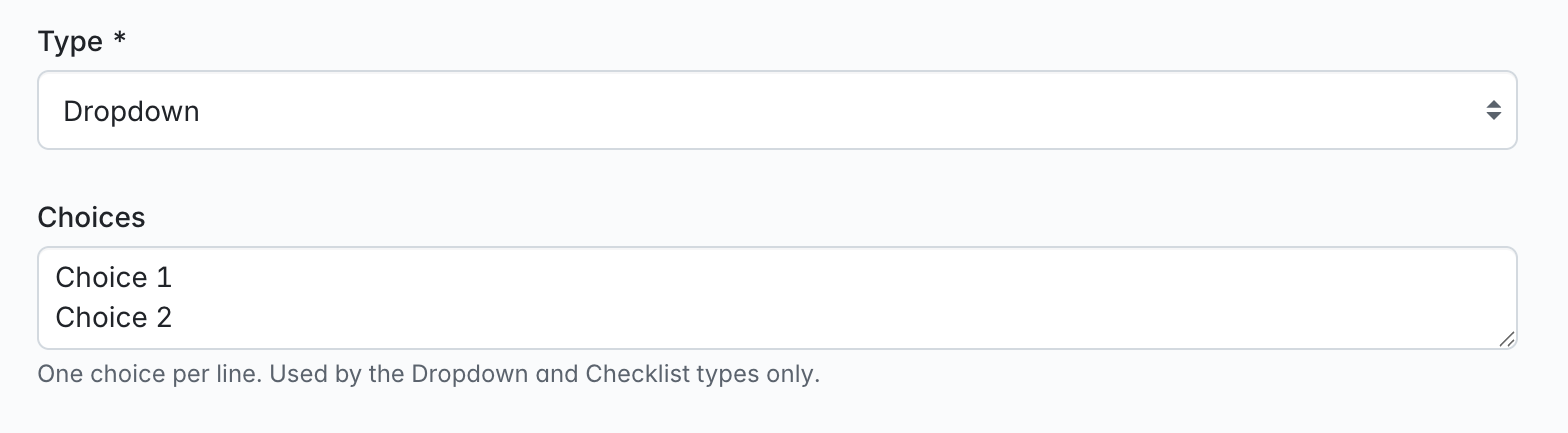
- Choices - where a Dropdown or Checklist 'Type' has been selected above, enter your choices into this text area, one per line, eg:
- Allow an 'Other' option - where a Dropdown or Checklist 'Type' has been selected, enabling this will display an 'Other' option on the dropdown/checklist field. When selected, a text area will be displayed that the requestor has to fill to proceed.
- Required - sets the field to be mandatory, the requestor must make selection/input to proceed with their request.
- Help Text - allows you do add some notes/guidance on how to complete the field, this is displayed beneath the field on the form when added.
- Placeholder - allows you do add some 'placeholder' text within the field to help guide the requestor with an example of how to input data into the field.
- Validation pattern (regex)/Validation message - using regex, you can apply a validation pattern to ensure that any data entered into the field is a uniform standard, and will not accept inputs matching the regex pattern. You can also provide a 'Validation message' to assist the requestor if they submit invalid data, such as 'This field must be in email format, eg [email protected]'.
- Minimum/Maximum Length - set a minimum or maximum length of characters (or both!) for the field. When too few characters are entered, we will display a message informing the user, and we will not allow characters to exceed the maximum length when set.
So how do I begin building my custom fields for my organization's Event Requests?
As mentioned above, when in the 'Custom Fields' area of your Site Settings, click on the '+ New Field' button to begin adding your custom field. We will demonstrate two examples here to show how the flow can be used and how the fields will appear on your Event Request form.
Adding a custom mandatory text field
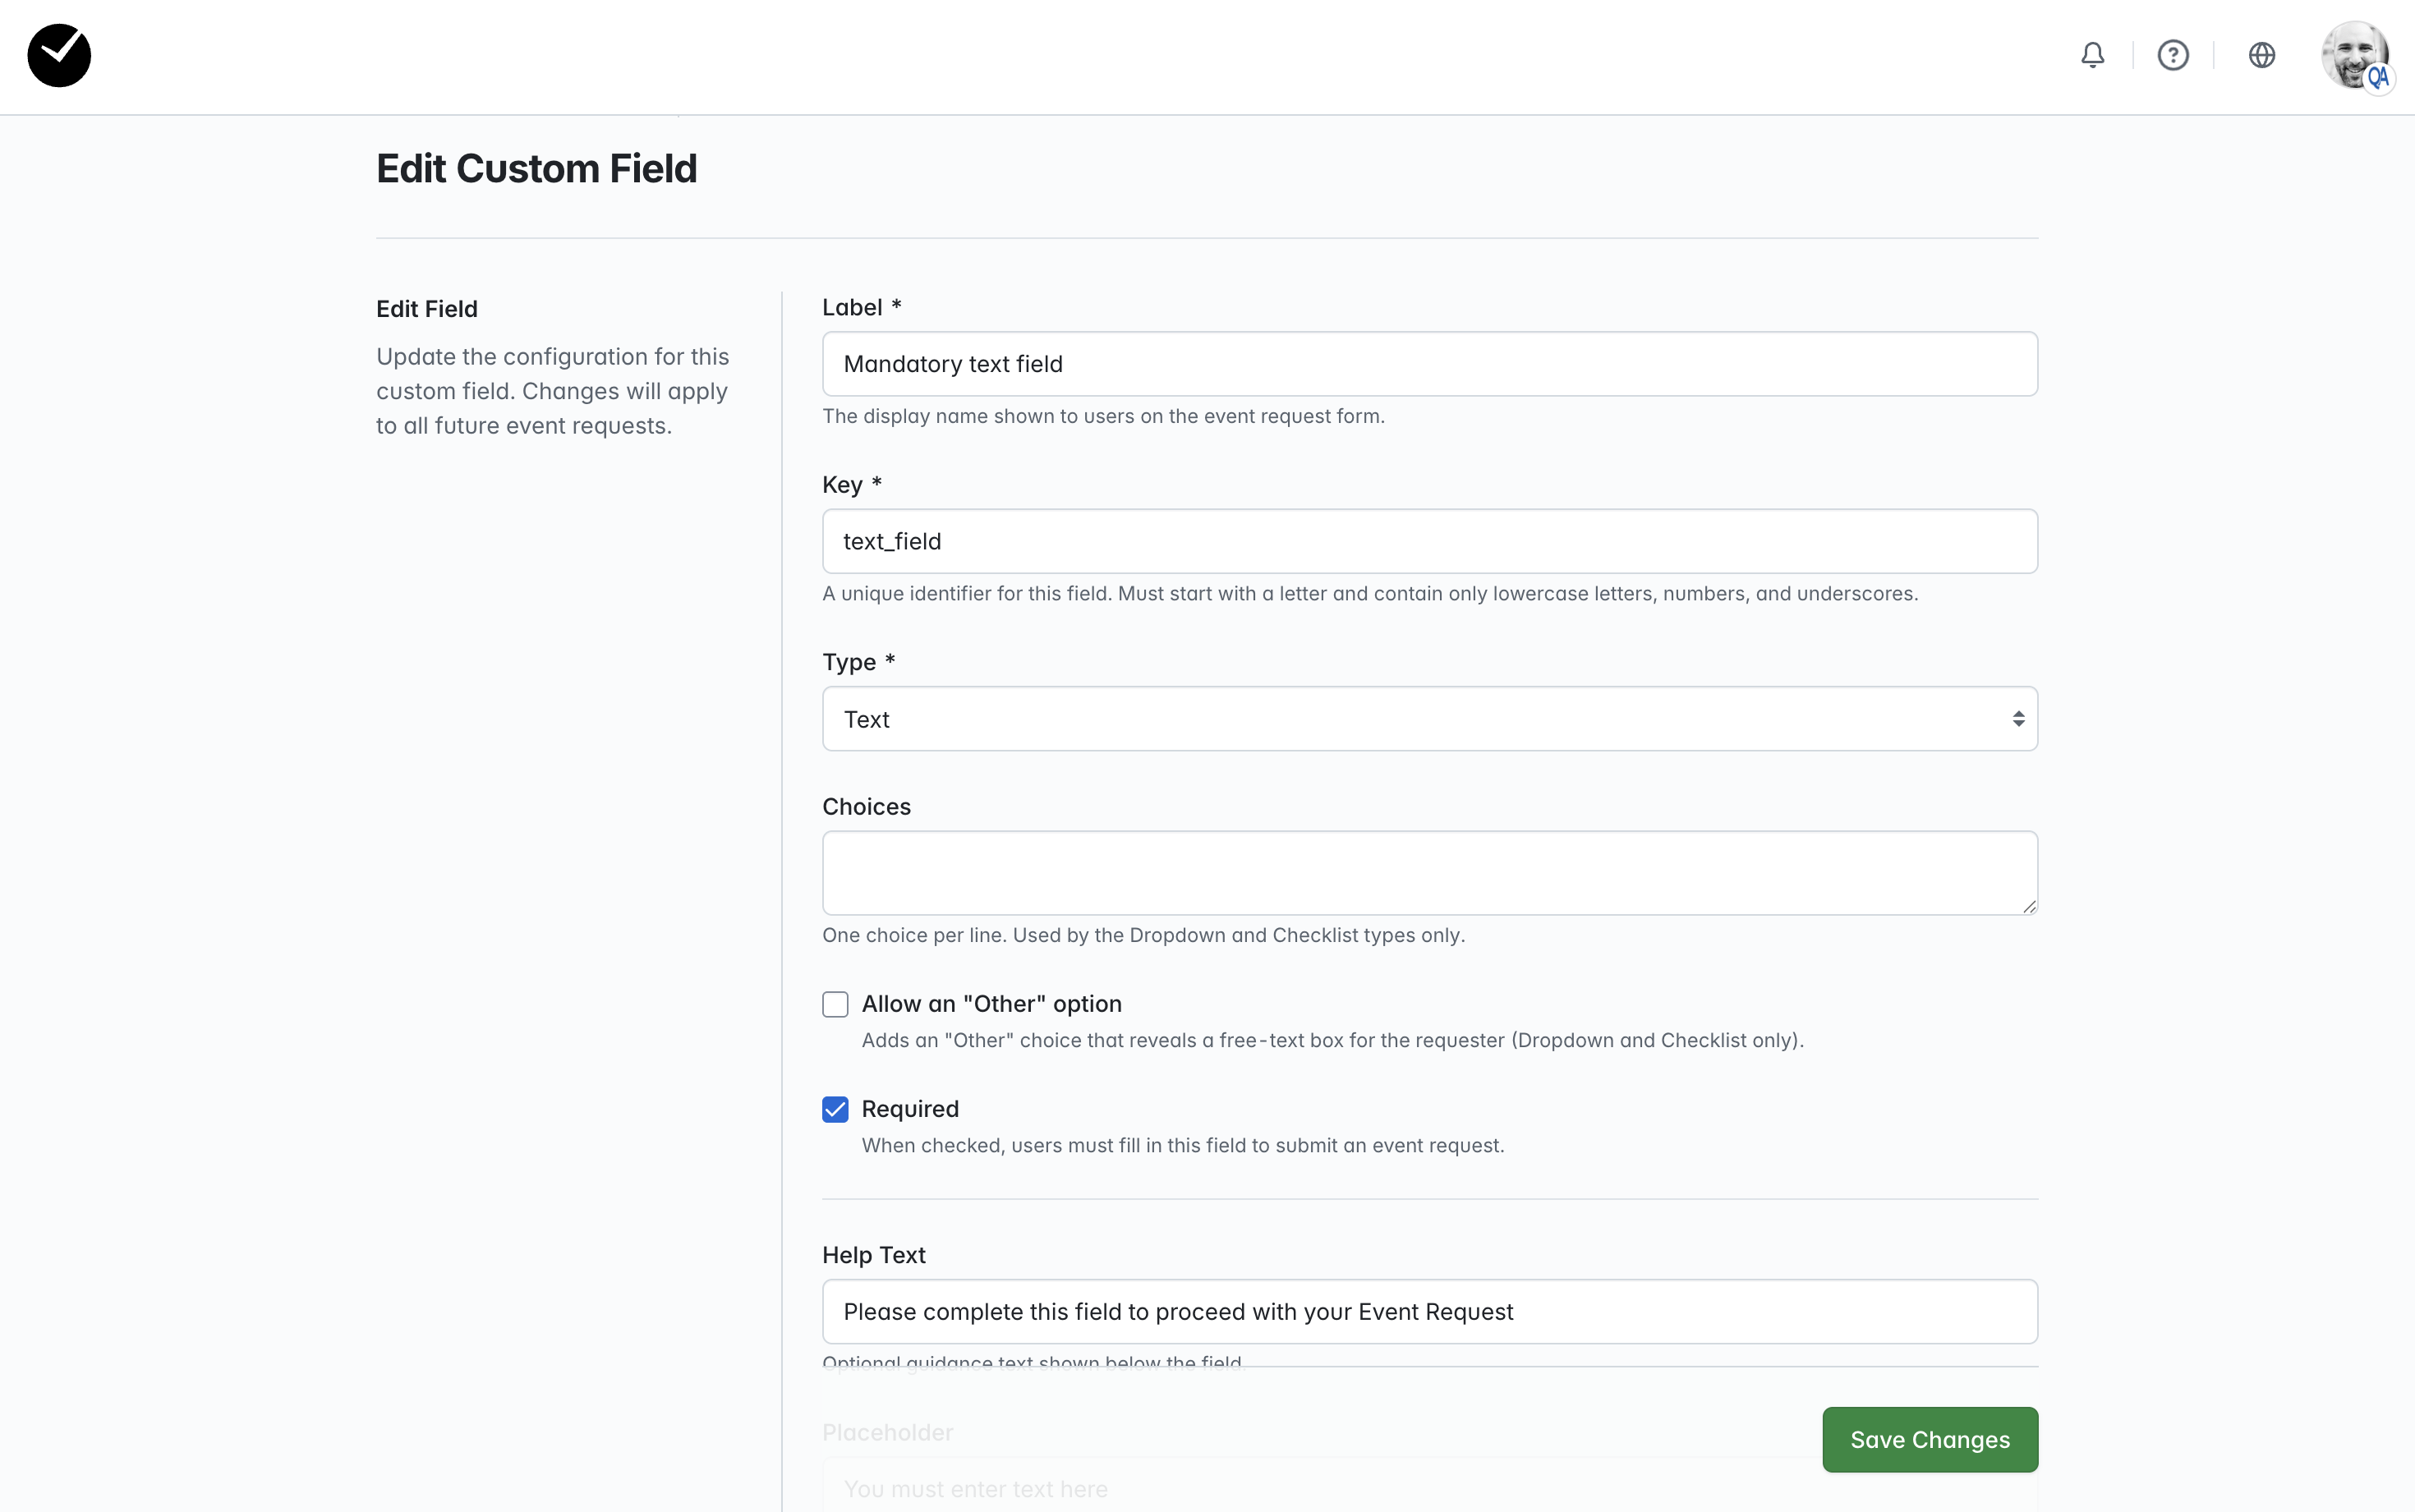
- After selecting to create a new field, we populate the following fields/configuration options:
- Label - populated
- Key - populated
- Type - Text
- Required - enabled
- Placeholder text - populated
- Help message - populated
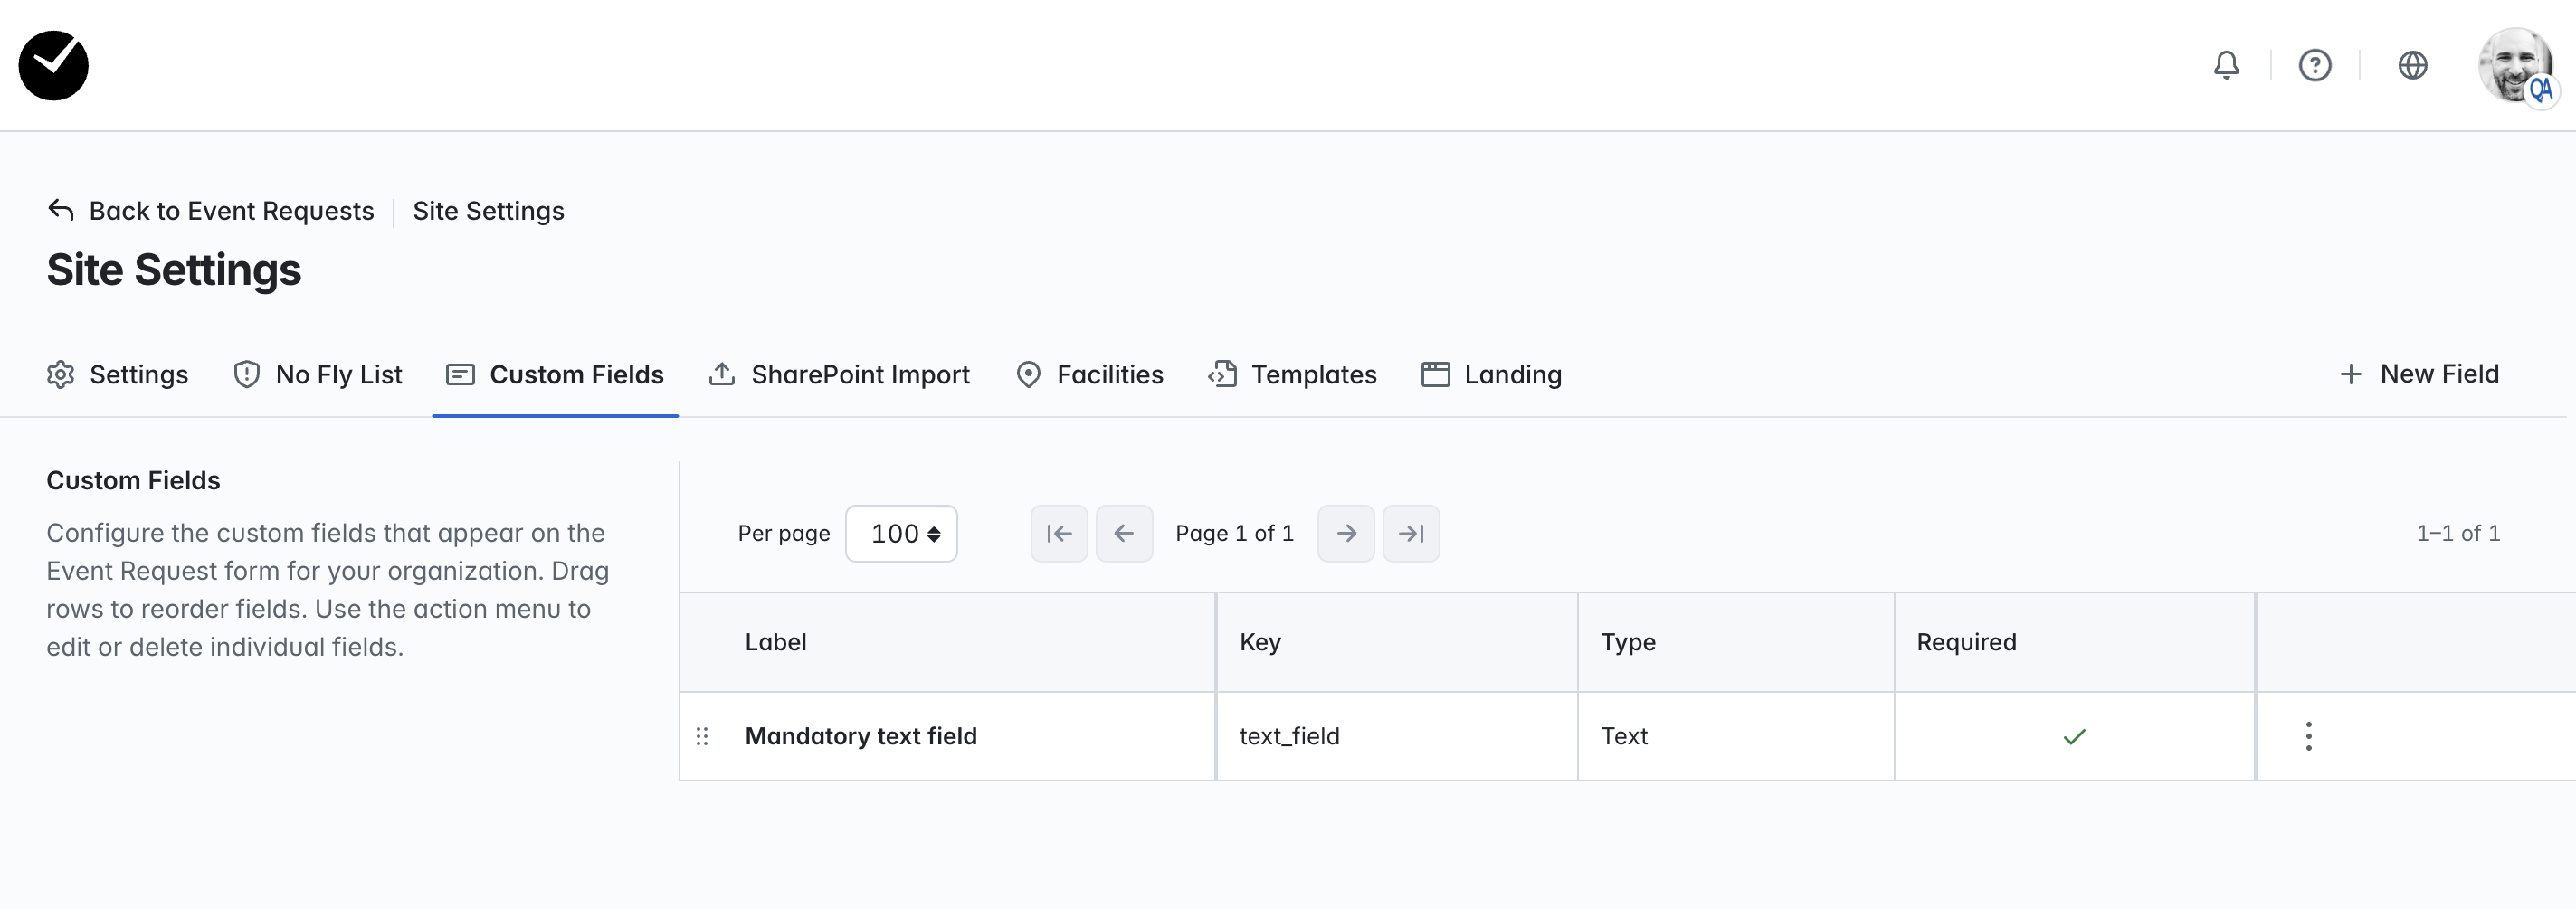
- Next we save the field, and we are returned to the Custom Fields area, with the new field showing on the grid. Note that the 'Required' column shows that the field is a mandatory field.
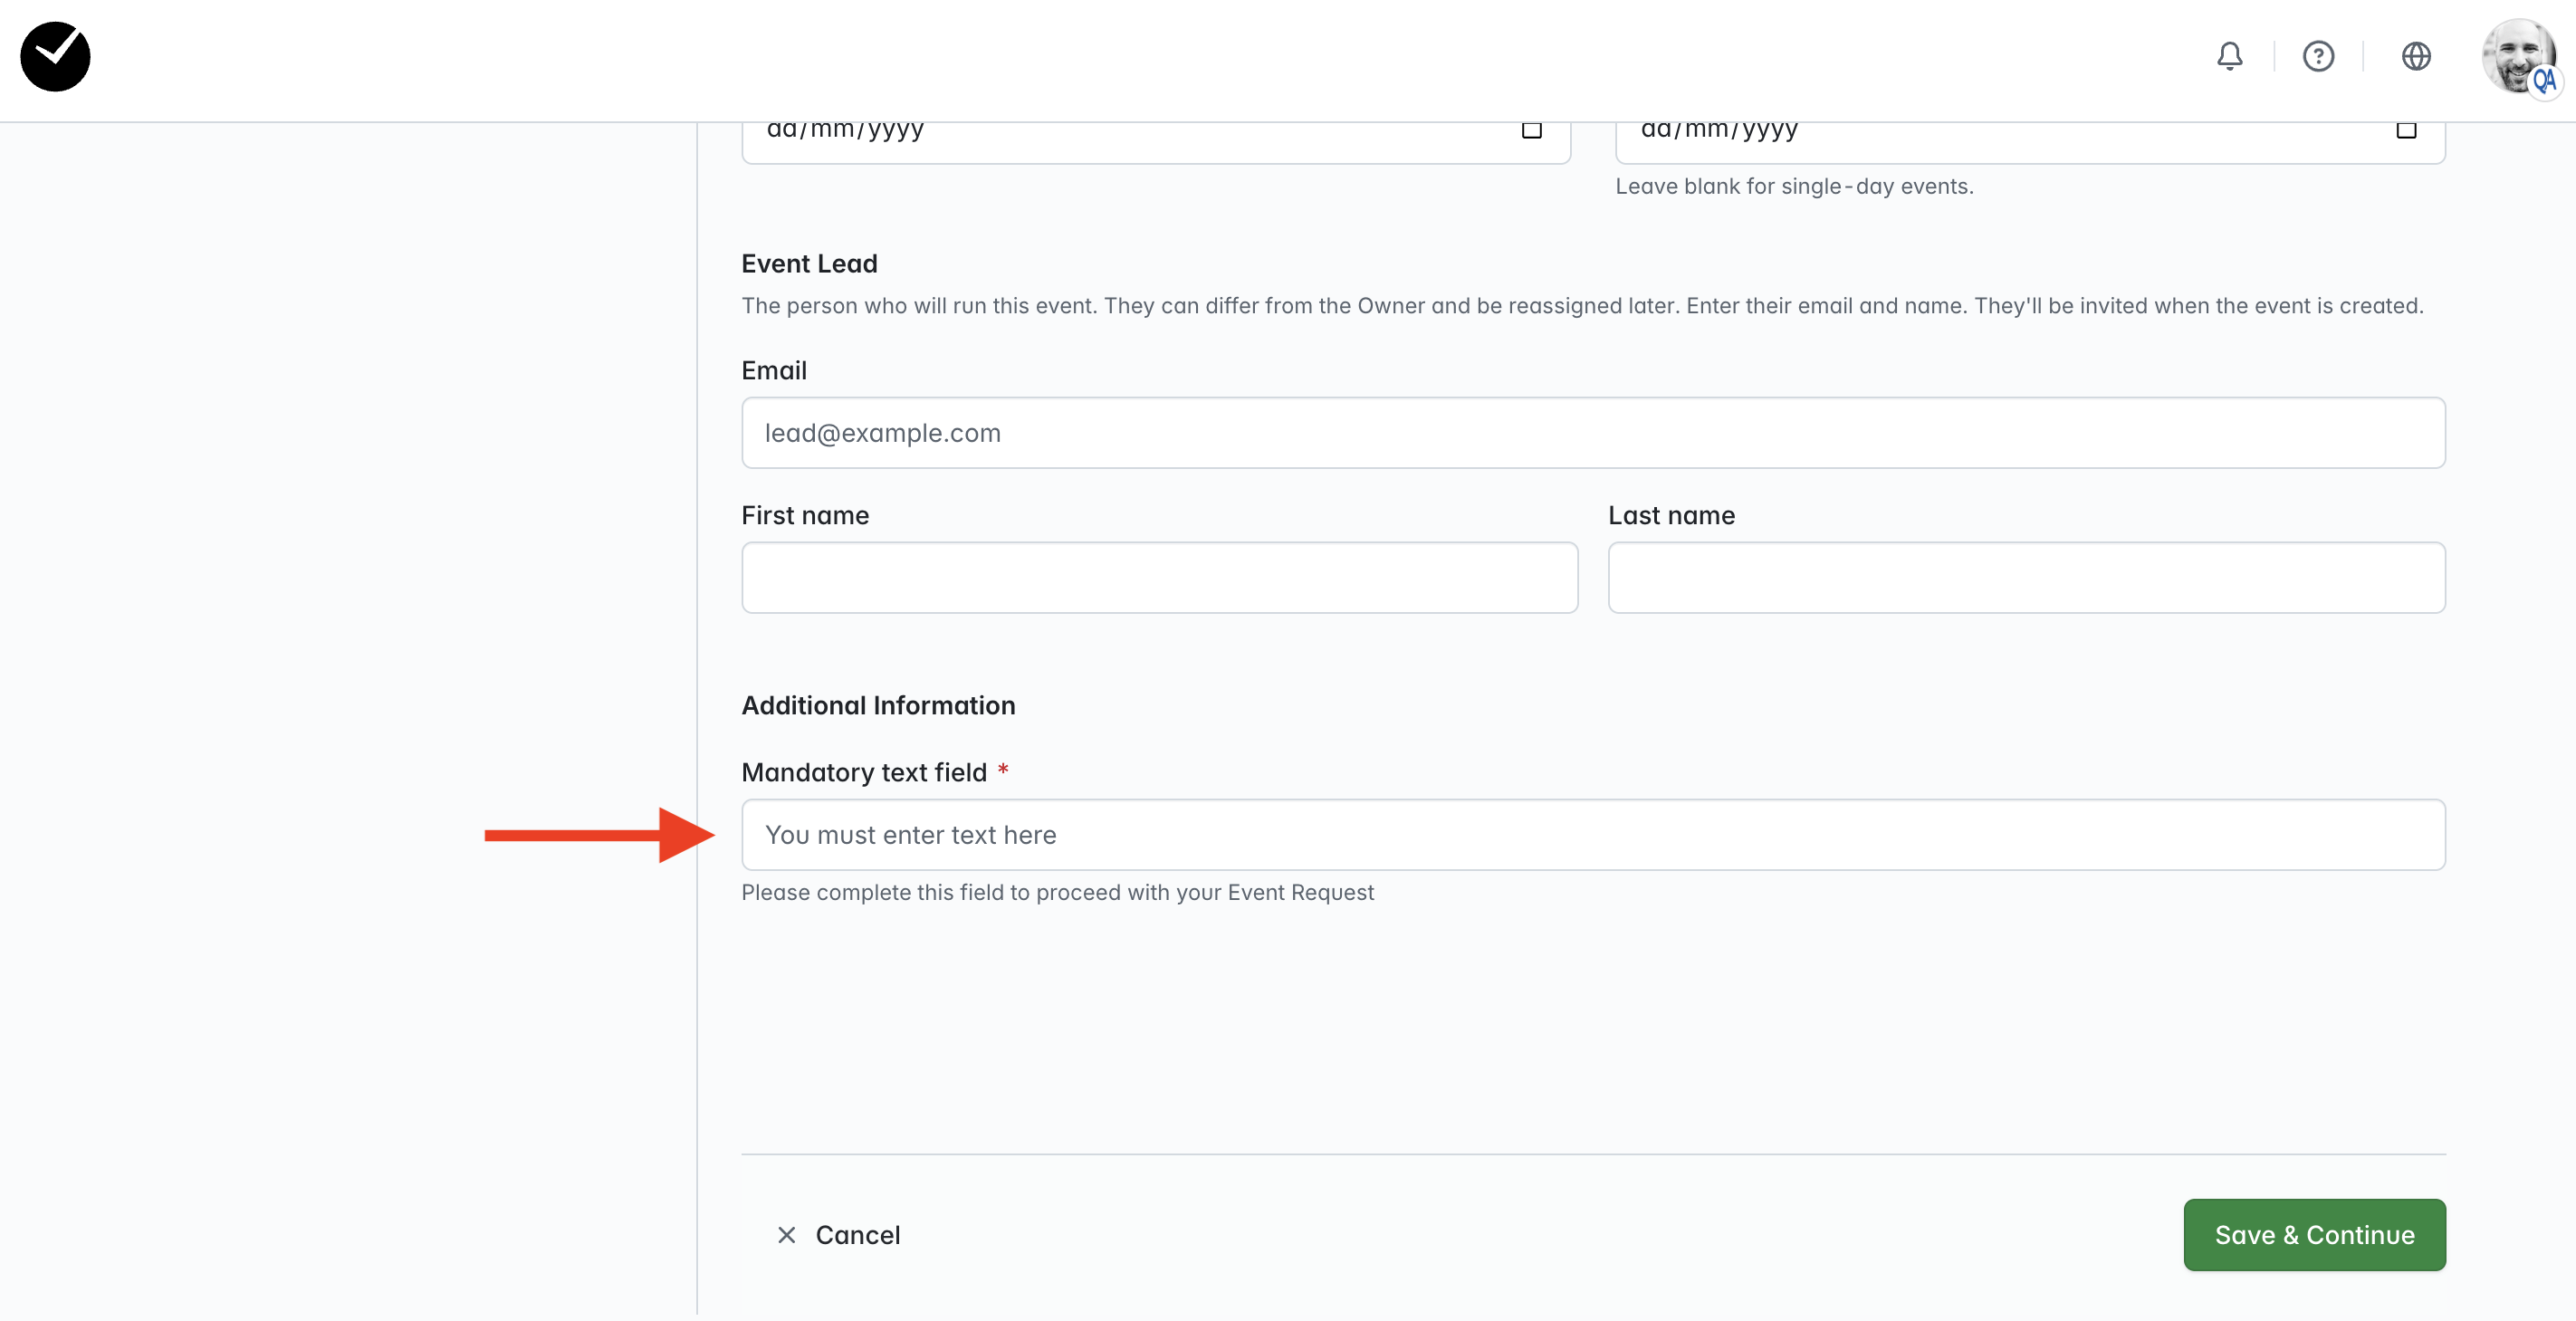
- Now when a requestor begins to create their Event Request, you can see the custom field is displayed as expected under the 'Additional Information' section:
Adding a dropdown custom field with 'Other' option enabled
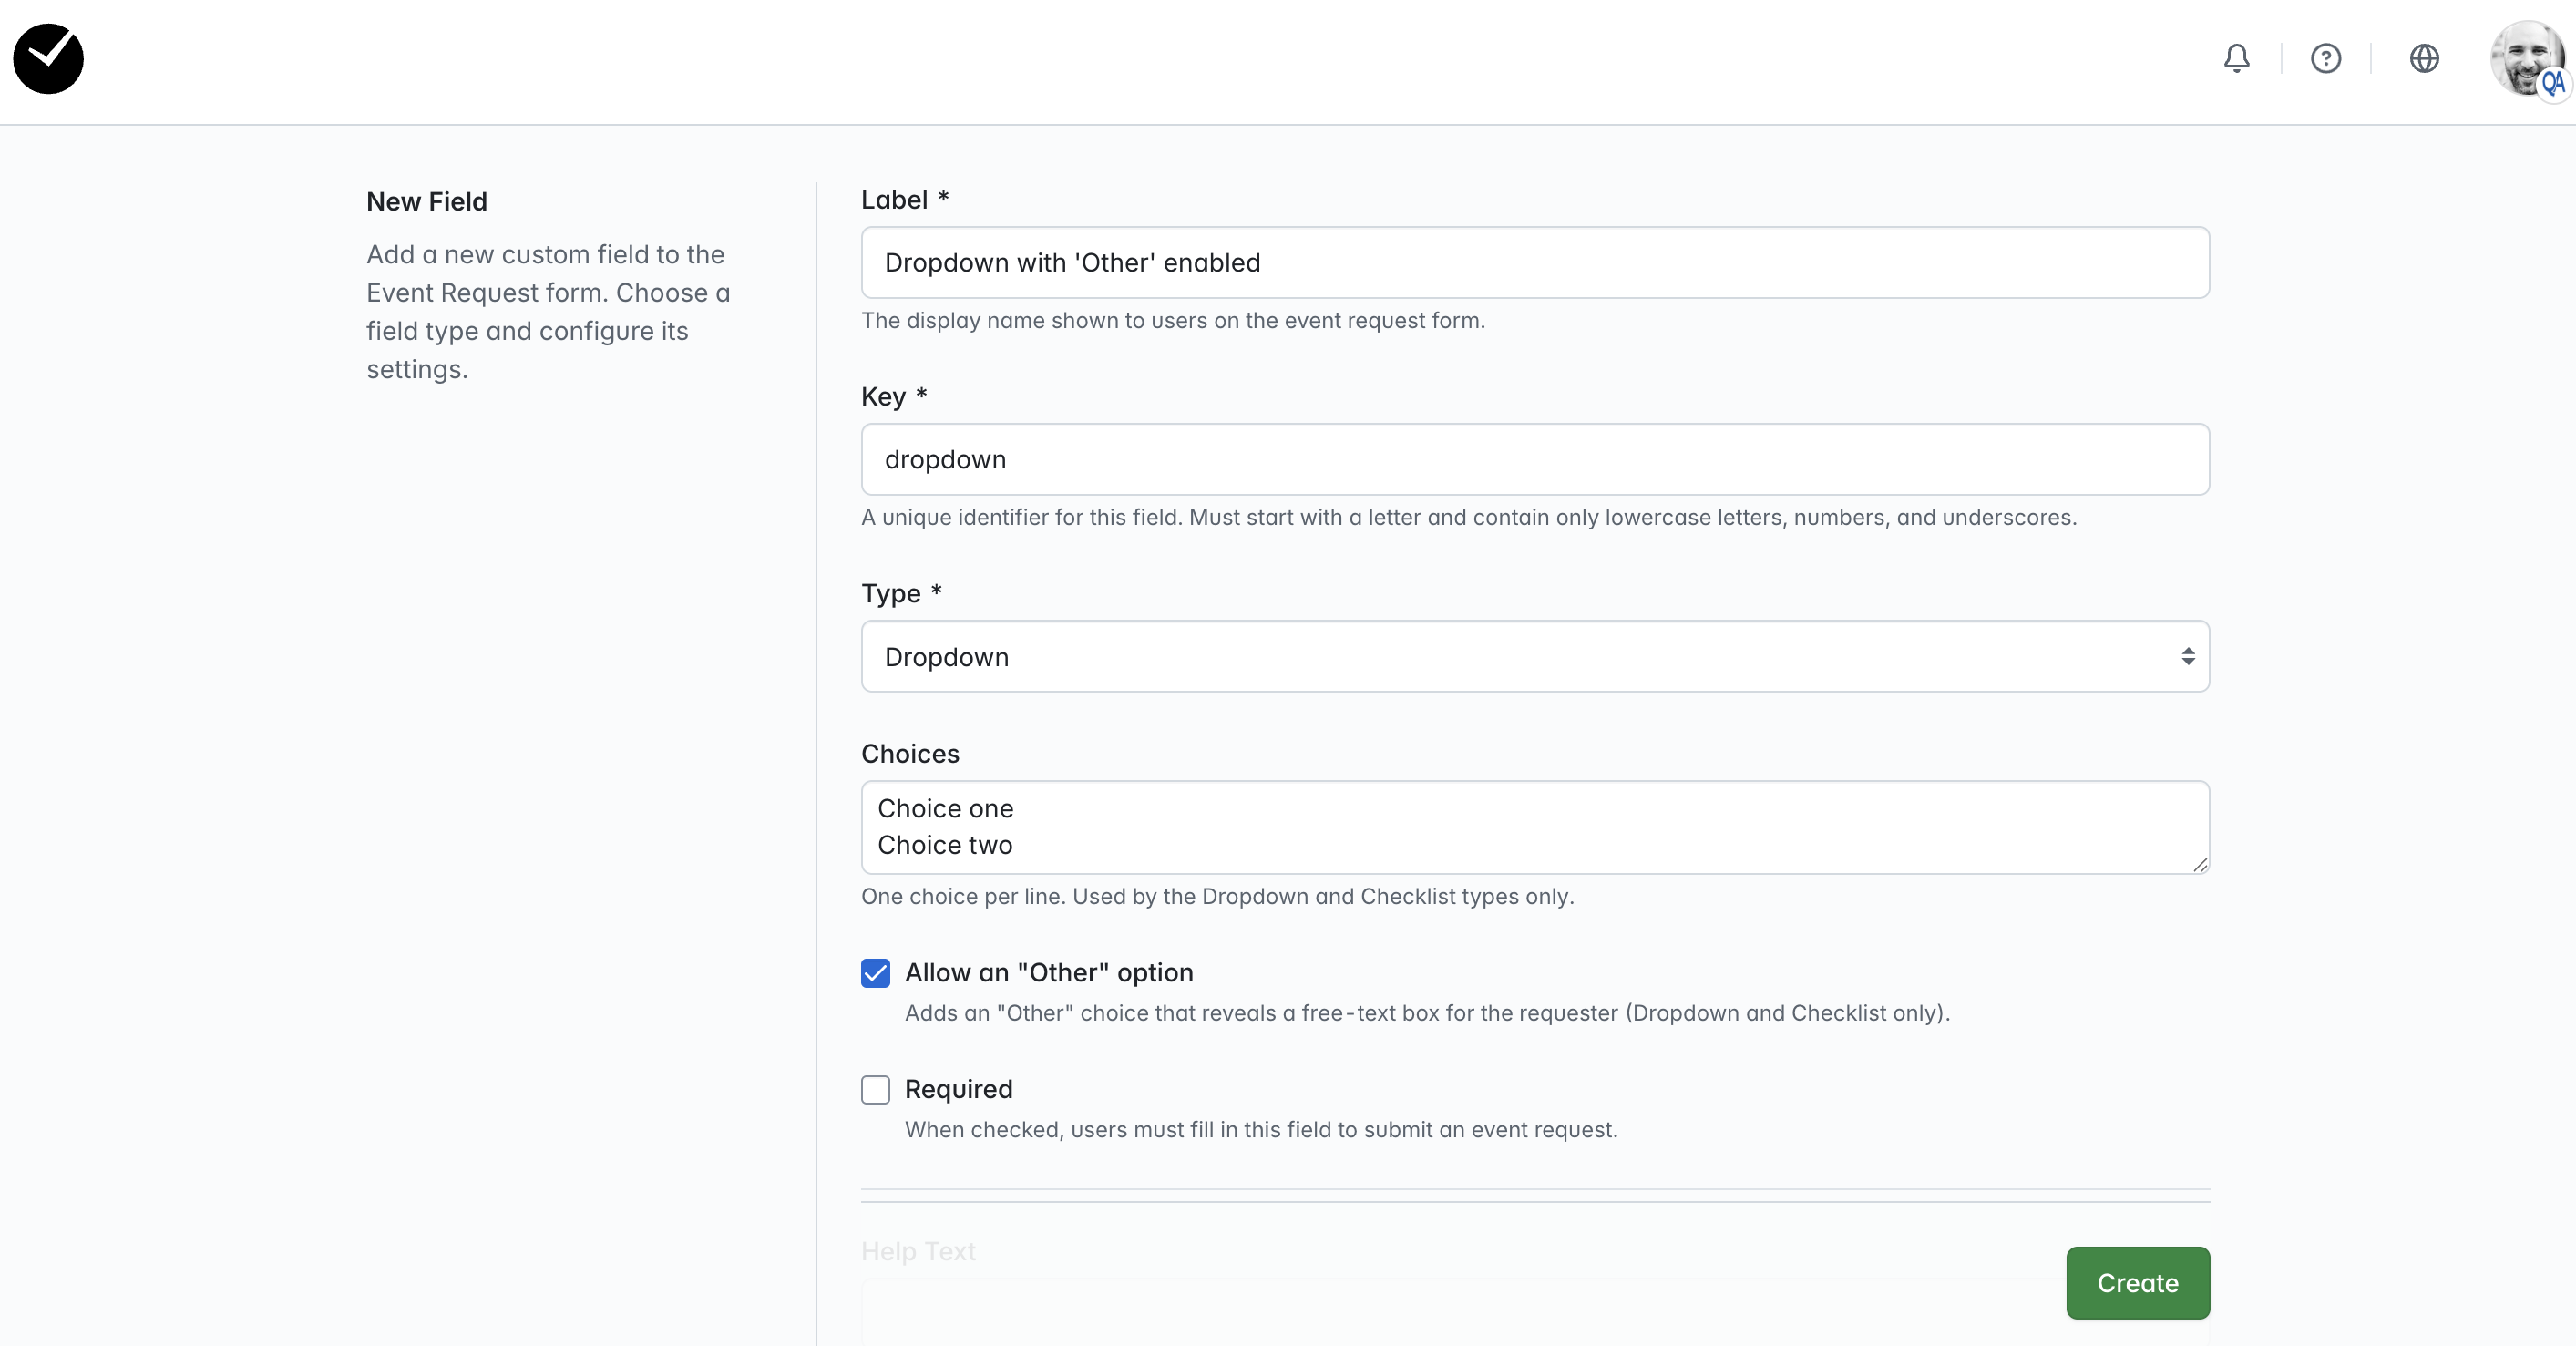
- After selecting to create a new field, we populate the following fields/configuration options:
- Label - populated
- Key - populated
- Type - Dropdown
- Choices - populated
- Allow an 'Other' option - enabled
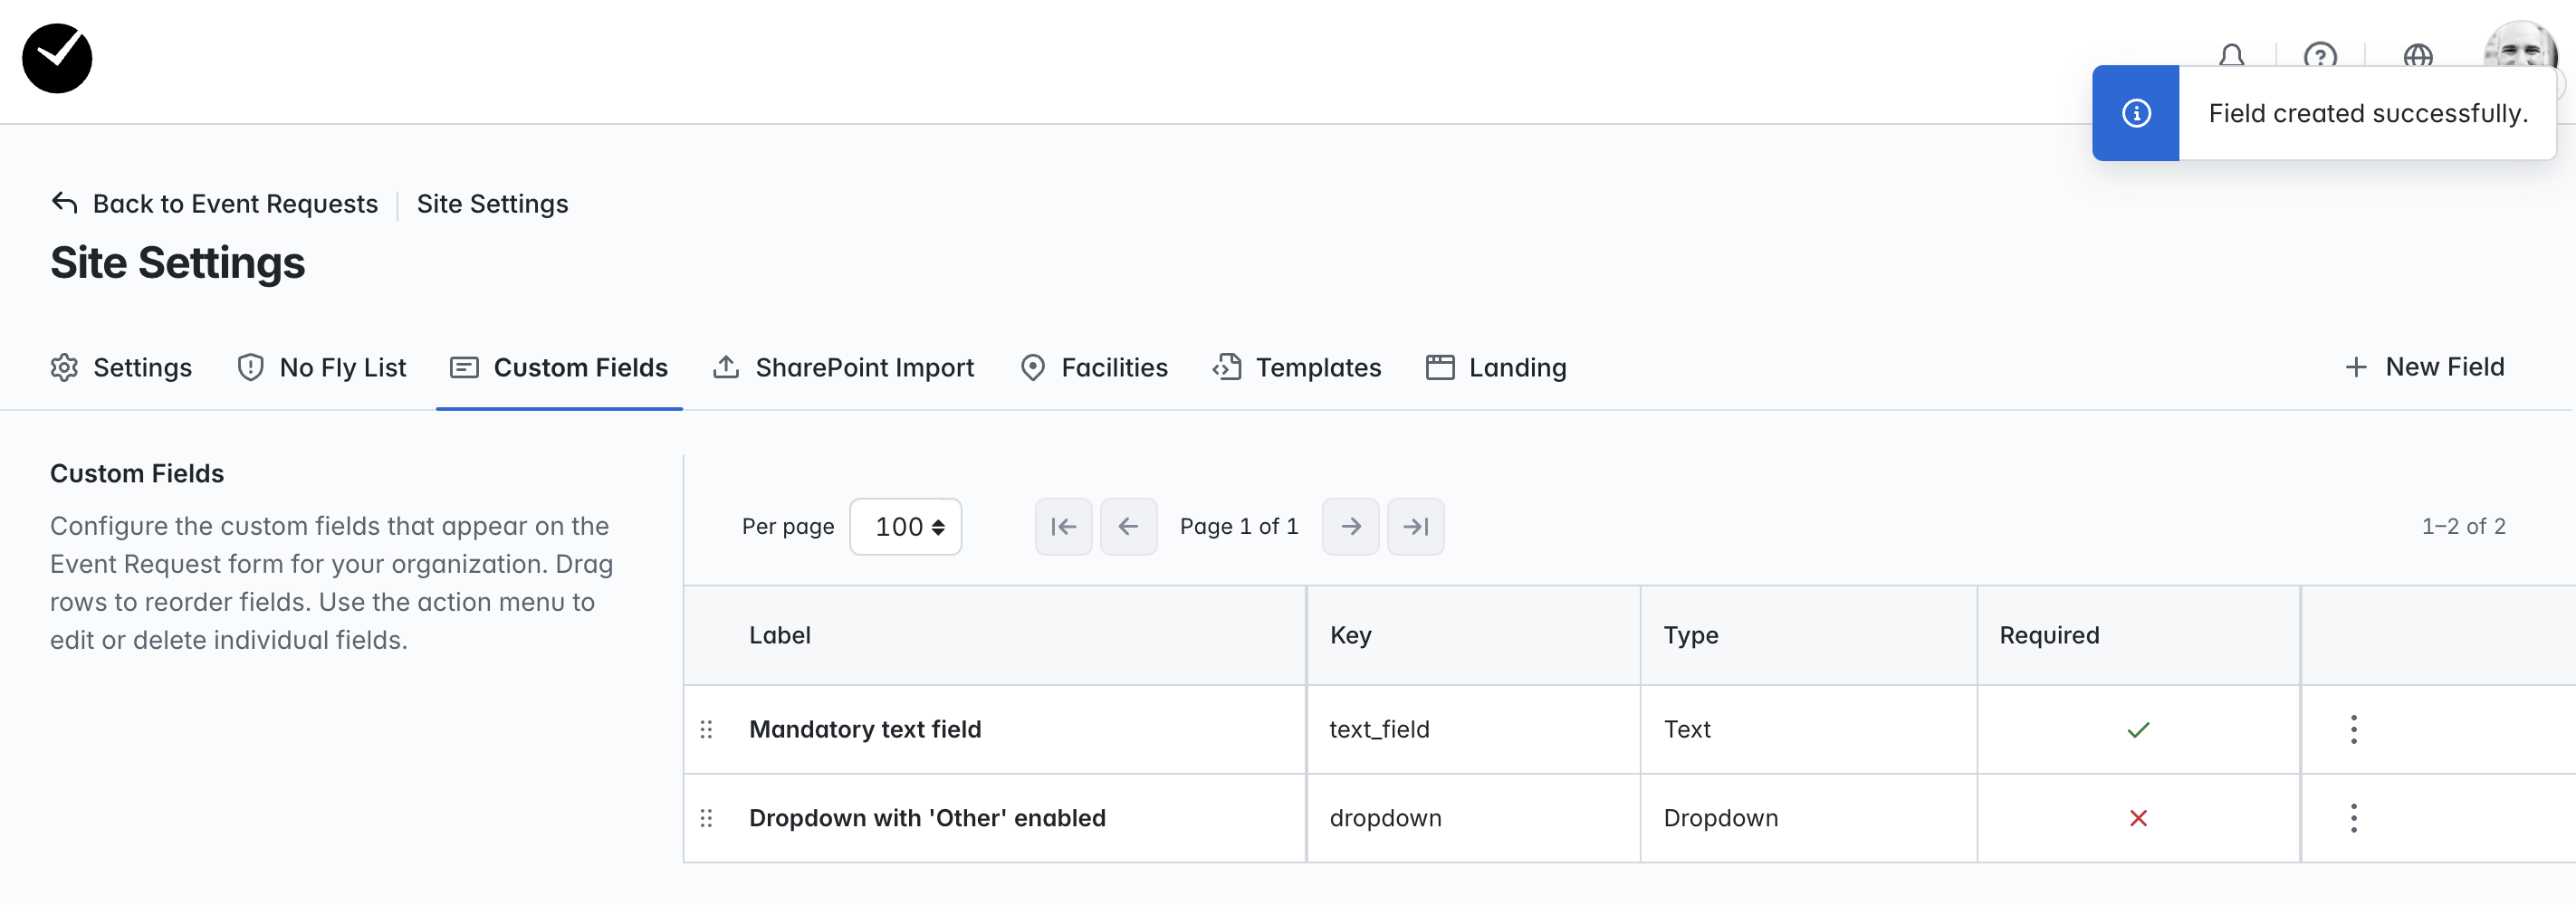
- Next we save the field, and we are returned to the Custom Fields area, with the new field showing on the grid. Note that the 'Required' column shows that the field is not a mandatory field.
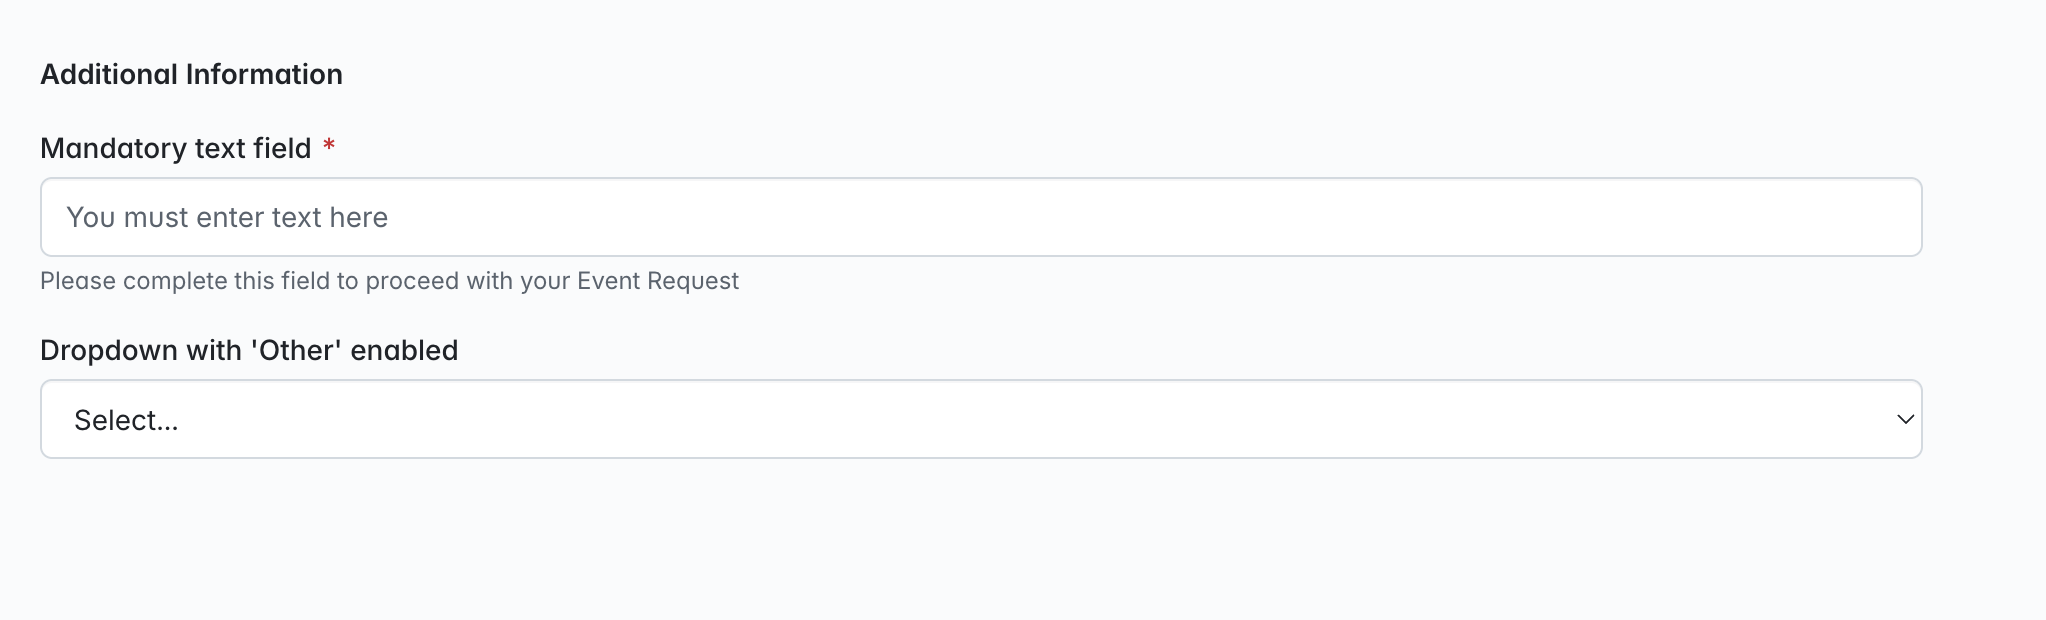
- Now when a requestor begins to create their Event Request, you can see the second custom field is displayed beneath the first as expected under the 'Additional Information' section:
- Also note that the choices added are present (including the 'Other' option), and when 'Other' is selected, a second text field is displayed:


How do I manage my custom fields once they have been added to the Event Request form?
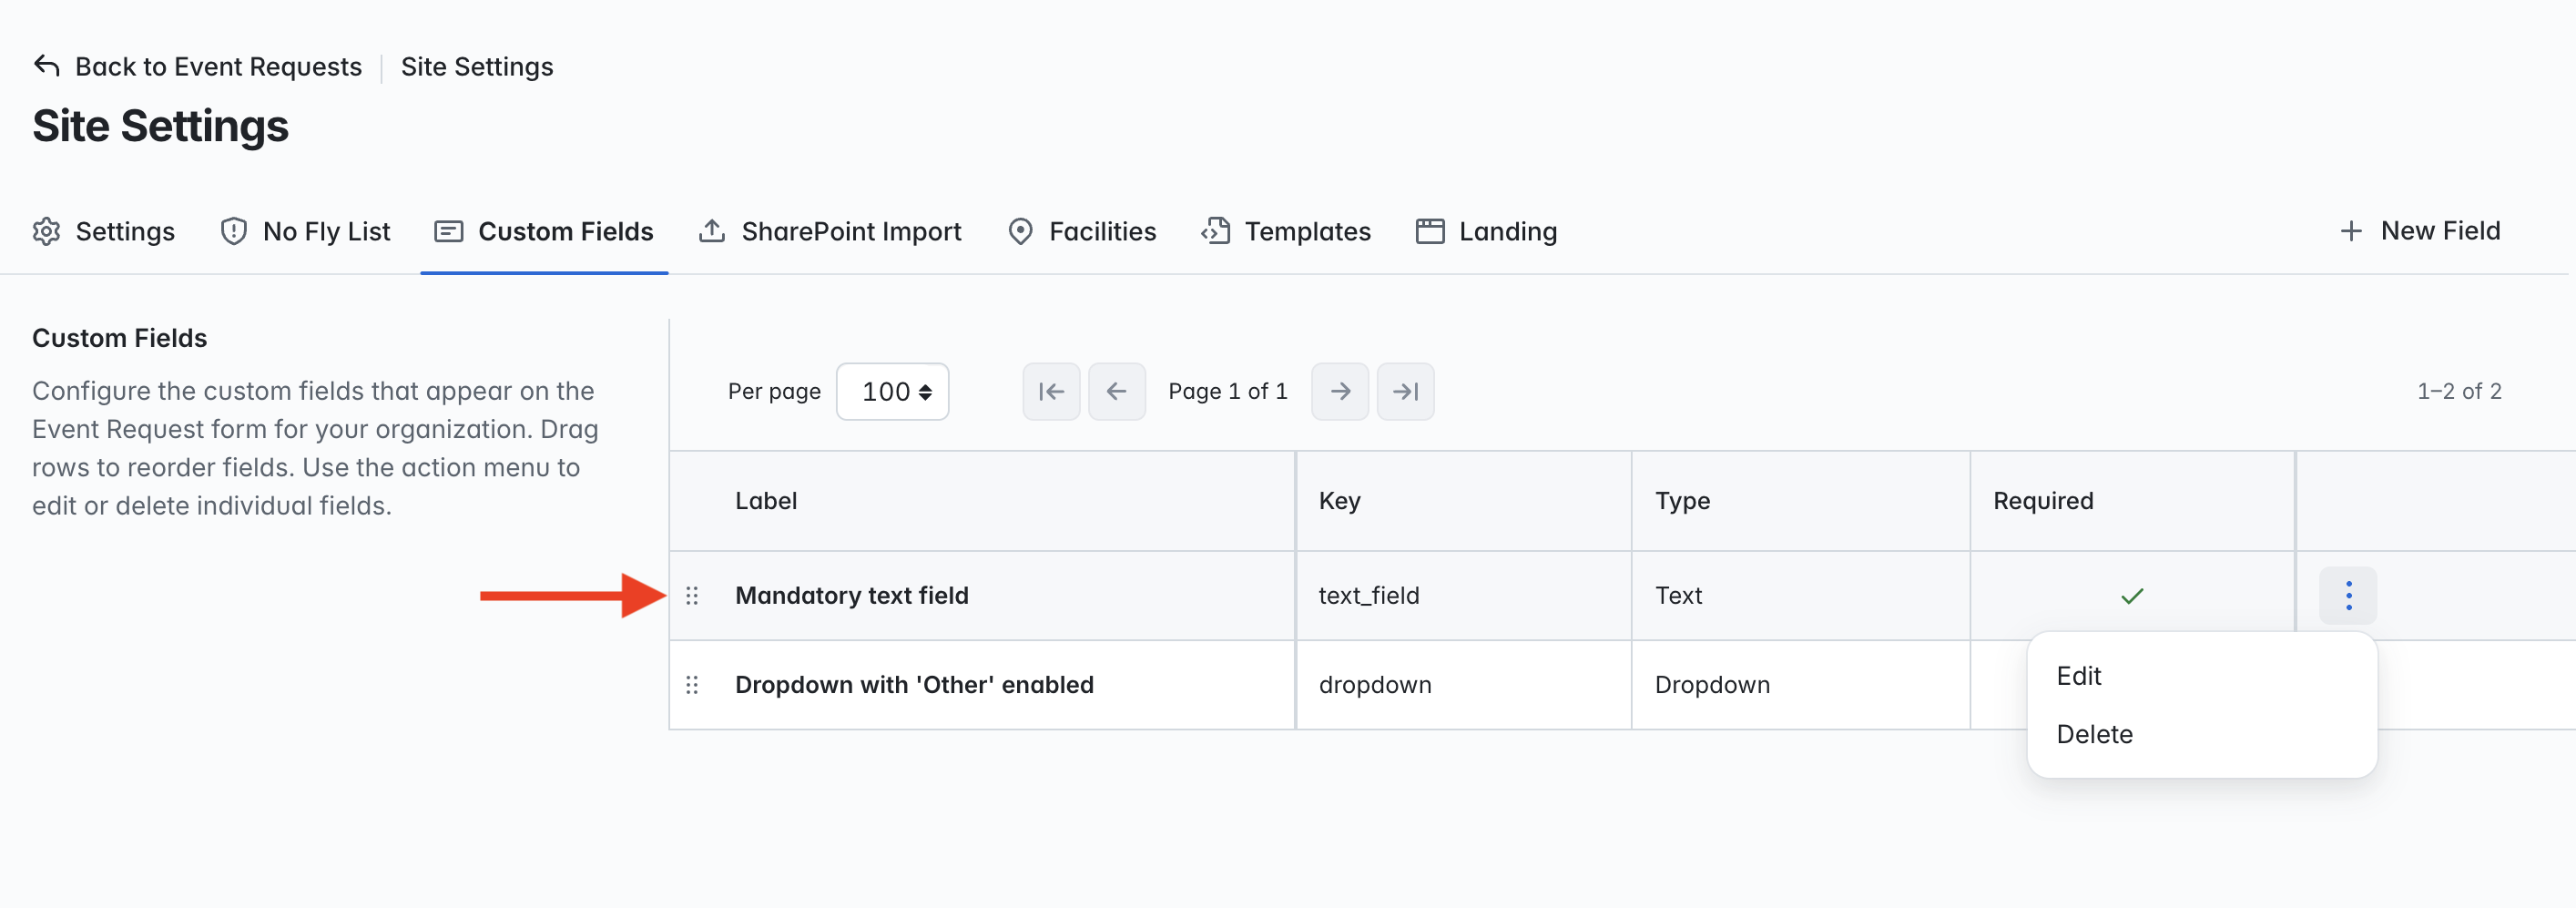
To edit or delete a custom field, click on the 3 dots at the end of the row for the field you wish to manage, and select the option you wish to action:
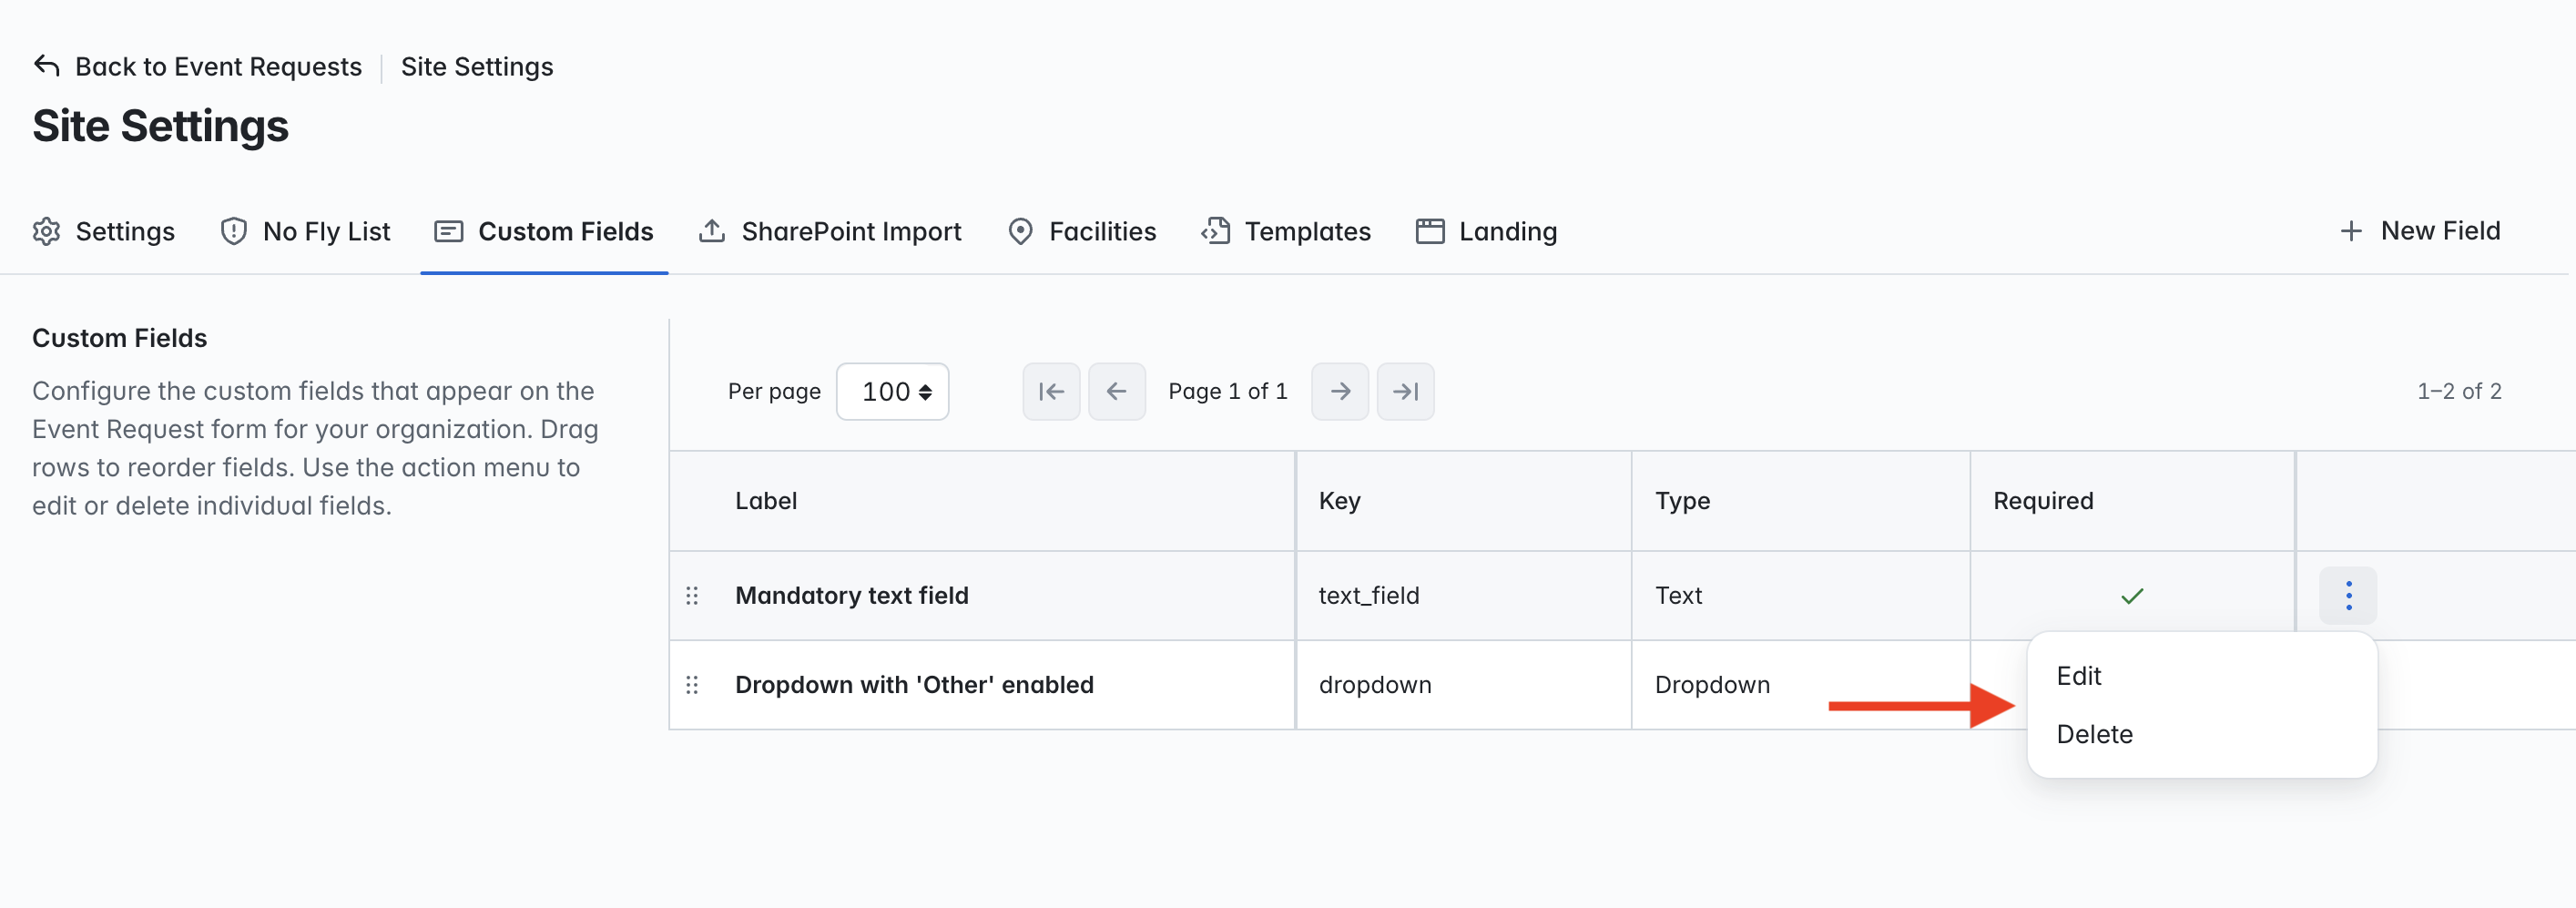
Selecting 'Edit' will take you to the 'Edit Custom Field' page, where you can make your changes as needed and save. Selecting 'Delete' will destroy the field following confirmation.
You can also re-order your custom fields by clicking on the 6 dots to the left of the row of the field you wish to move and dragging the field into the position you wish it to be displayed. There are no saving requirements needed here, this will be stored automatically.