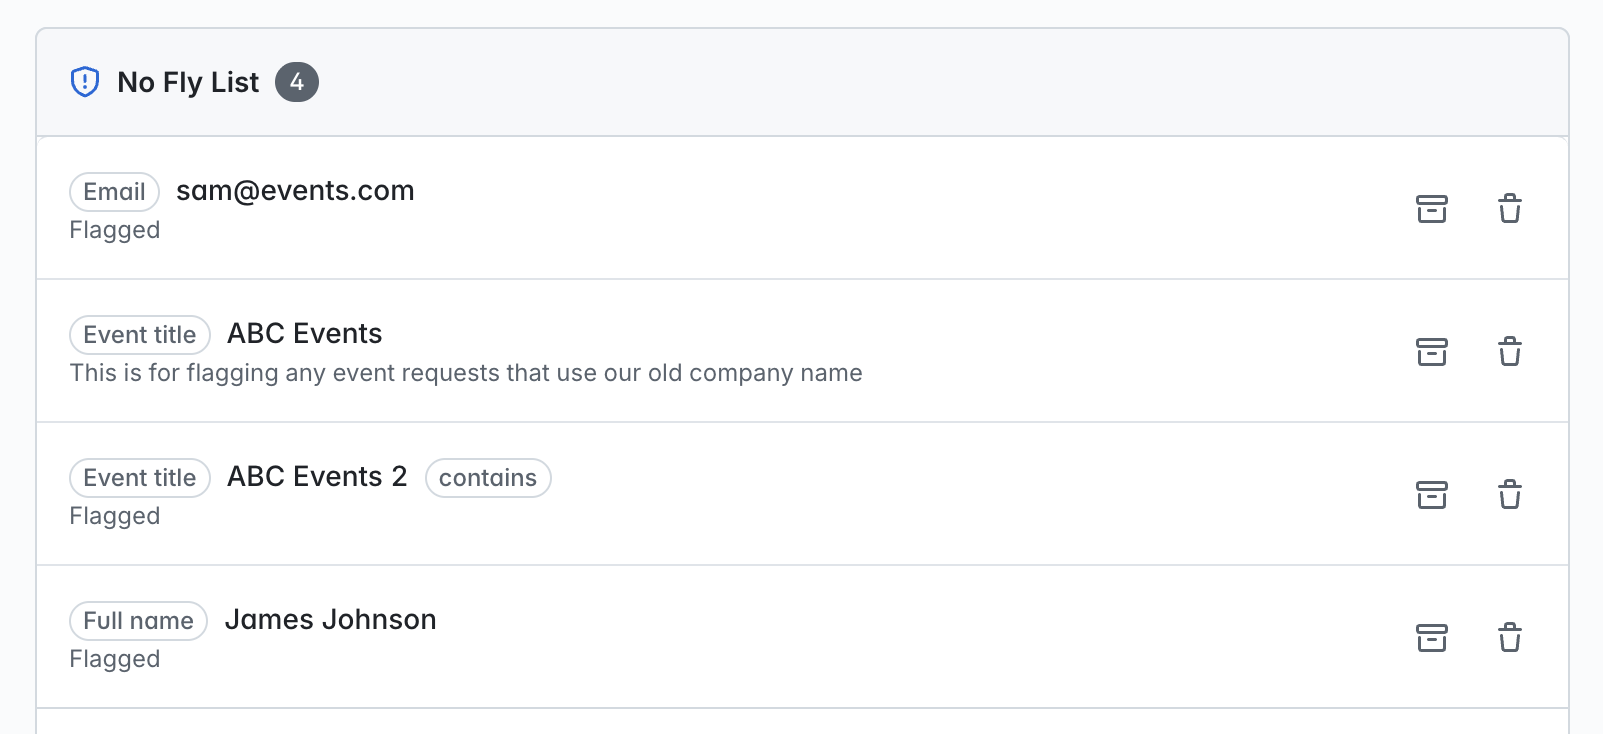
.png)
What is the 'No Fly List' feature?
Note: To use the 'Event Requests' feature, it must be enabled for your organization first. Please contact support if you are interested in activating the feature for your organization.
Only administrators can configure an organization's 'No Fly List'.
If you'd like to create a list of users or specific event titles that should be flagged for explicit review, you can begin setting this up in your Site Settings -> No Fly List area. This can be accessed from the left column in your Event Requests area by selecting the 'Site Settings' option, following by the 'No Fly List' tab on your Site Settings page:
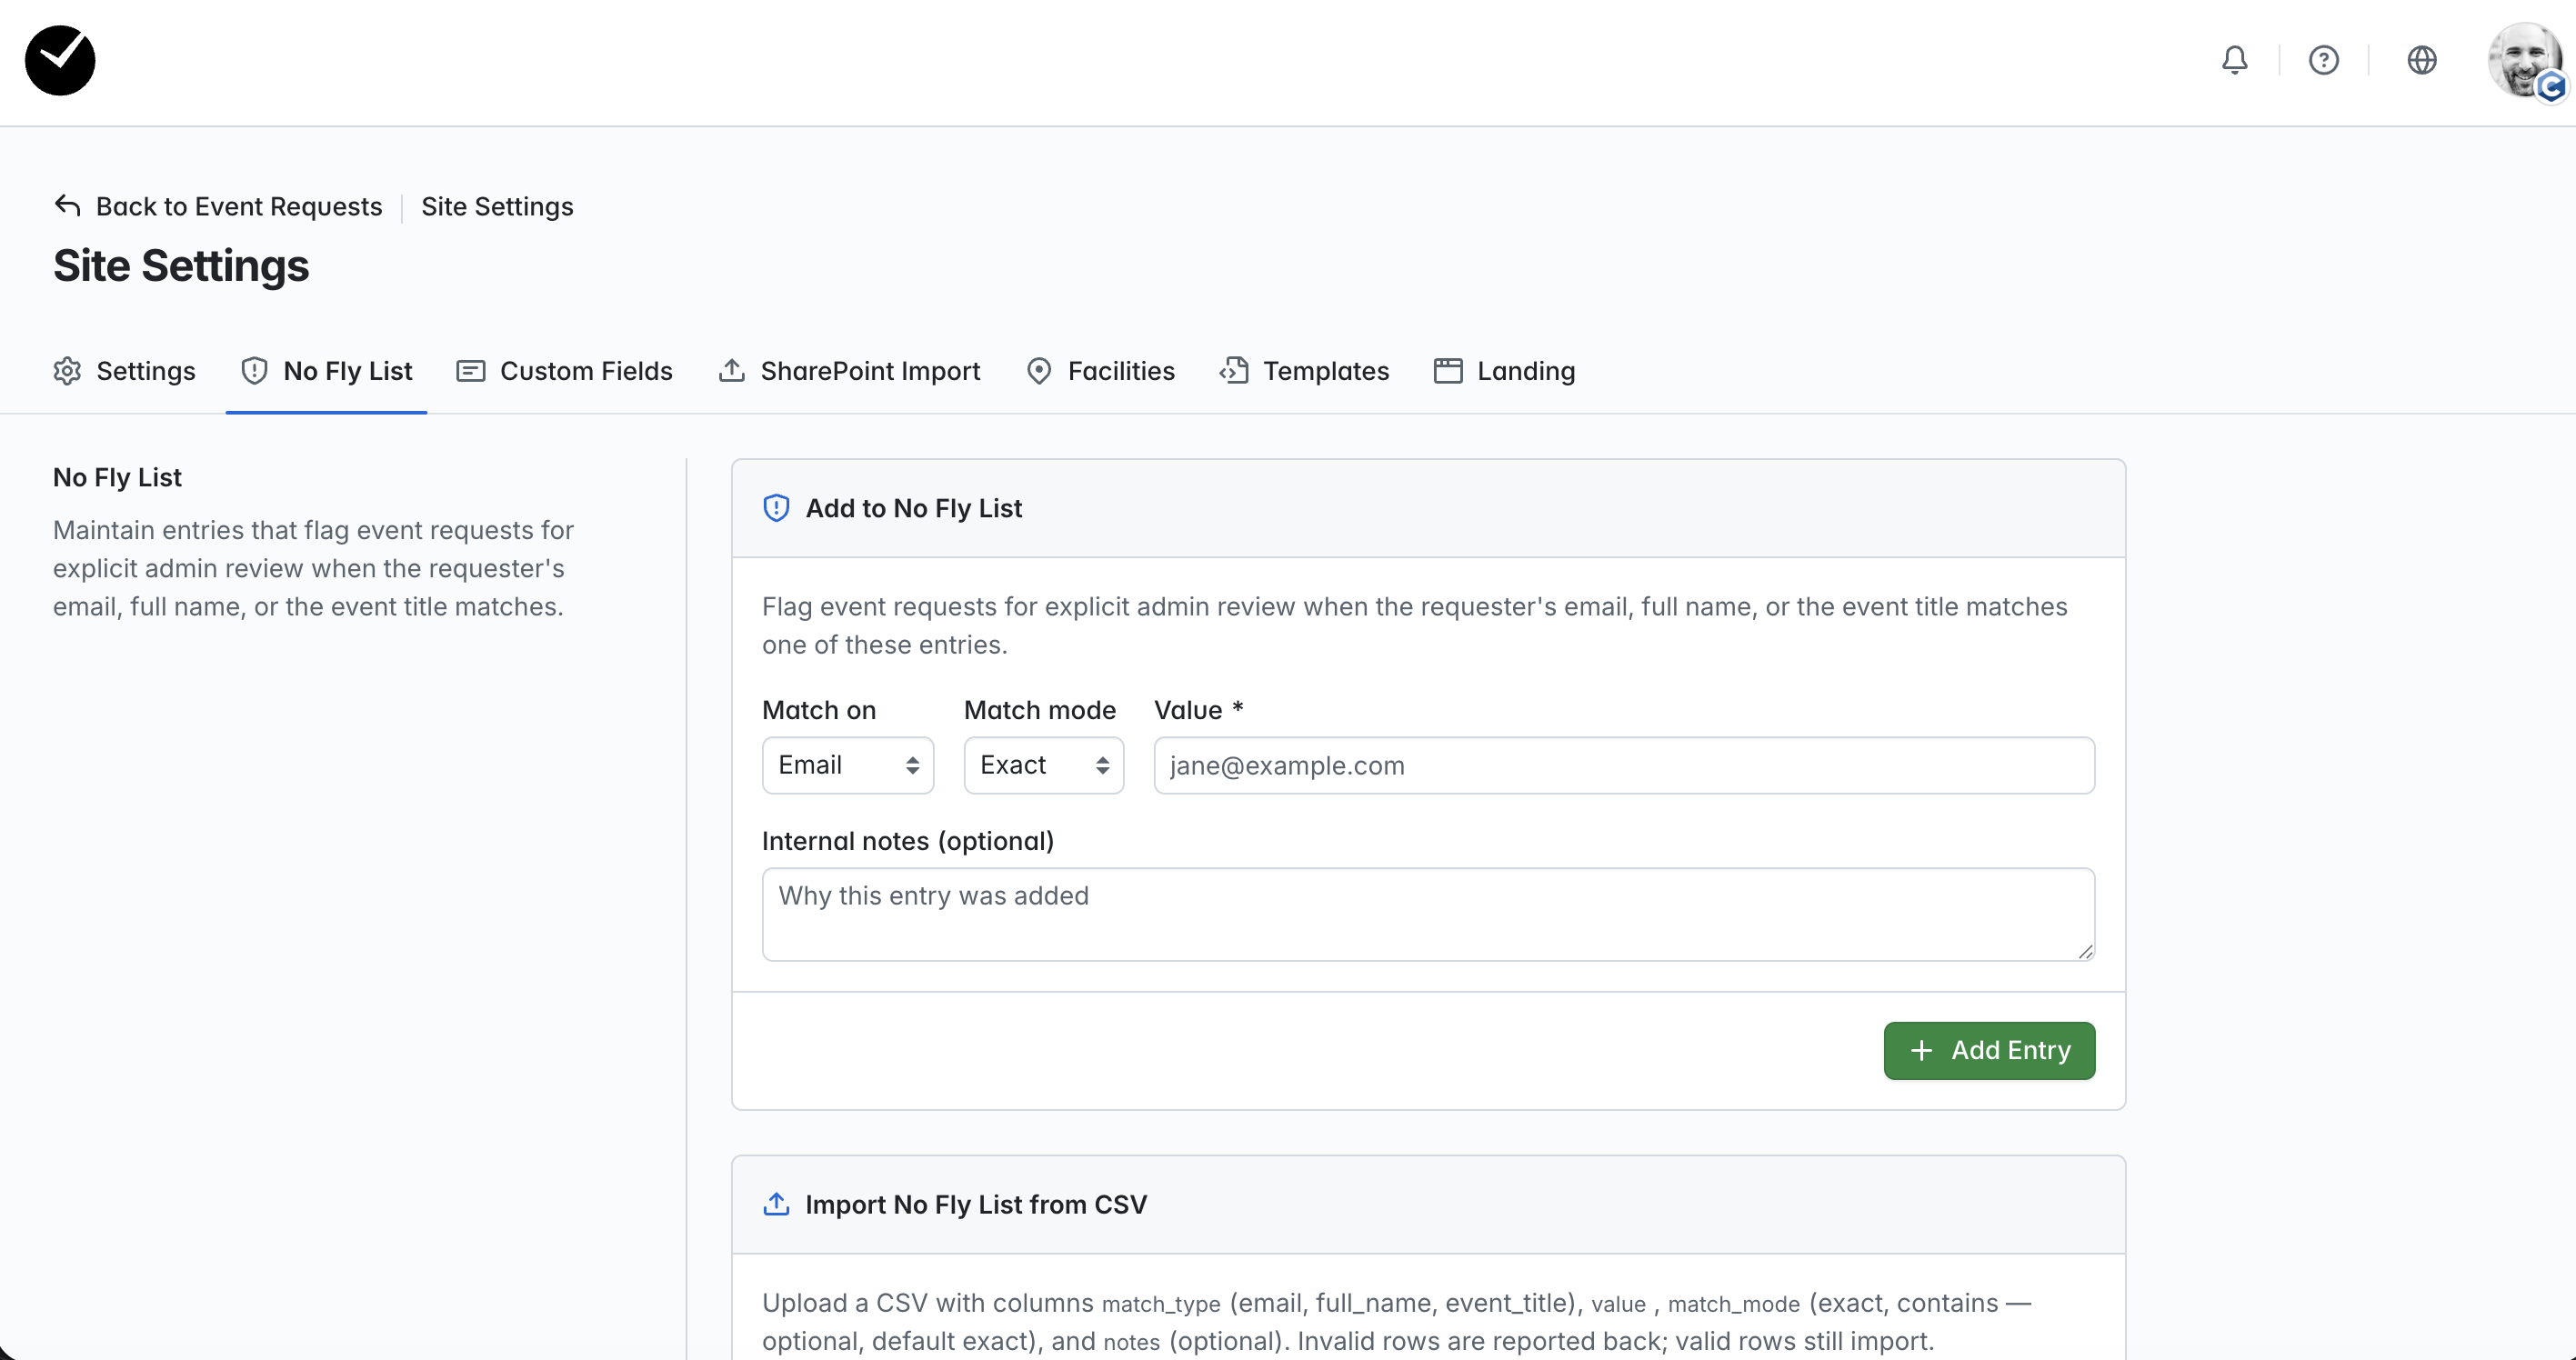
In here, you can begin building your list, either manually (individual entries) or via import (CSV file).
Manually adding 'No Fly List' content
To begin adding to your list manually, you must configure using the fields provided:
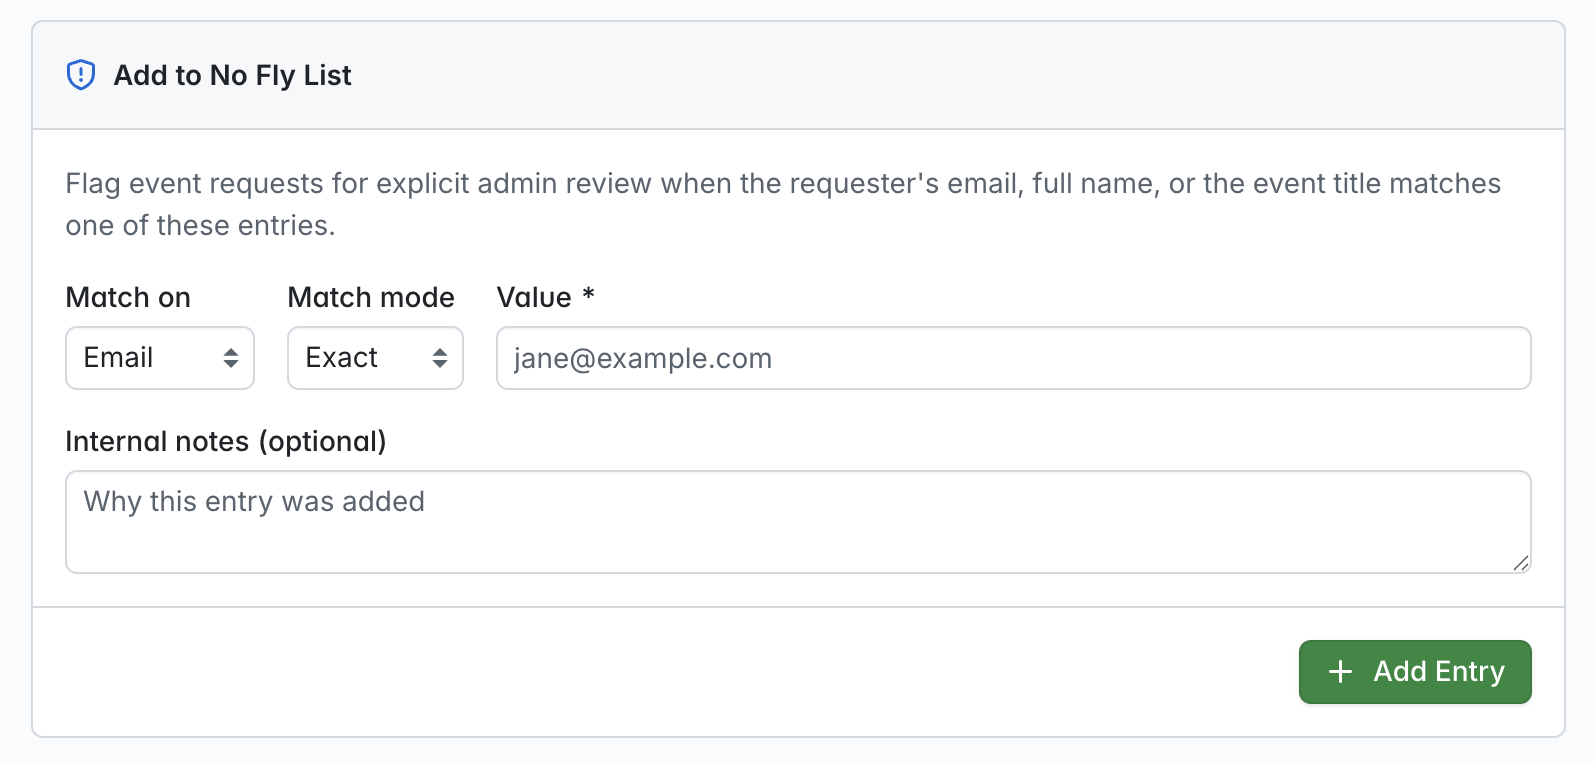
- Match on - select the type of match you wish to apply, either a specific email address (Email), name (Full name) or Event title.
- Match mode - select whether the value you are adding should be matched approximately (Exact) or whether the value matches an entry that contains the value (Contains).
- Value - this is the value that will be flagged on your No Fly List when an event request is submitted. As mentioned above, this would either be an email address, full name or event title.
- Internal notes - allows you to add a note for internal use, this will be displayed on the entry at the bottom of the page when added.
When you are ready to submit, click on the '+ Add Entry' button:
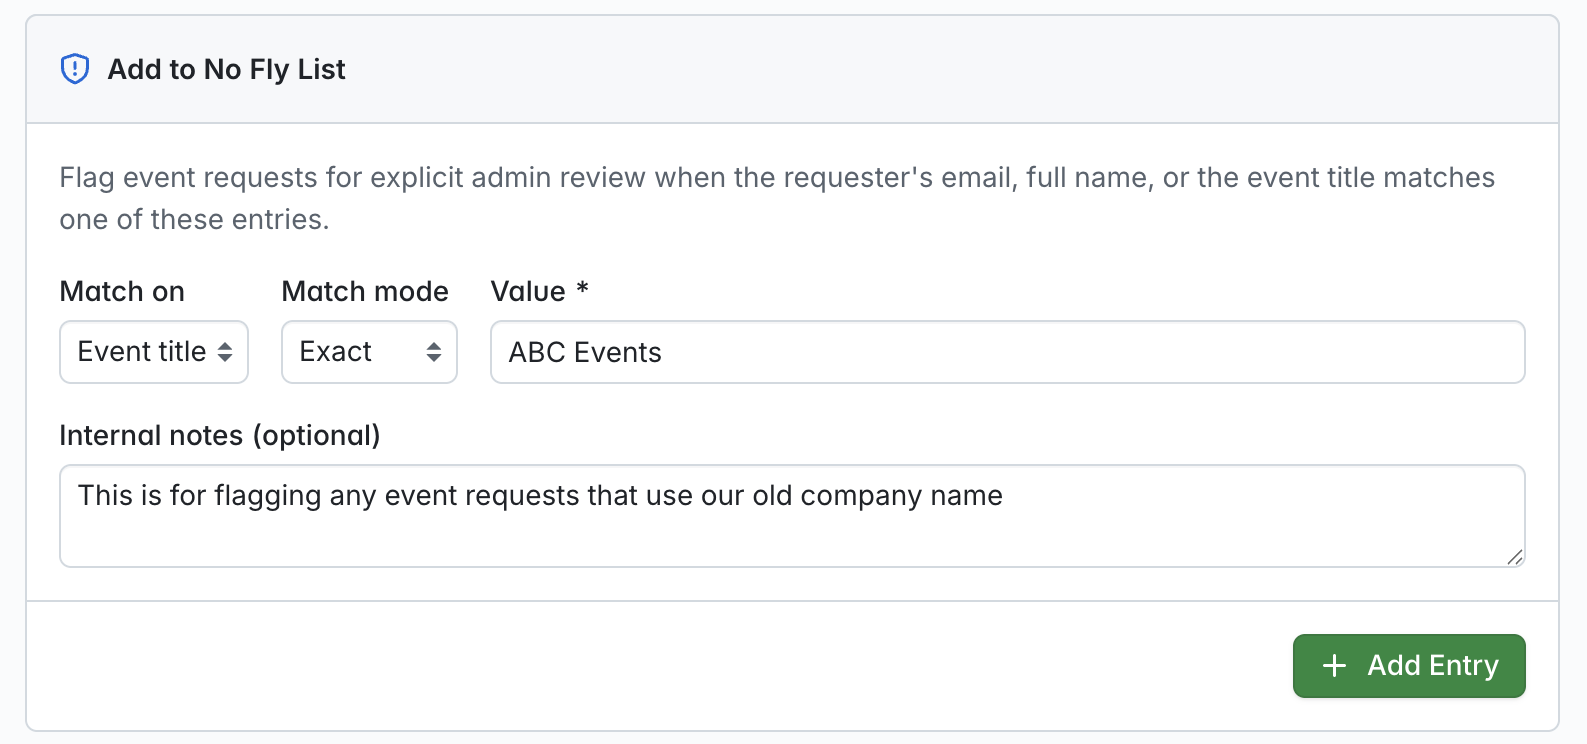
The entry will be added and visible at the bottom of the page:
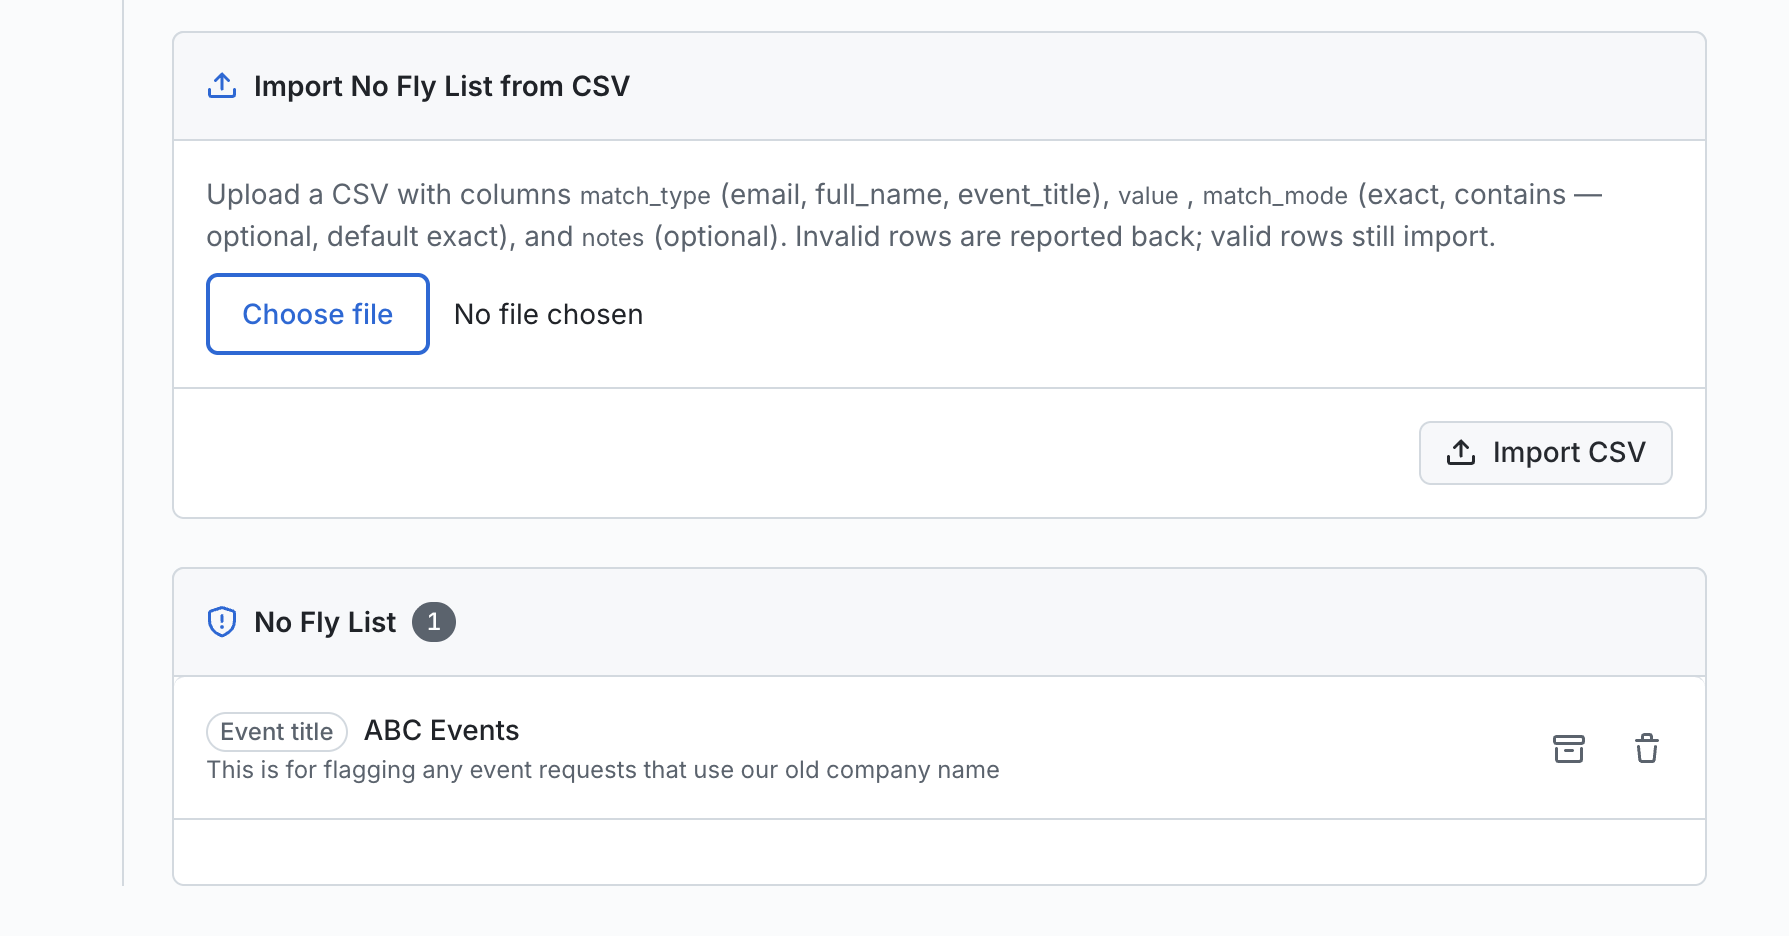
From here you can continue to add and monitor your No Fly List. If you wish to remove or archive an entry from your No Fly List, click on the relevant icon available on the right of the entry to perform the action.
Importing 'No Fly List' content
To begin importing a No Fly List list, you must prepare a CSV file containing the entries you wish to import. The file must use the following column headers and contain data to import:
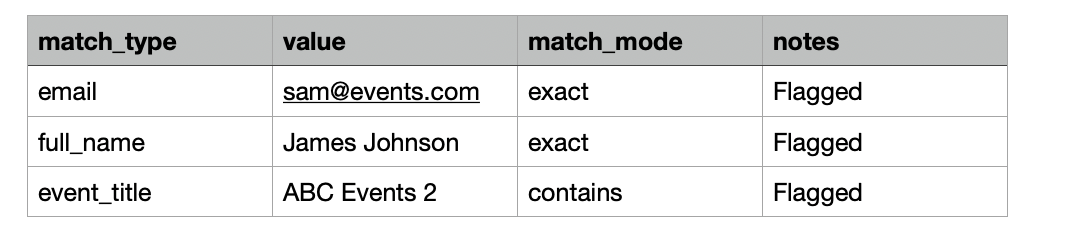
match_type(email, full_name, event_title)valuematch_mode(exact, contains — optional, default exact)notes(optional)
When you are ready, click on the 'Choose File' button and select the CSV file. Select 'Import CSV' to proceed.
Your entries should now be successfully imported, and will be displayed at the bottom of the page: