.png)
How do I create an Event Request?
Note: To use the 'Event Requests' feature, it must be enabled for your organization first. Please contact support if you are interested in activating the feature for your organization.
To begin creating an Event Request from within getregistered, select the 'Event Requests' tab on your Organization Dashboard and select either the '+ New Request' button or the 'Create New Event Request' tile. If you have created no requests previously, click on the 'Create Your First Request' button.

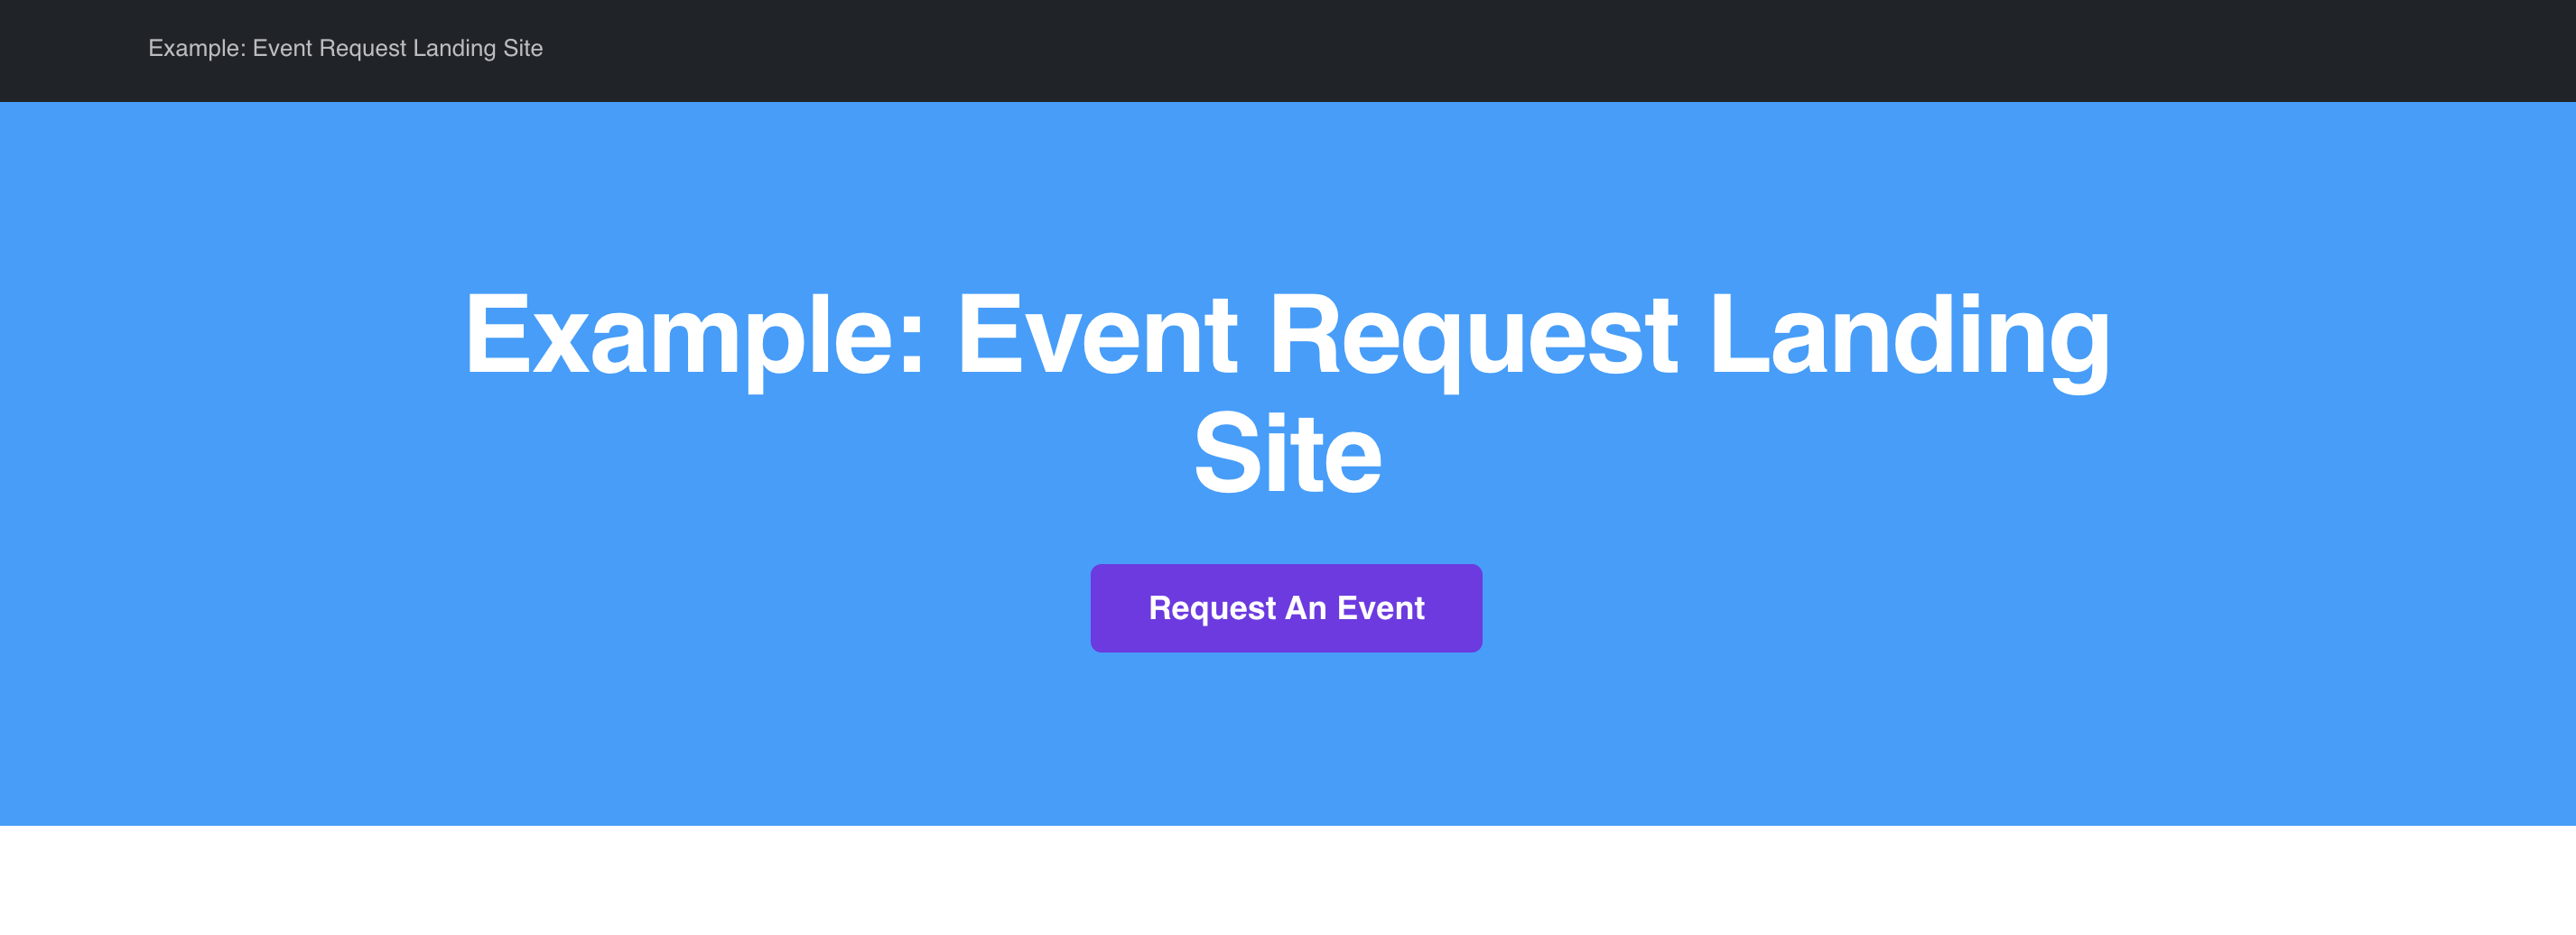
If your organization has enabled a 'landing site' for your organization (which bypasses the need to enter via your organization's Admin area), once you have logged in, click on the Request Event button to proceed:
You will now be presented with your organization's New Event Request form:

You will initially need to complete your event's 'Event Details' to proceed - any fields that are mandatory will be marked with an asterisk (*). During creation, you may spot the following additional sections:
Event Lead
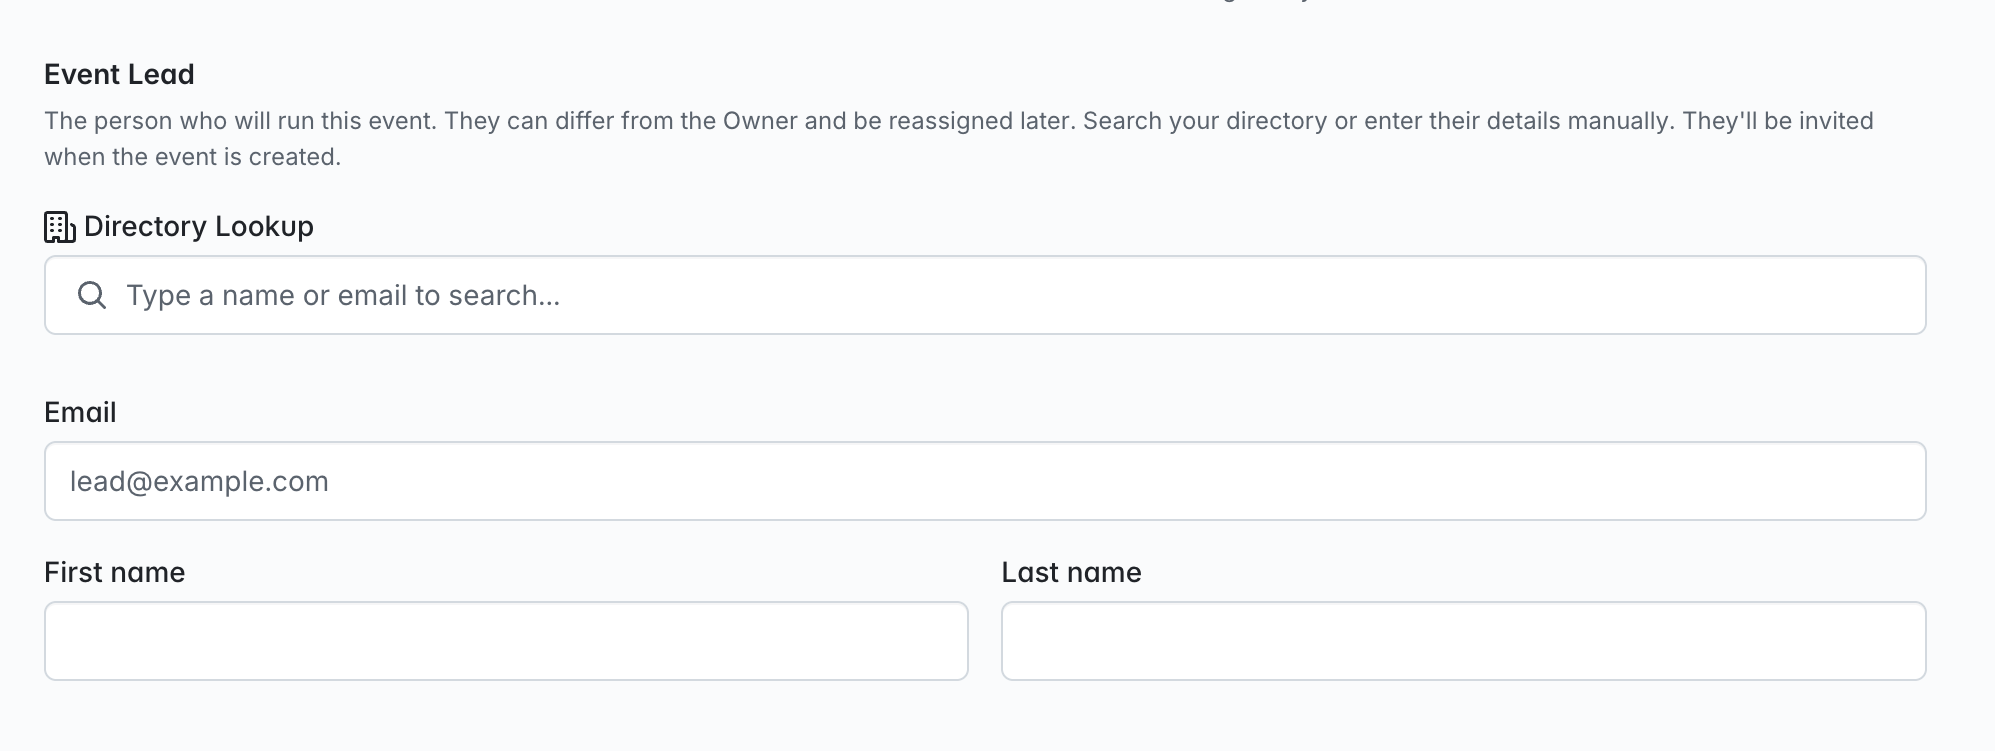
An 'Event Lead' is the person who will be running the event for you, and will be granted access to the event once the Event Request is submitted, accepted and converted. This is an optional feature, and not required to complete and submit an Event Request form.
Attendees
If your organization has SSO login enabled, you will see the 'Attendees' section displayed. This allows you to set if your event will be having attendees registering that are external to your organization's SSO, and will require a 'regular' login path to be able to register for the event. This will be noted on the event request when reviewed, and additional registration access options will be provided once the request is converted to an event.

When you are ready to continue, select to 'Save & Continue' - you will then proceed to the next part of the Event Request form. Your Event Request will now be saved and marked as a 'Draft', and you can return to complete or edit any other pages at another time, with your current progress safely stored in the background. You will next be asked to confirm your event's 'Schedule'.
Schedule
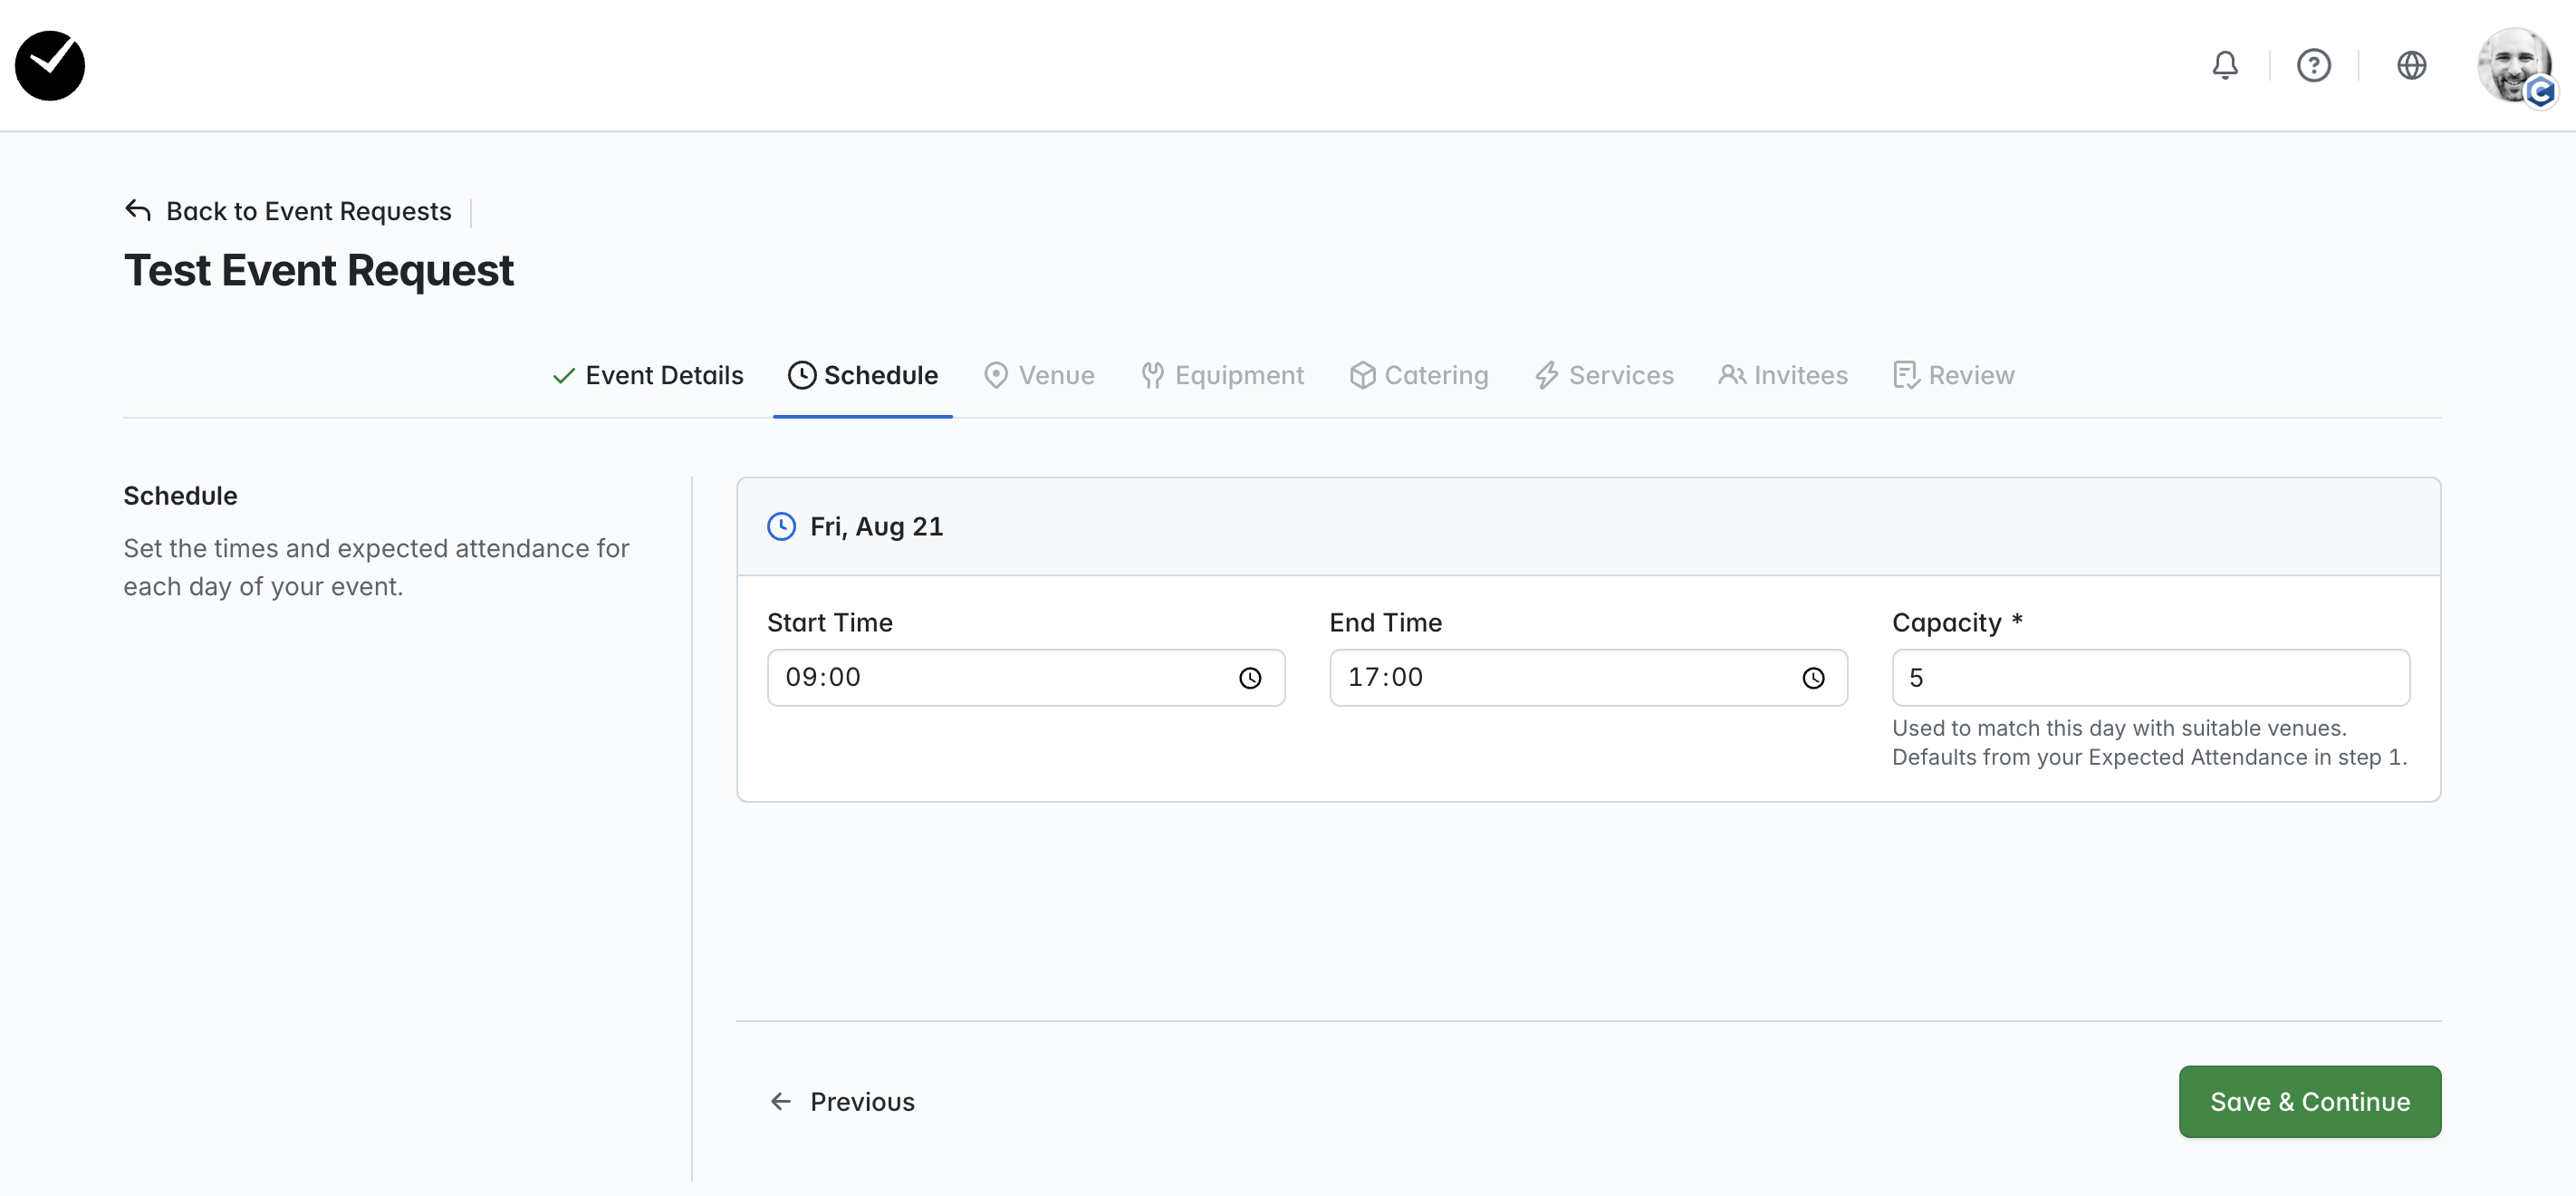
In here you will need to confirm the start and end times of your event, as well as the capacity. The running times will be pre-populated with 9am-5pm, and the capacity pre-populated by the amount submitted in the 'Expected Attendance' field on the previous page of the Event Request form. The capacity needs to be confirmed so that only venues with an appropriate capacity are returned on the next page. When you are ready to proceed, click on the 'Save & Continue' button. You will now be presented with the 'Venues' page of the form.
Venues
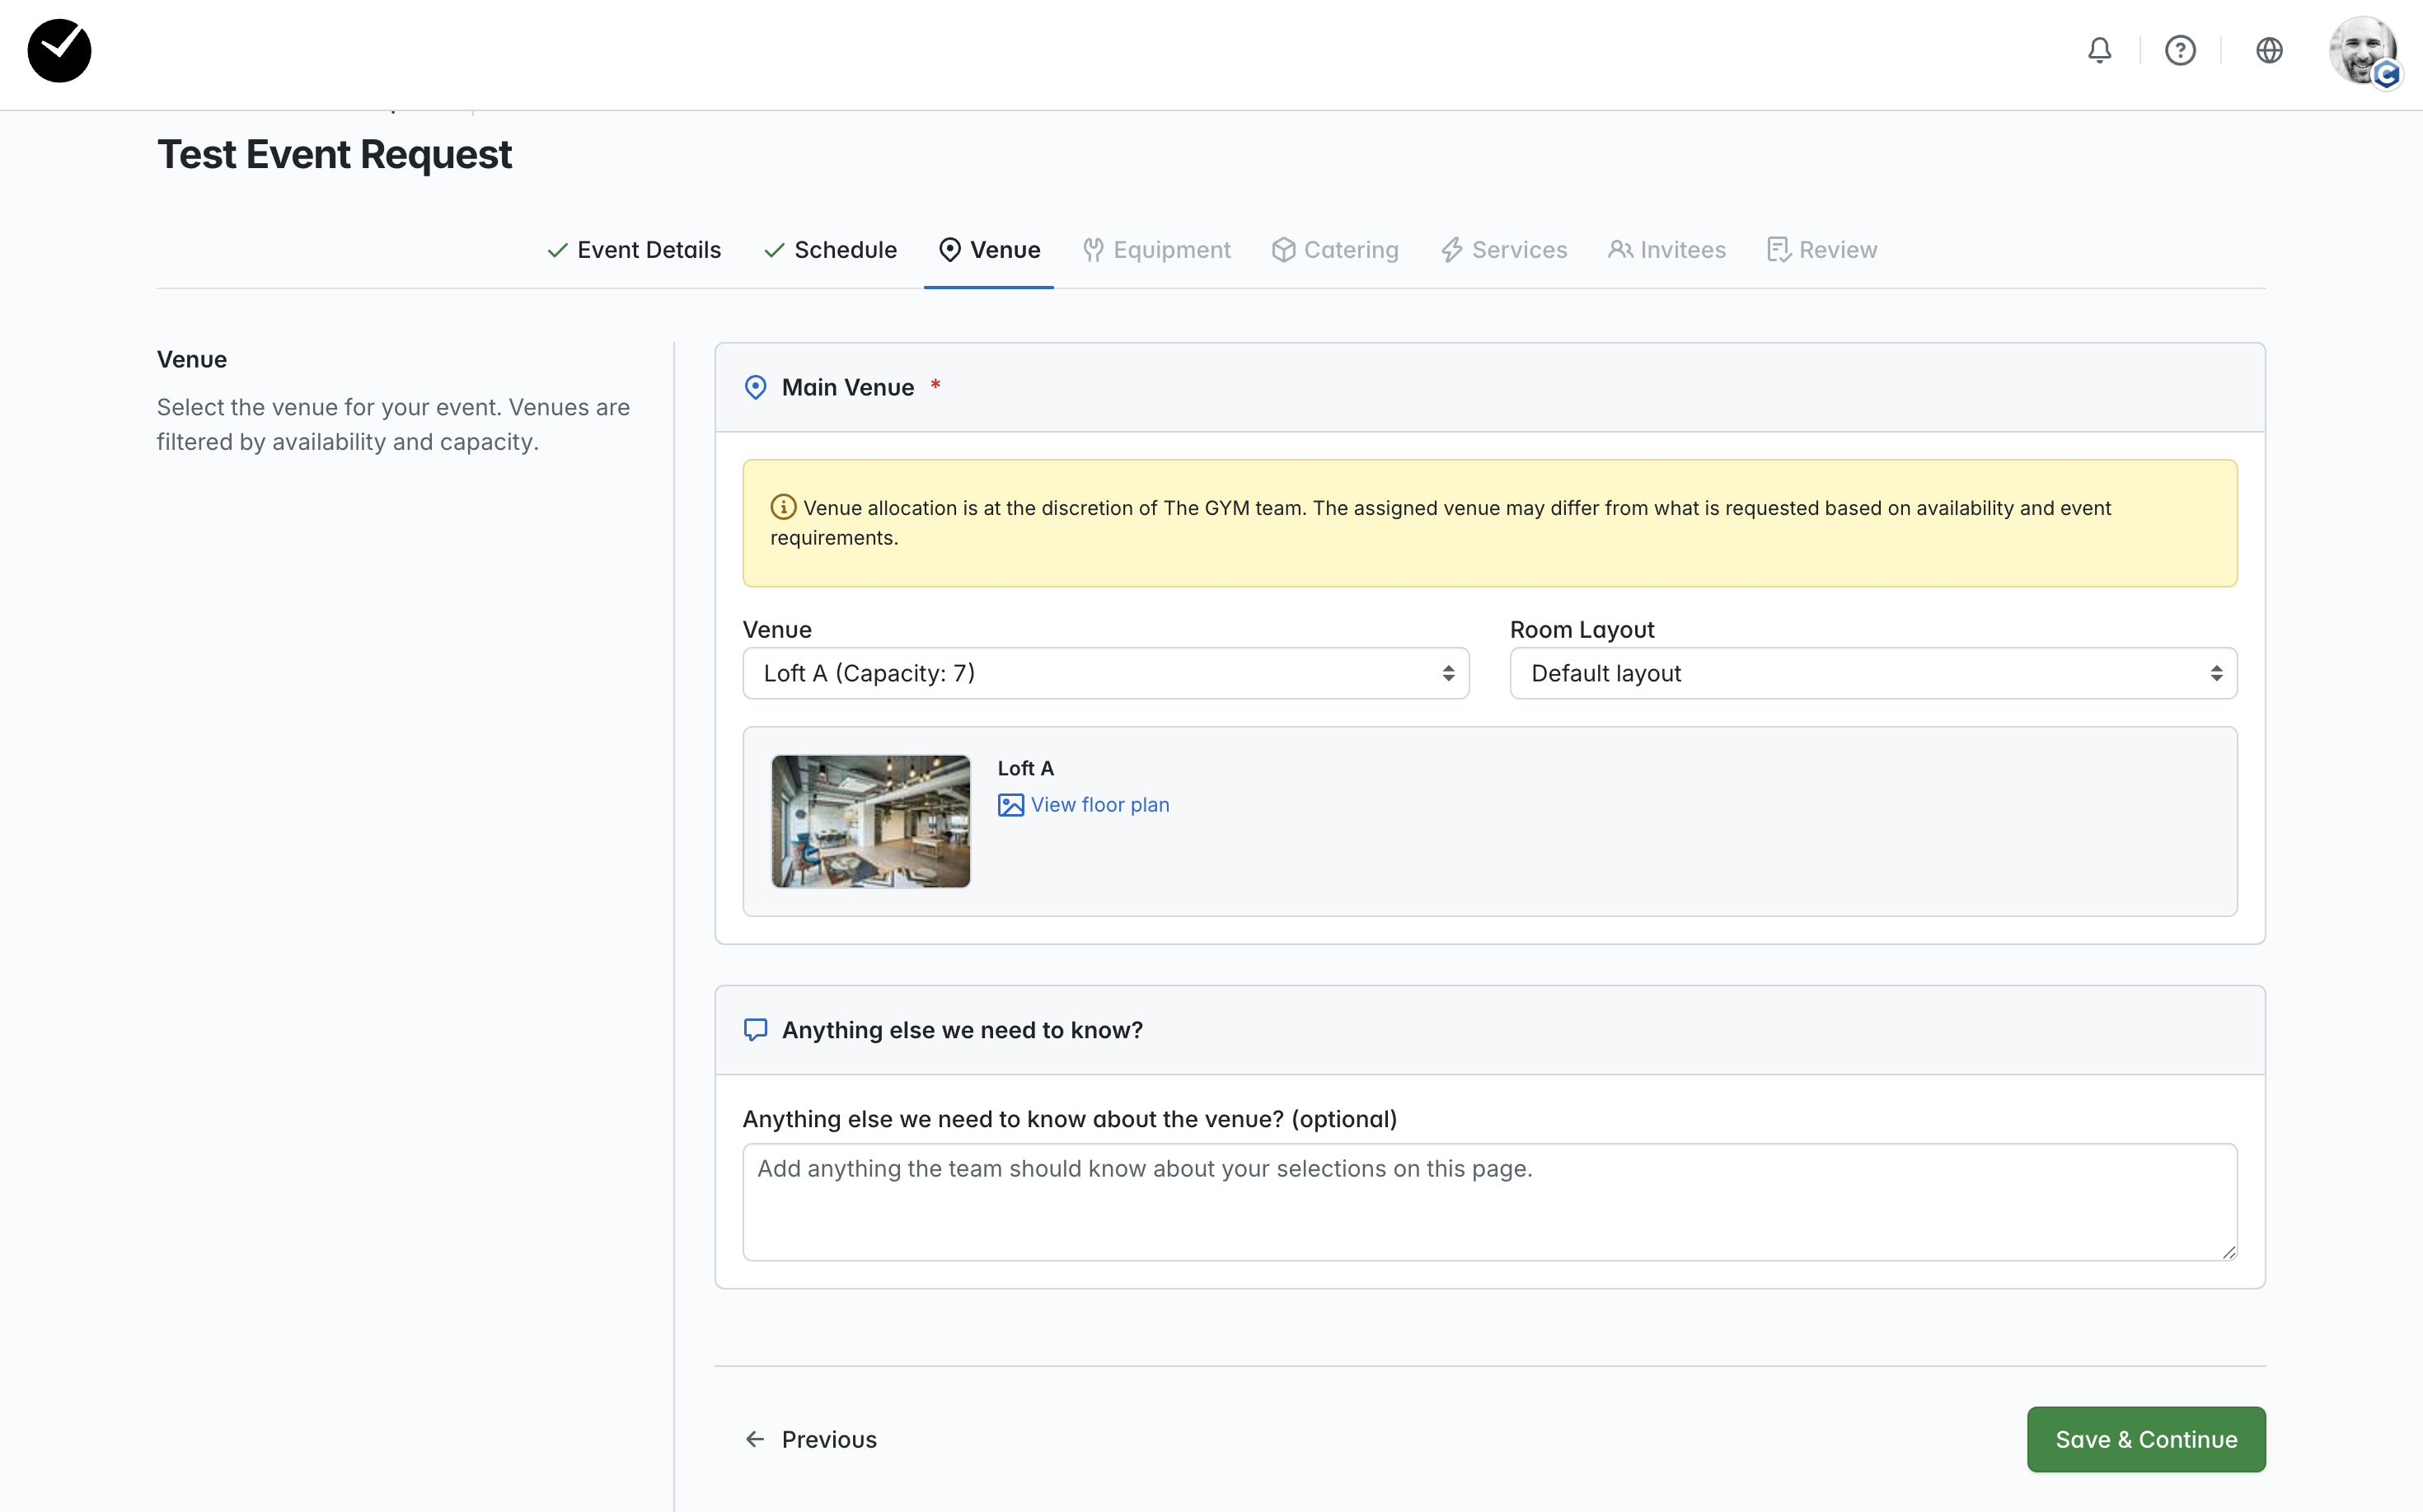
On the 'Venues' page, you will select the venue to be used for your event, as well as the room layout - these can both be specified using the dropdown menus provided. Please note that the venues available will be based on availability (running dates) and your proposed capacity (attendance). Where a venue does not have appropriate capacity or is unavailable for your requested event dates, they will not be shown. Venues when selected may have images to assist your choice, including a floor plan (where added to the venue configuration). When you are happy to proceed, select 'Save & Continue' - you will now be moving on to choose your facility requirements.
Facilities
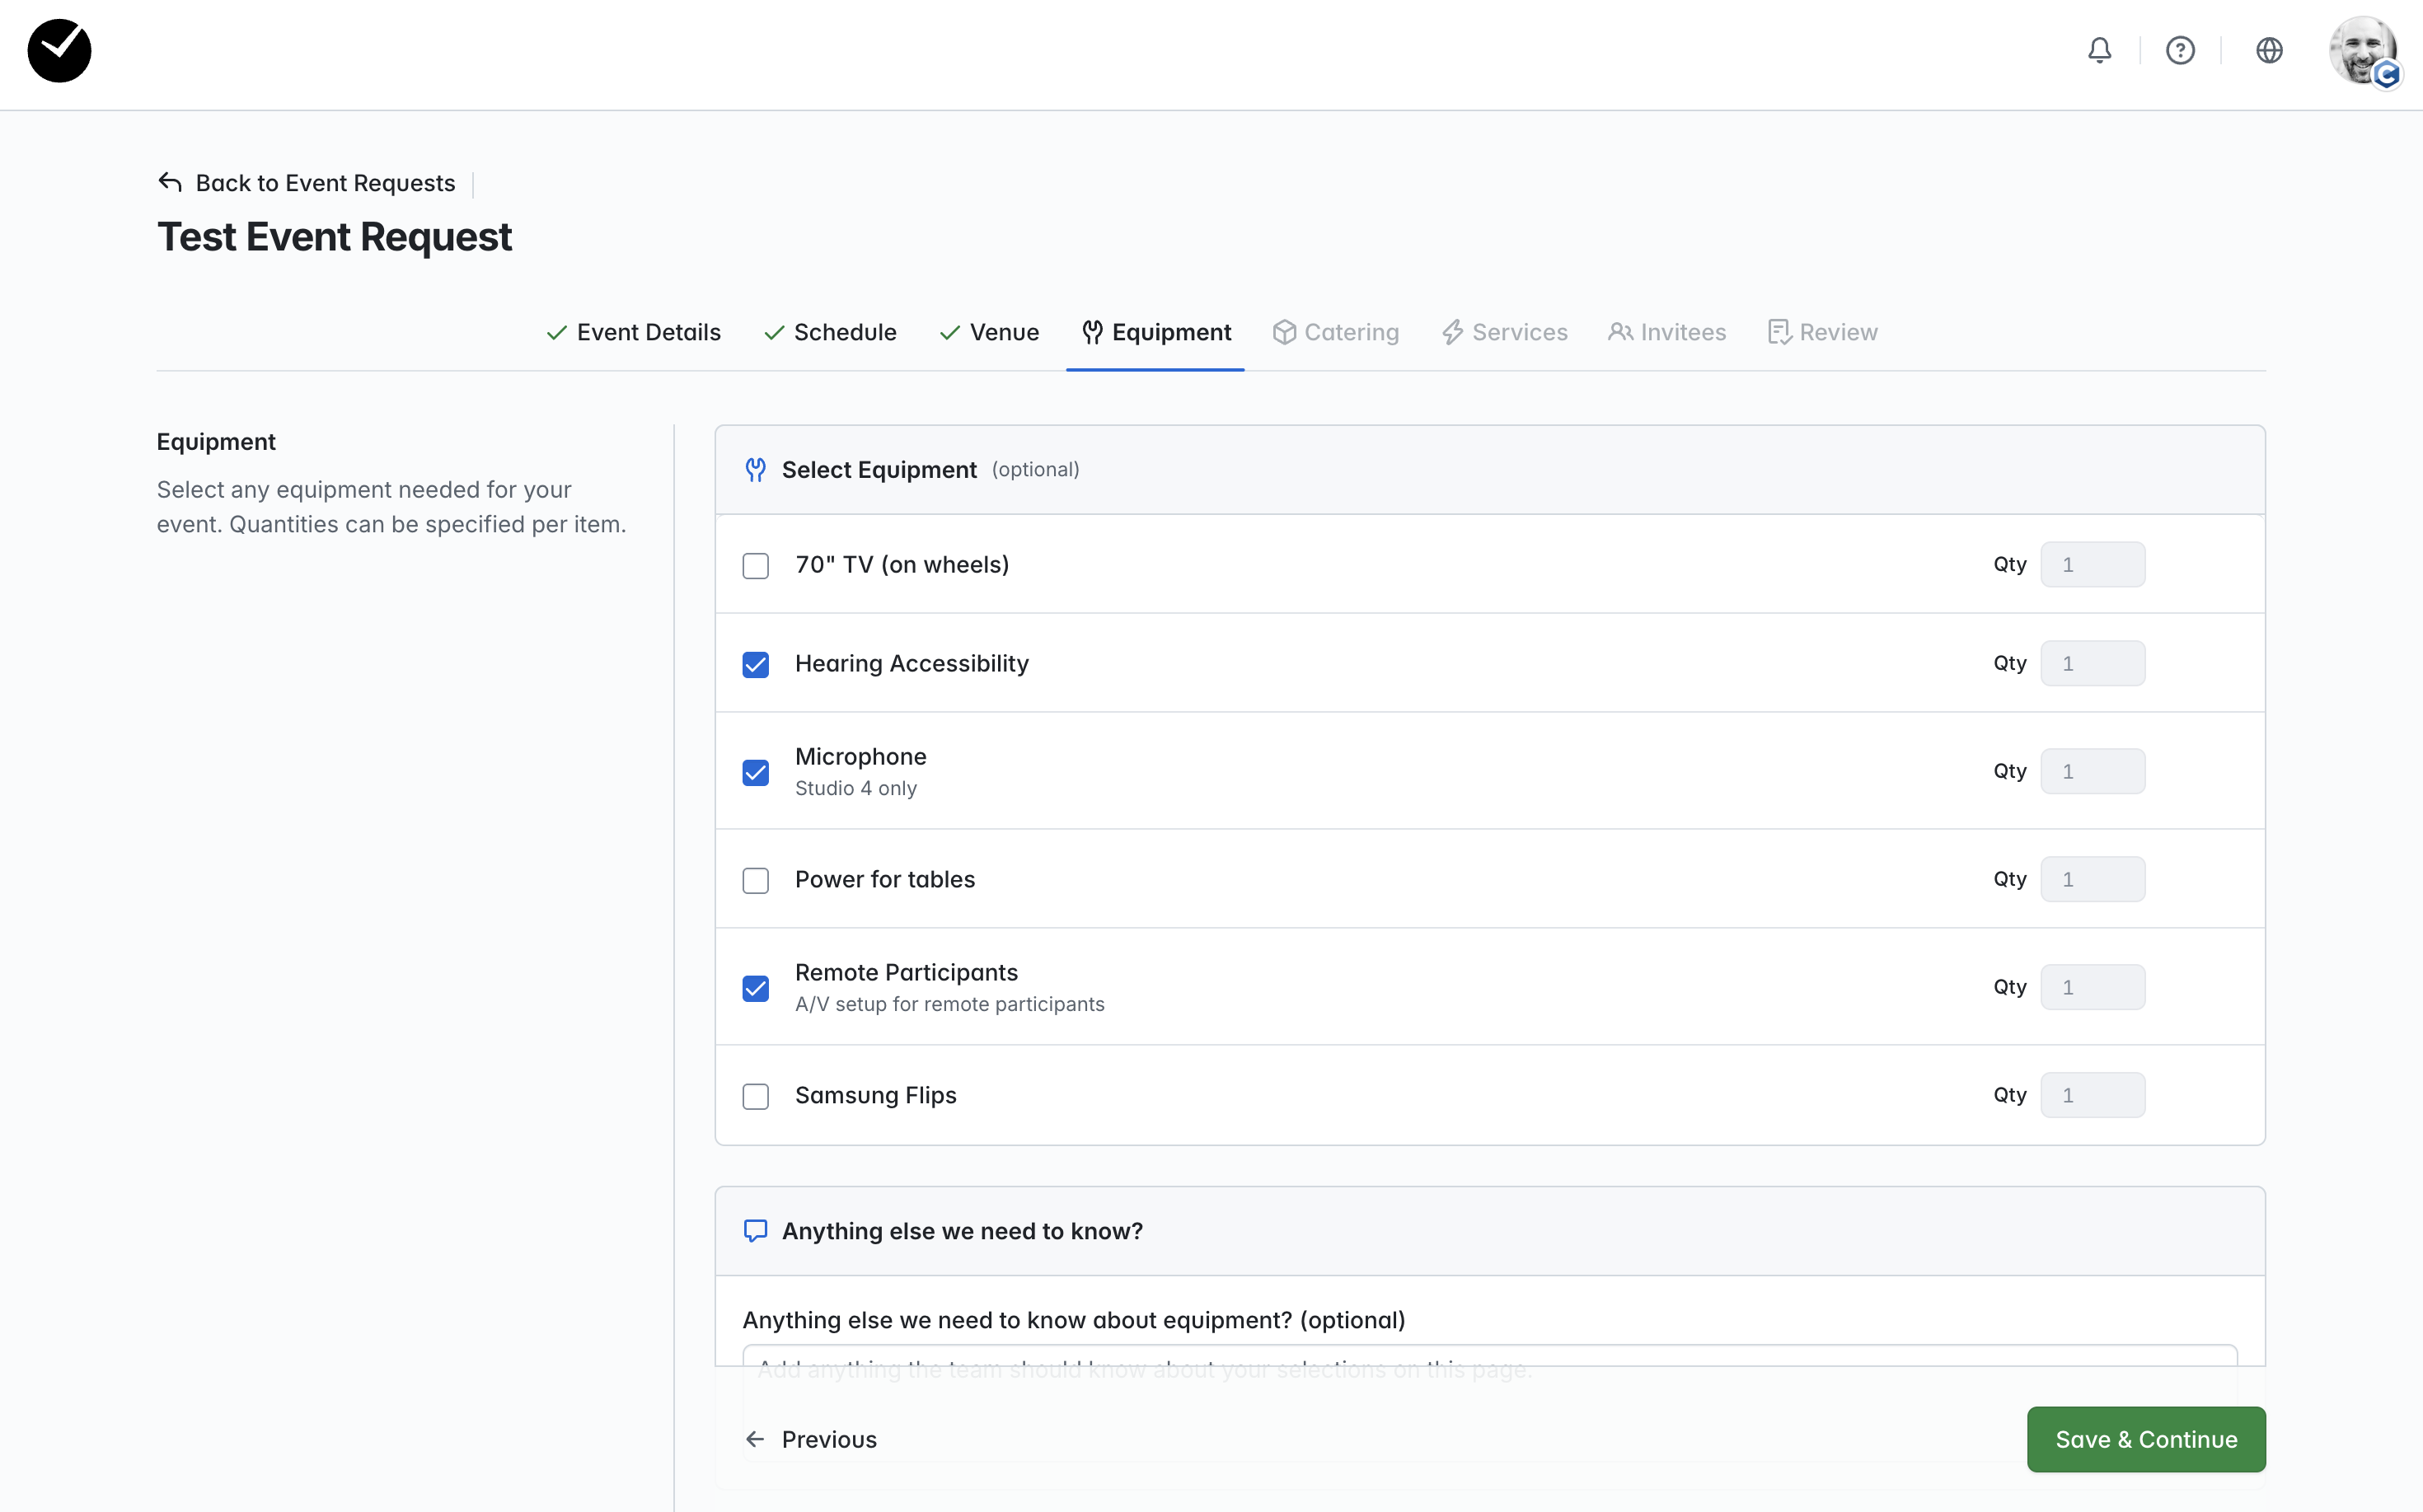
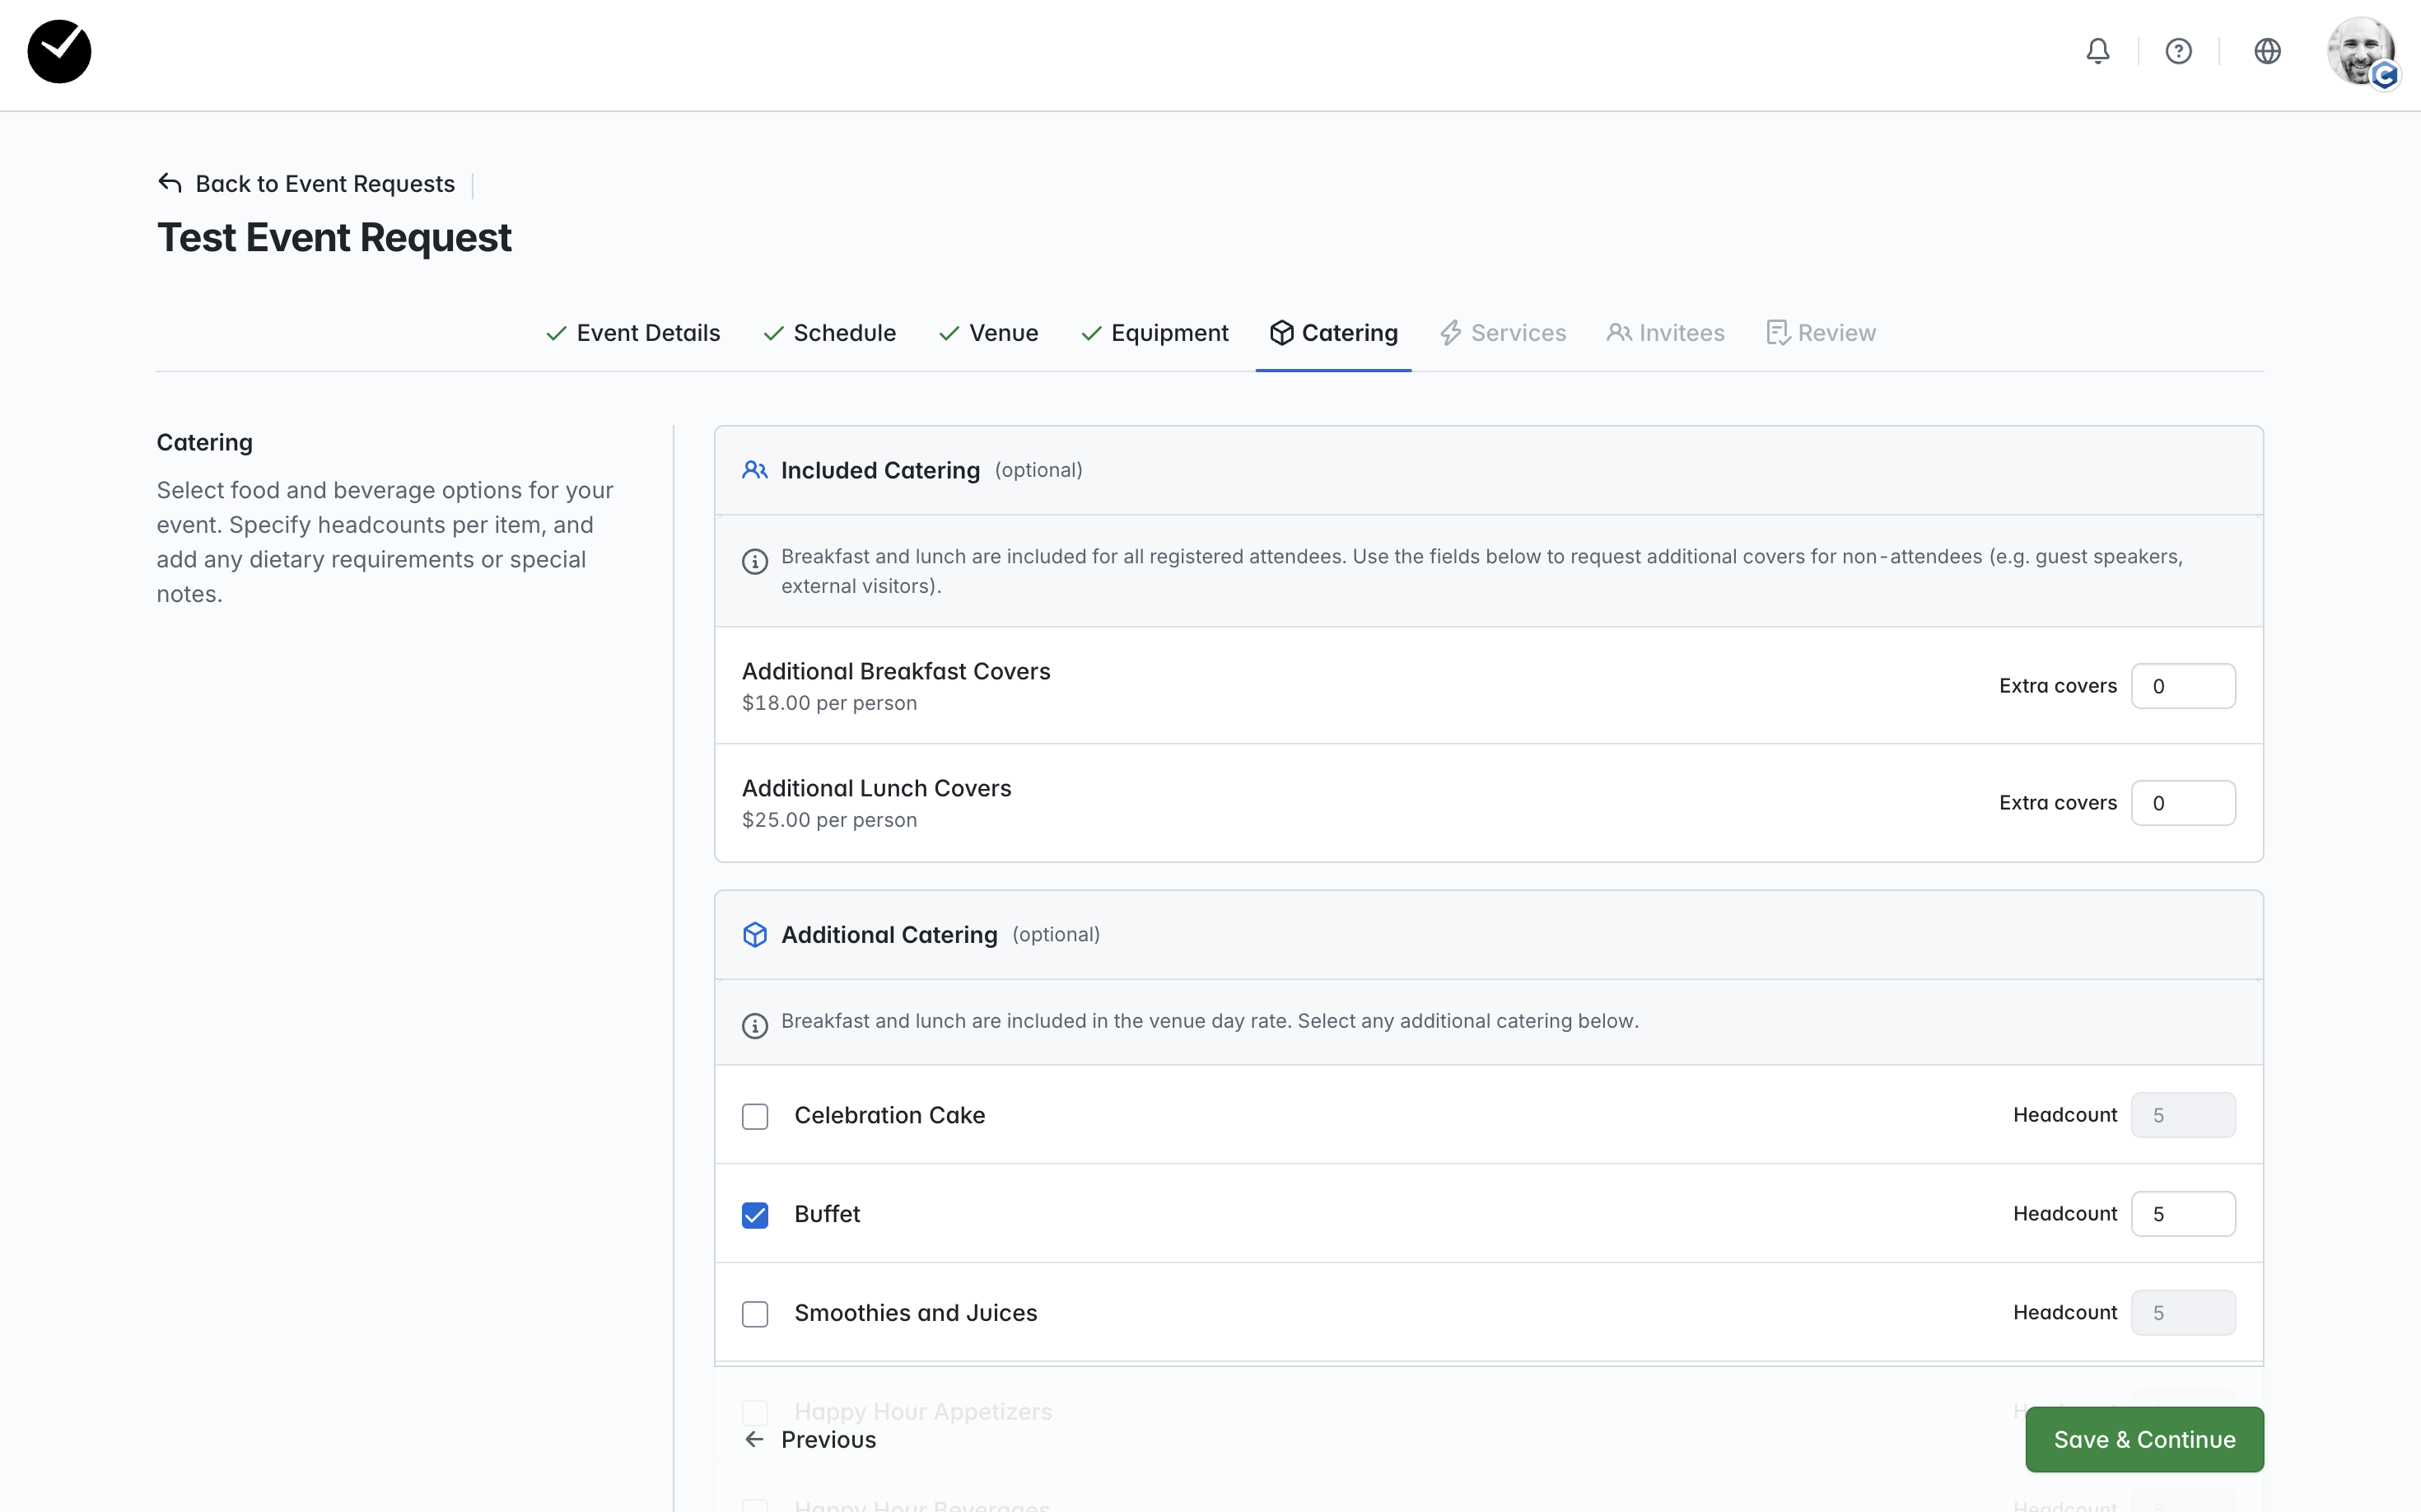
On the following pages, you will be asked to select what facilities your require for your event (eg equipment, catering and services required for the event). Here are some examples of what you may see:
Example: Equipment Requests
Example: Catering Requests
Example: Services Requests
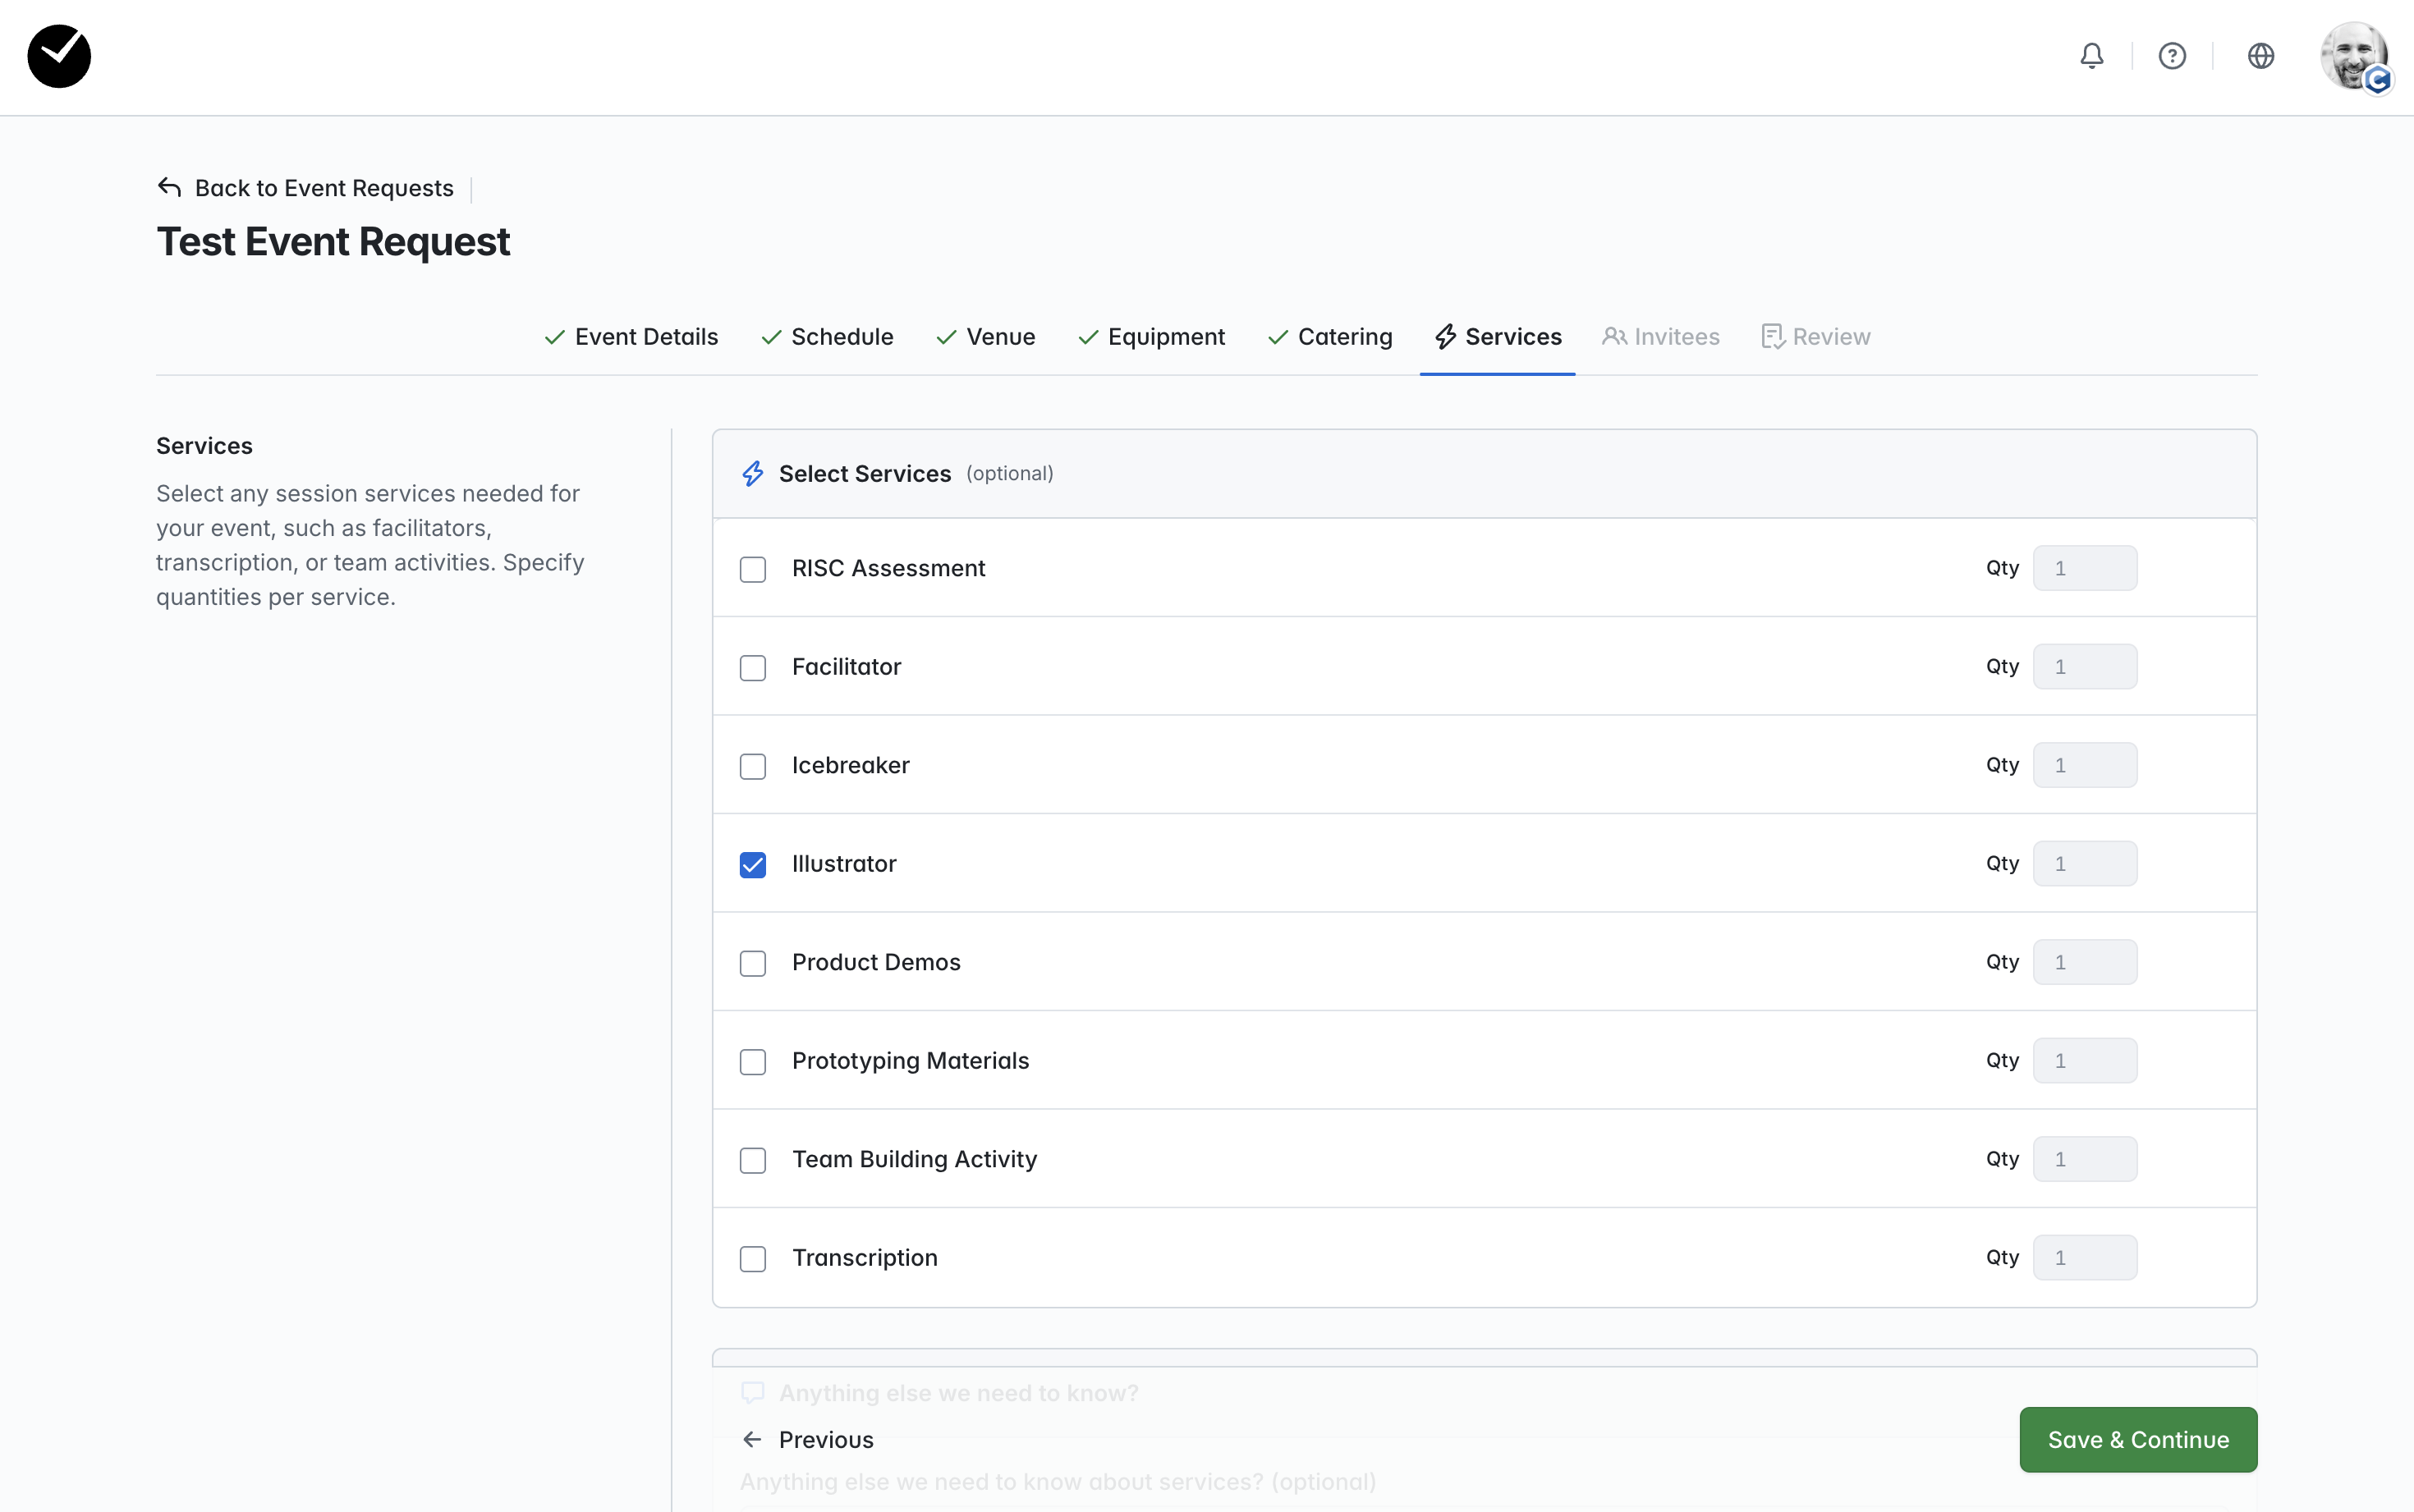
The options available on these pages may differ, as they are dependant on the configuration of your organization's Event Requests form. Simply select the checkboxes related to the services/consumables you wish to request and select 'Save & Continue' to proceed. When selected, some checkboxes may provide the ability to amend the quantity ('Qty') required for your event - to amend, click on the field next to the item you wish to adjust the quantity of and enter the new number.
Once you have configured and saved your services/consumables, you will be presented with the 'Invitees' page.
Invitees
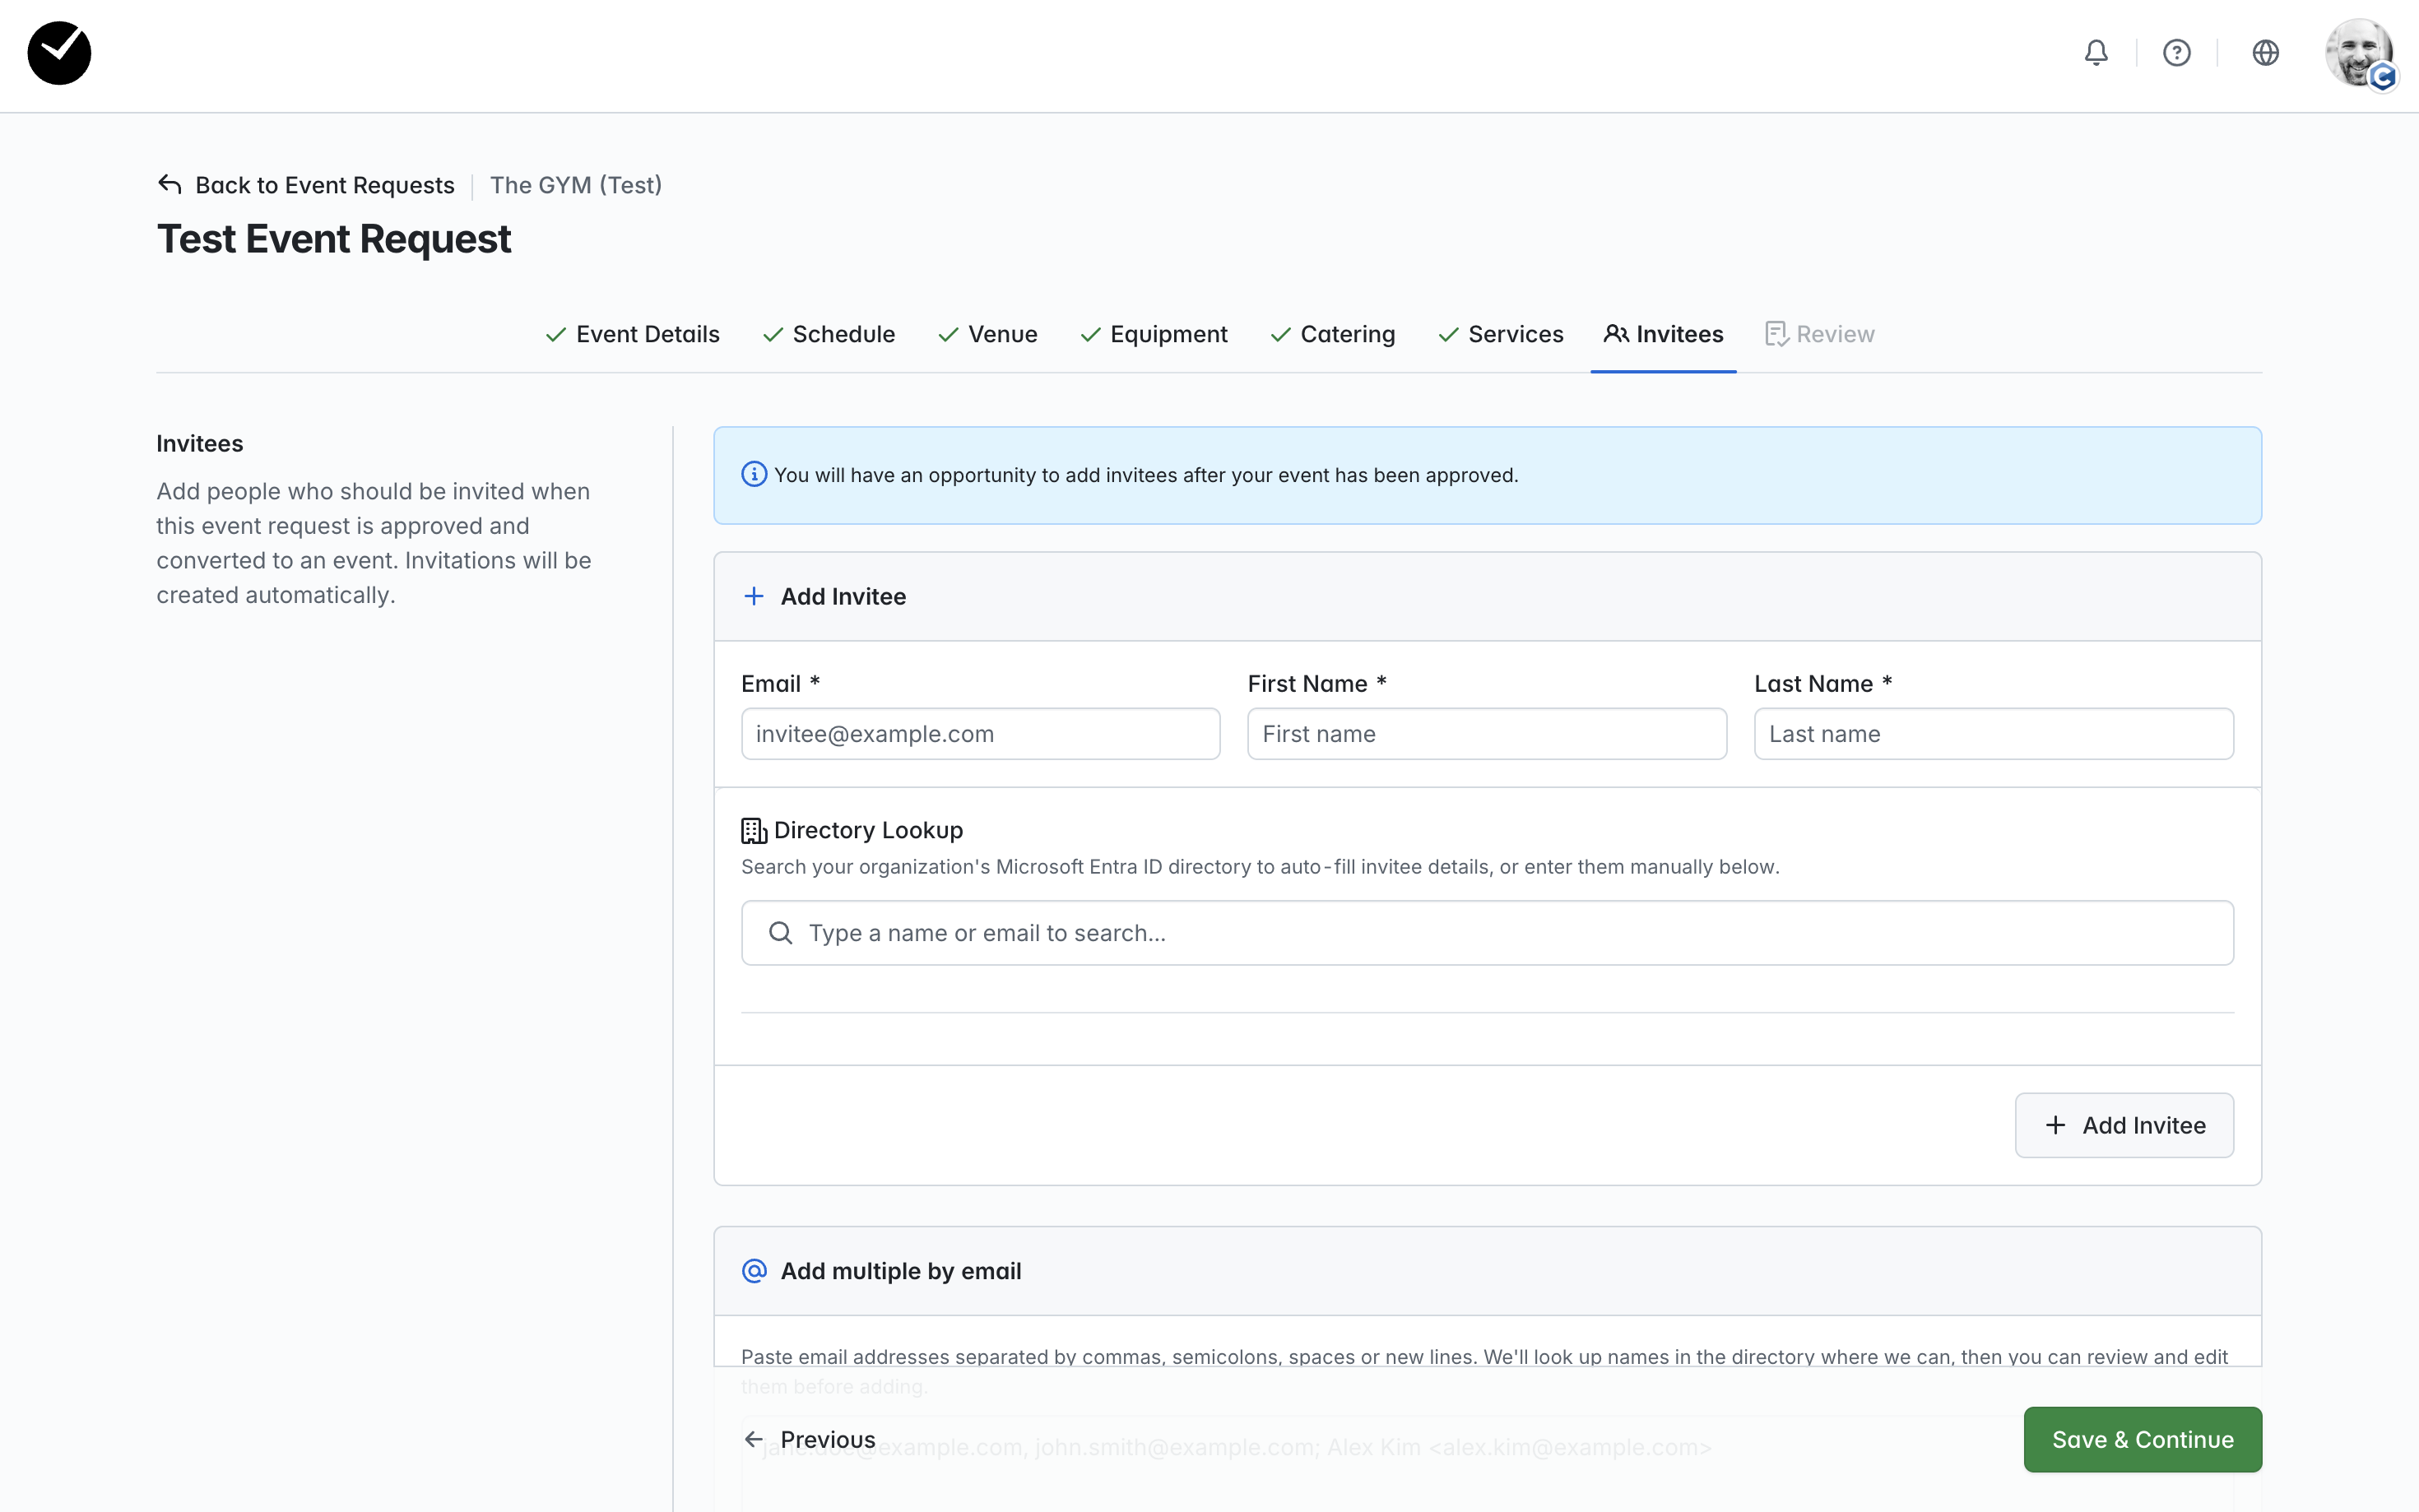
On this page, you can begin adding the attendees you would like to invite to your event. We offer 3 options for inviting attendees - individually (by name/email), Directory Lookup (pulled from your organization's user directory) or multiple by email only. To add an individual attendee either by Directory Lookup or by name/email, populate the relevant field(s) and select '+ Add Invitee'.
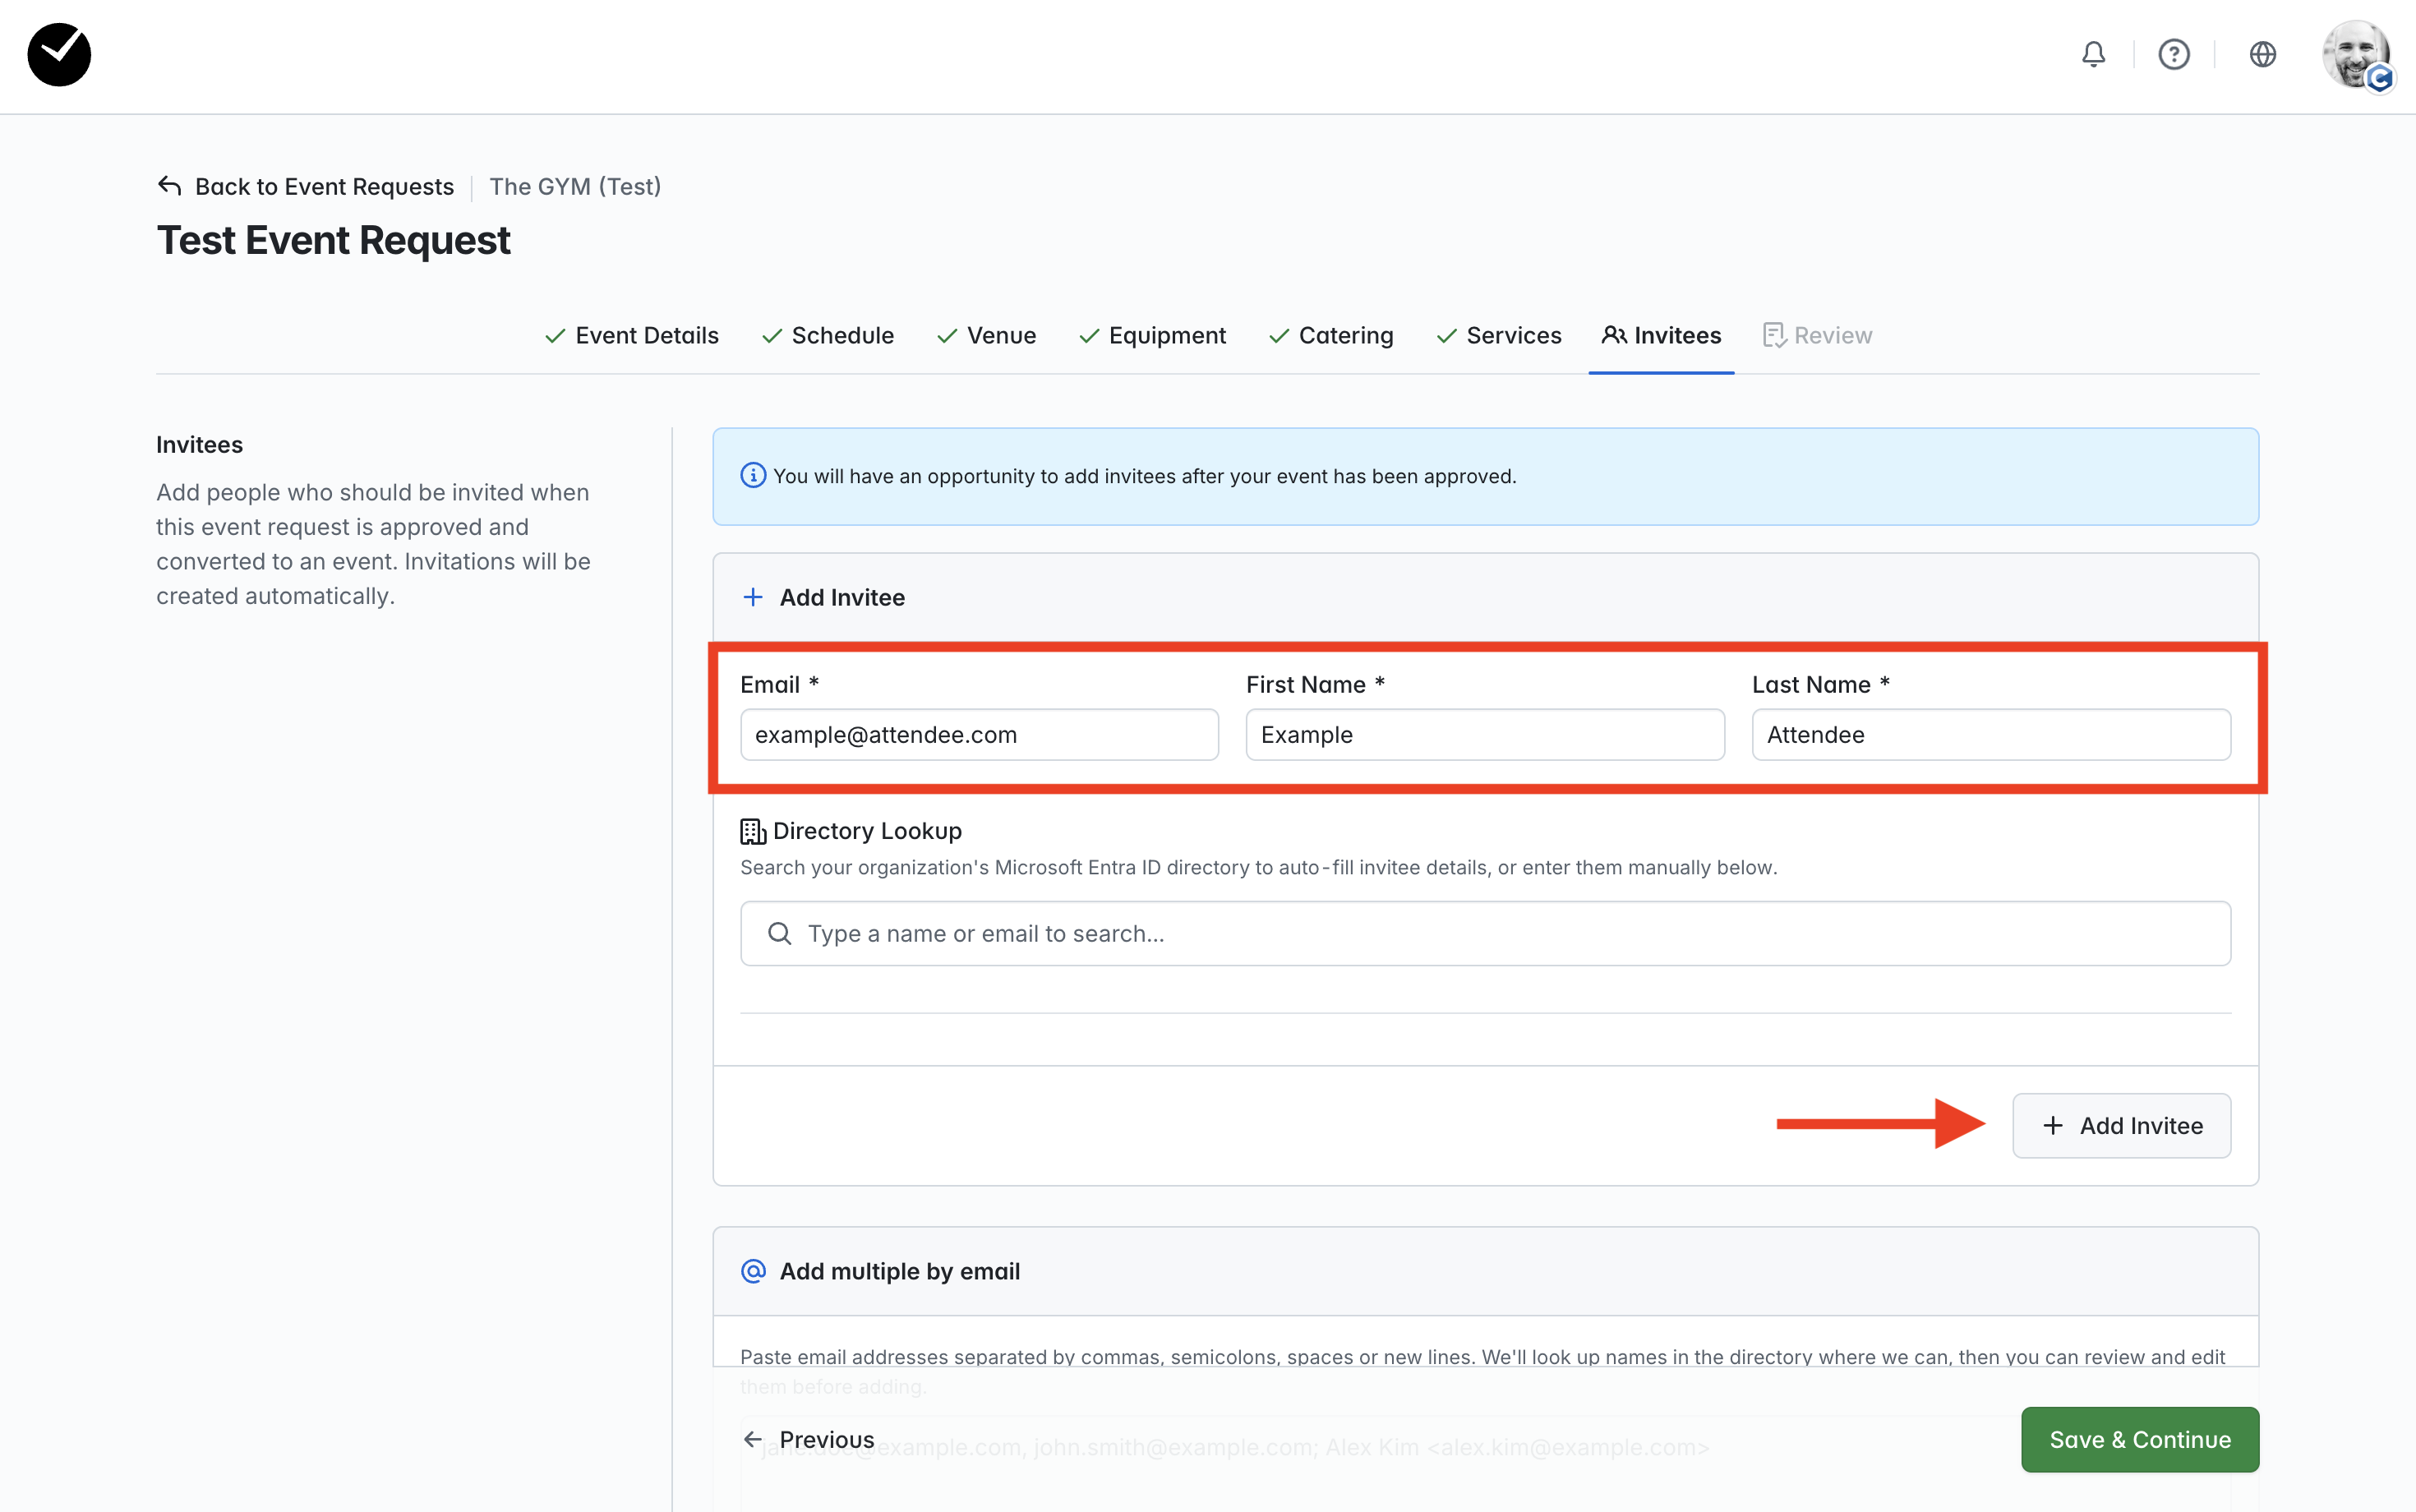
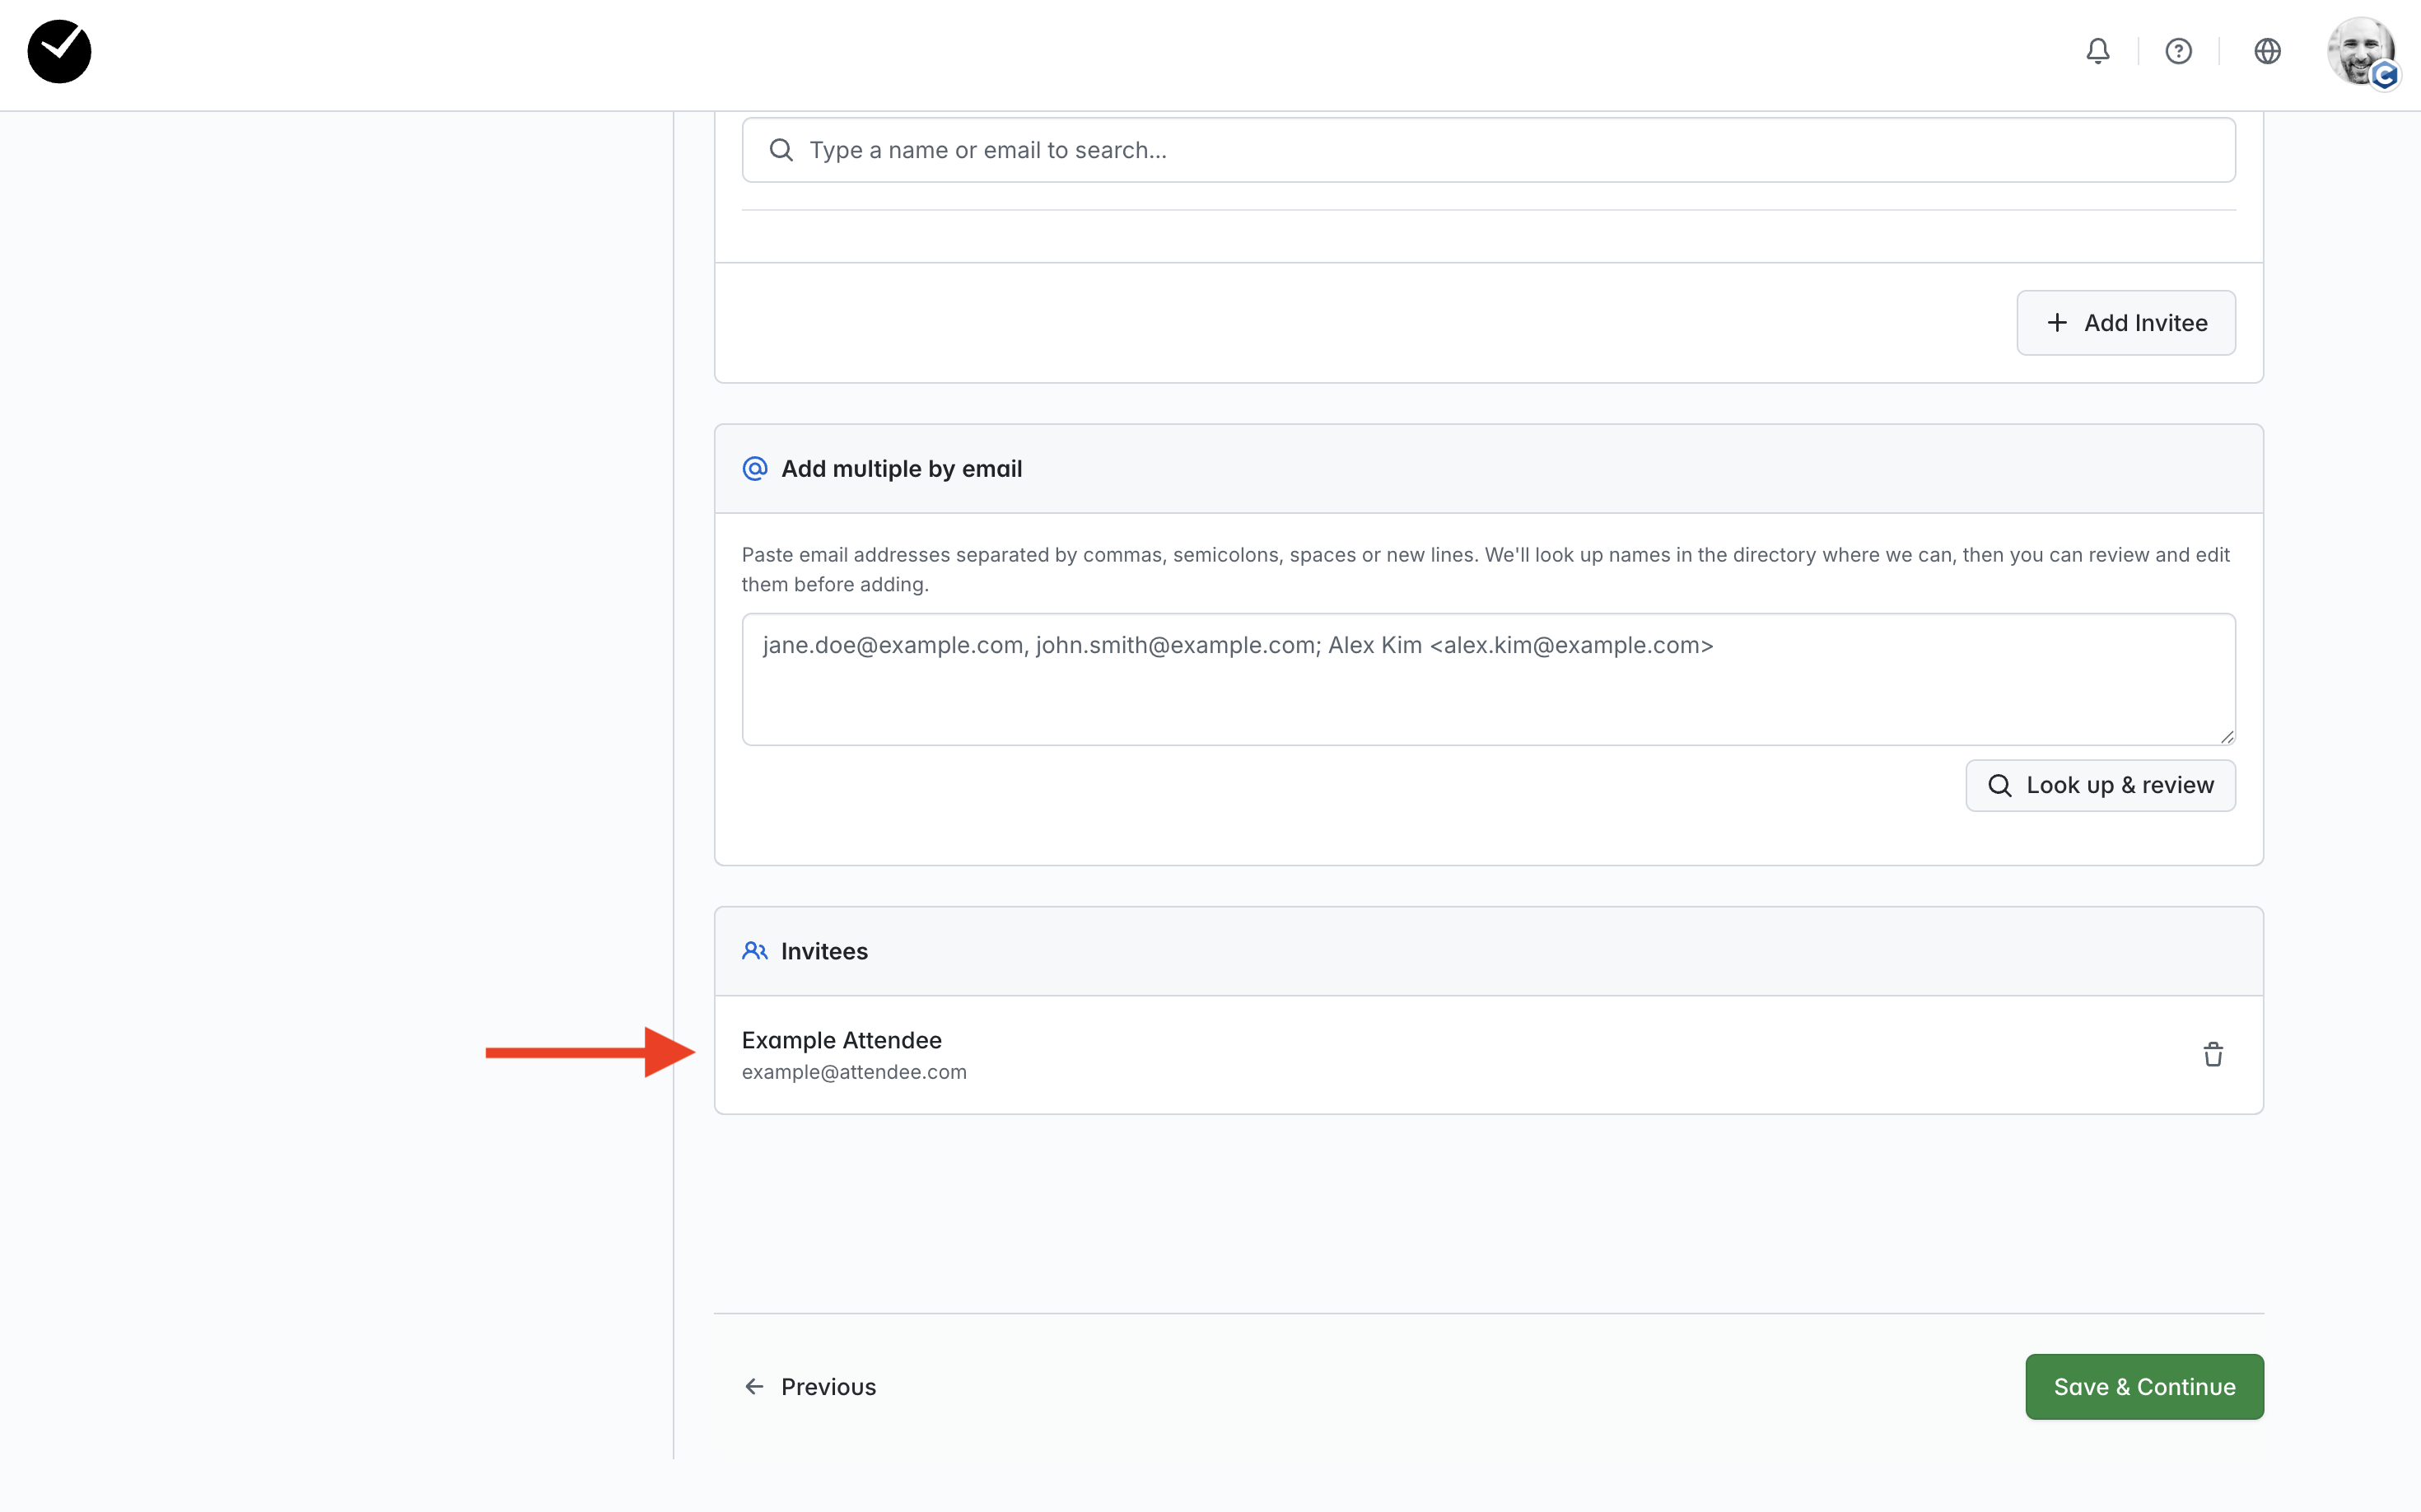
Your invitee will then be added to the 'Invitees' list at the bottom of the page:
To add multiple invitees at once, enter the email addresses of the invitees separated by a comma and click on 'Look up & Review':
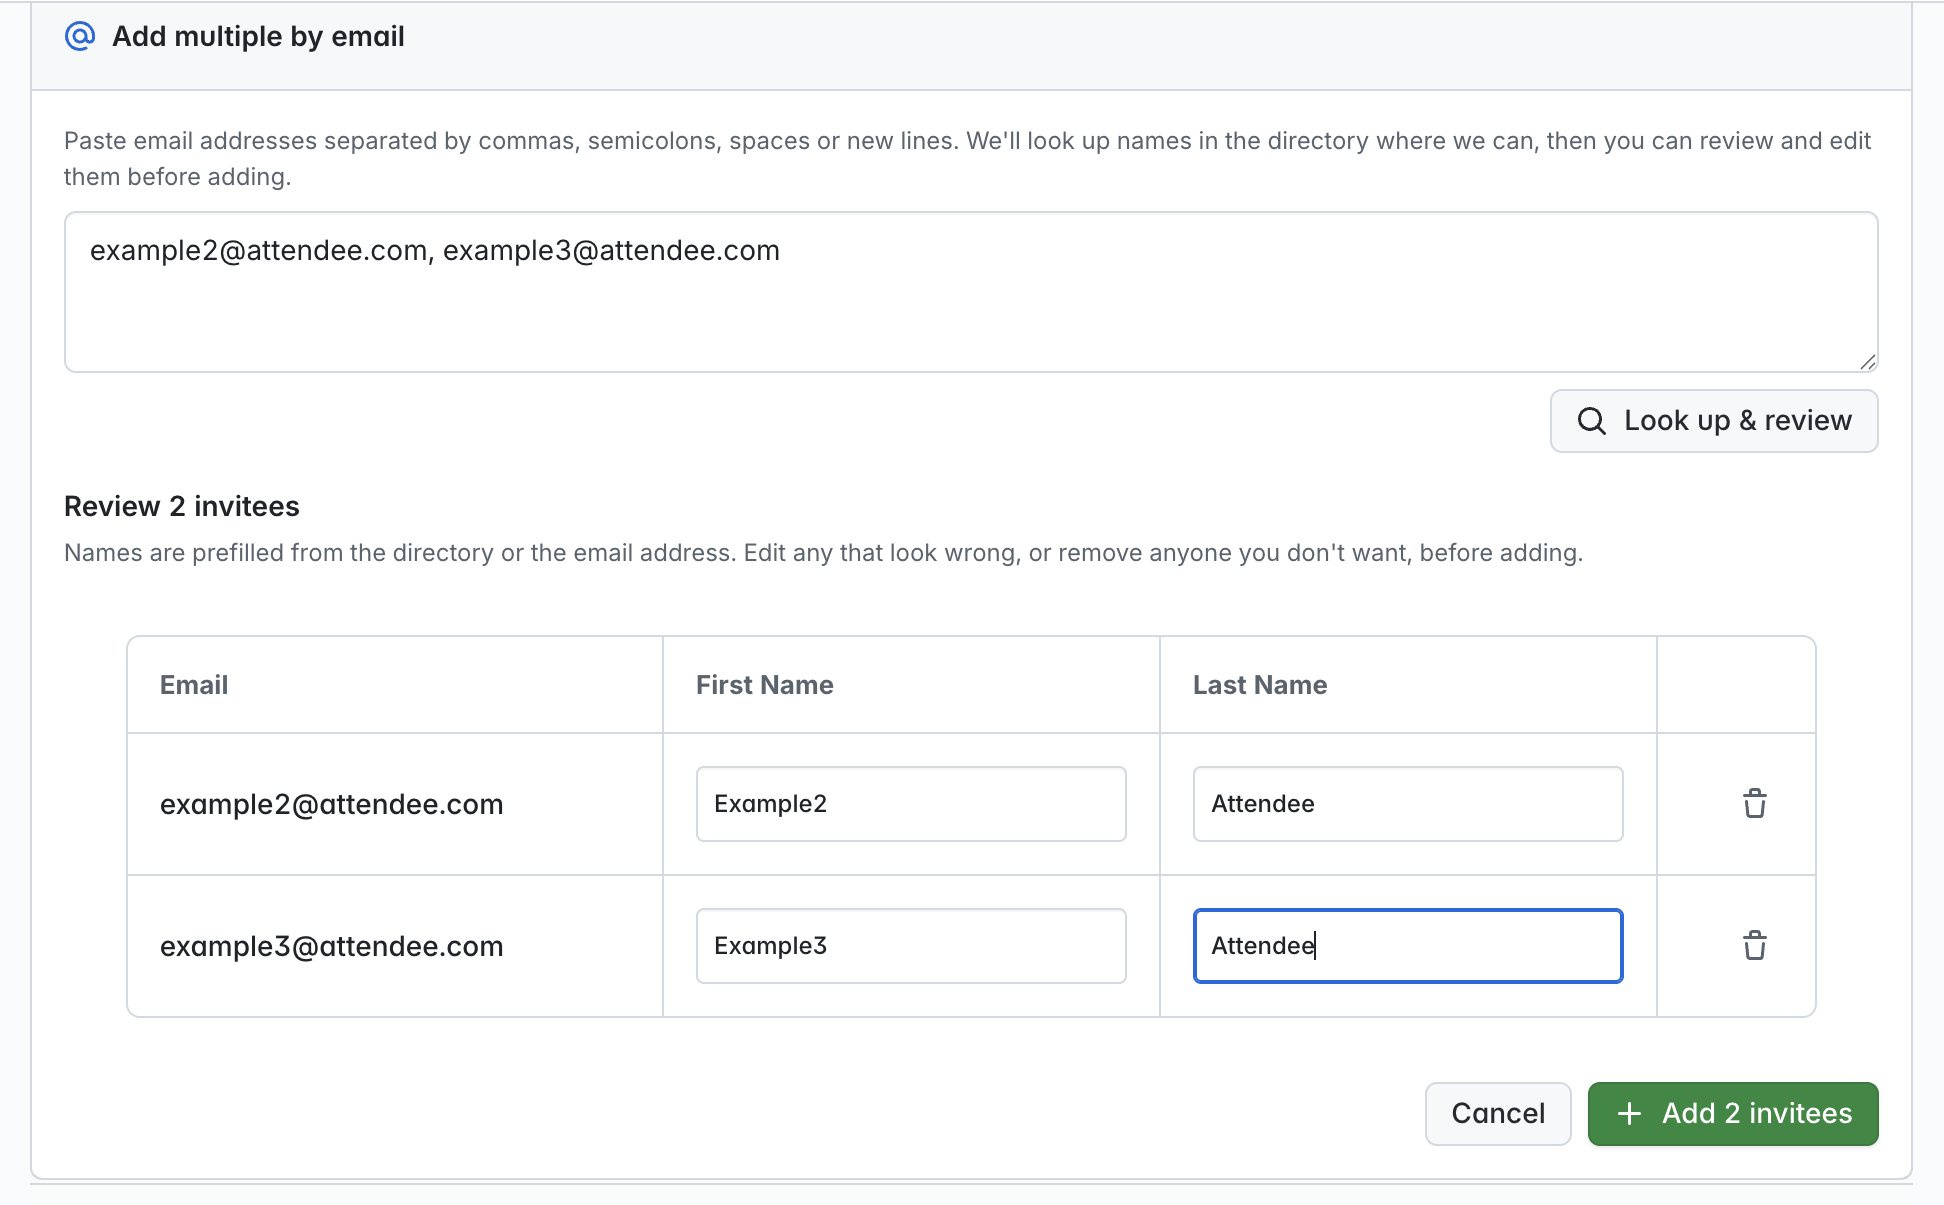
You will then be presented with a grid listing each invitee per row, with the ability to add/amend names before submission. When you are ready to submit, click on the green '+ Add * invitees' button and they will be added to the Invitees list. When you are ready to proceed, click on the 'Save & Continue' button - you will now be on the 'Review' page.
Review
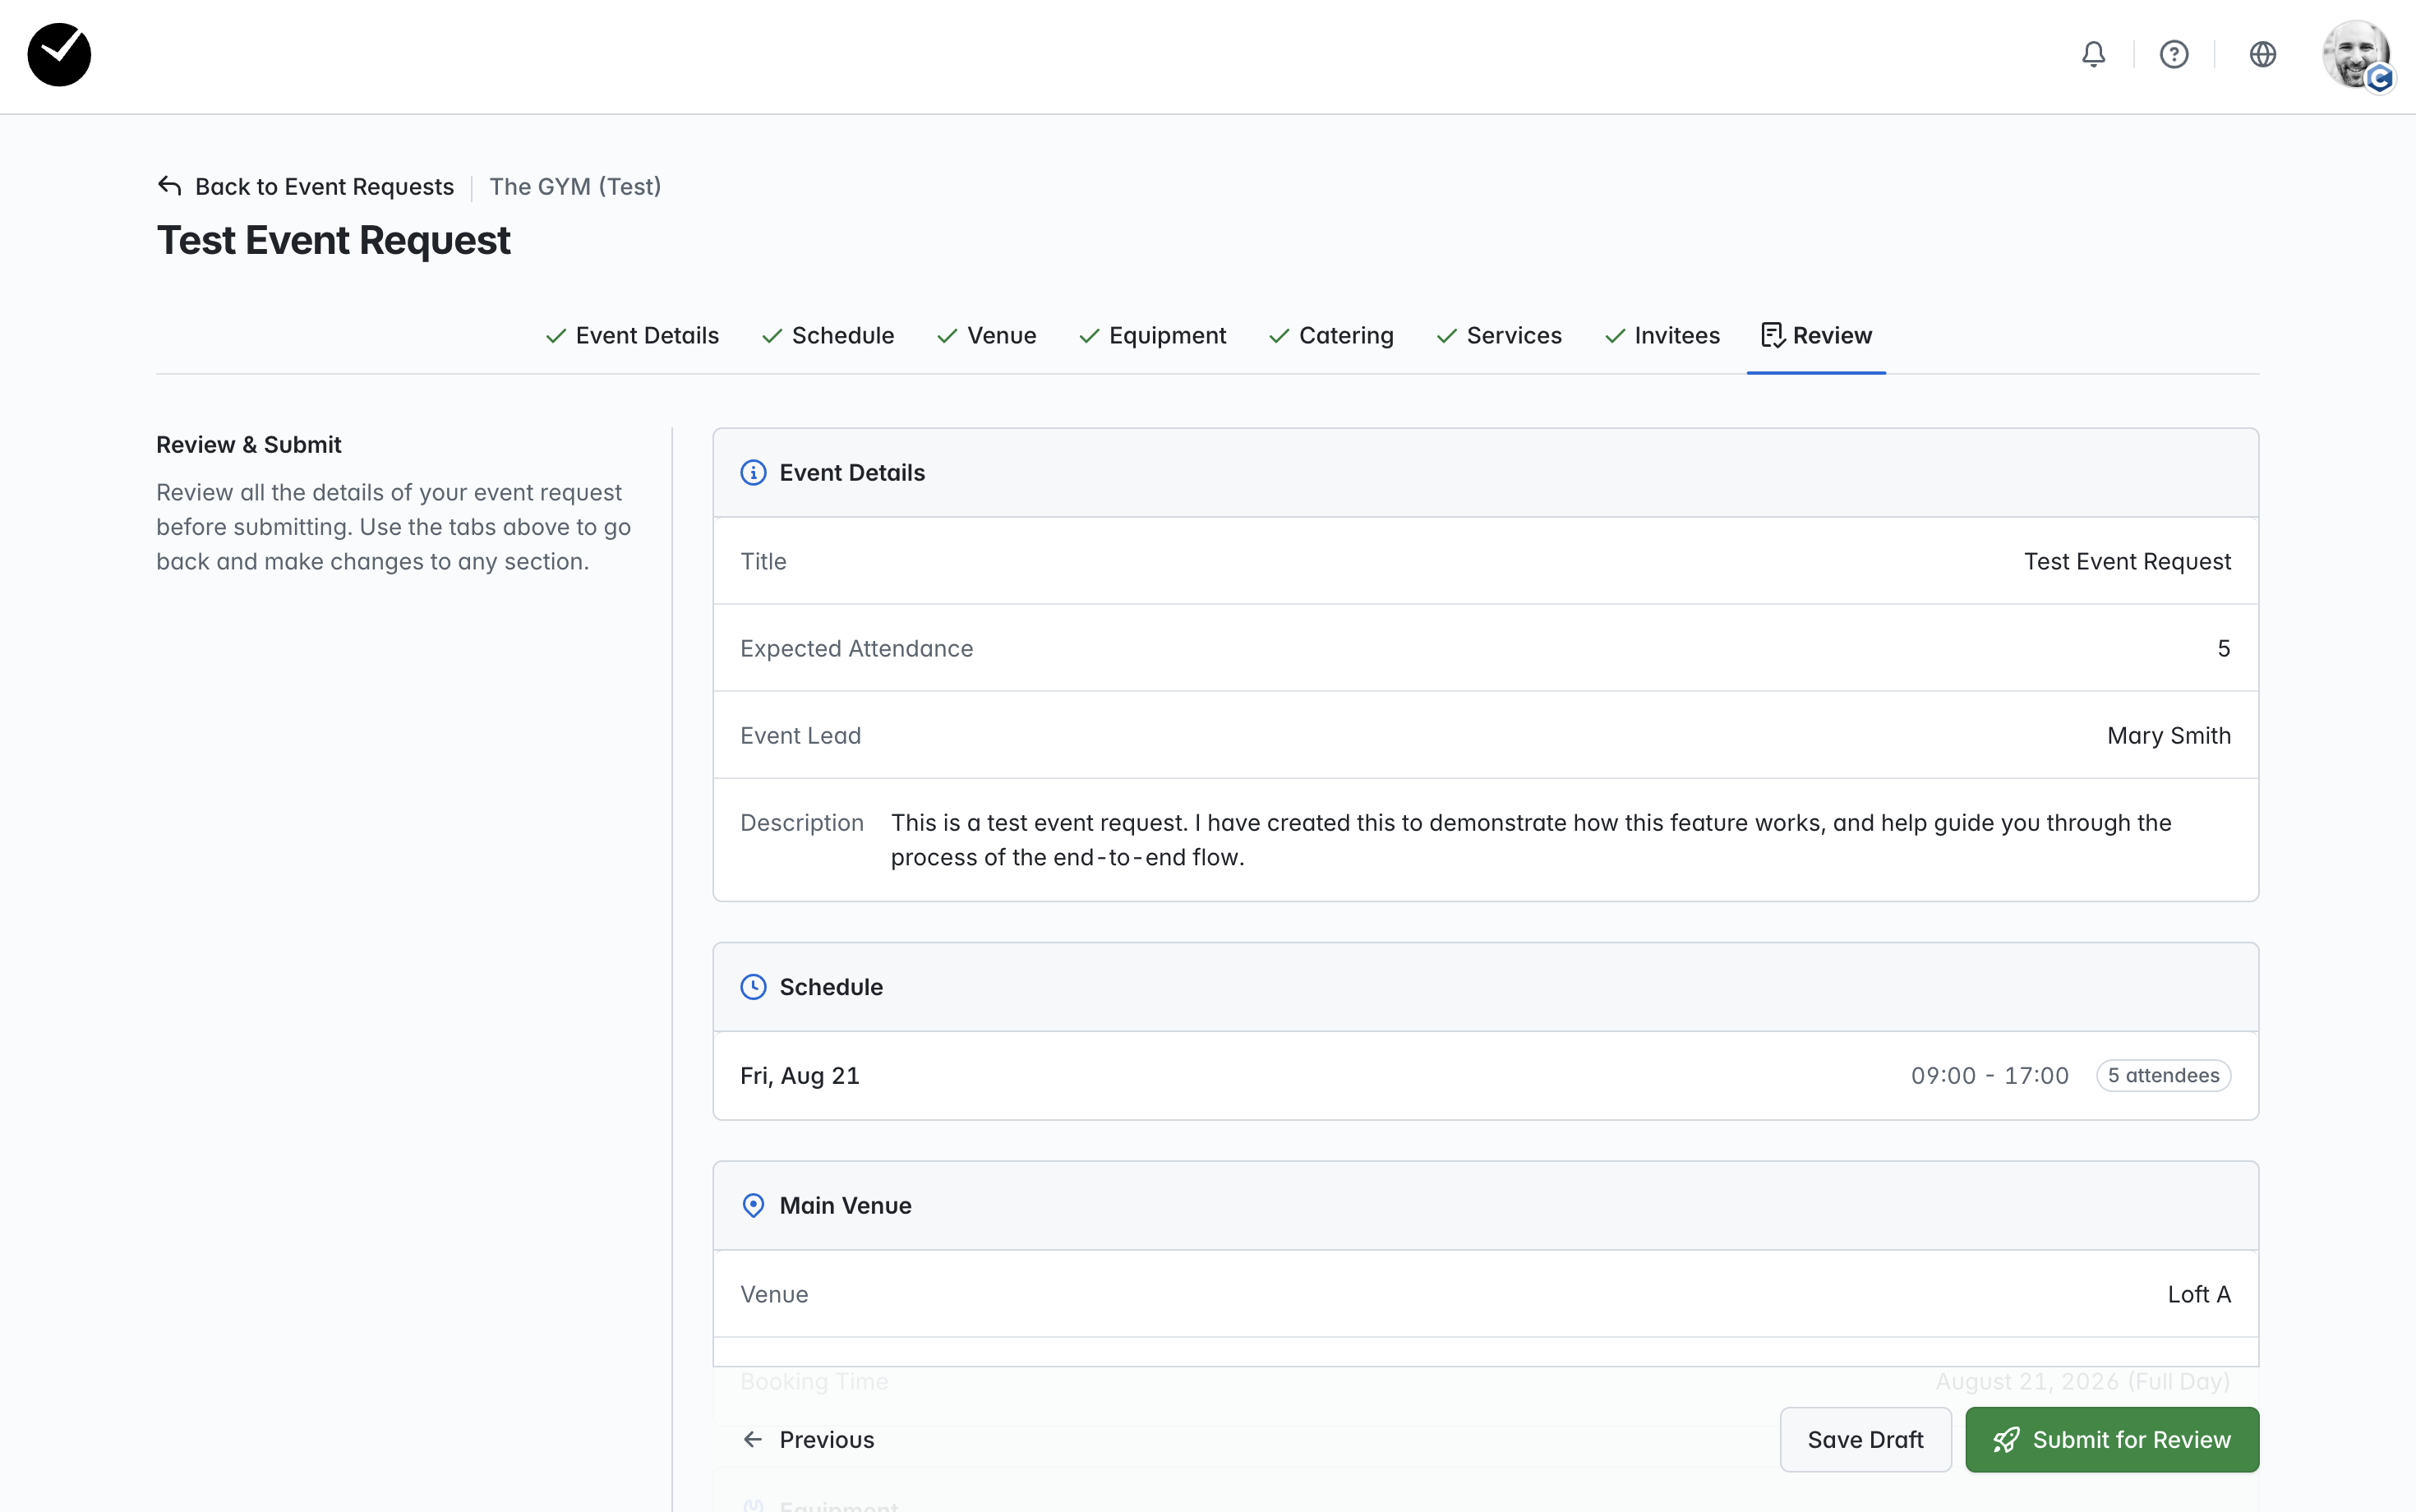
This is the final page of the Event Request form - on here you can review all the data you have saved for your event before you submit. If you're not ready to submit yet, you can select to 'Save Draft', which will take you back to the Event Requests area of your organization. If you need to make any edits, simply click on the tab related to the area you need to amend (eg Schedule, Invitees etc), and you will be able to make your edits and save. You can then just click on the 'Review' tab to return to the Review page and submit for review.
To submit, click on the 'Submit for Review' button - and you will then see a summary page displayed:
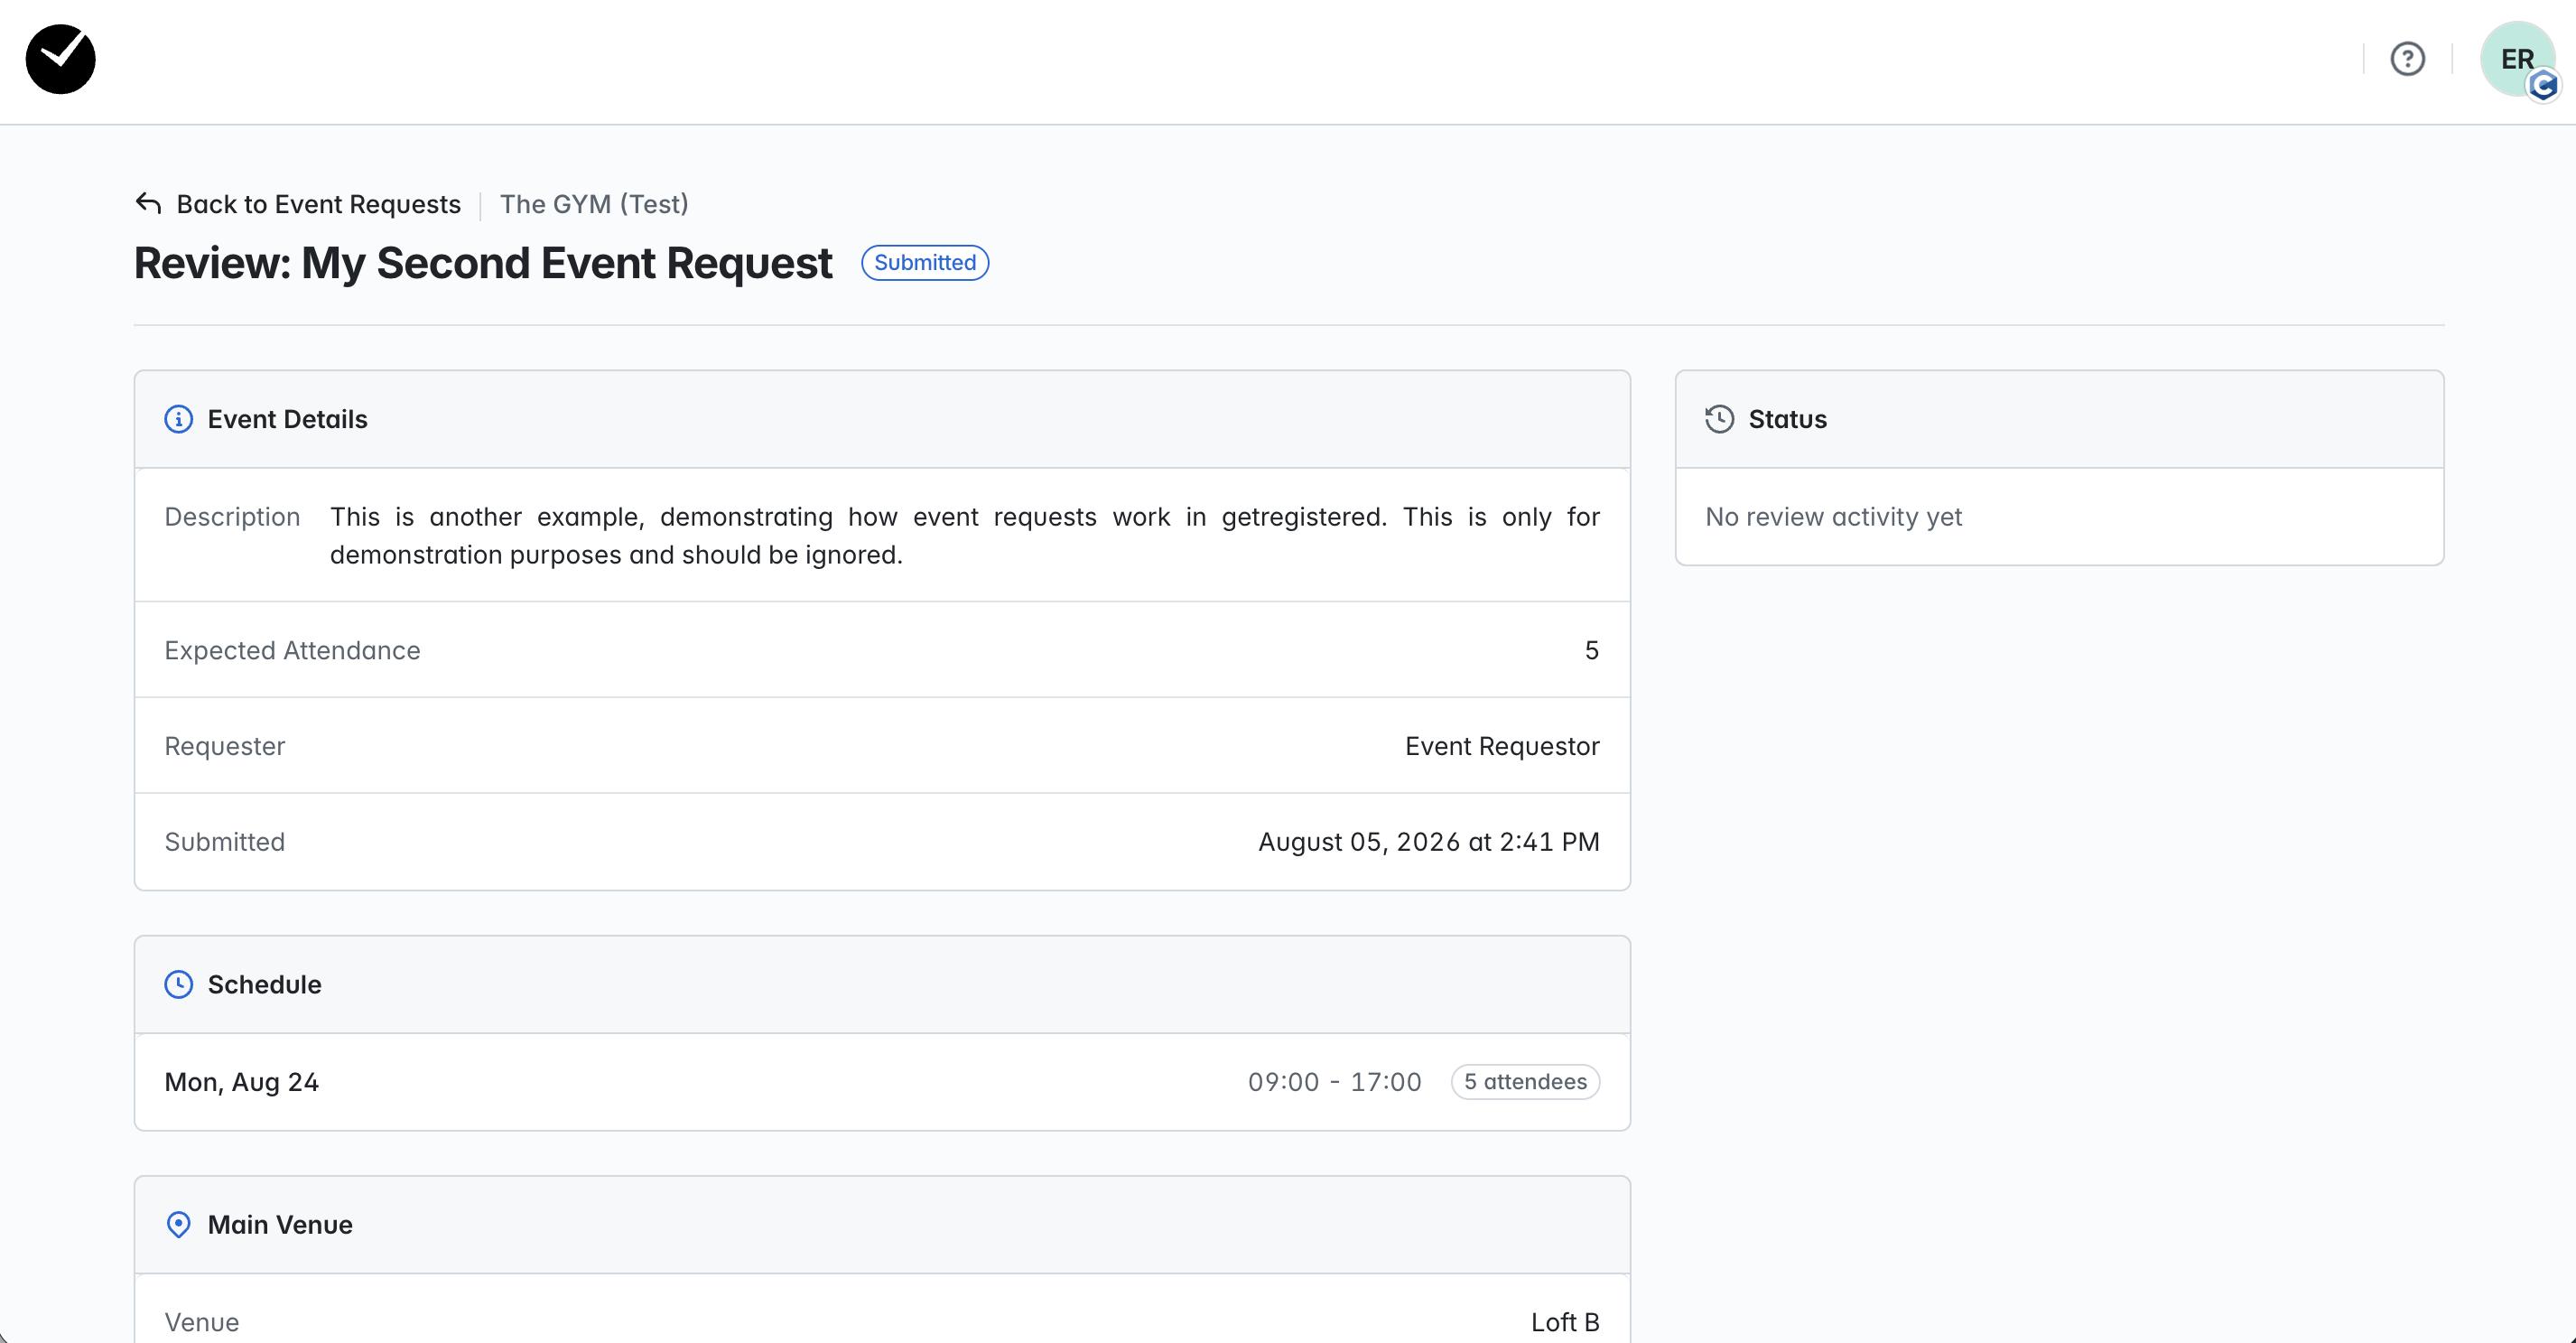
Your Event Request will then be marked as 'Submitted' and your organization's administrators will be notified of the new request. They will then review and choose whether to approve, request changes or decline your request accordingly.