.png)
How do I review an Event Request?
Notes: To use the 'Event Requests' feature, it must be enabled for your organization first. Please contact support if you are interested in activating the feature for your organization.
Only administrators can review an Event Request.
As an administrator, you have the ability to review and convert Event Requests, as well as the ability to create them yourself. Whenever a new event request is submitted, or changes related to a request you have reviewed occur, you will receive an email notification - however, you can also access all of your organization's Event Requests from your Organization Dashboard, under the 'Event Requests' tab:
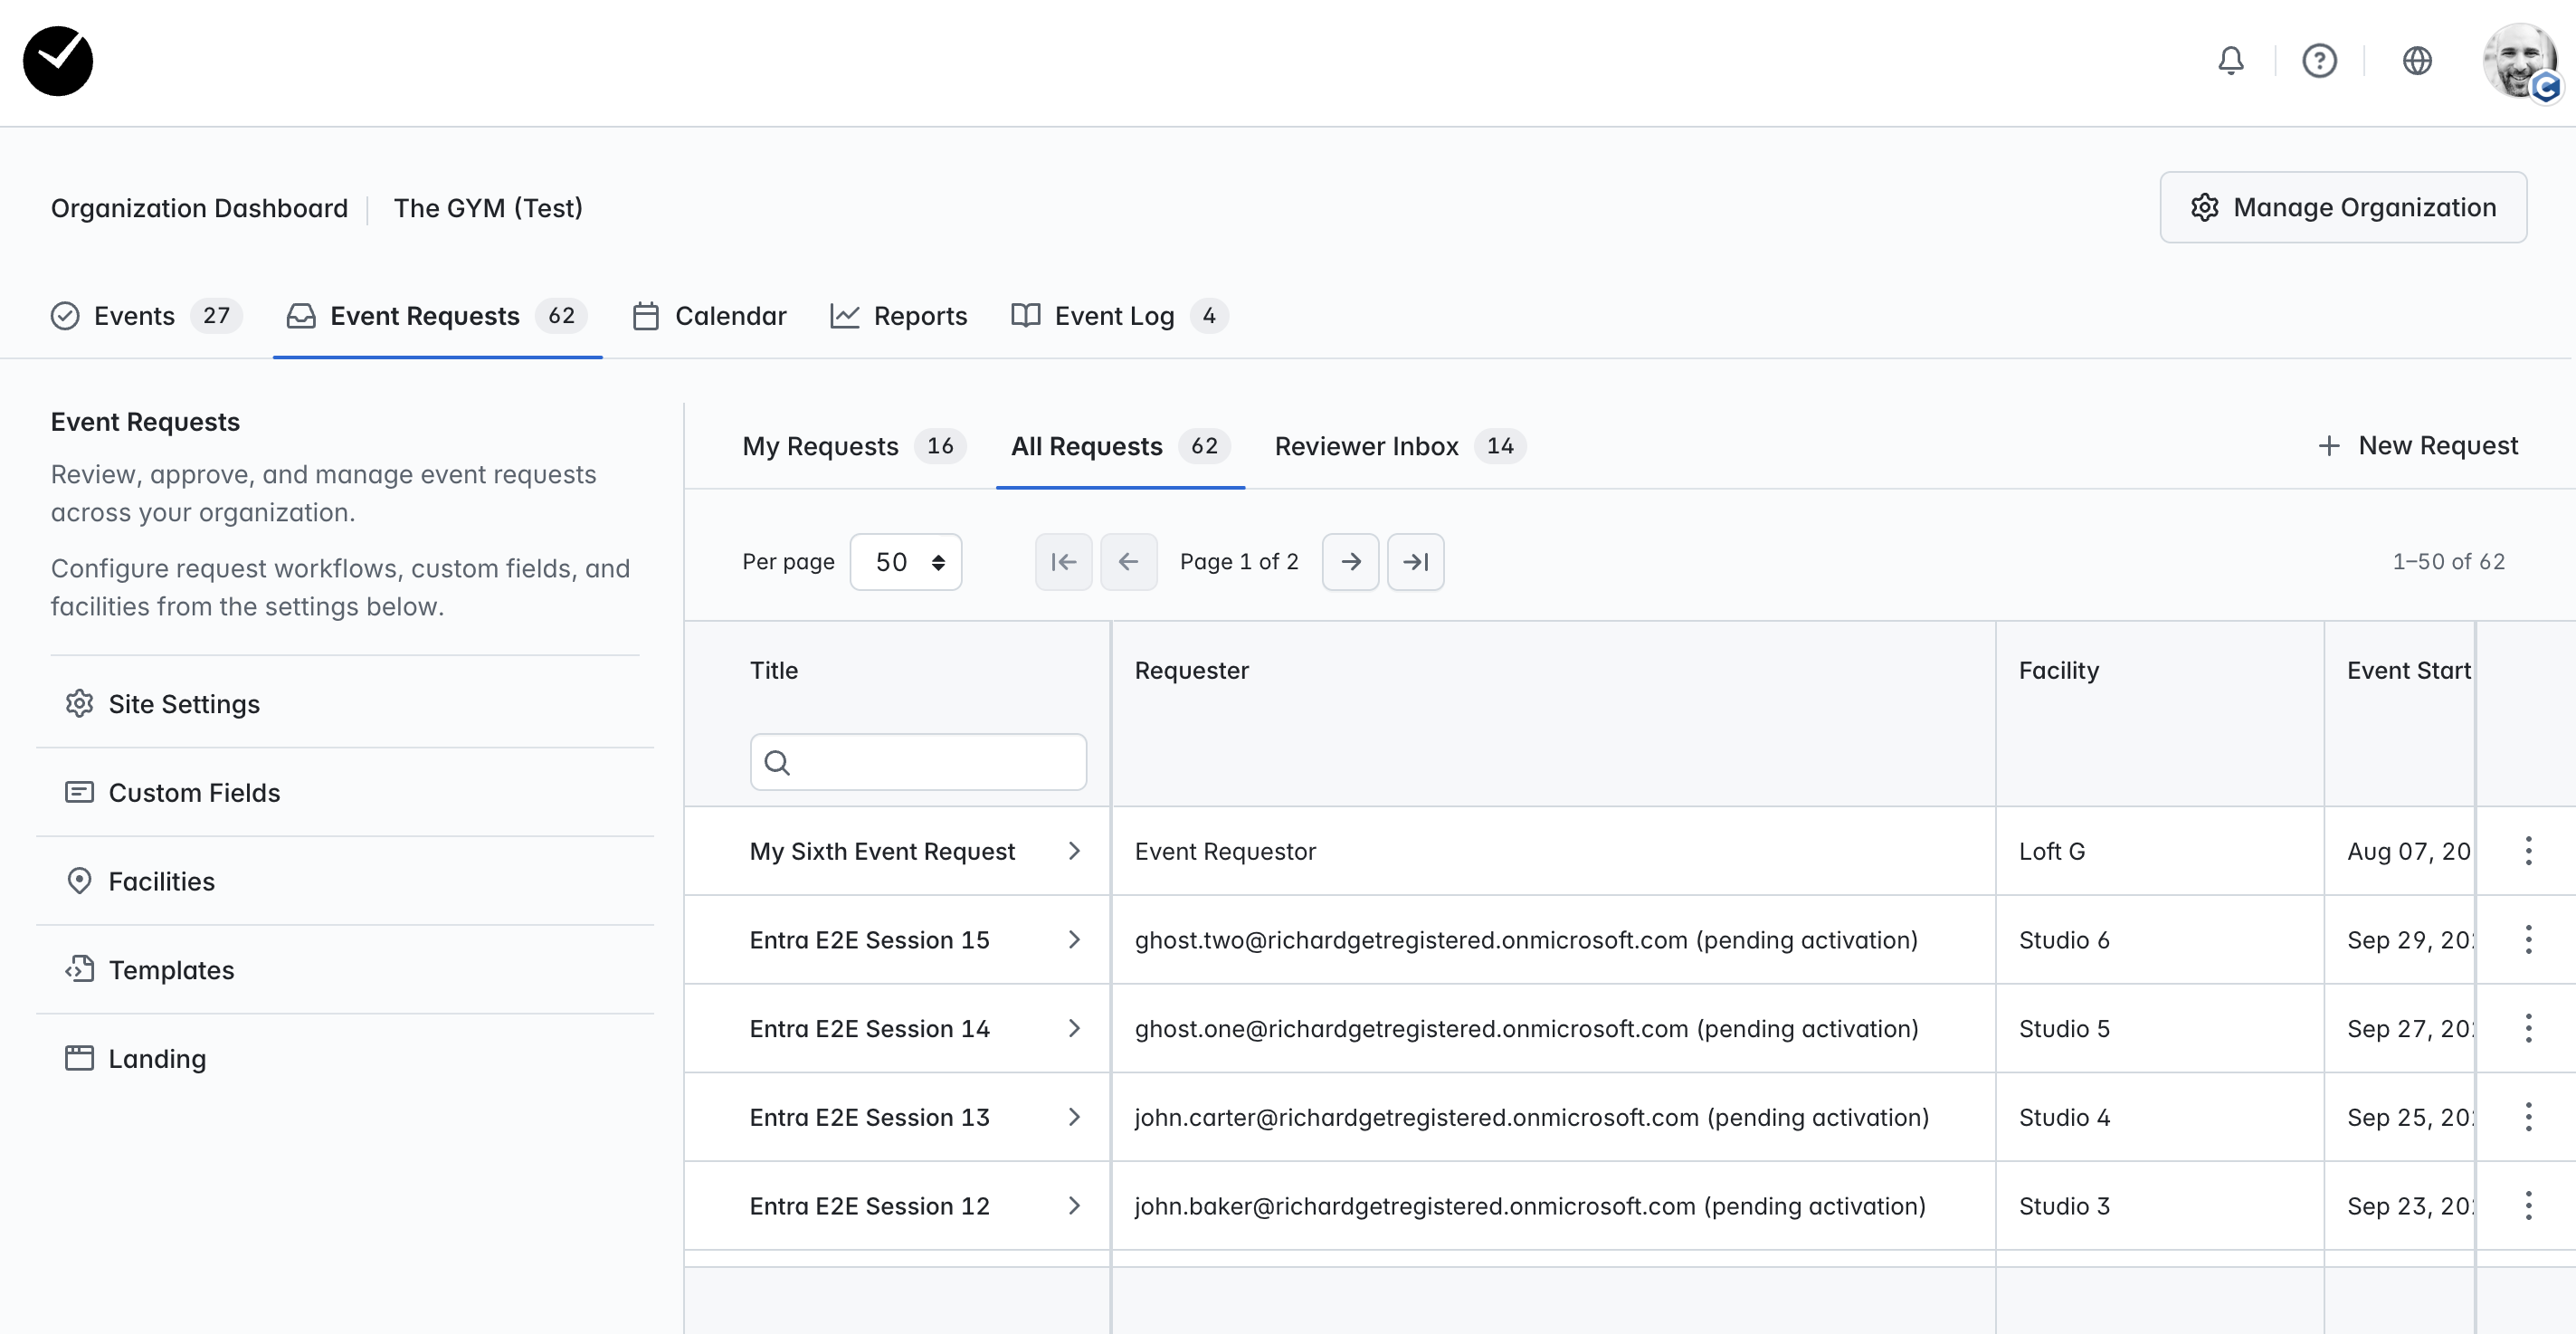
You will see 'All Requests' by default when landing in this area - this grid returns all requests that have created in your organization, with the ability to easily search, sort and filter where required.
The tab to the left ('My Requests') contains only Event Requests you have created yourself, and the tab to the right ('Reviewer Inbox') collects all Event Requests waiting to be reviewed/actioned against in one place:
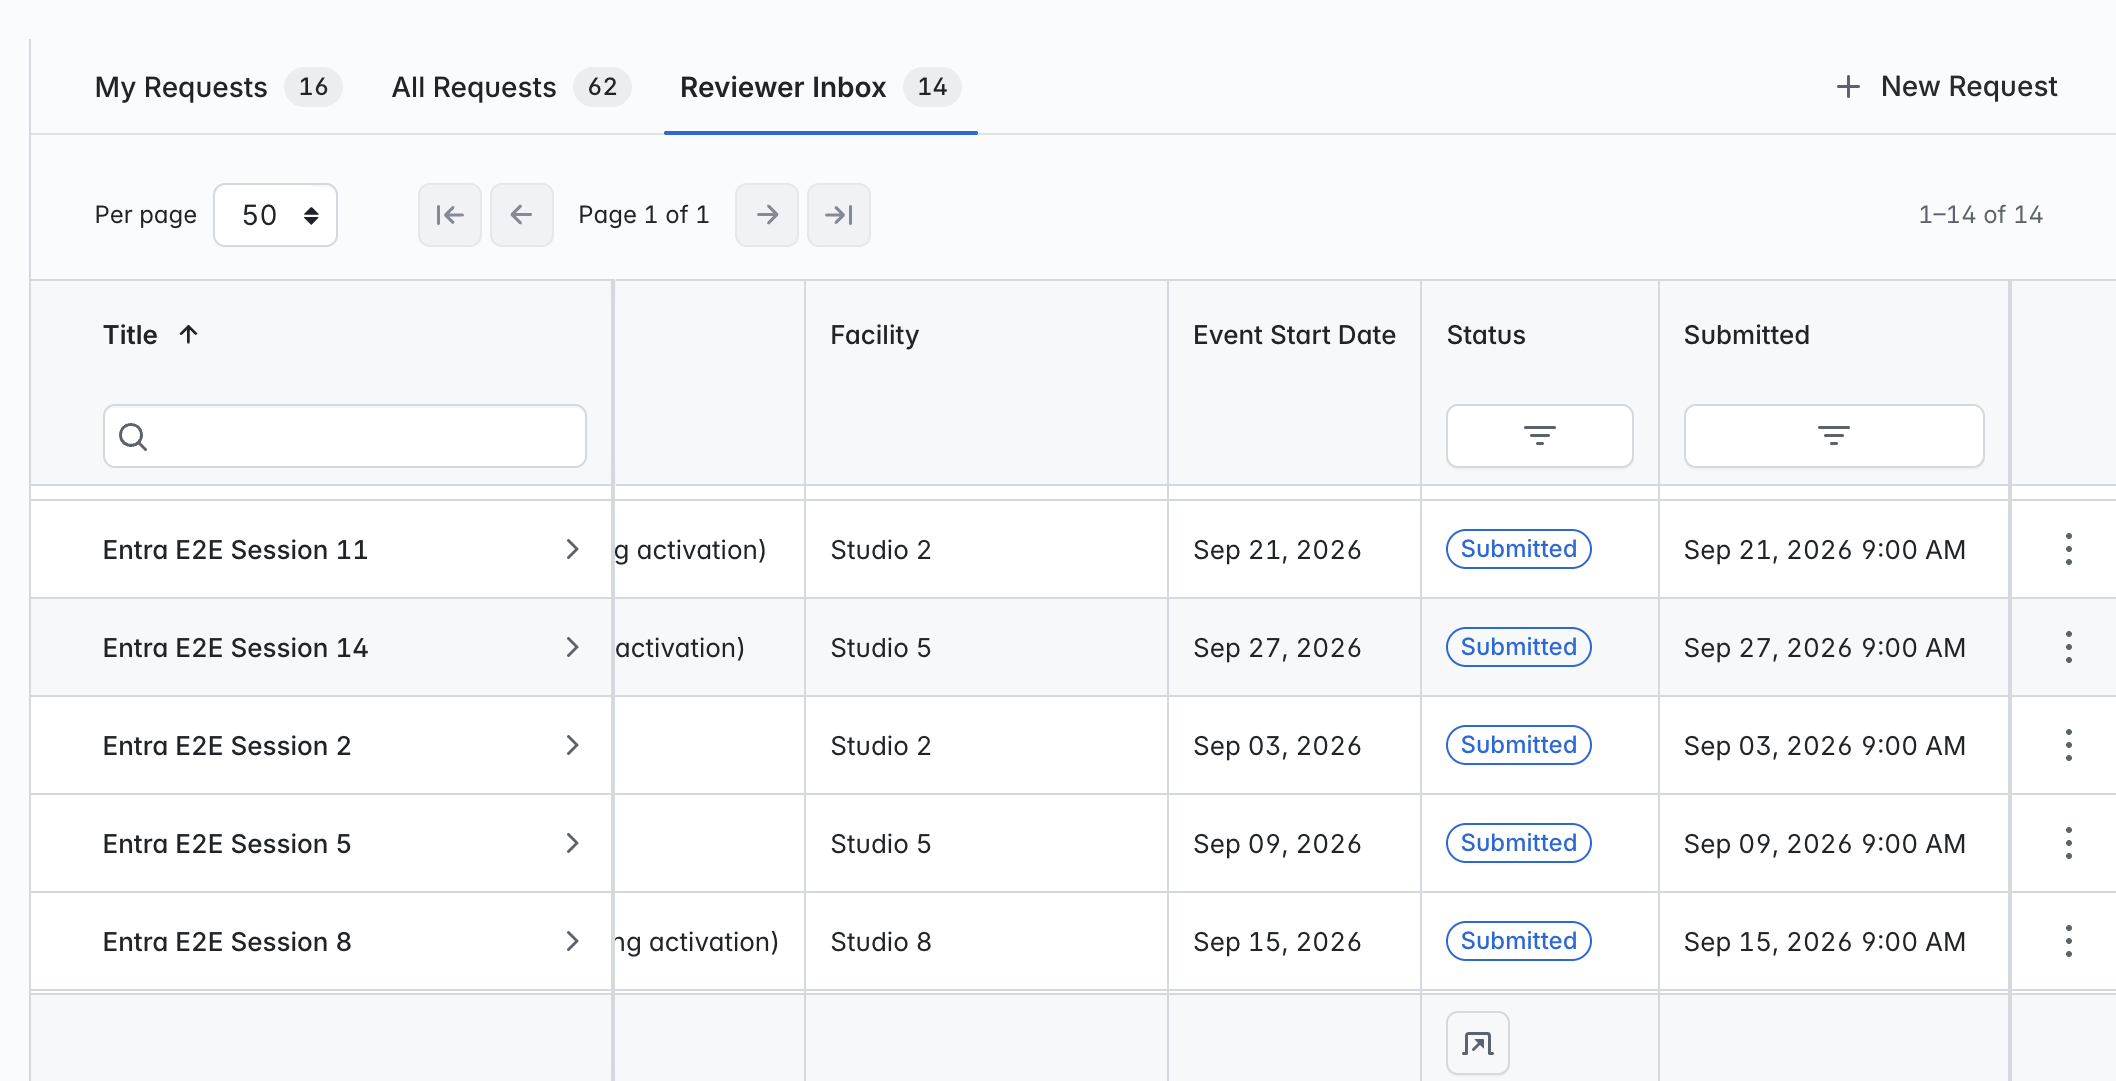
Any administrator can review and edit any Event Request if required, and this area can greatly assist your team with keeping on top of all pending requests!
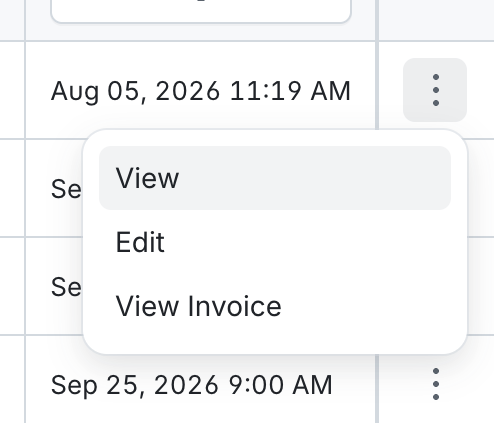
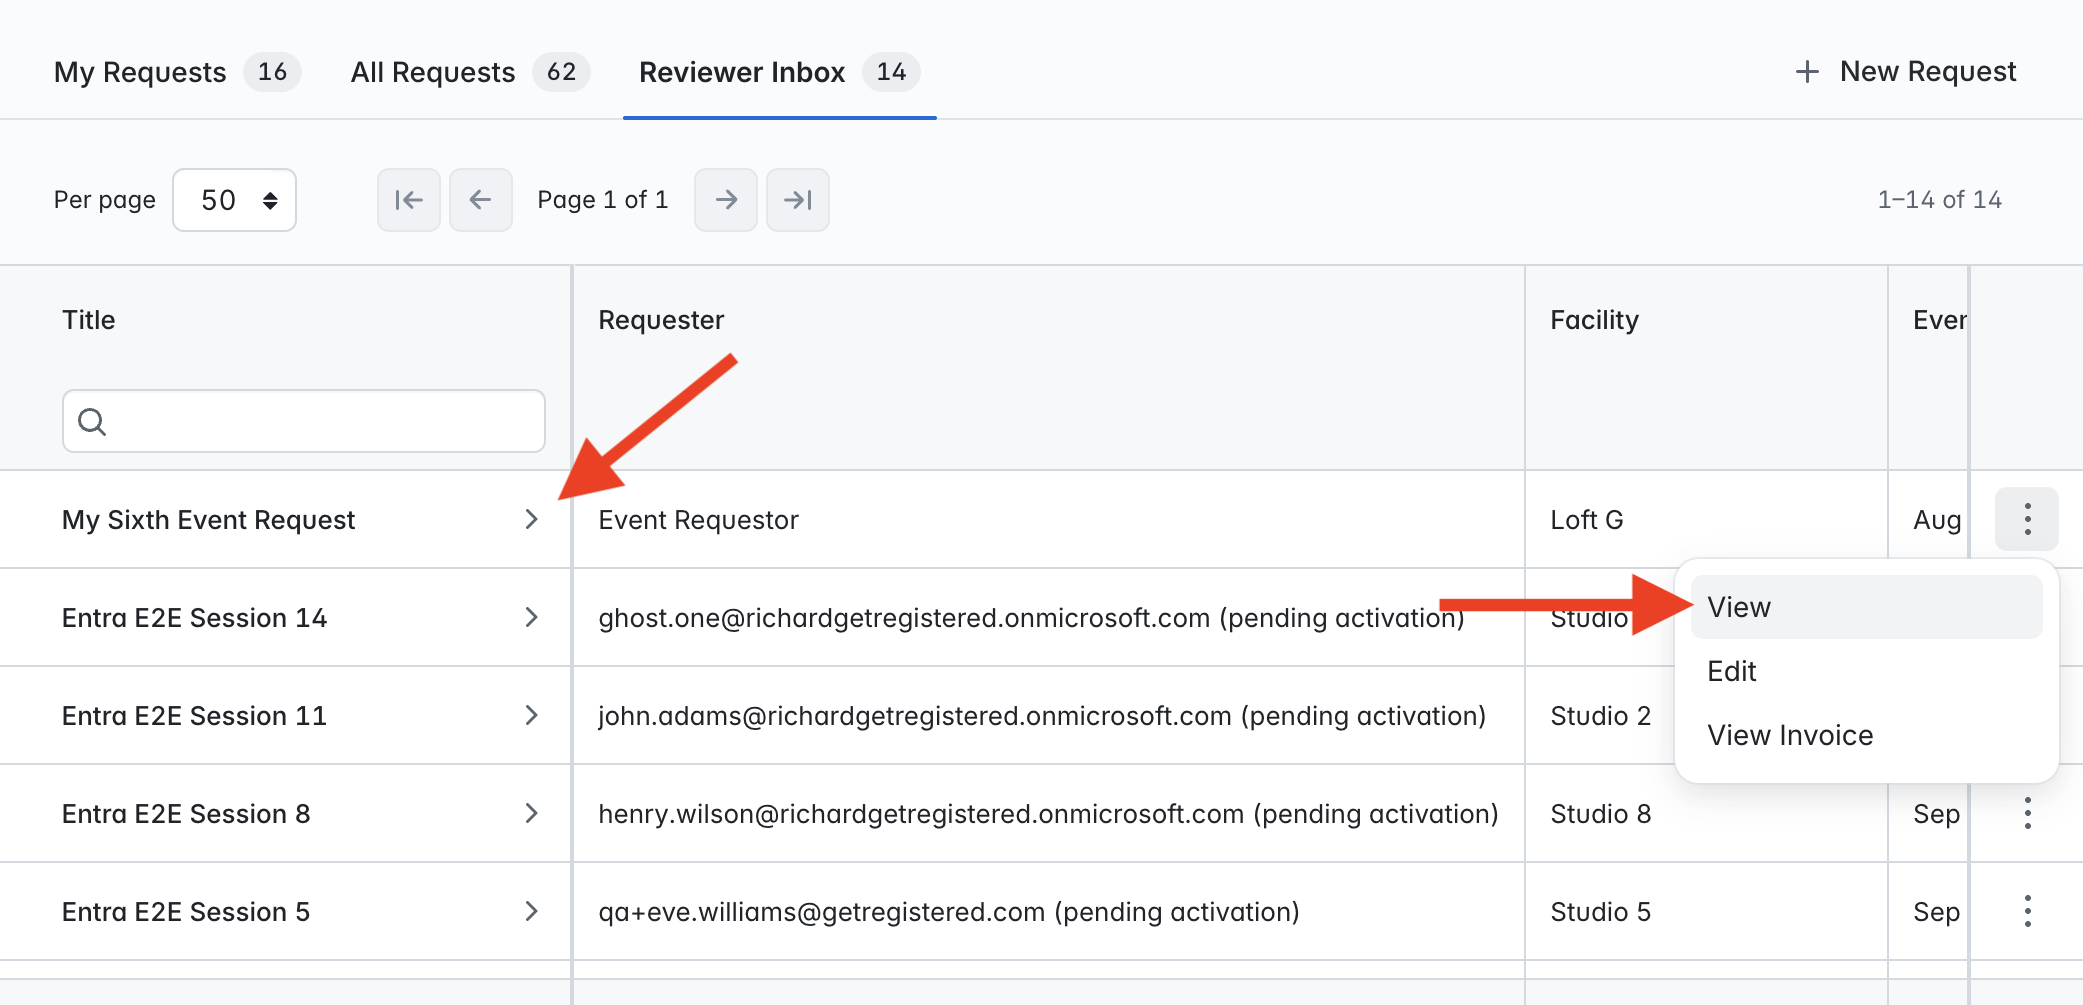
To view any request on any of the tabs above, simply click on the '>' arrow button next to the Event Requests name. To edit a request or view the generated invoice (where applicable), click on the 3 dots at the end of the row of the request:
So how do I review an Event Request then?
As mentioned earlier, when a new Event Request is submitted, or when changes occur to an Event Request you have been reviewing, you will receive an email notification with a link that will take you directly to the related Event Request Summary page.
In the app, enter the Event Requests area and select the 'Reviewer Inbox' tab to access all pending requests - just select to view the request you wish to review, either by clicking the '>' button or the 'View' option at the end of the request's row.
You will then see the Summary page for the selected Event Request:
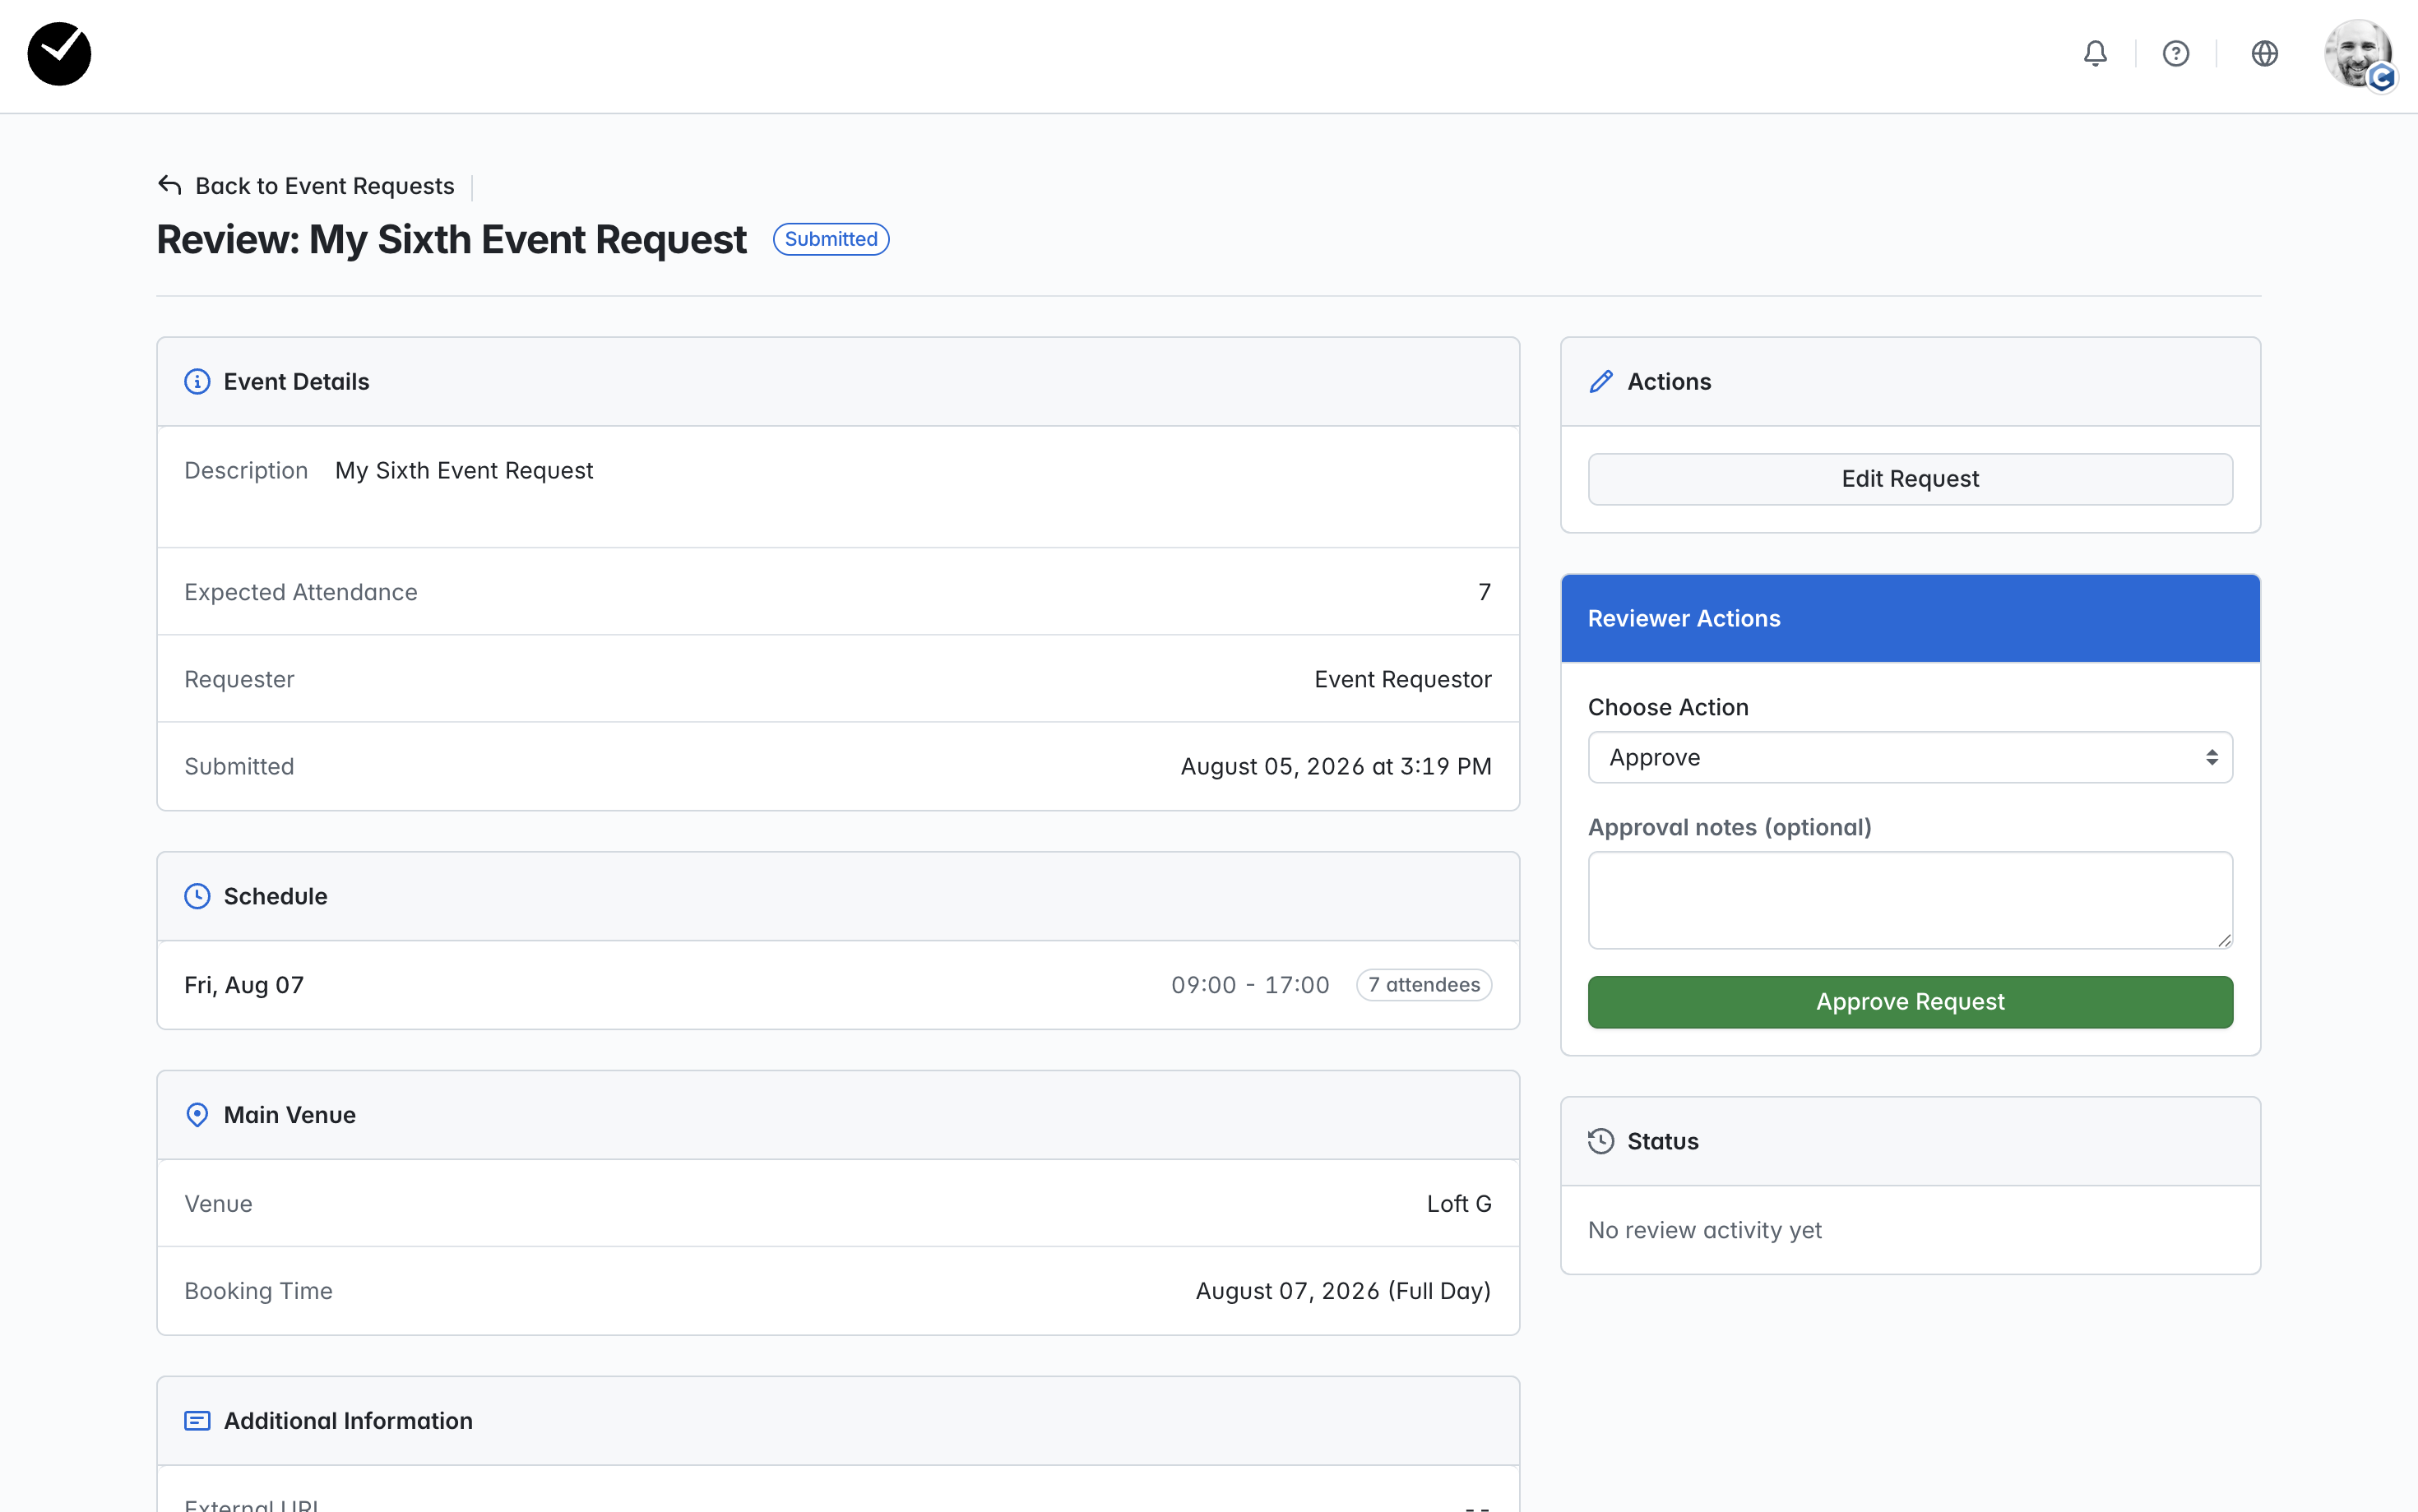
On the main body of the page, you will see a list of all the request items created by the event requestor for you to review, which you can then review at your leisure. On the right of the page, you will find access to edit the request ('Edit Request' button) as well as choose your action for the request, leave notes, and view a status log of any previous review activity. When you have reviewed the Event Request details and are ready to make an action, select the 'Choose Action' dropdown, and you will see the following options:
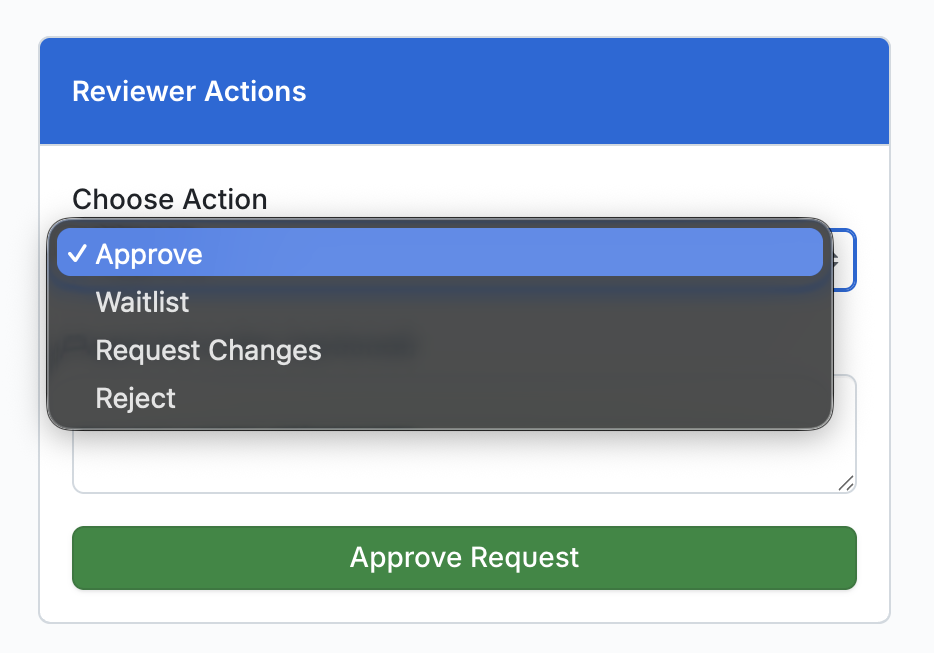
- Approve - approves the request, making it eligible for conversion into an event.
- Waitlist - mark the request as waitlisted, to let the requestor know that the request has been acknowledged and will be reviewed when appropriate.
- Request Changes - this will notify the requestor that changes to their request are required before it can be approved.
- Reject - reject the request completely. Please note that Event Requests cannot be changed from 'Rejected' status once it has been set, but can still be viewed by both the requestor and reviewer.
How do I approve an Event Request?
On the Event Request Summary page, once you have reviewed the request and are happy to proceed, select the 'Approve' action on the Choose Action dropdown and enter a note if you wish (this is optional):
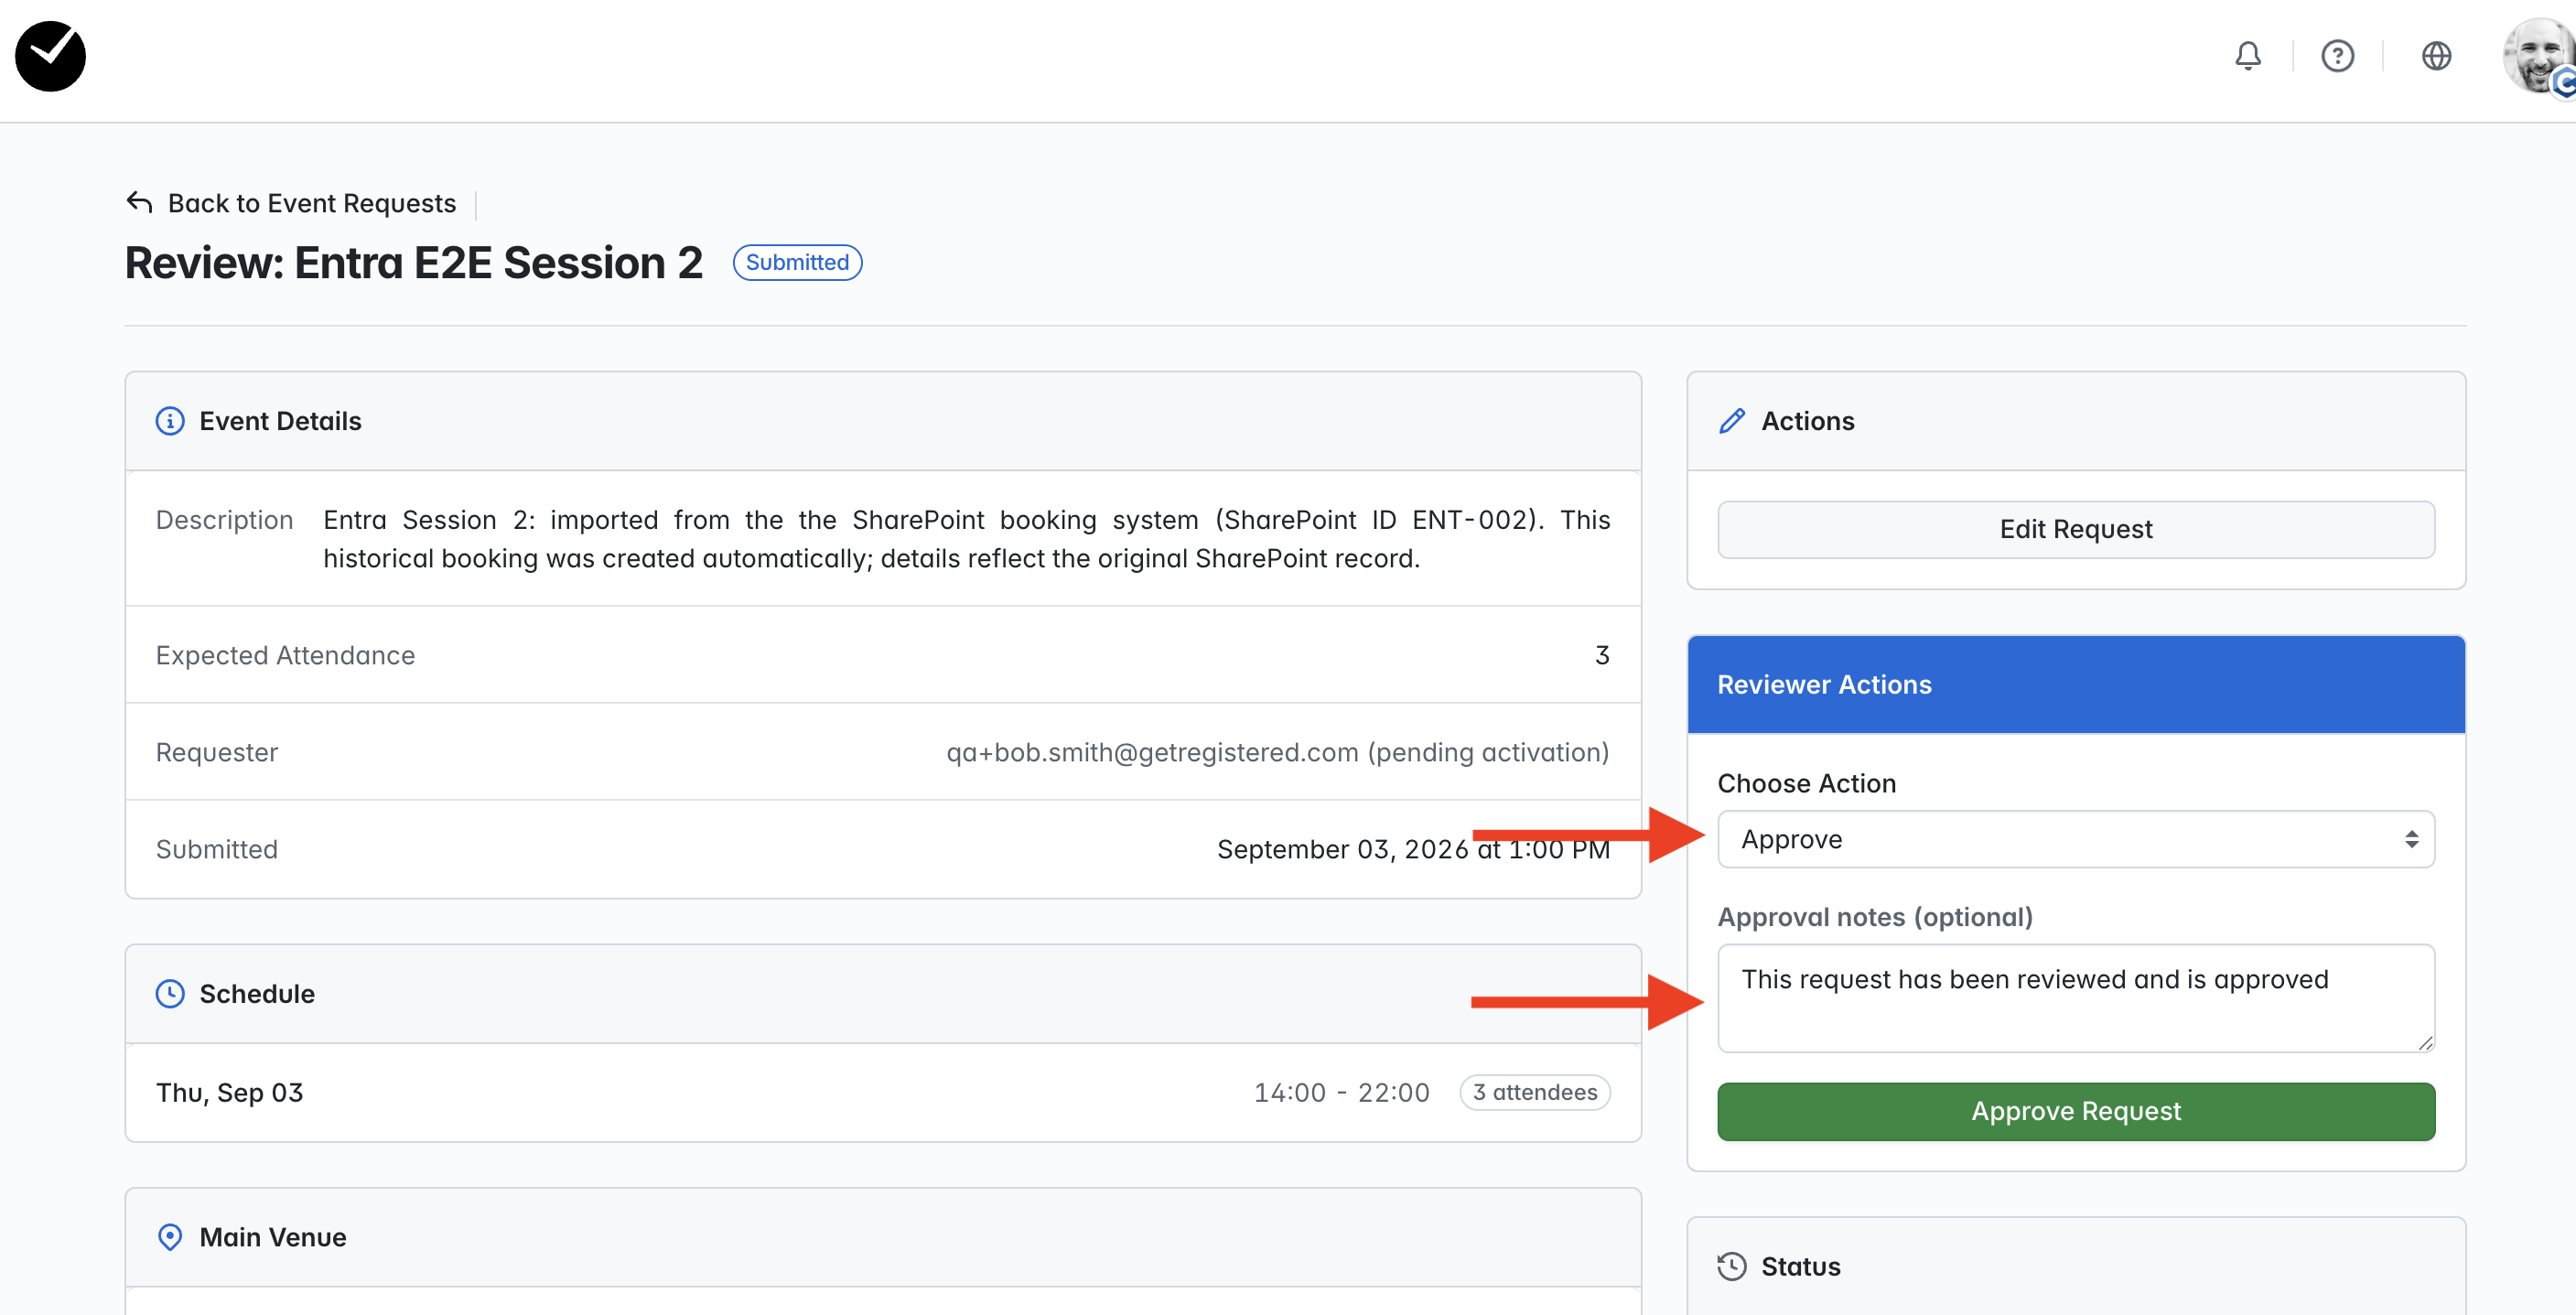
Next, click on the 'Approve Request' button - the request will be approved and the event requestor will be notified via email. You will now see an updated summary page, with the options to edit the request, 'Convert to Event' and 'Cancel Request' on the right hand side. 'Cancel Request' is also visible to the event requestor, and can used by them to submit for cancellation if required.
If you wish to proceed to convert the request into an event, click on the 'Convert to Event' and you will be taken to the 'Convert to Event' page:
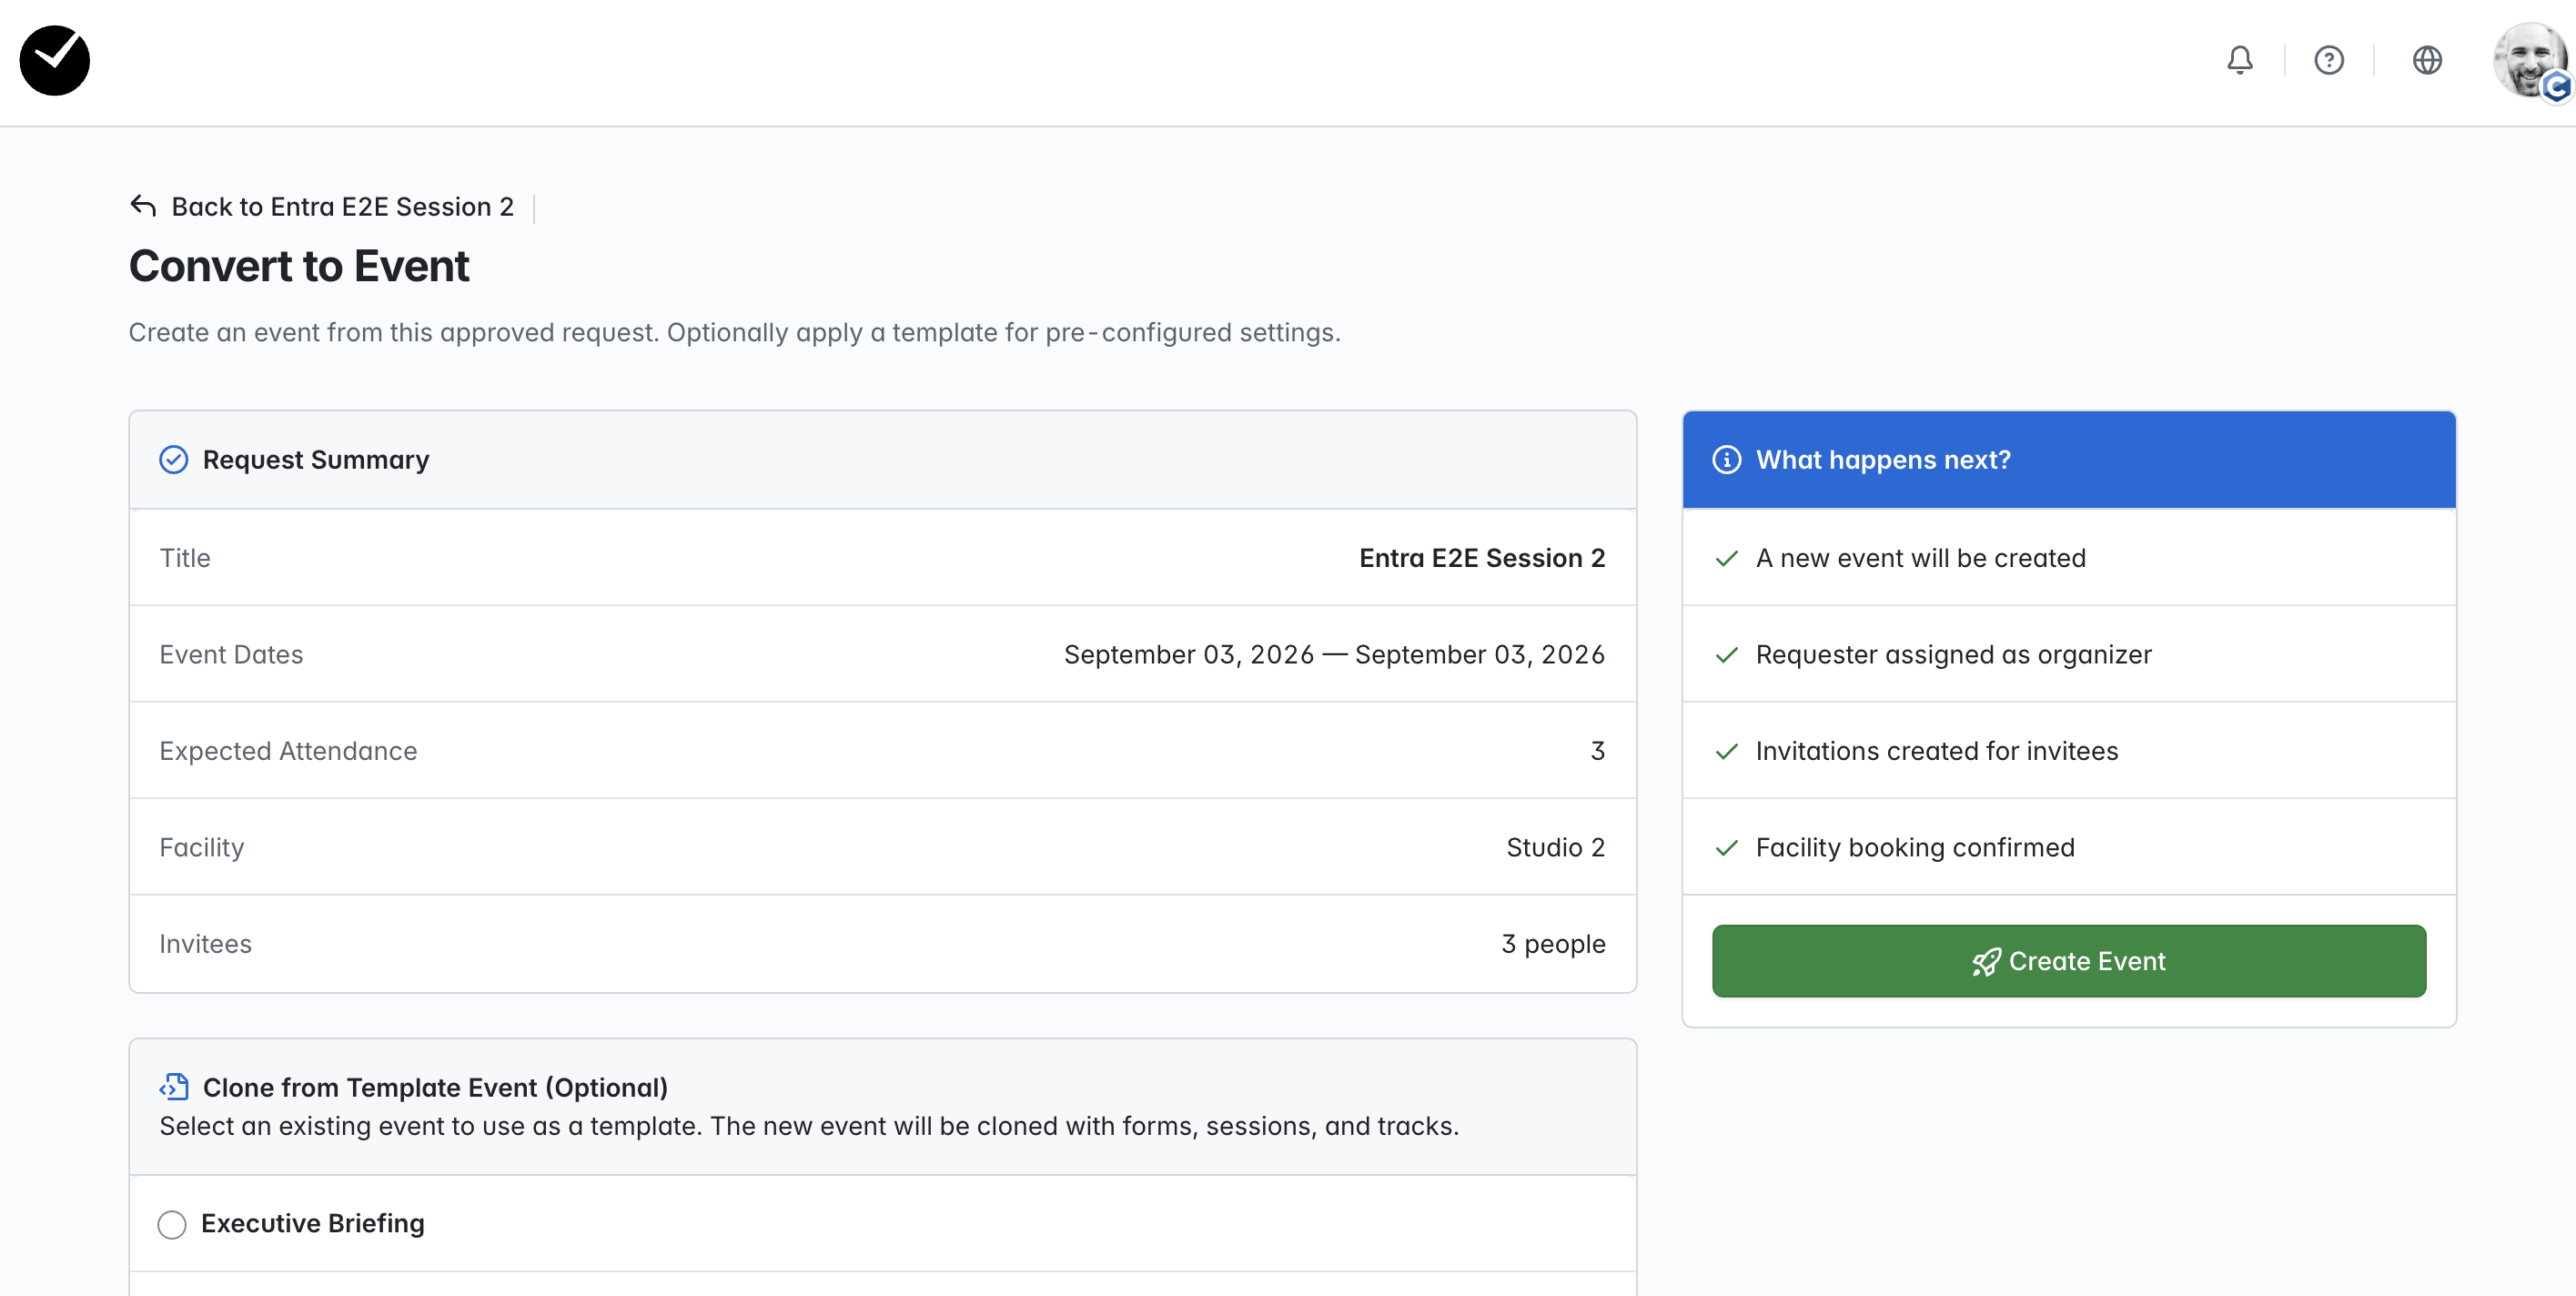
In here, you can choose to select to clone the event from a pre-created template, or just convert to a standard event with no additional configuration applied. When you are ready to create the event, select the 'Create Event' button and the event will be created. You will be redirected to the event once created, and it will be set to 'Draft'. The event requestor will also be able to access as an 'Event Owner' role and can interact with specific features of the admin area.
Can I create internal notes for event requests that I am reviewing?
When an event request is in 'Submitted' or 'Draft' status (in review), you will see the following 'Internal Notes' text areas on the right of the page:

In these areas, you can create notes that are only visible to staff who can review requests, or in regards to catering, notes that will be captured in caterer sheets and cross-event reports. Any notes added here will not be visible to the event requestor. They will also be visible to staff who can review requests within the Facilities and Services area of the event once the request is converted to an event.
How do I waitlist an Event Request?
On the Event Request Summary page, select the 'Waitlist' action on the Choose Action dropdown and enter a note if you wish (this is optional):
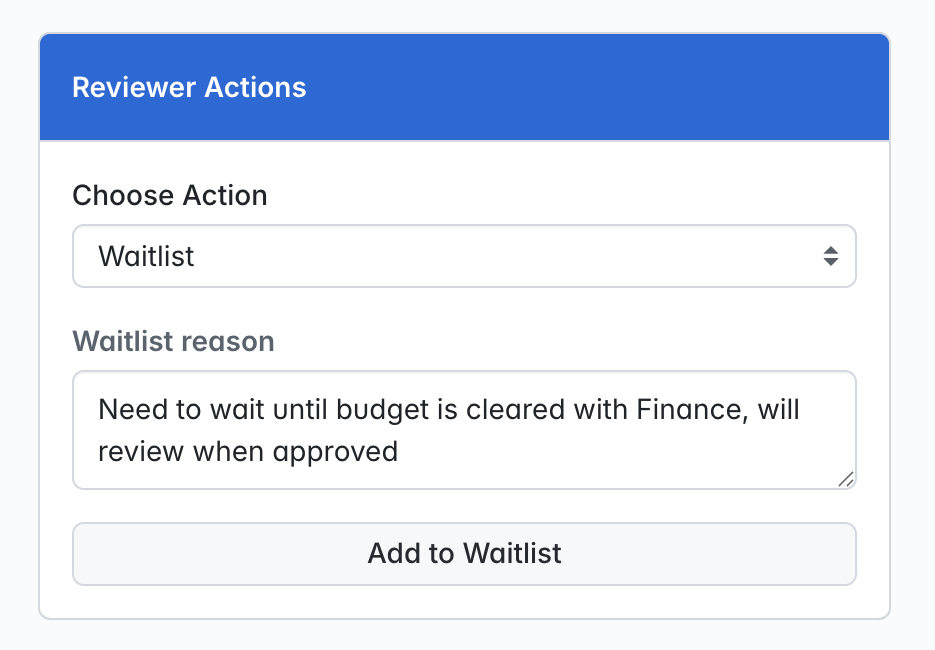
Next, click on the 'Add to Waitlist' button - the request will be waitlisted and the event requestor will be notified via email. You will now see an updated summary page, and the request status will show as 'Waitlisted':
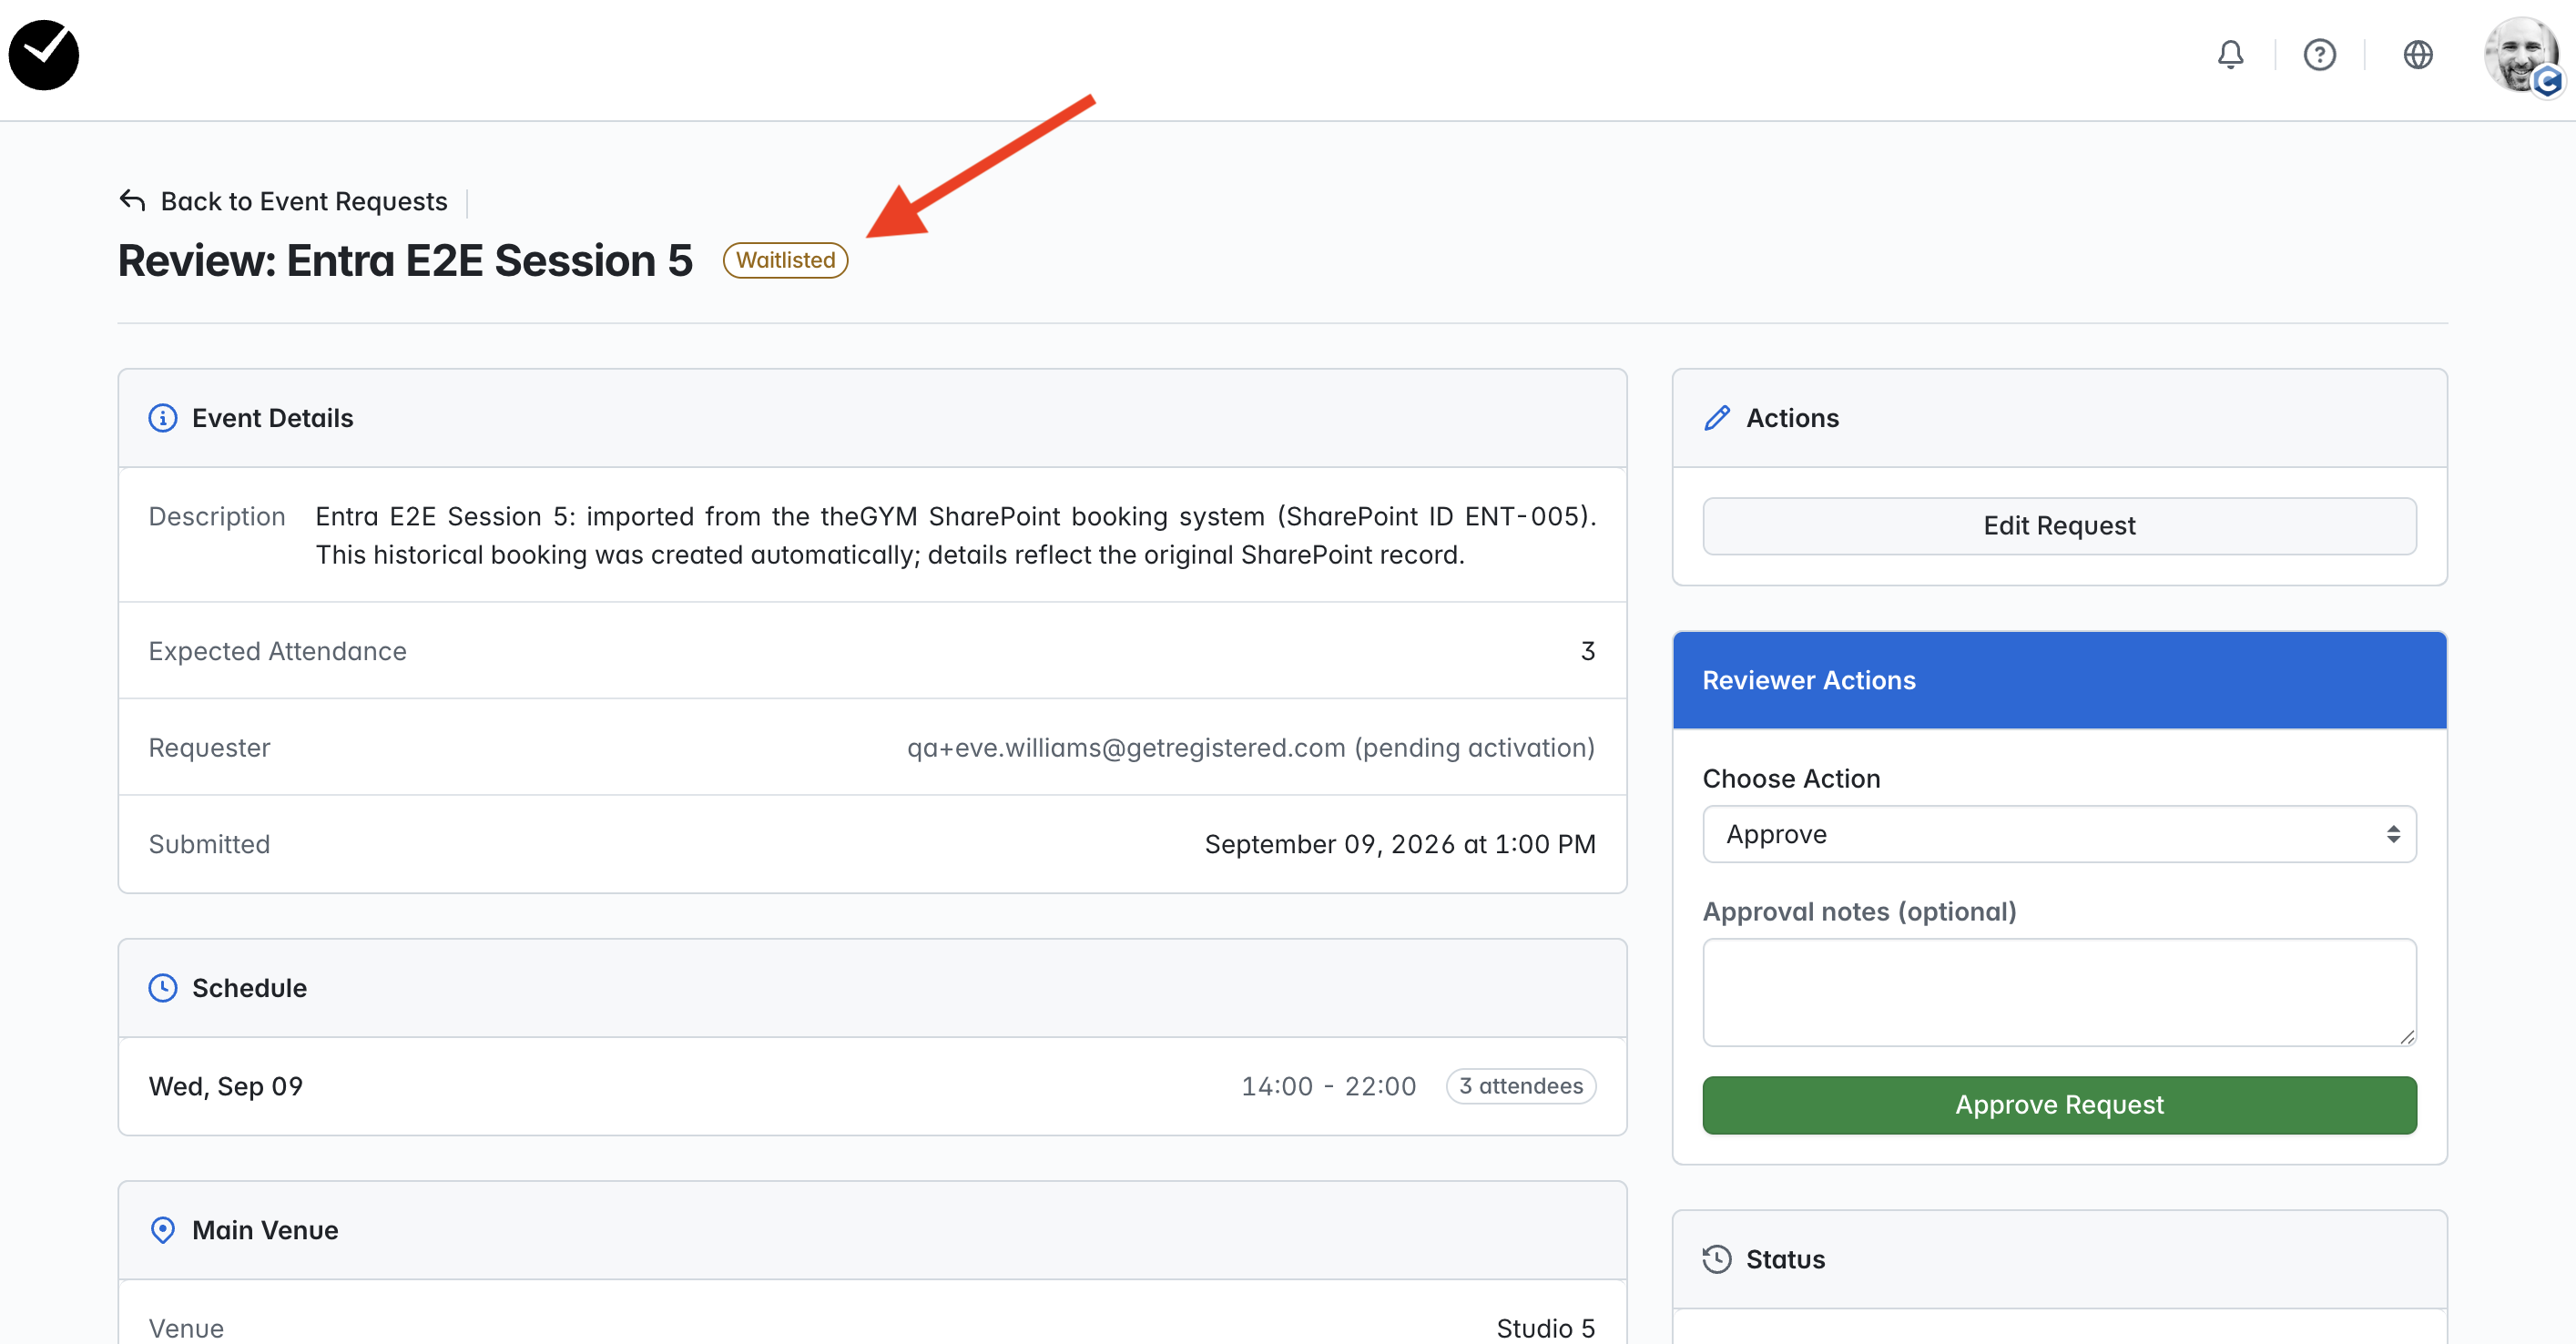
Both you and the event requestor will see the option to edit the request on the Summary page, 'and the Reviewer Actions area remains open for approval when the request is ready to be reviewed again.
How do I request changes to an Event Request?
On the Event Request Summary page, select the 'Request Changes' action on the Choose Action dropdown and enter a note if you wish (this is optional):
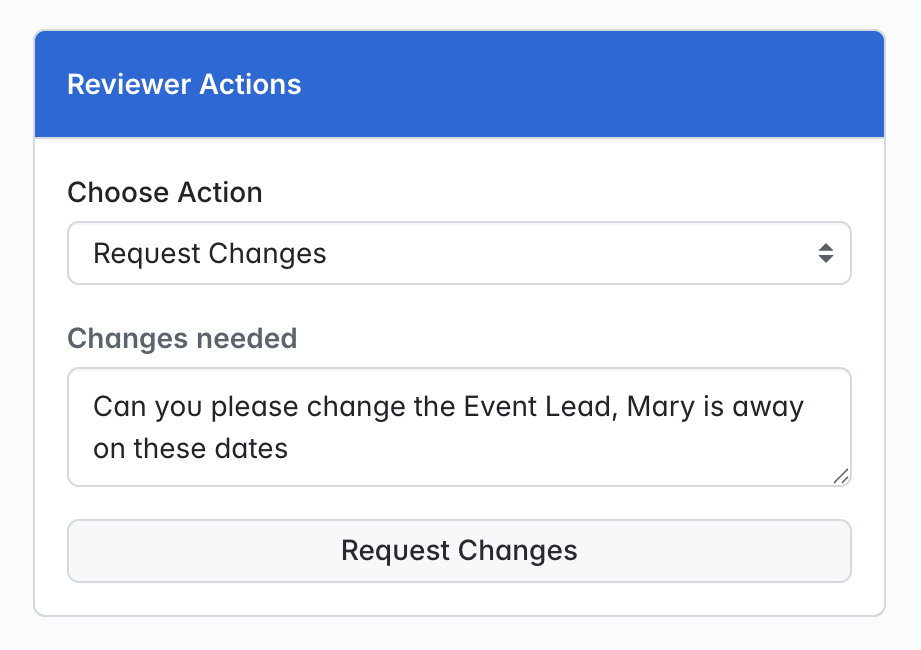
Next, click on the 'Request Changes' button - the request will be updated and the event requestor will be notified via email. You will now see an updated summary page, and the request status will show as 'Changes Requested':
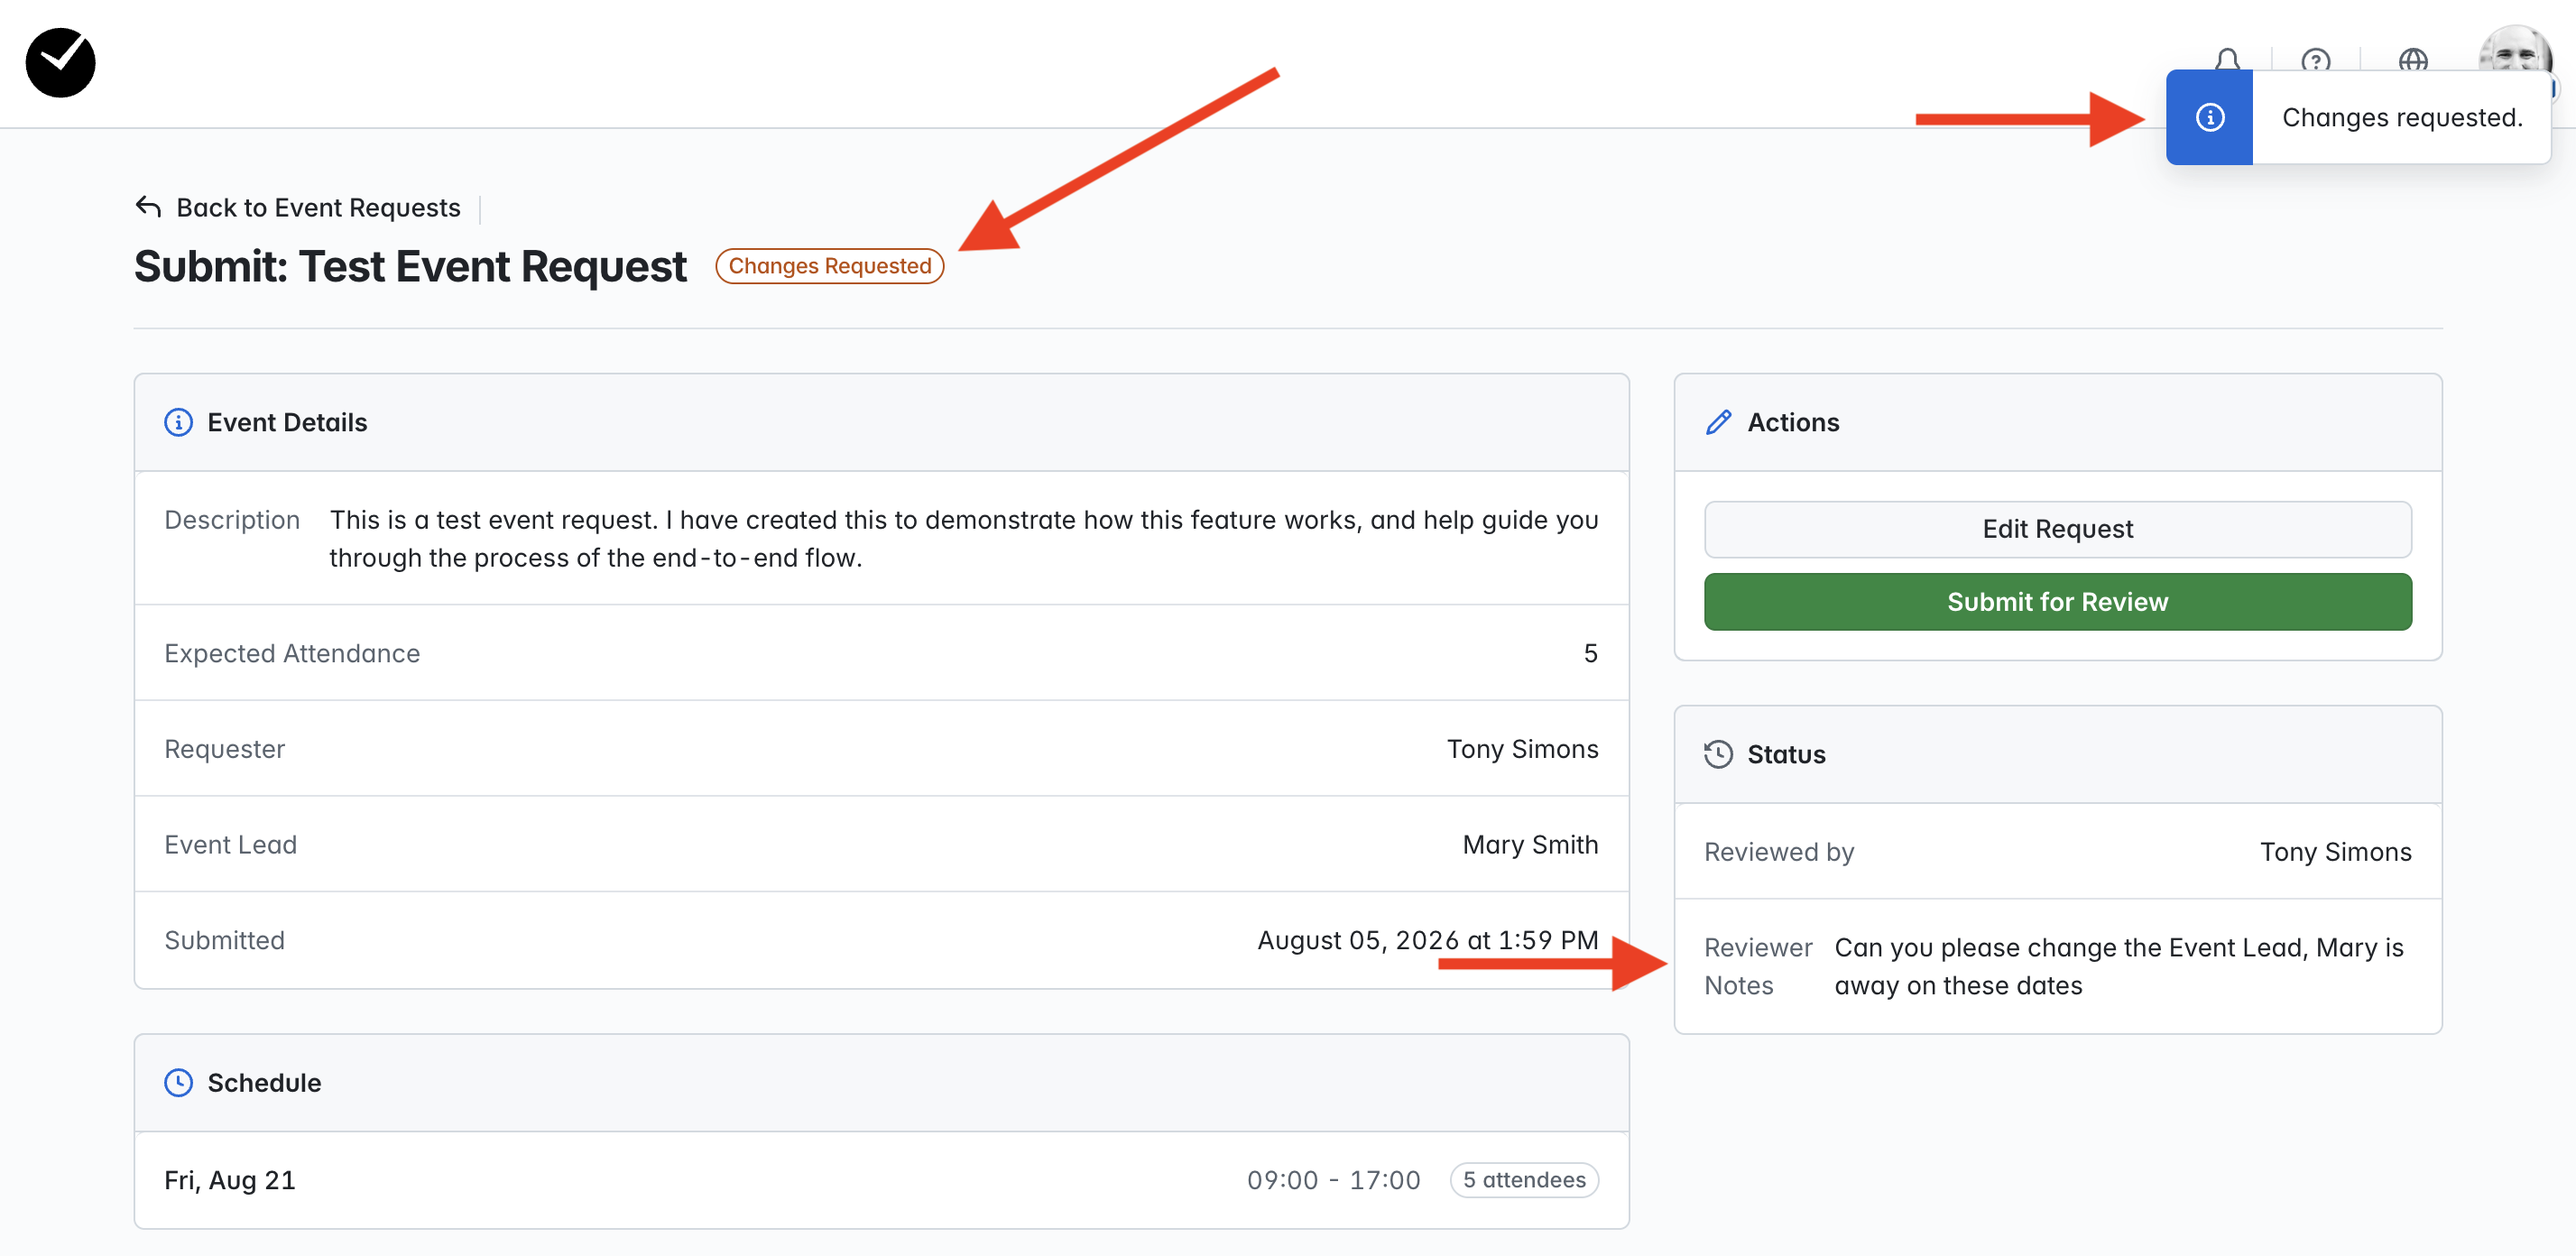
You may also note that the 'Status' column is now updated, displaying your note (if added). Event Requestors can now make the necessary edits to the request, and then resubmit for review using the 'Submit for Review' button.
How do I reject an Event Request?
On the Event Request Summary page, select the 'Reject' action on the Choose Action dropdown and enter a note if you wish (this is optional):
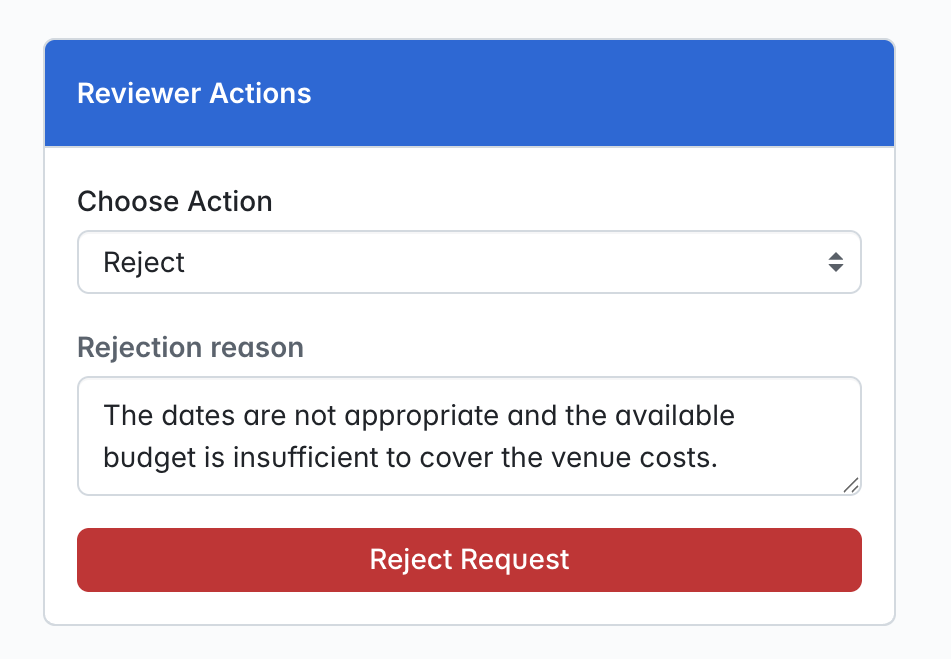
Next, click on the 'Reject Request' button - the request will be rejected and the event requestor will be notified via email. You will now see an updated summary page, and the request status will show as 'Rejected':
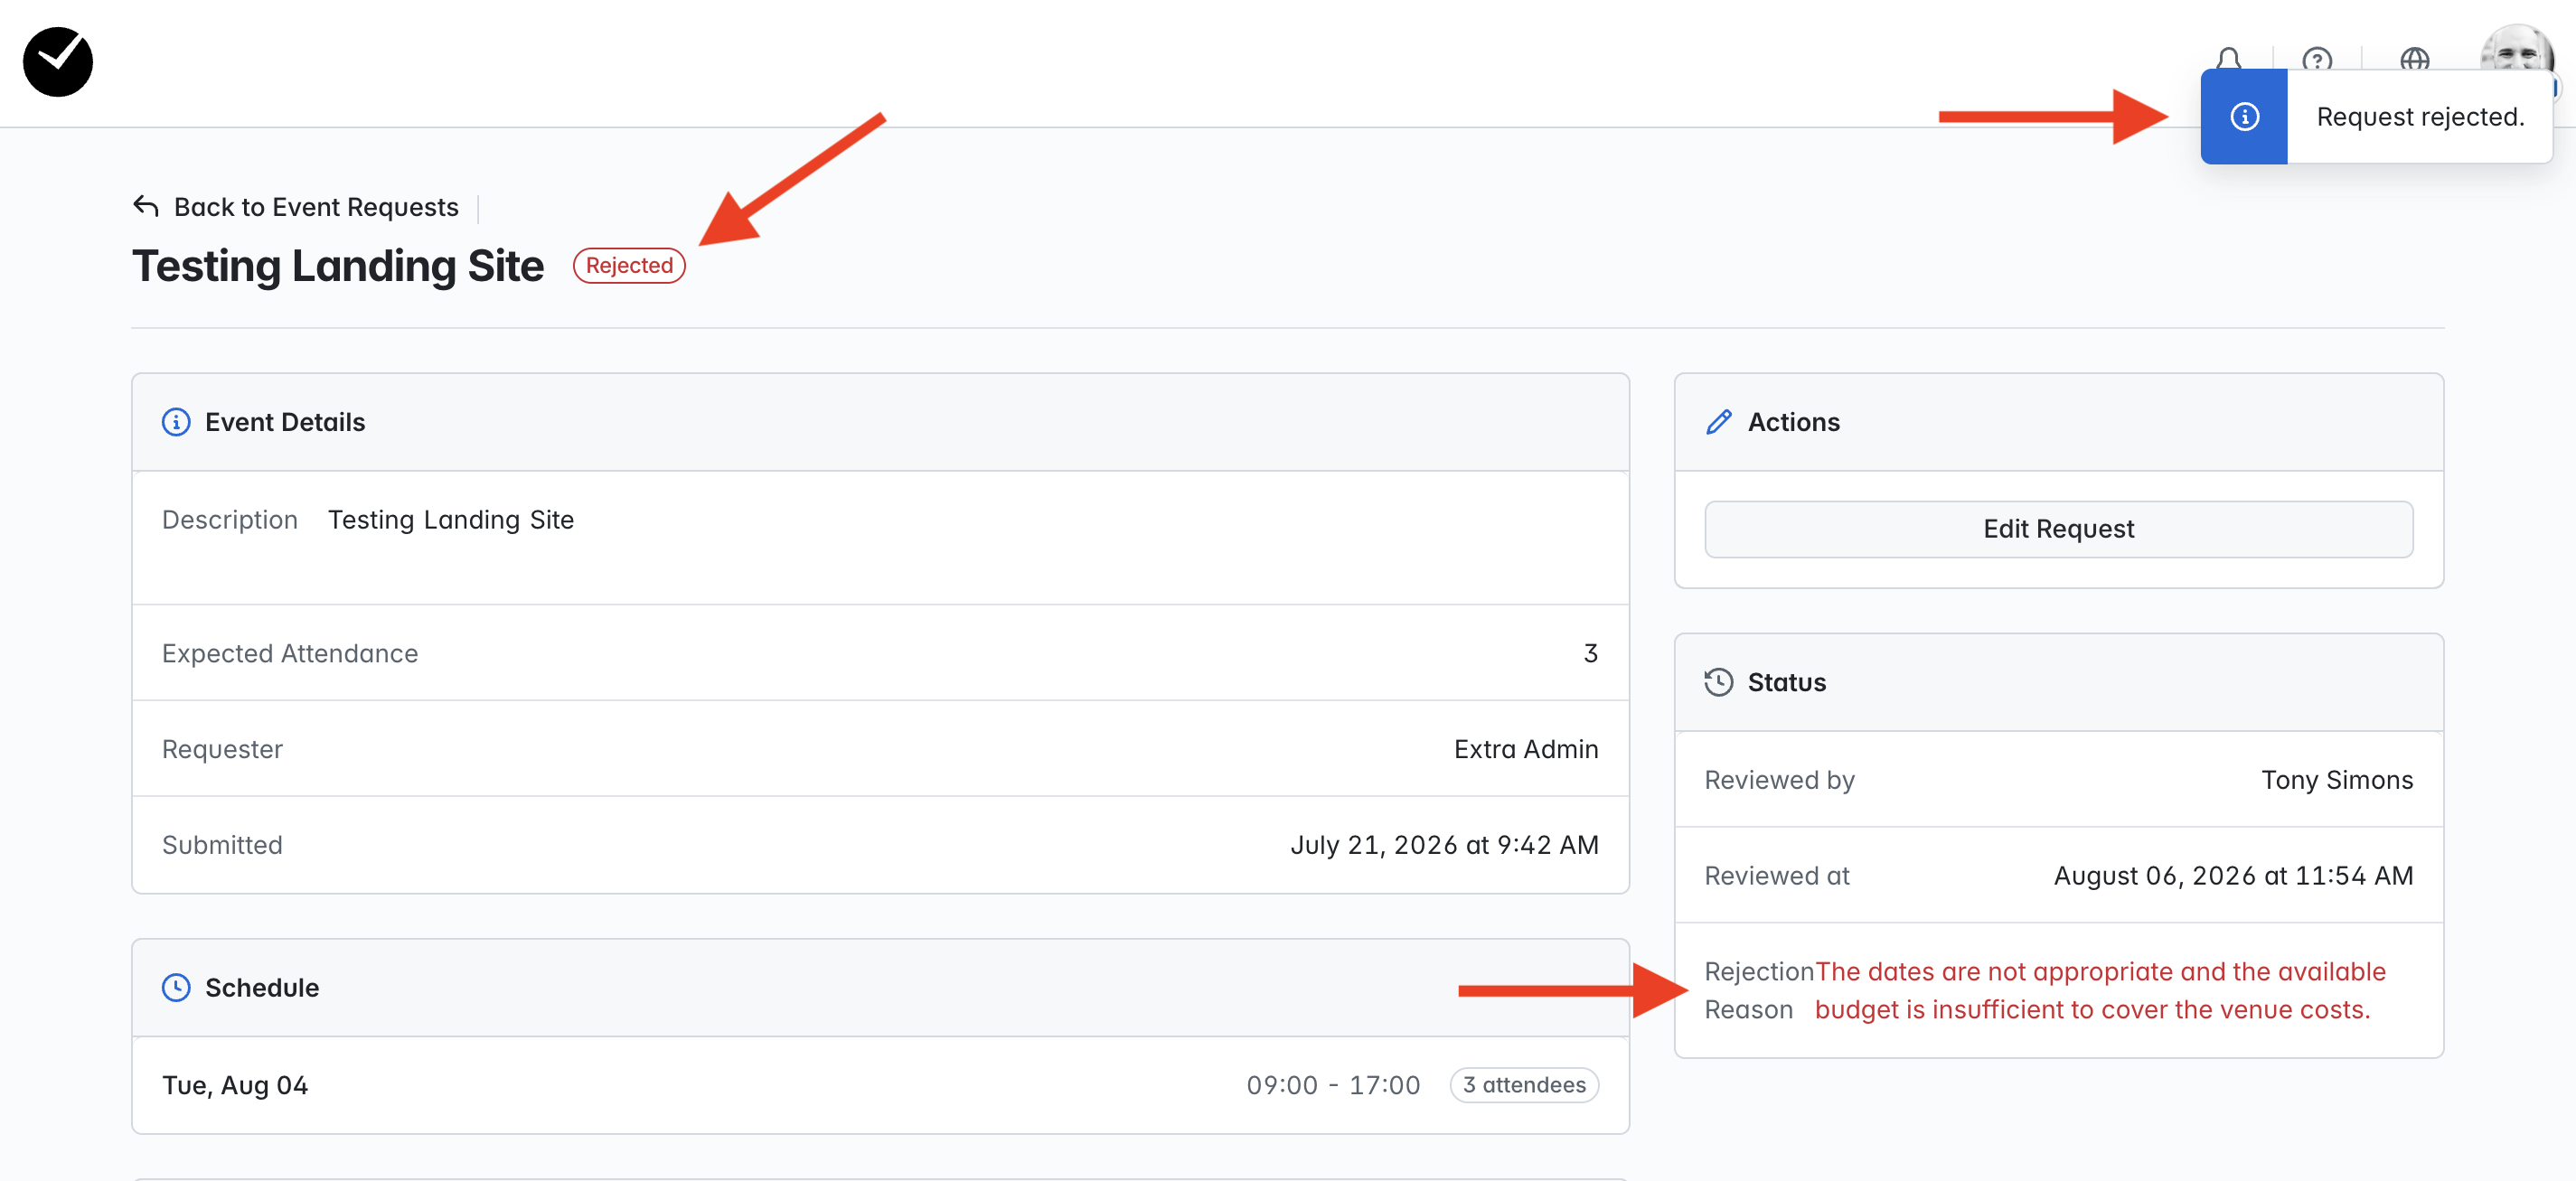
You may also note that the 'Status' column is now updated, displaying your note (if added). Event Requestors can still make edits to the request, but ultimately, the request can not be changed in status (eg changed to approved) and will remain unusable as potential event candidate.
What does it mean when an event request is waitlisted due to 'Insufficient Attendee Capacity'?
If you are reviewing an event request that exceeds the 'Daily Capacity' (or 'Capacity Exception' for a day/days) within your organization, you will see that the request is automatically waitlisted:

This is in place to ensure that venues are not overbooked for converted events and ensure that you have enough staff/resources to cover the requested capacity. In the 'Daily Capacity' area on the right, you will see details shown displaying how much the event request is exceeding capacity.
When reviewing an event request, you can choose to request changes from the requestor to reduce the event capacity. Alternatively, if you are happy that the venue can accommodate the capacity, you can choose to review and approve the request in the 'Reviewer Actions' section:

You must enter a reason into the 'Reason for approving...' text area before you approve, and when you are happy to proceed, click on the 'Approve over capacity' button. The event request will then show as approved, and a message will be displayed noting that the 'over capacity' has been acknlowledged.
When you decide to proceed with converting the event request, further action is required before you can convert to an event. On the 'Convert to Event' page, you will see the following yellow section at the top of the page:

Enter your reason for allowing the 'over capacity' for the event in the text area provided and then toggle the 'I understand...' checkbox. The 'Create Event' button will then be unlocked, and you can then proceed to convert the request to an event.