.png)
How do I create and manage Showcase 'Types'?
Note: only administrators can create and manage custom Showcase 'Types'
If you are an administrator for your organization, you have the ability to create and manage custom Showcase 'Types', that will be available to be used in any event in your organization using the the Showcase feature.
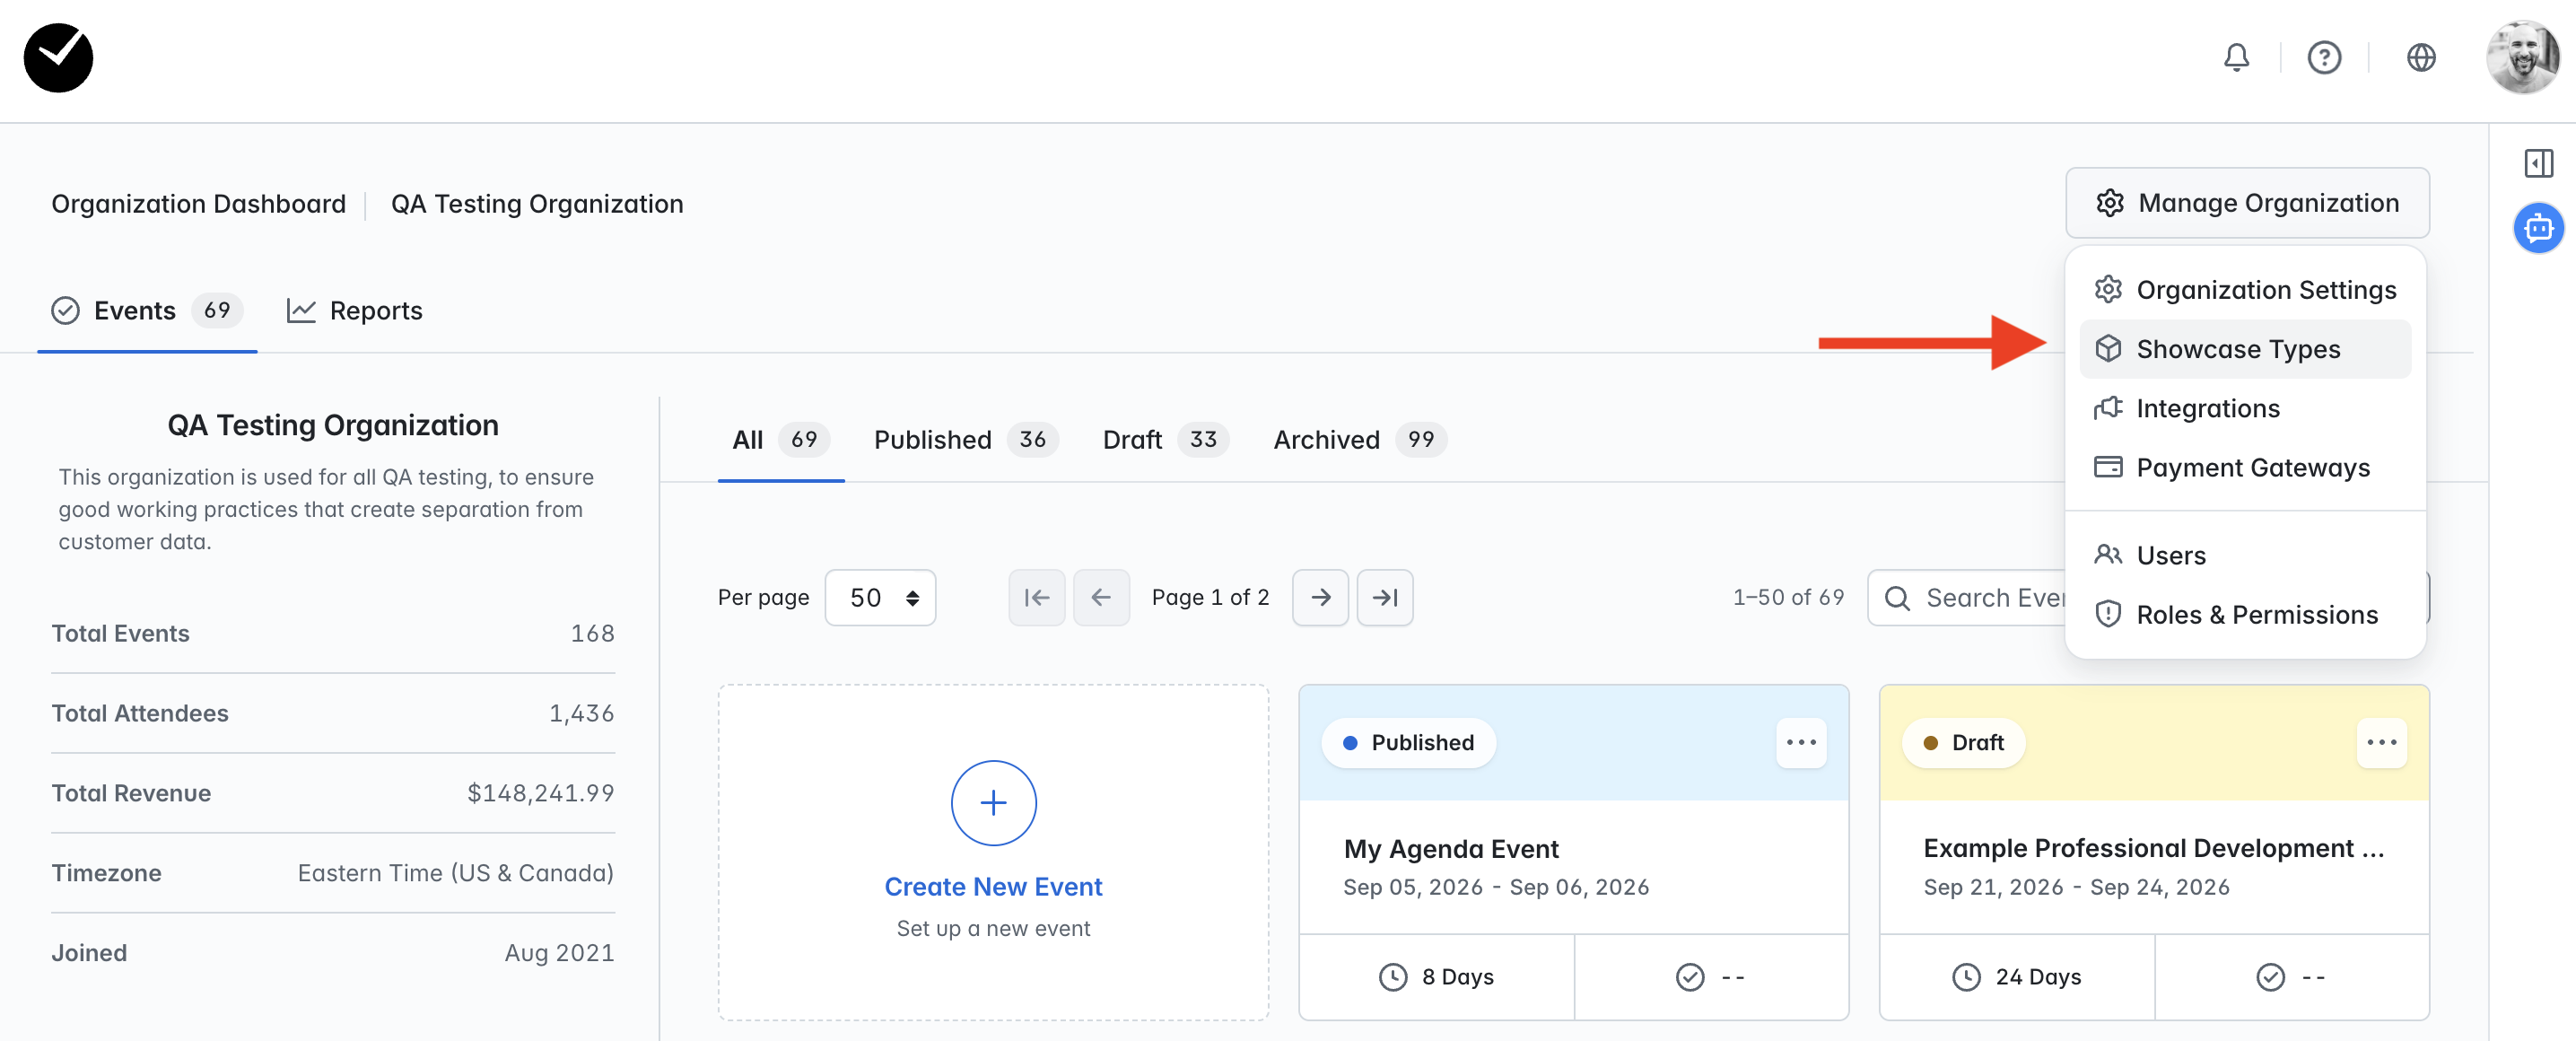
To begin creating or managing a Showcase Type, click on the 'Manage Organization' option on your Organization Dashboard and select the 'Showcase Types' option:
You will then be taken to the main 'Showcase Types' page, listing all available Showcase Types for your organization:
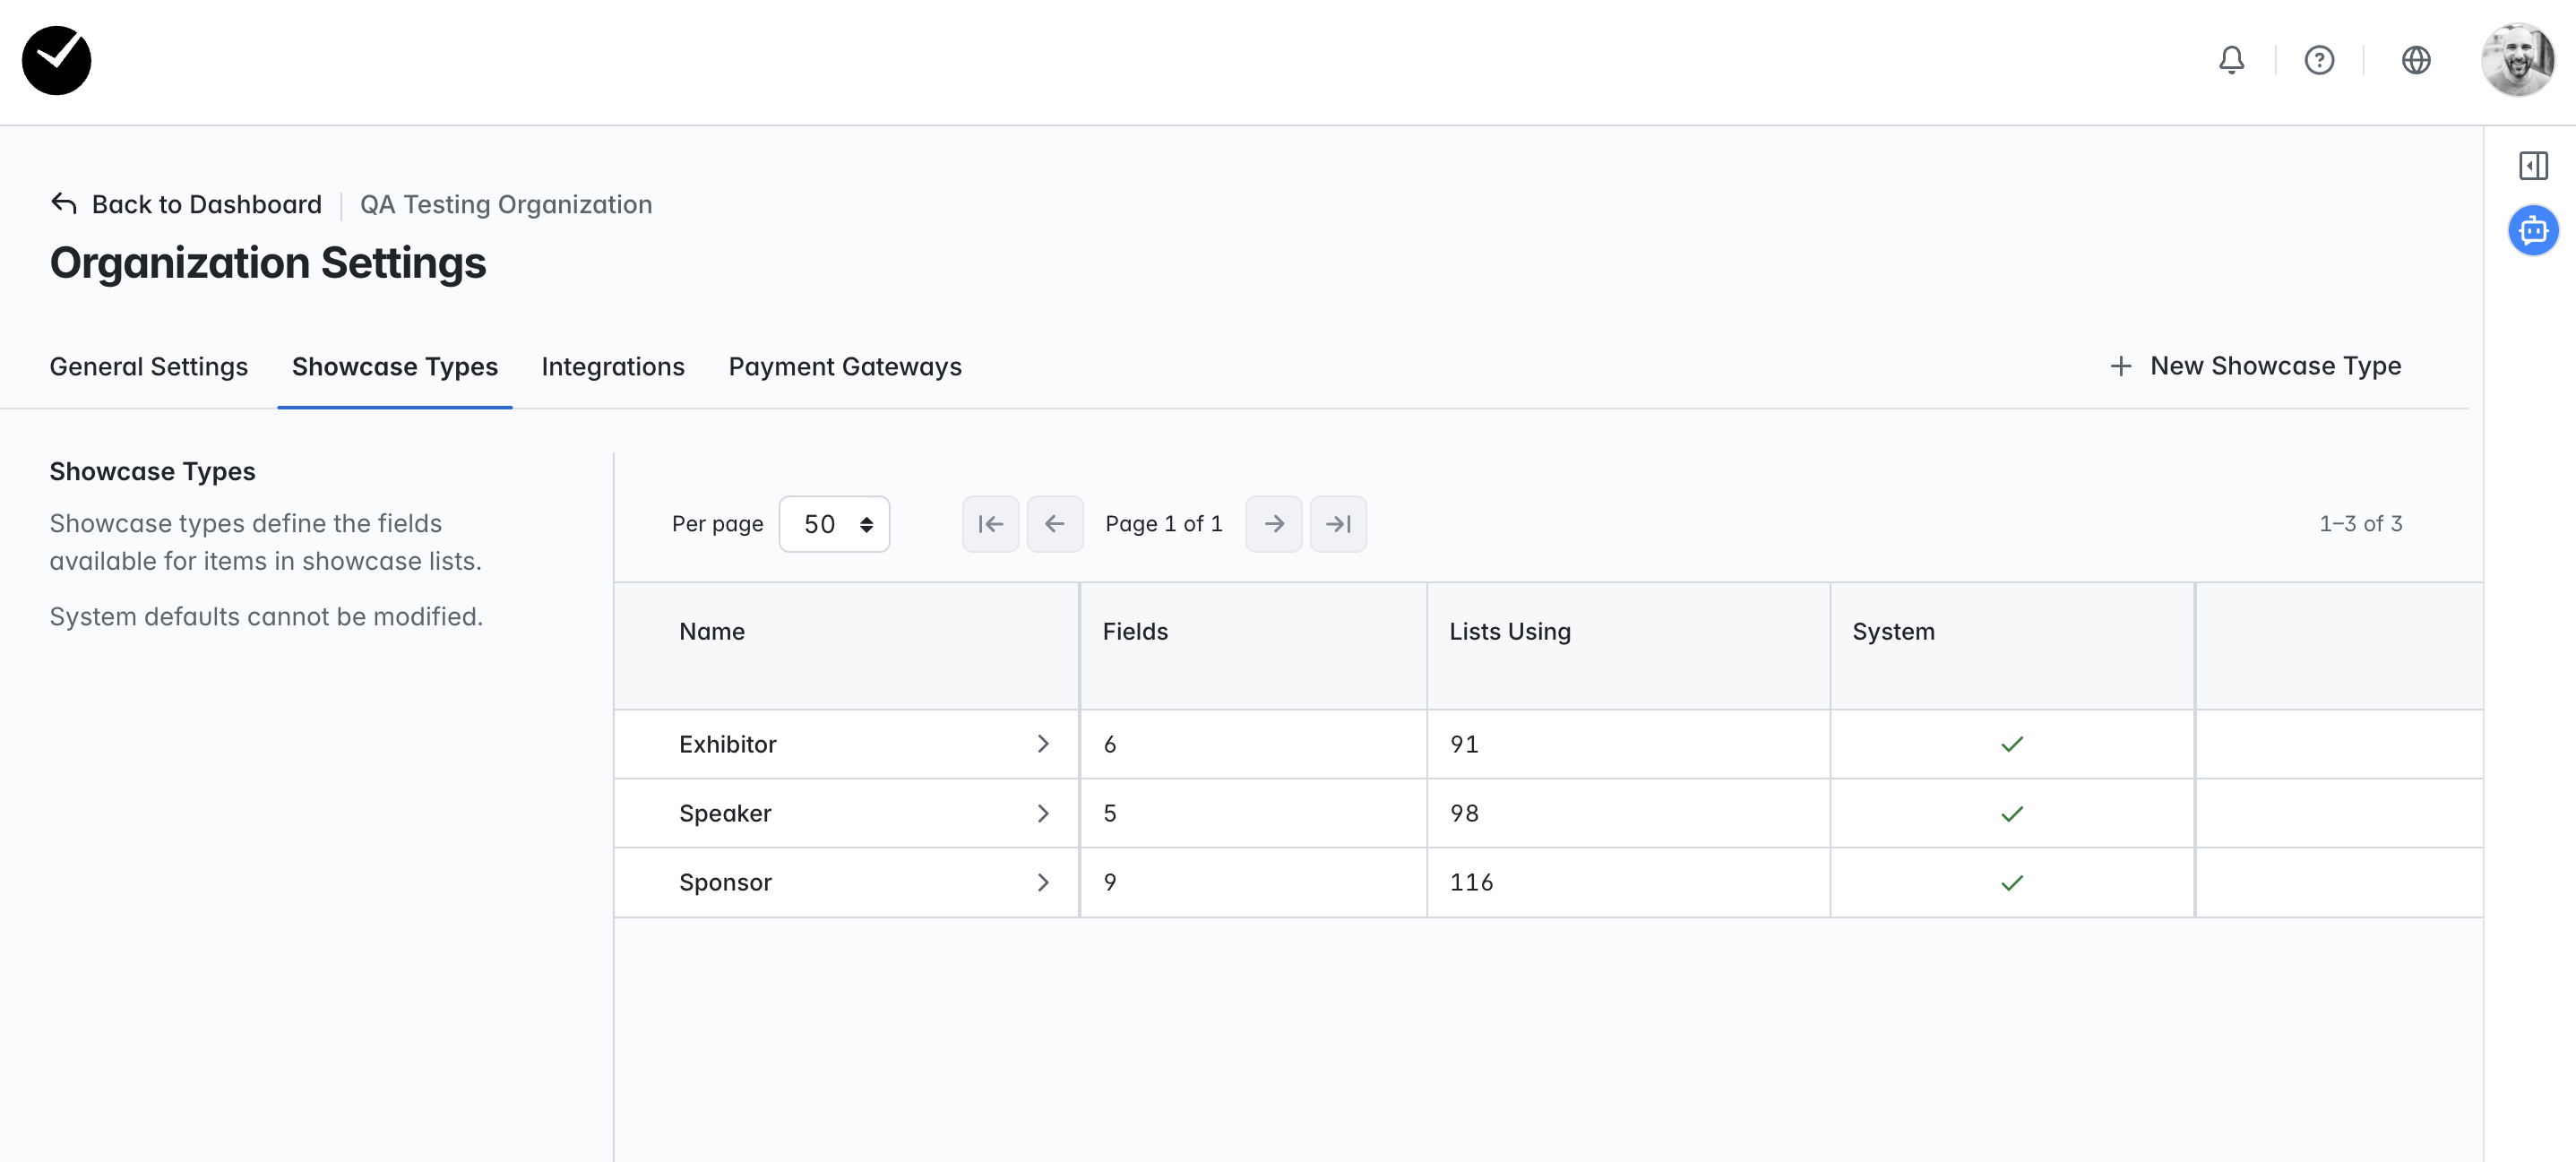
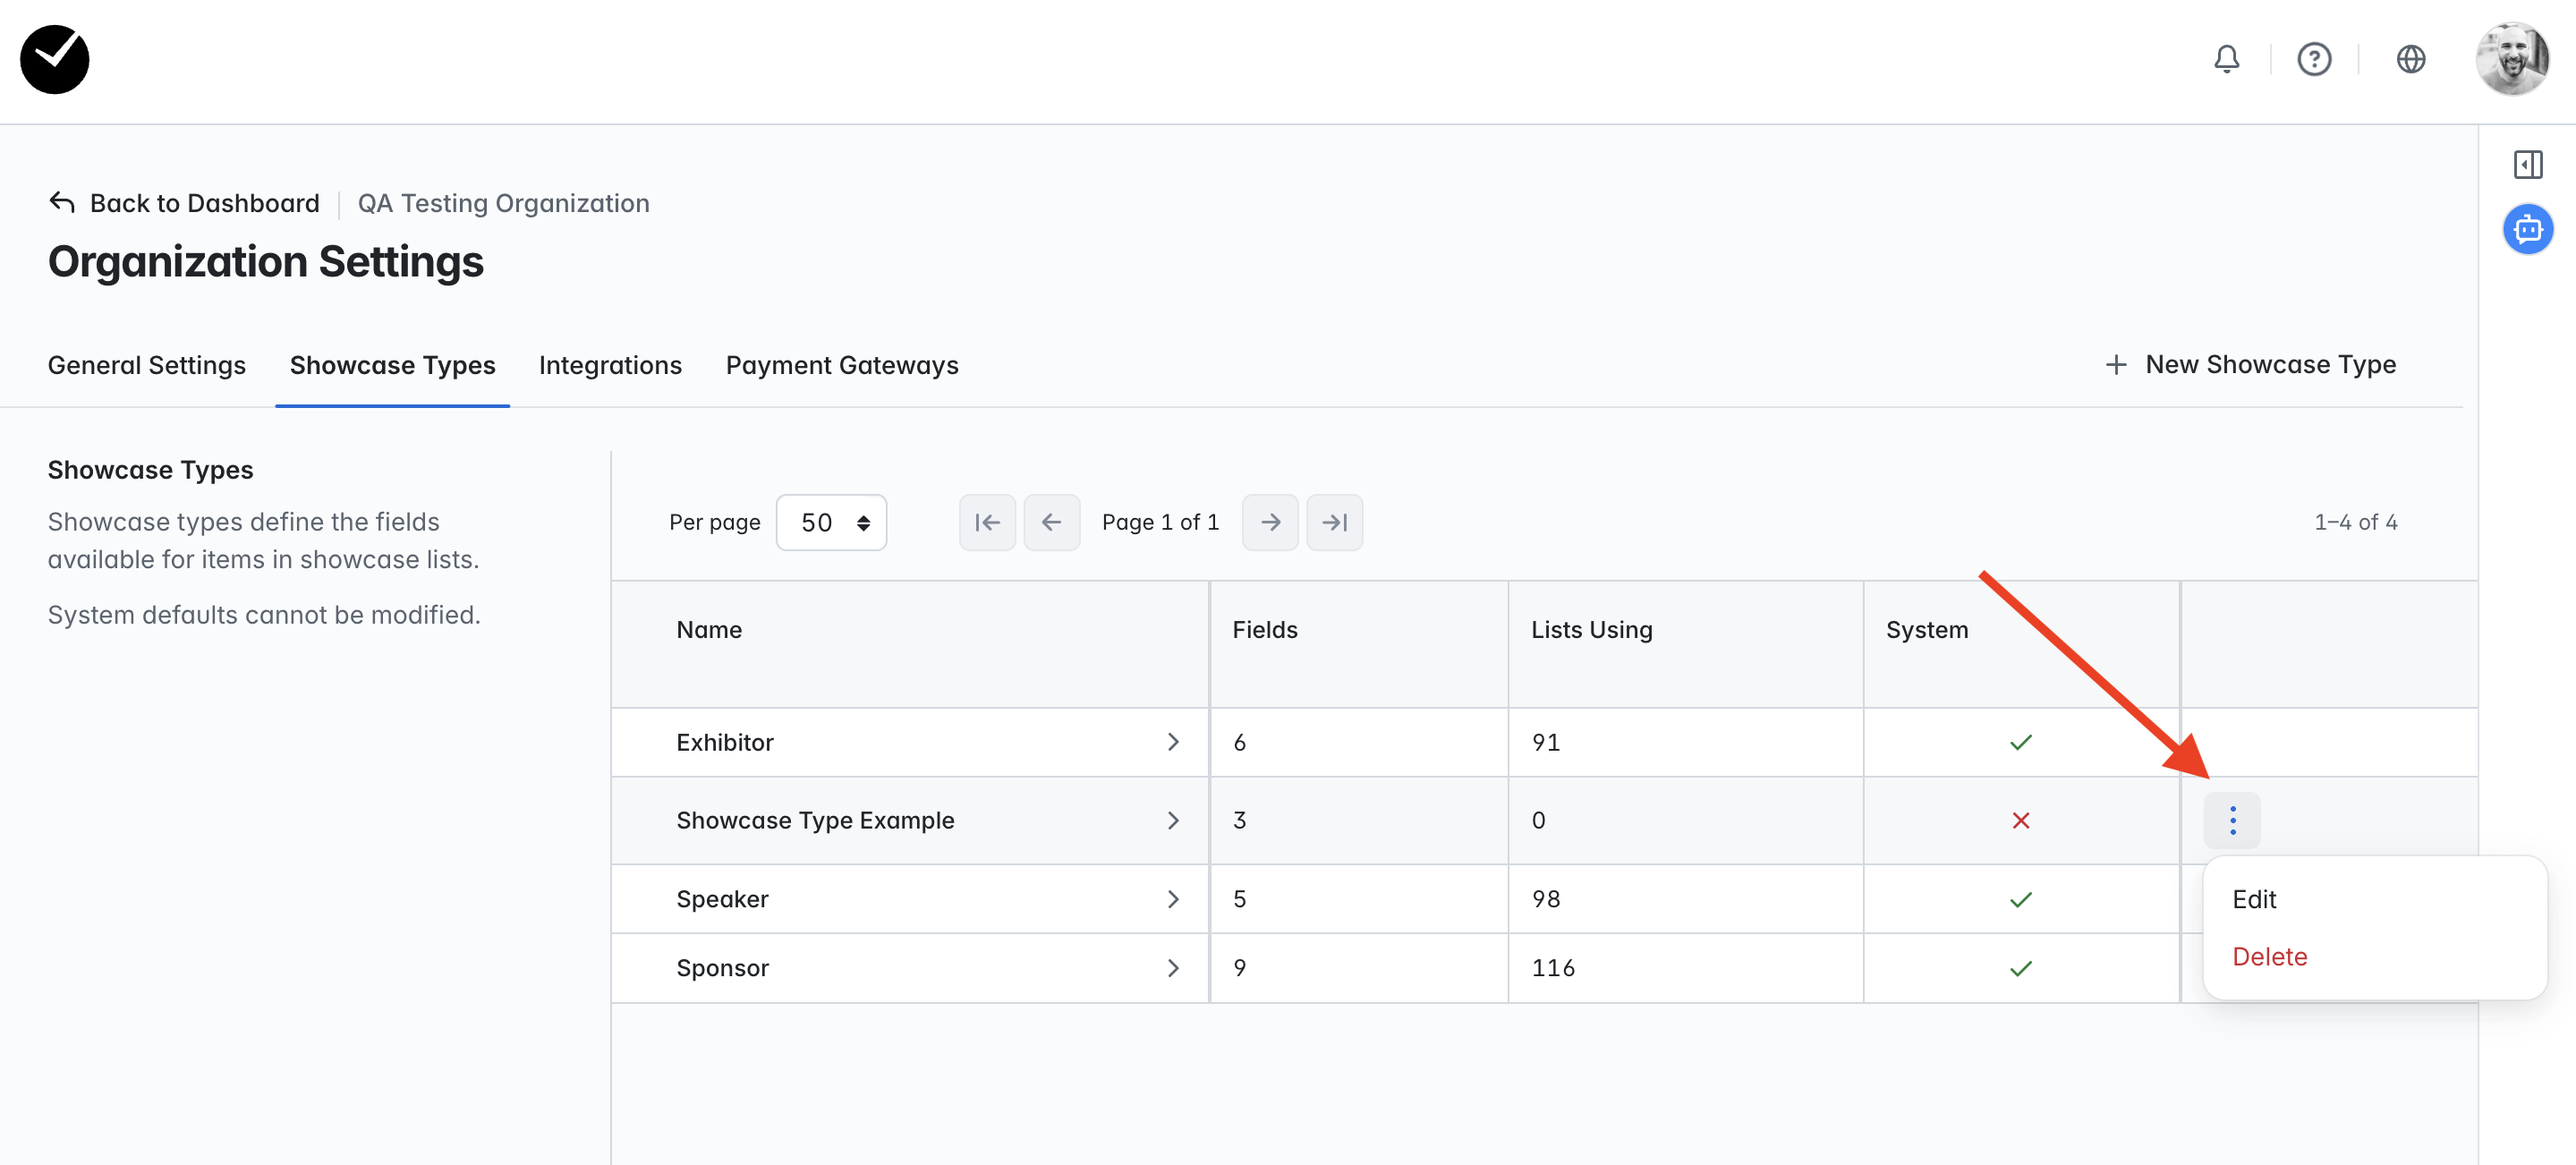
On the grid, as well as listing the current Showcase Types available, you will also see the total number of fields per 'Type', as well as the number of Showcase 'Lists' using each Showcase 'Type'. The last column (System) denotes if the Showcase Type is a default Type (tick icon) or custom (cross icon). 'System' Showcase Types cannot be edited or deleted.
How to I create and manage custom Showcase 'Types'?
When on the 'Showcase Types' page, select the '+ New Showcase Type' button at the top right of the area. You will then be taken to the 'New Showcase Type' form:
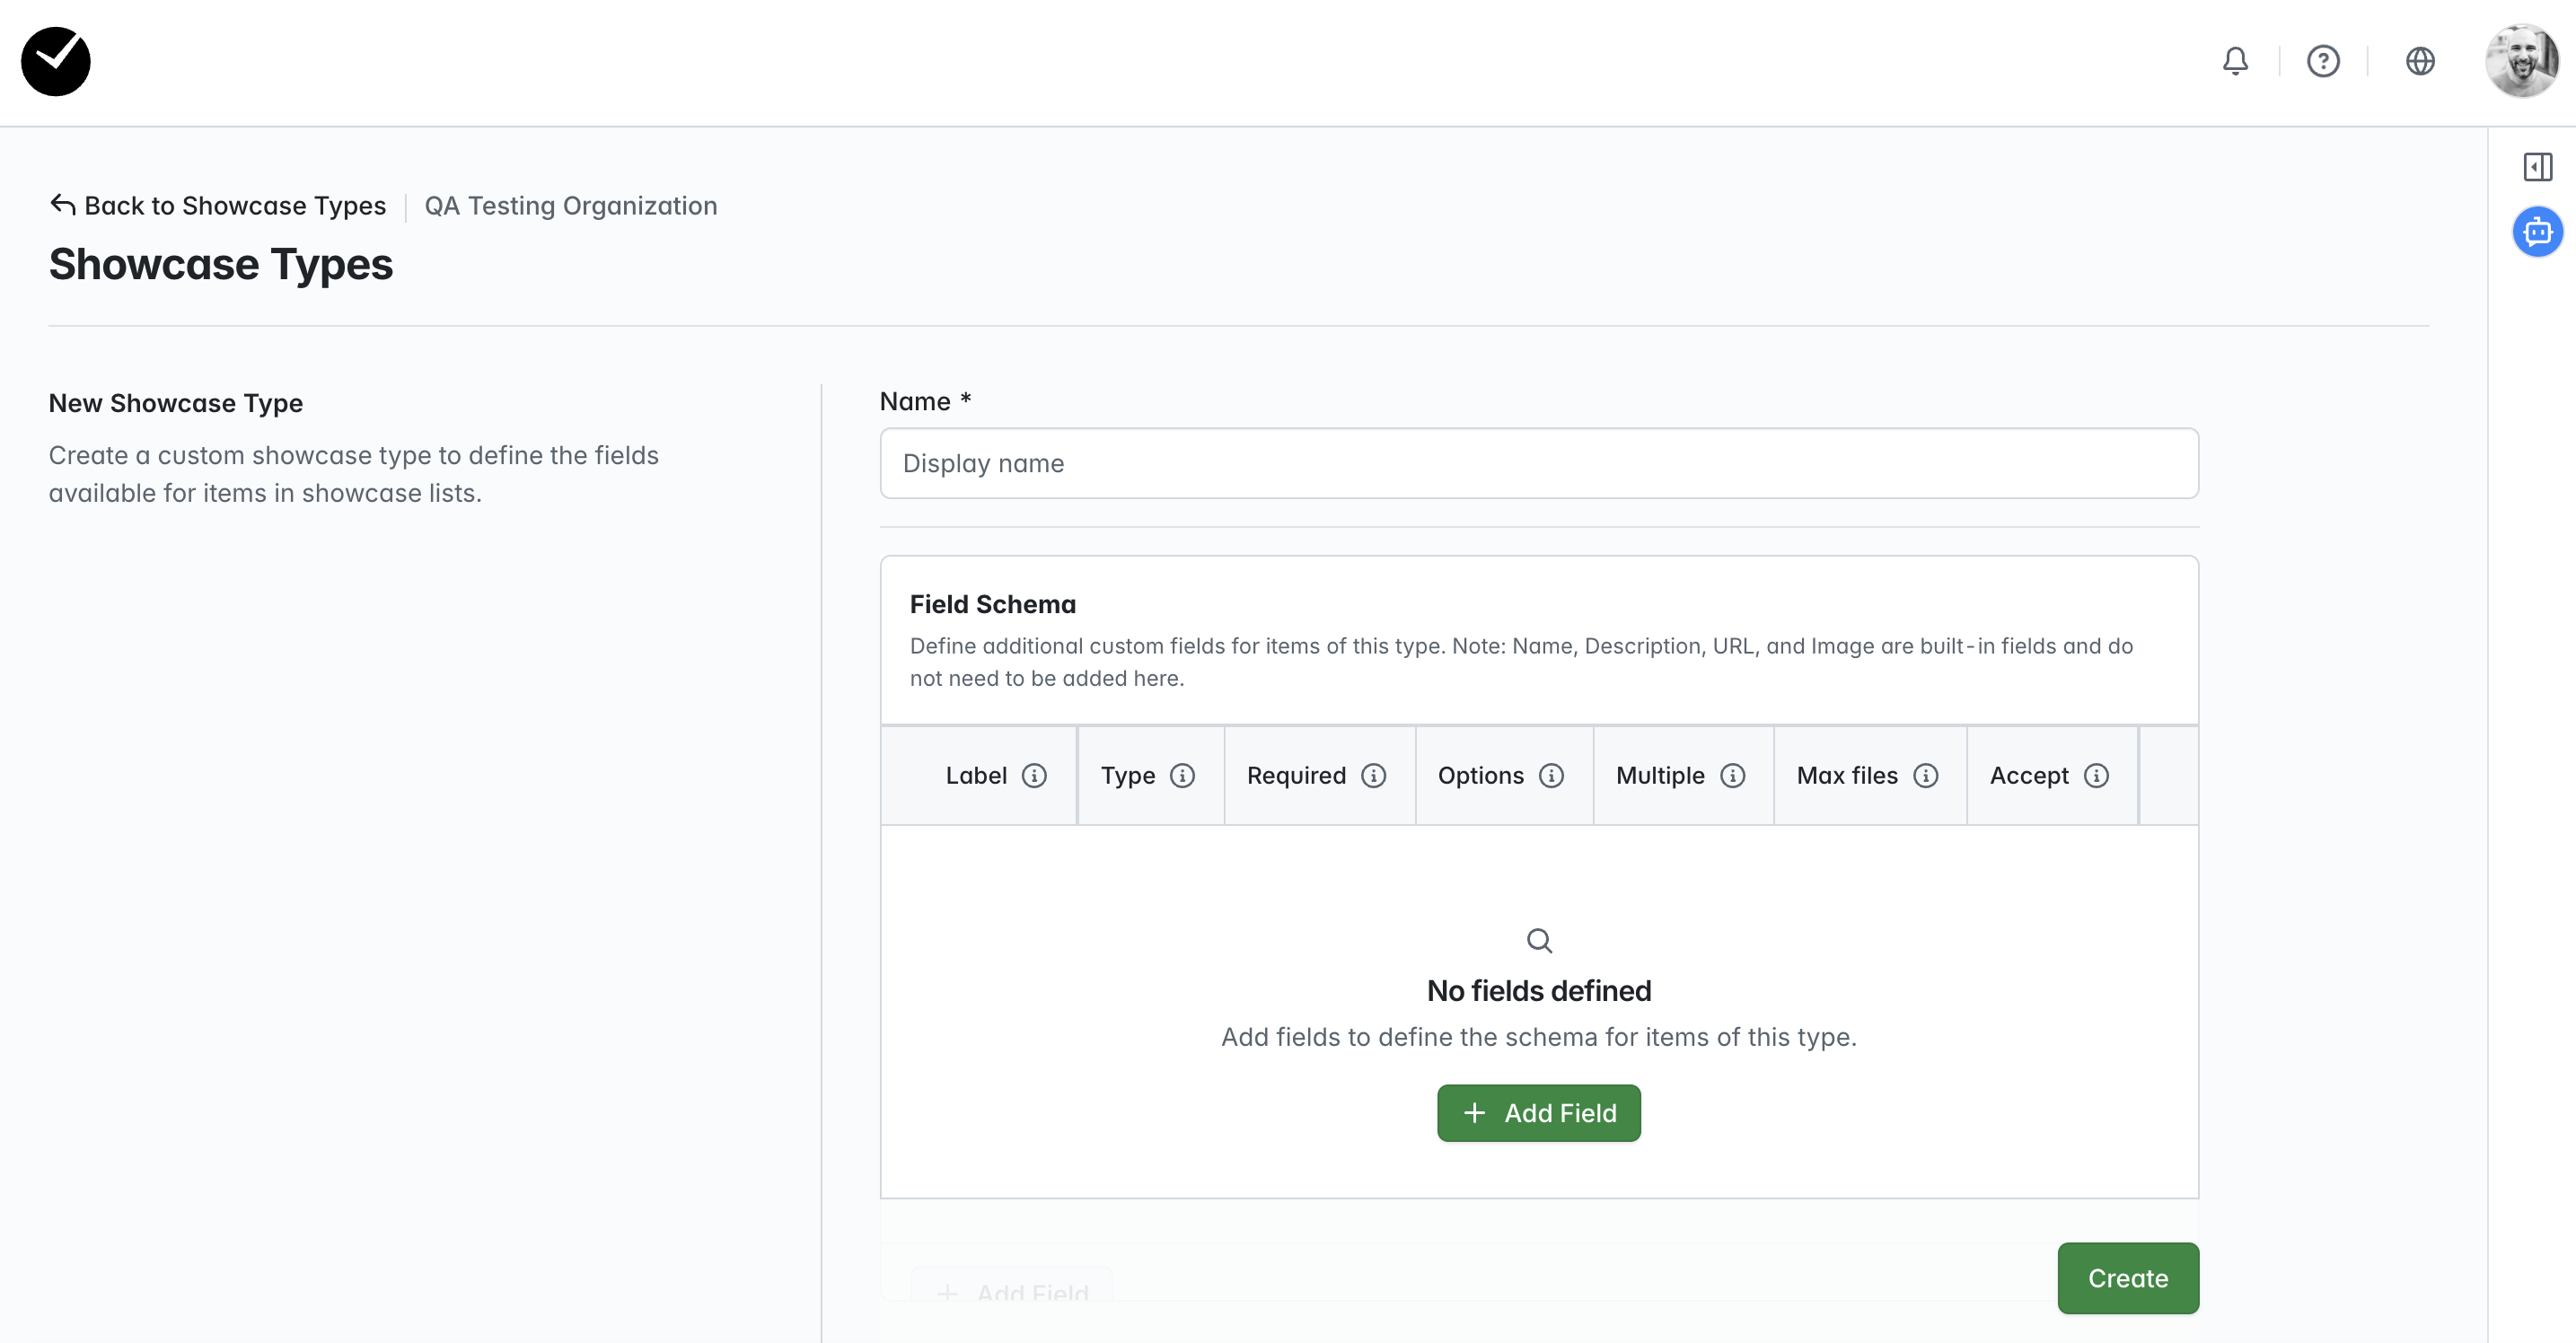
In here, you will need to create a name for your Showcase Type (which will be displayed when creating your Showcase Tiers and Items), and then add any fields you wish to collect data for that will be shown when the Showcase List containing Items from this Showcase Type is displayed on your event website.
Please note that the following fields are added by default for you, and do not require additional fields to be added for the following unless you require them:
- Image - allows the user to upload an image to be displayed for the Showcase Item on your event website when this Showcase type is selected.
- Name - allows the user to add a name for the Showcase Item that will be displayed on your event website.
- Description - allows the user to add a description for the Showcase Item that will be displayed on your event website.
- URL - allows the user to add a URL link for the Showcase Item that will be displayed on your event website.
Once you have added your 'Name', click on the green '+ Add Field' button, and you will see a field row is added to the main area of the form.
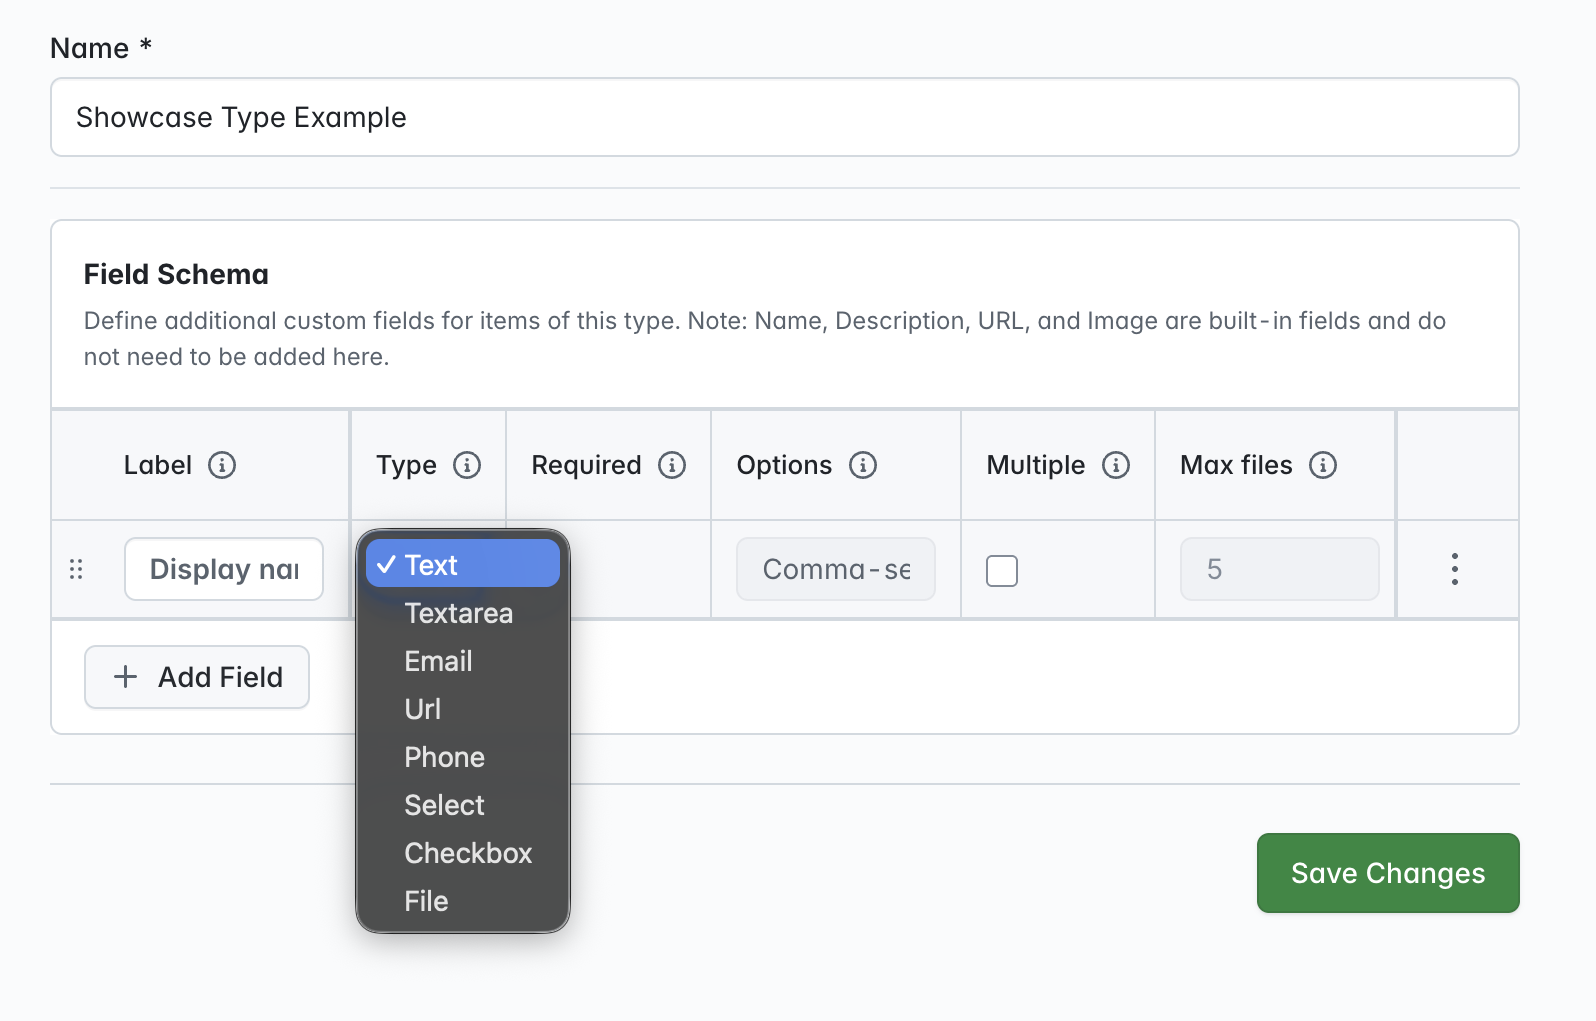
On the far side of the row, you will see the 'Label' field - this is the label that will be displayed for your field when viewed by your users when creating a Showcase Item using your Showcase Type. Following this, you will see the 'Type' selector. You can add the following field types to your Showcase Type:
- Text - adds a simple one line text field, useful for capturing small amounts of text.
- Text area - adds a larger 'text area', allowing the capture of larger amounts of text.
- Email - adds a simple one line field that will only accept characters using a standard email address format.
- URL - adds a simple one line field that will only accept characters using a standard URL address format.
- Phone - adds a simple one line field that will only accept characters using a standard phone/cell number format.
- Select - adds a simple dropdown to your Showcase Type, with the ability to add multiple choice selections for the field.
- Checkbox - adds a simple checkbox to the Showcase Type, ideal for collecting yes/no answers.
- File - allows you to enable a file upload for your Showcase Type, which will then display a link to the uploaded file to download when attendees view the Showcase Item using your Showcase Type.
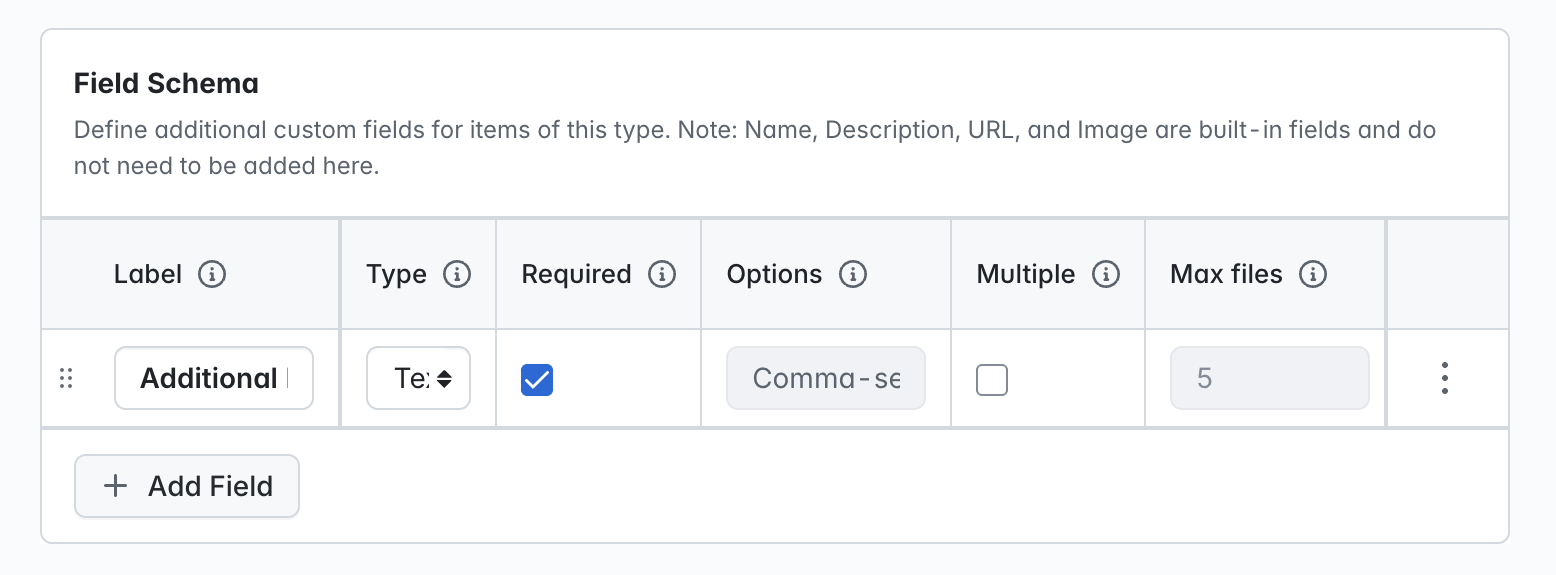
You can also make the field mandatory by selecting the 'Required' checkbox for the field:
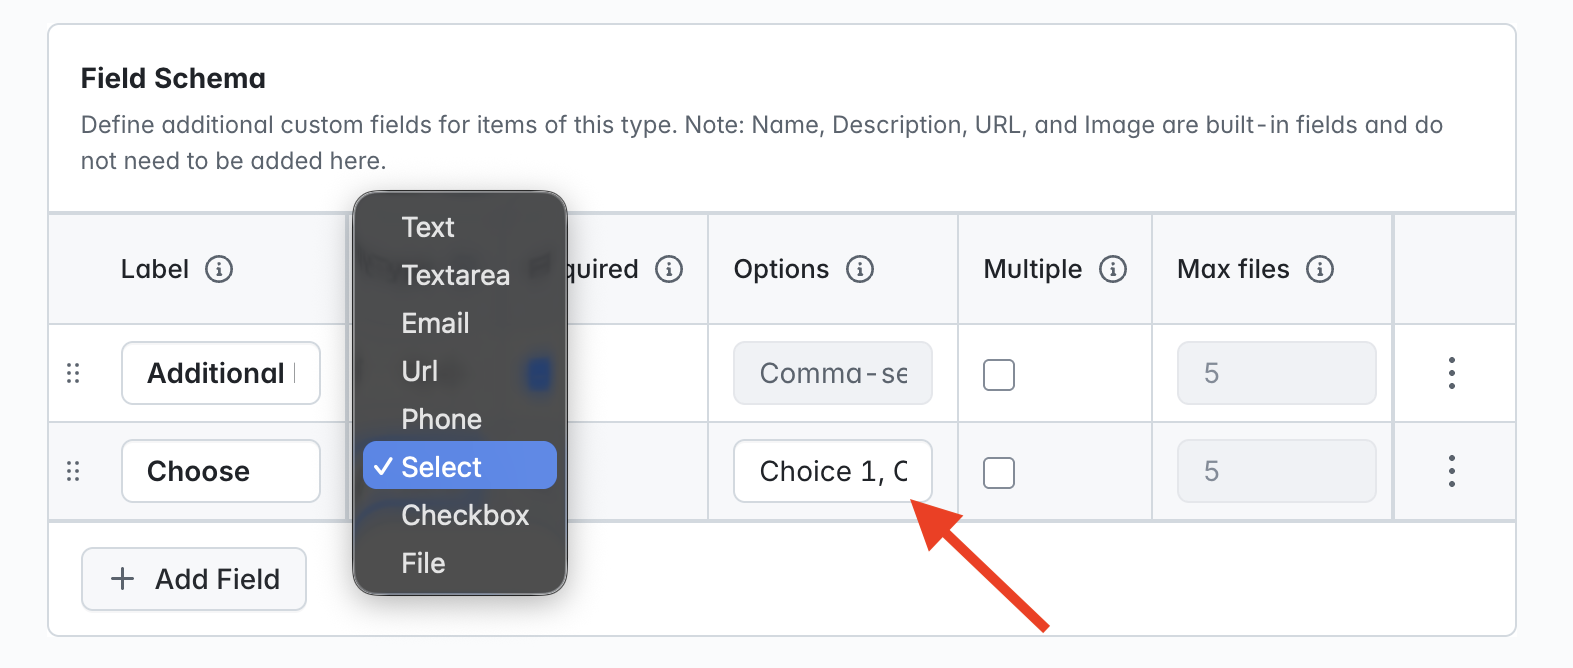
When creating a 'Select' field, you will see the 'Options' field enabled on the row - enter your choices separated by a comma in this field:
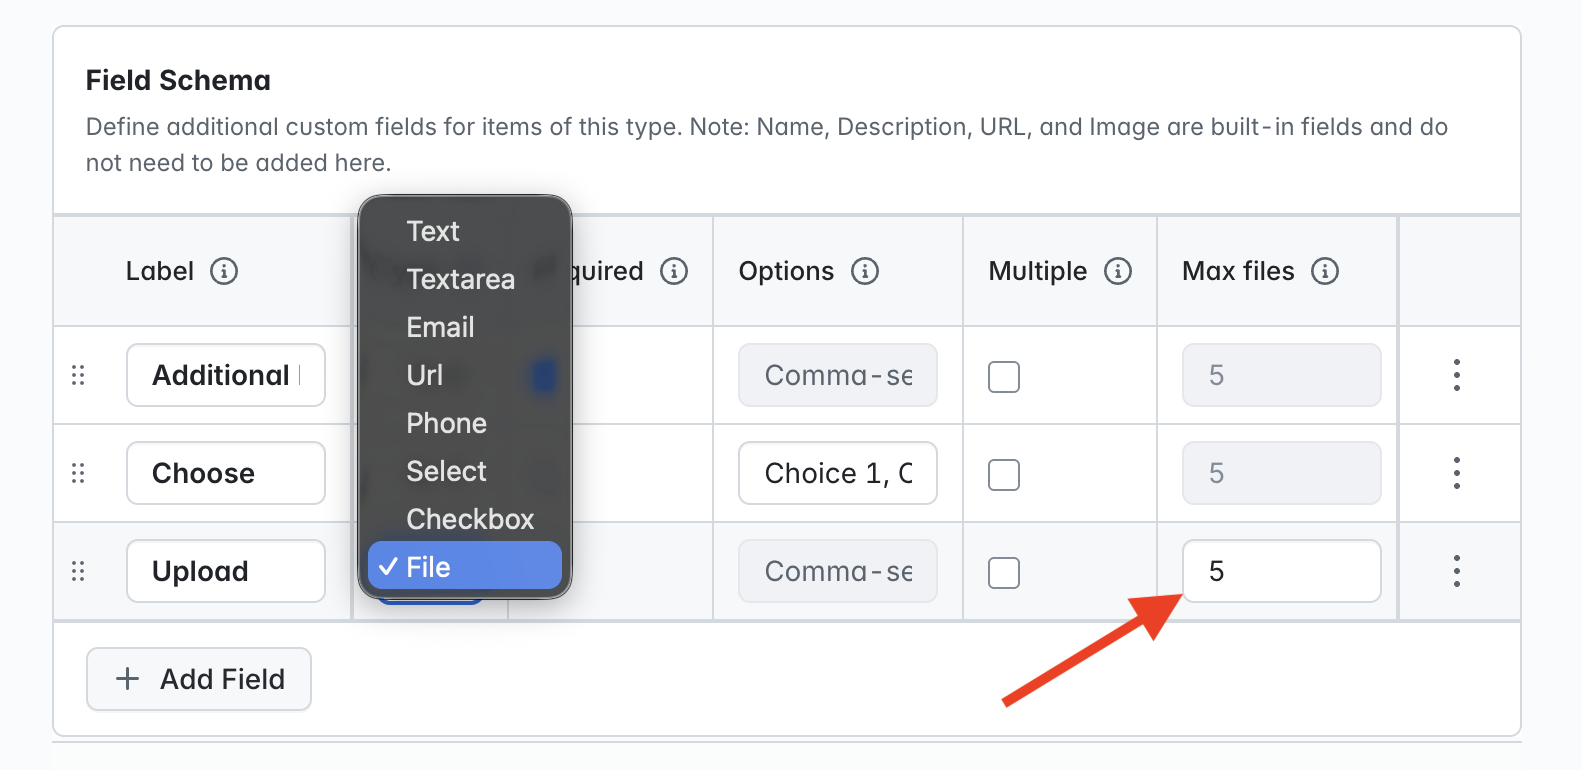
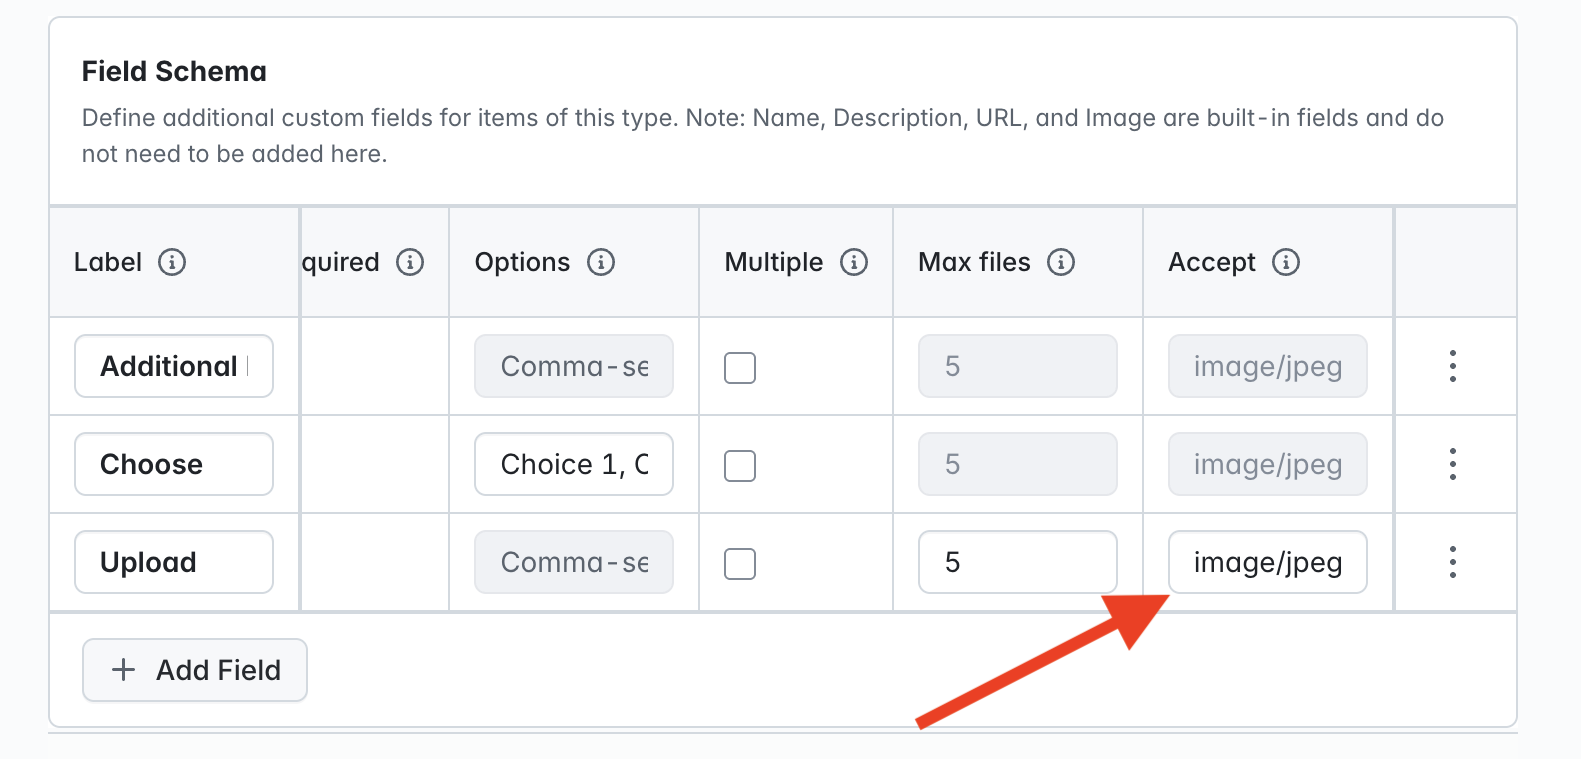
When creating a 'File' field, you will see the 'Max files' field enabled on the row - choose the amount of files you will accept for the field, default is the maximum allowed (5). You can also choose the type of files you will accept using the 'Accept' field:
When you have finished editing and wish to save your work, click on the green 'Save Changes' button. You will then be taken back to the main Showcase Types page, with your new Showcase Type displayed on the grid. You will notice that the red cross is displayed for your Showcase Type (indicating that it is a custom type) as well as 3 dots at the end of the row. To return to editing your Showcase Type or delete it, click on the 3 dots at the end of the row and select 'Edit'/'Delete':
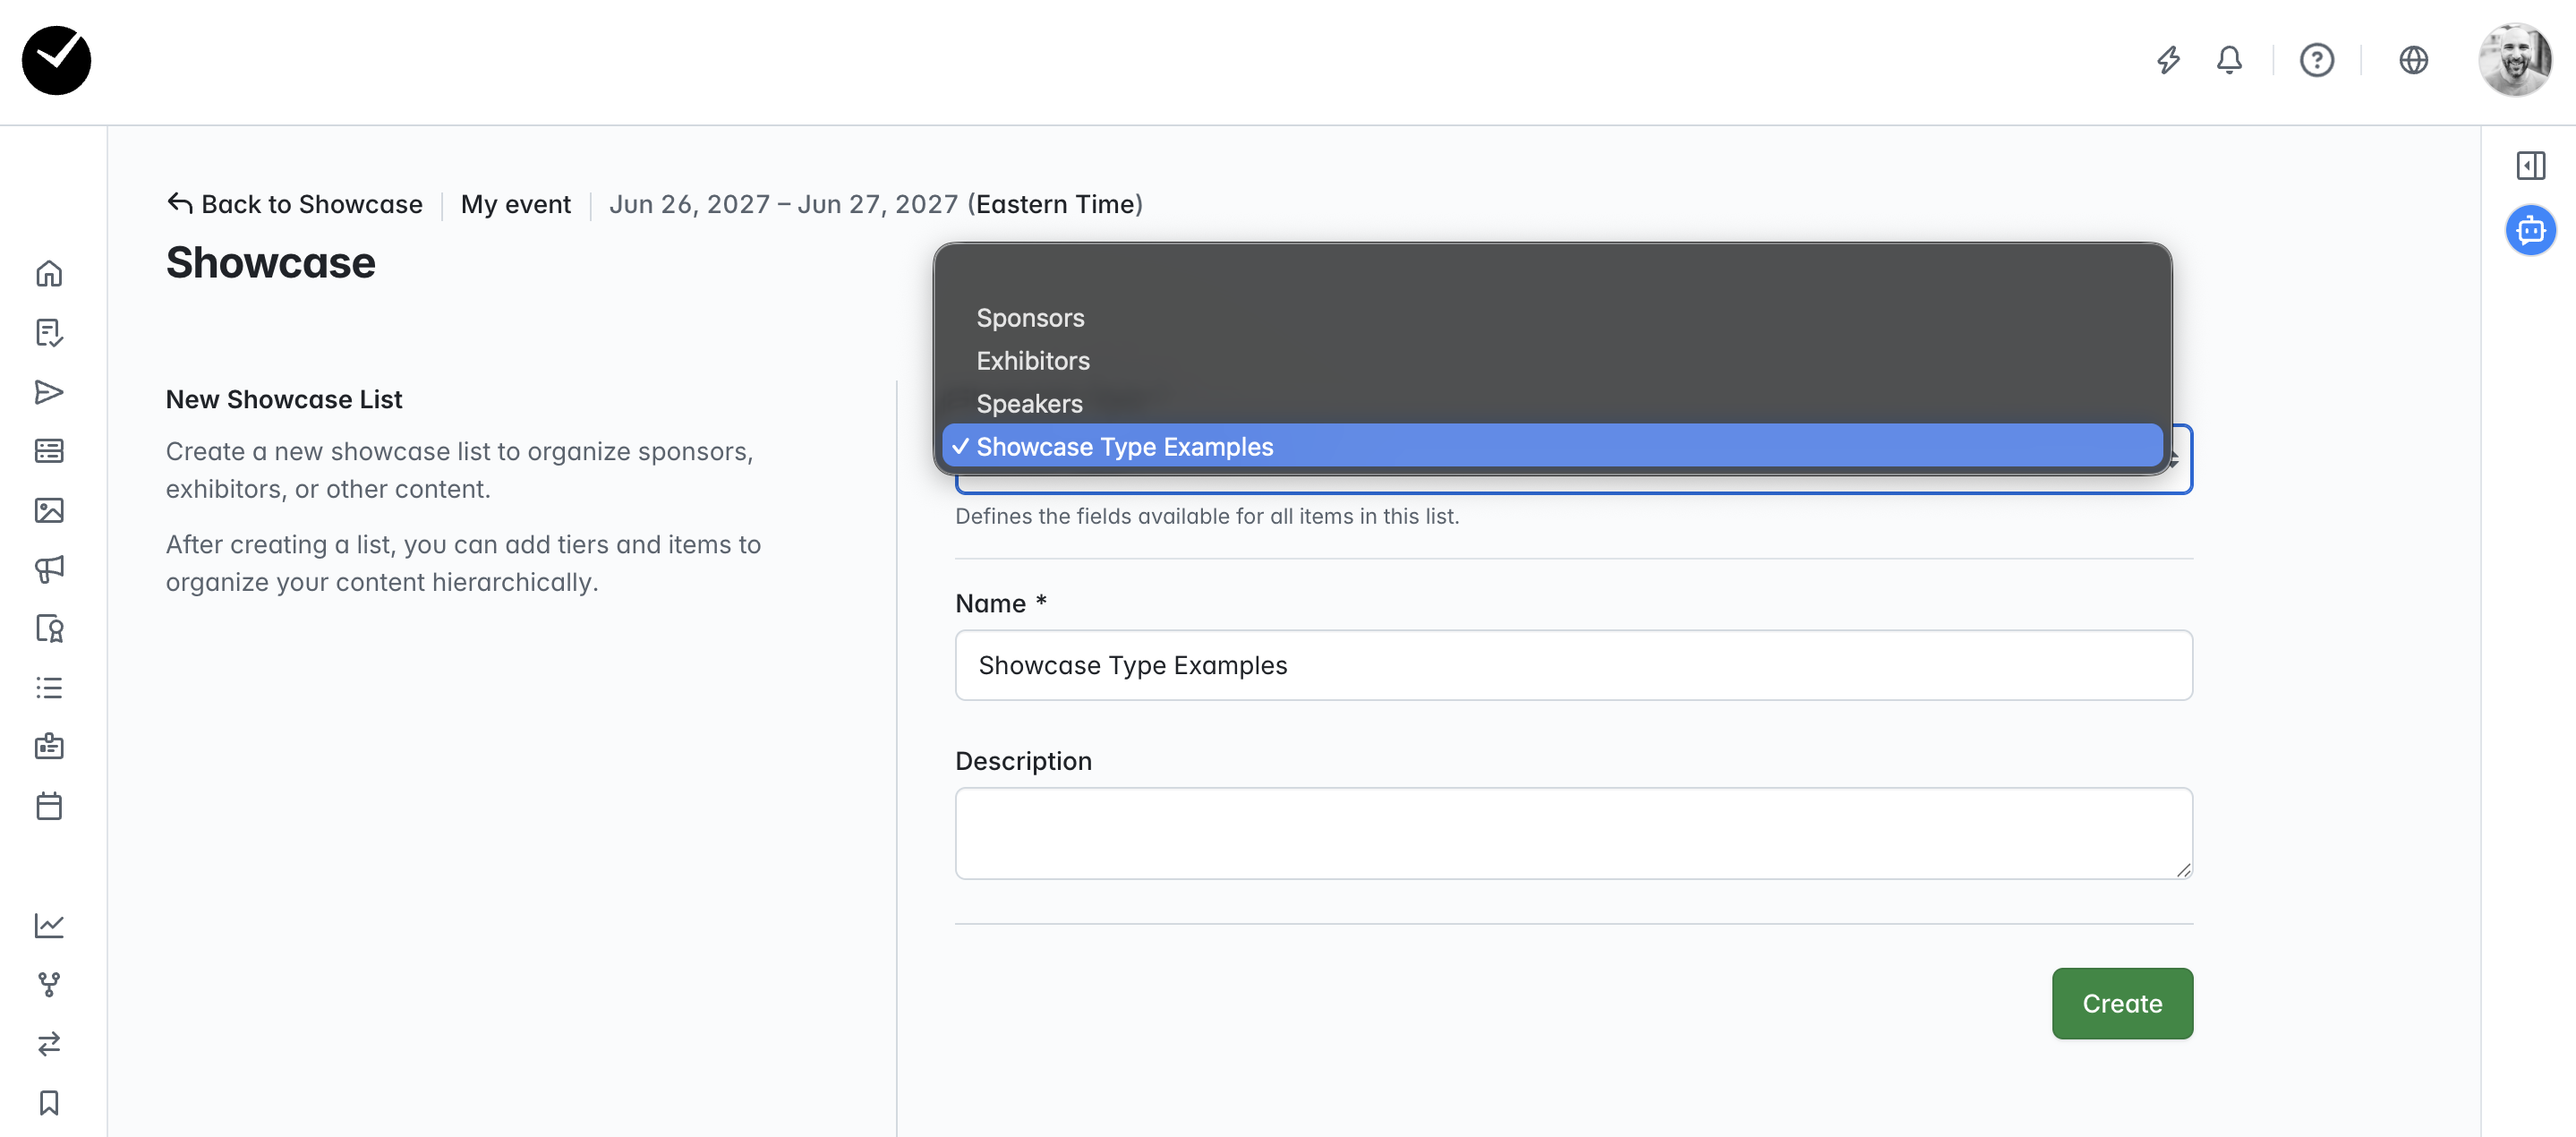
Now your Showcase Type is saved, it is now ready to be used in your events and can be selected when creating a Showcase Tier:
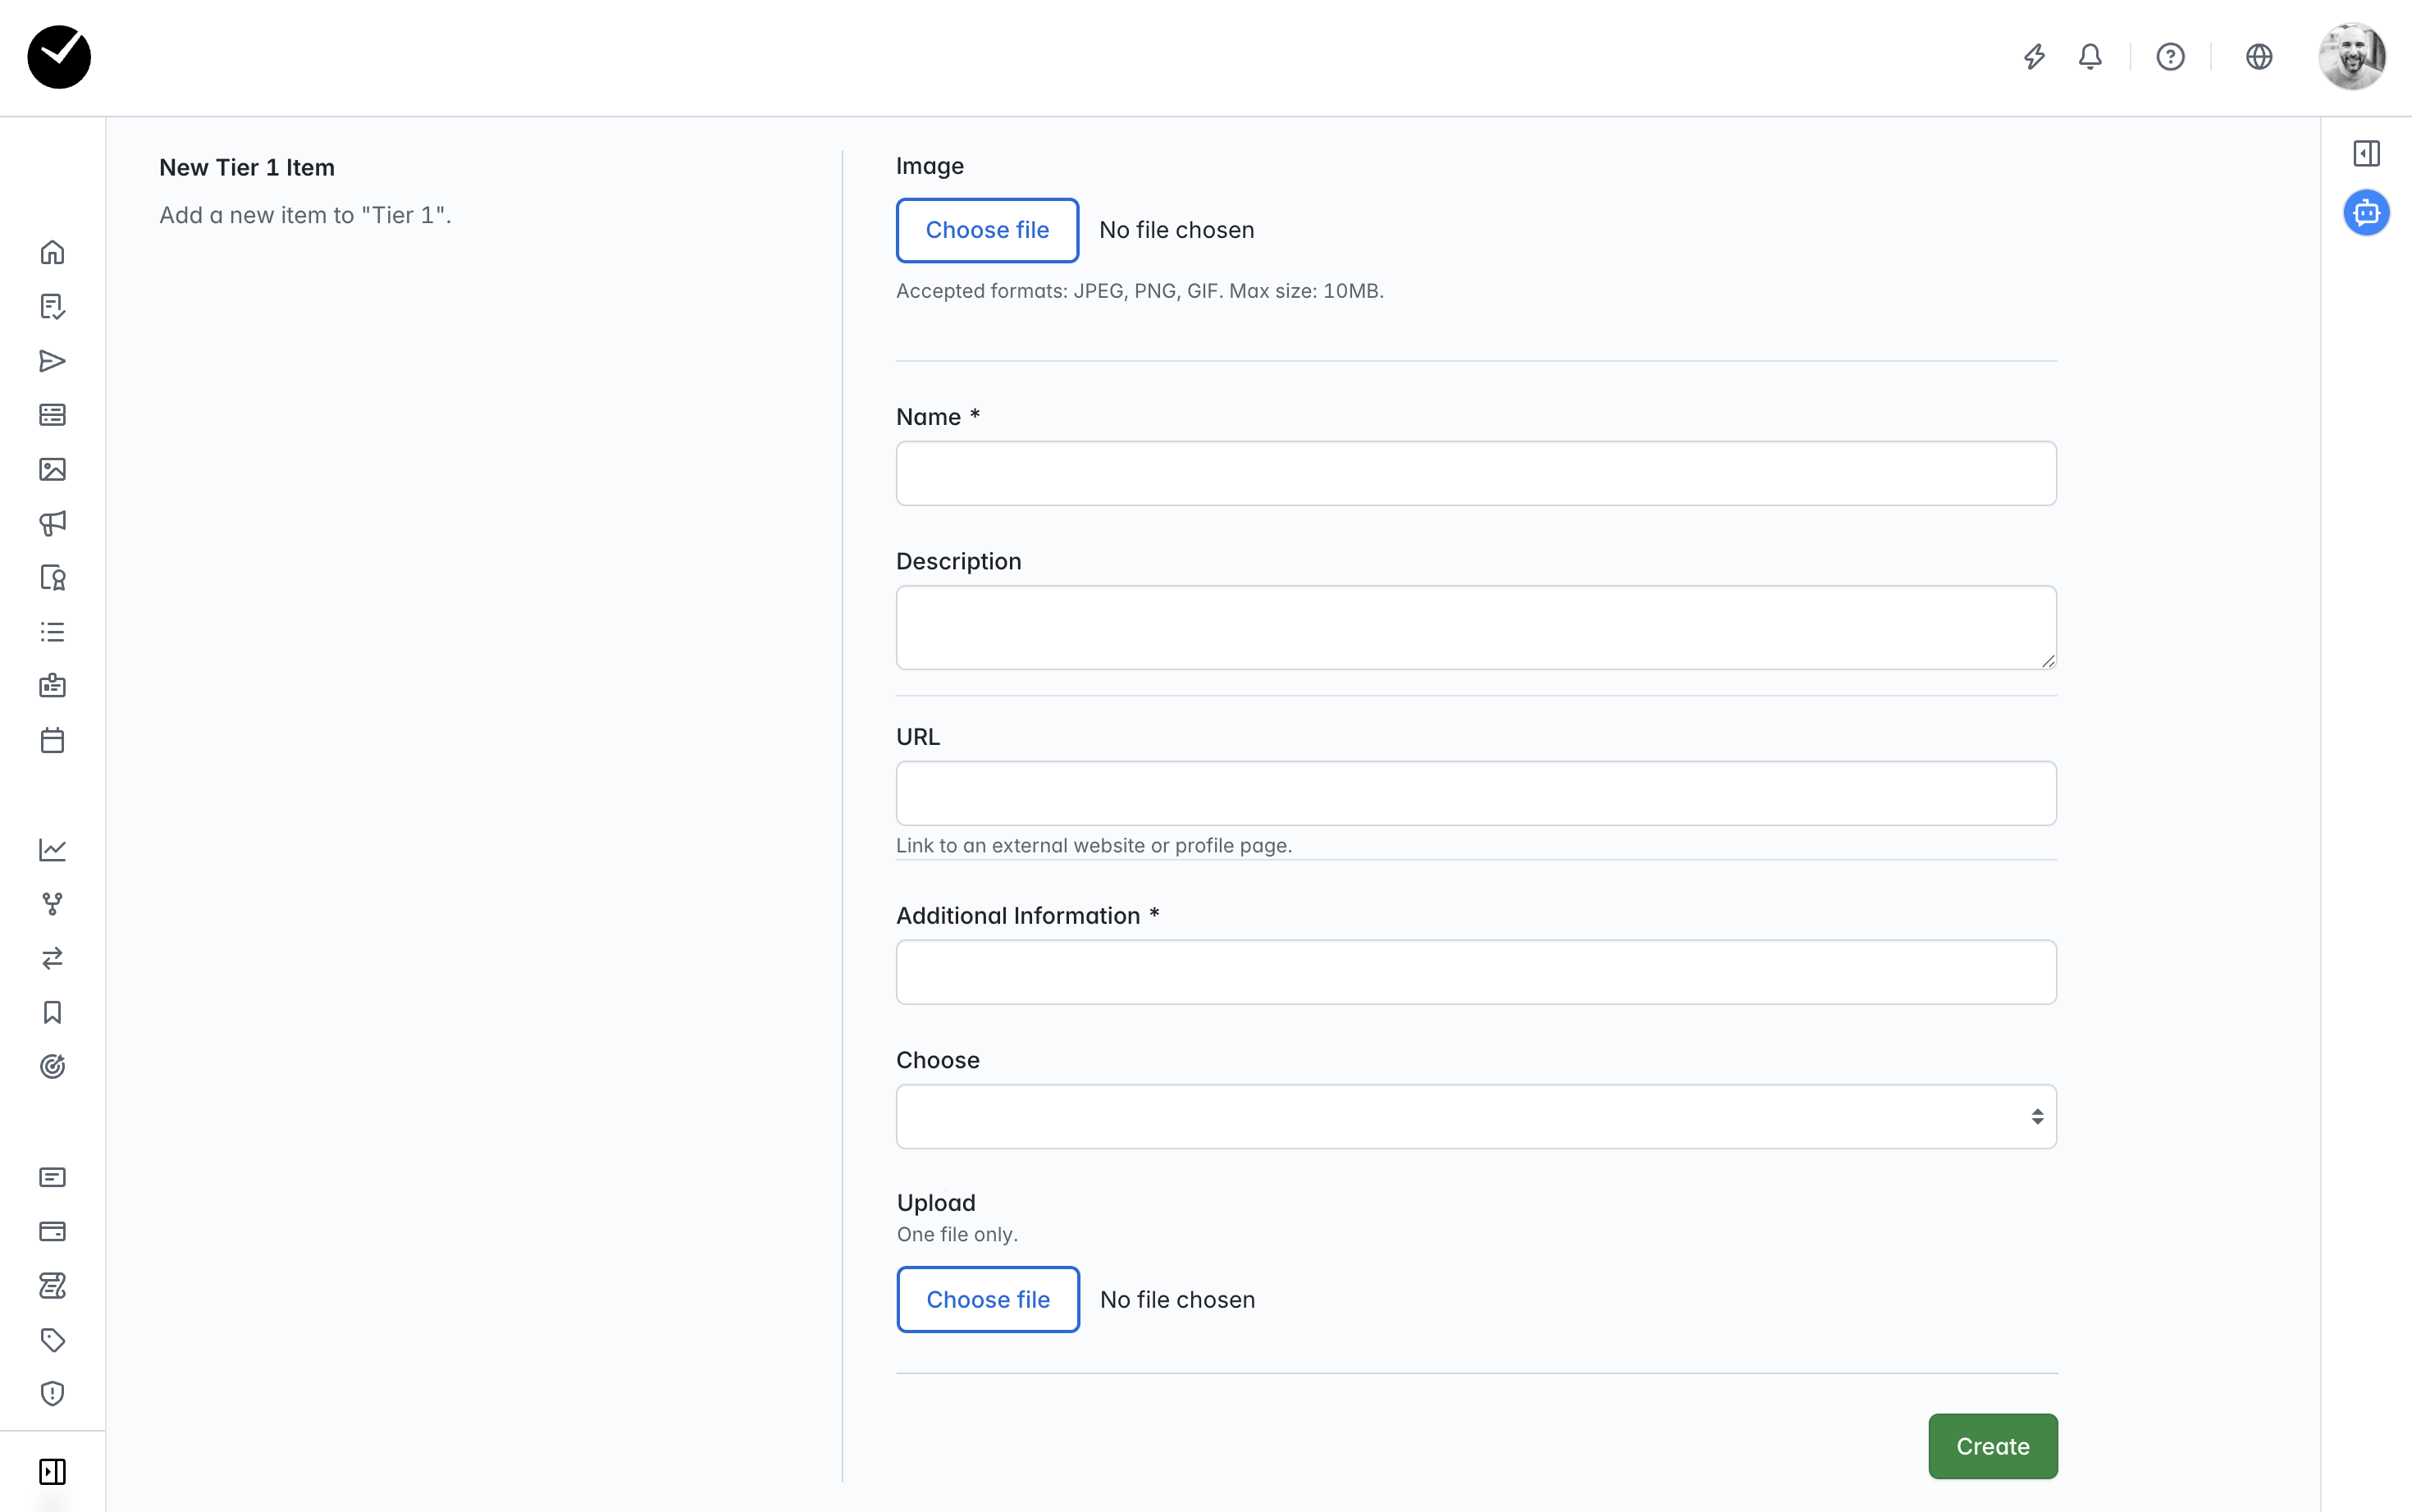
And when a user begins adding items to a Showcase Tier using your custom Showcase Type, you will see all fields added on the New Showcase Item form: