.png)
How do I use the enhanced event cloning feature?
Note: the enhanced event cloning feature is an optional feature and must be enabled by us for your organization to begin using it. Please contact support if you wish to enable the feature for your organization.
Only administrators can clone events in your organization.
If your organization has the 'Enhanced Event Cloning' feature enabled, you will be able to clone your events with much more granularity, and upgrade old events to use features such as the new site and registration form editors. Please note that when using this feature, registrations, invoices and payments will not be cloned to the event, and the cloned event will be set to 'Draft' mode by default.
How do I use the enhanced event cloning feature then?
Using the enhanced event cloning feature to clone your events is initiated in exactly the same way as using the regular version. Either click on the 3 dots on any event tile on your Organization Dashboard and select 'Clone', or click on the 'Event Settings' menu within an event and select 'Clone':
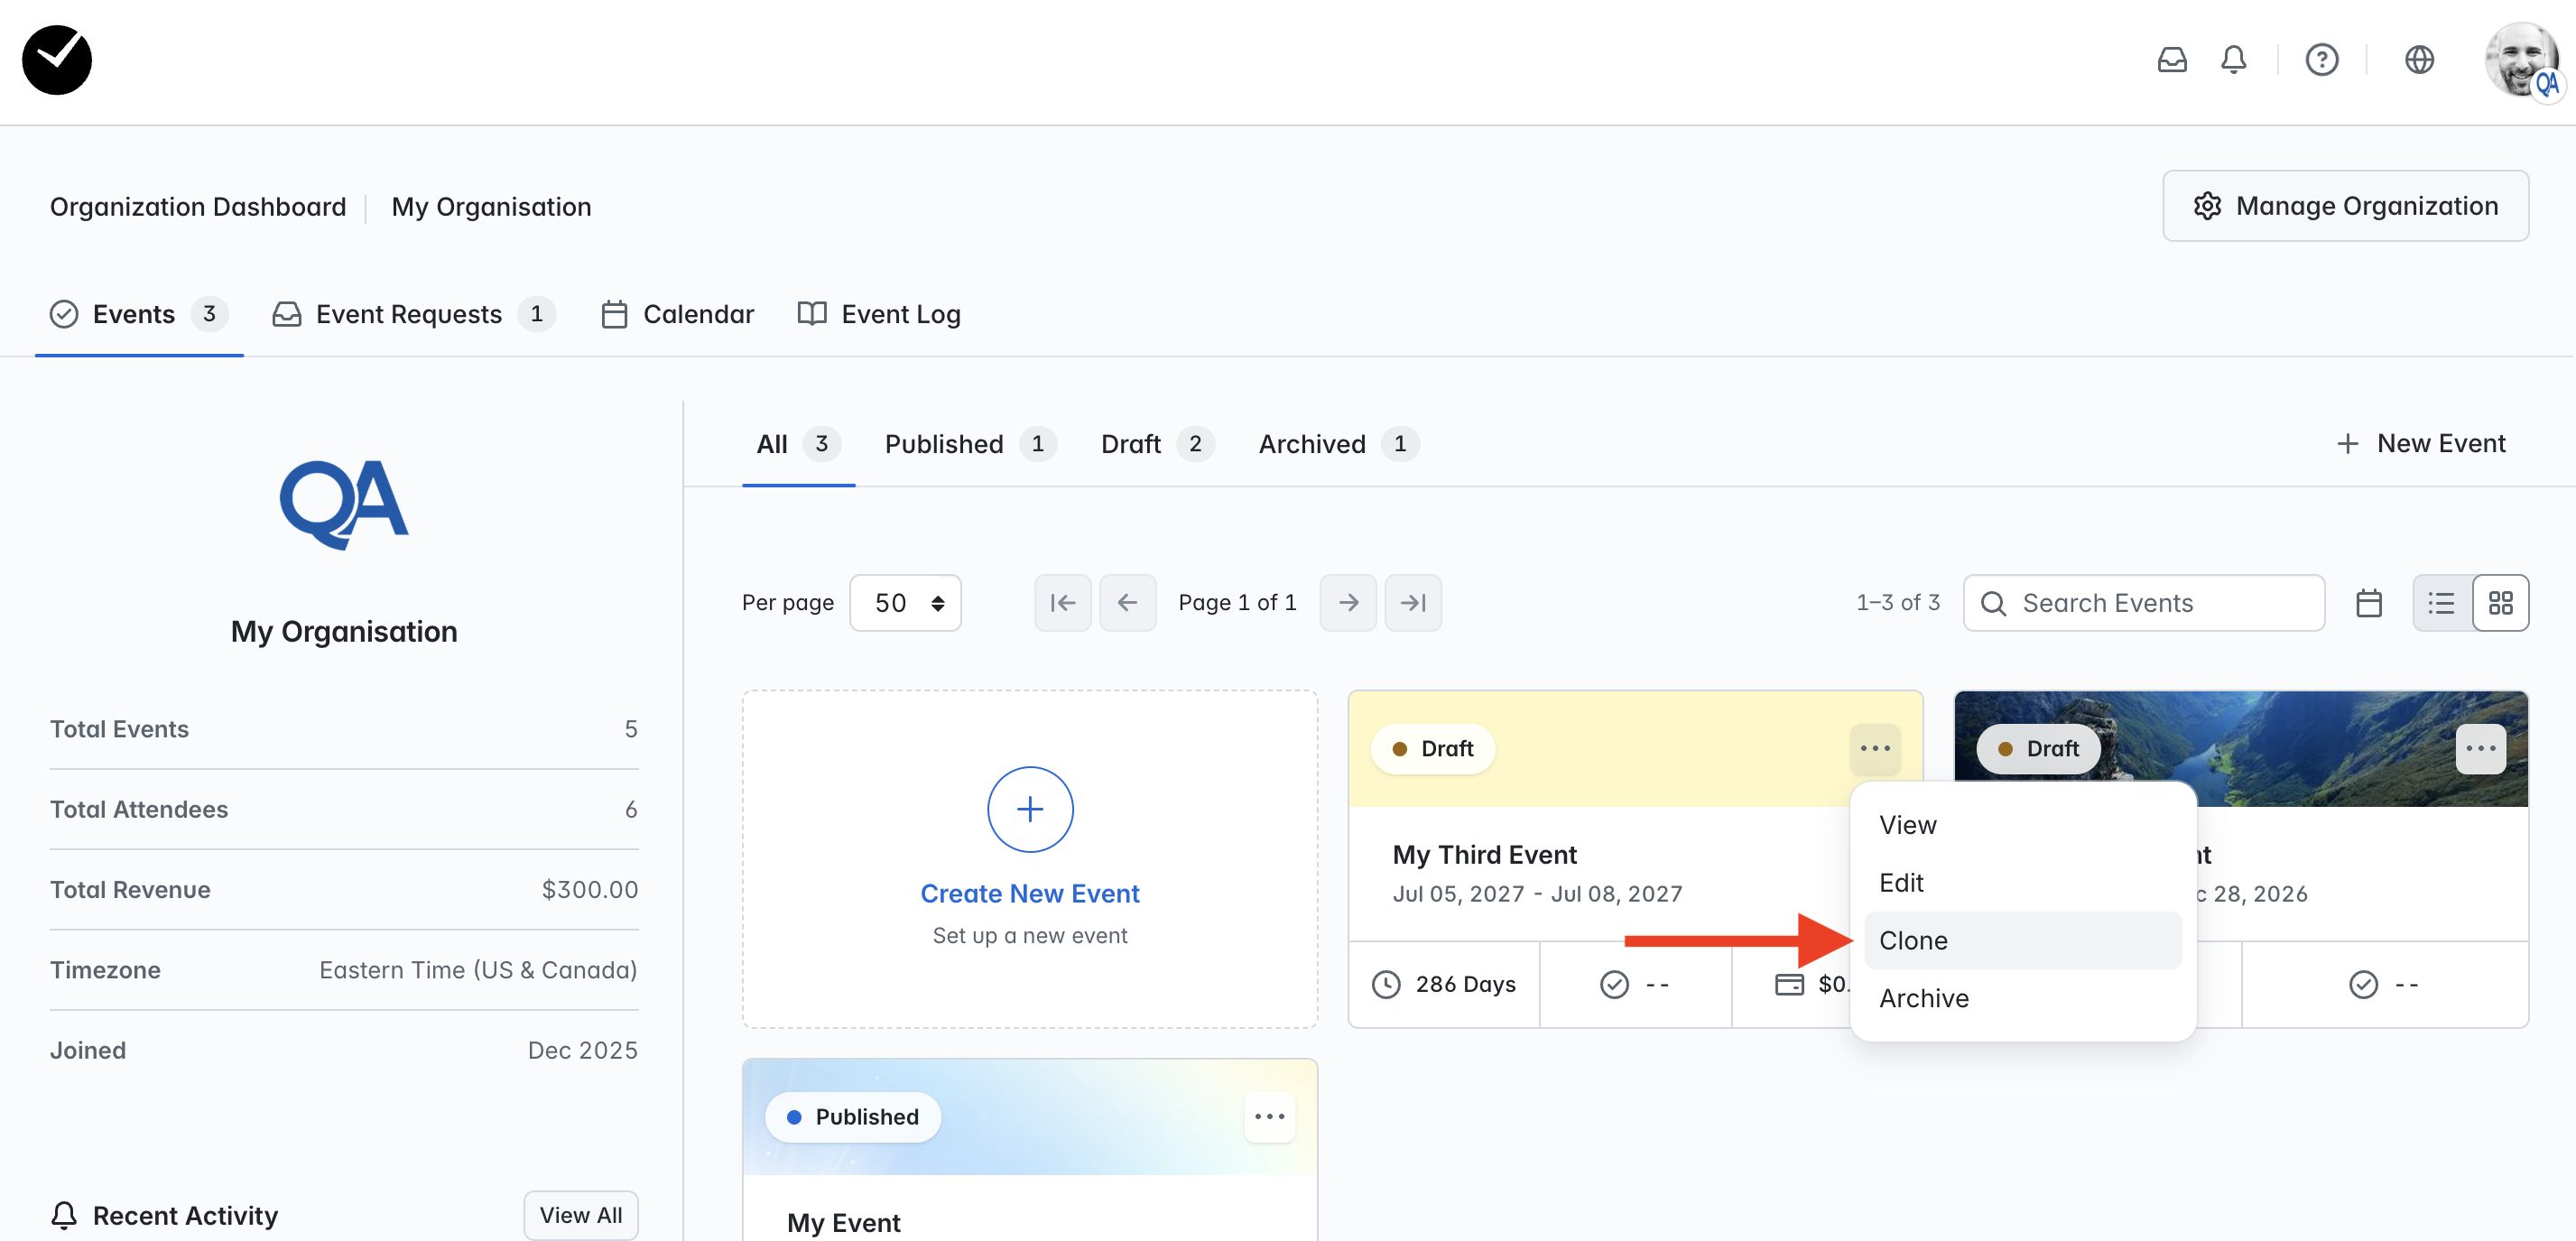
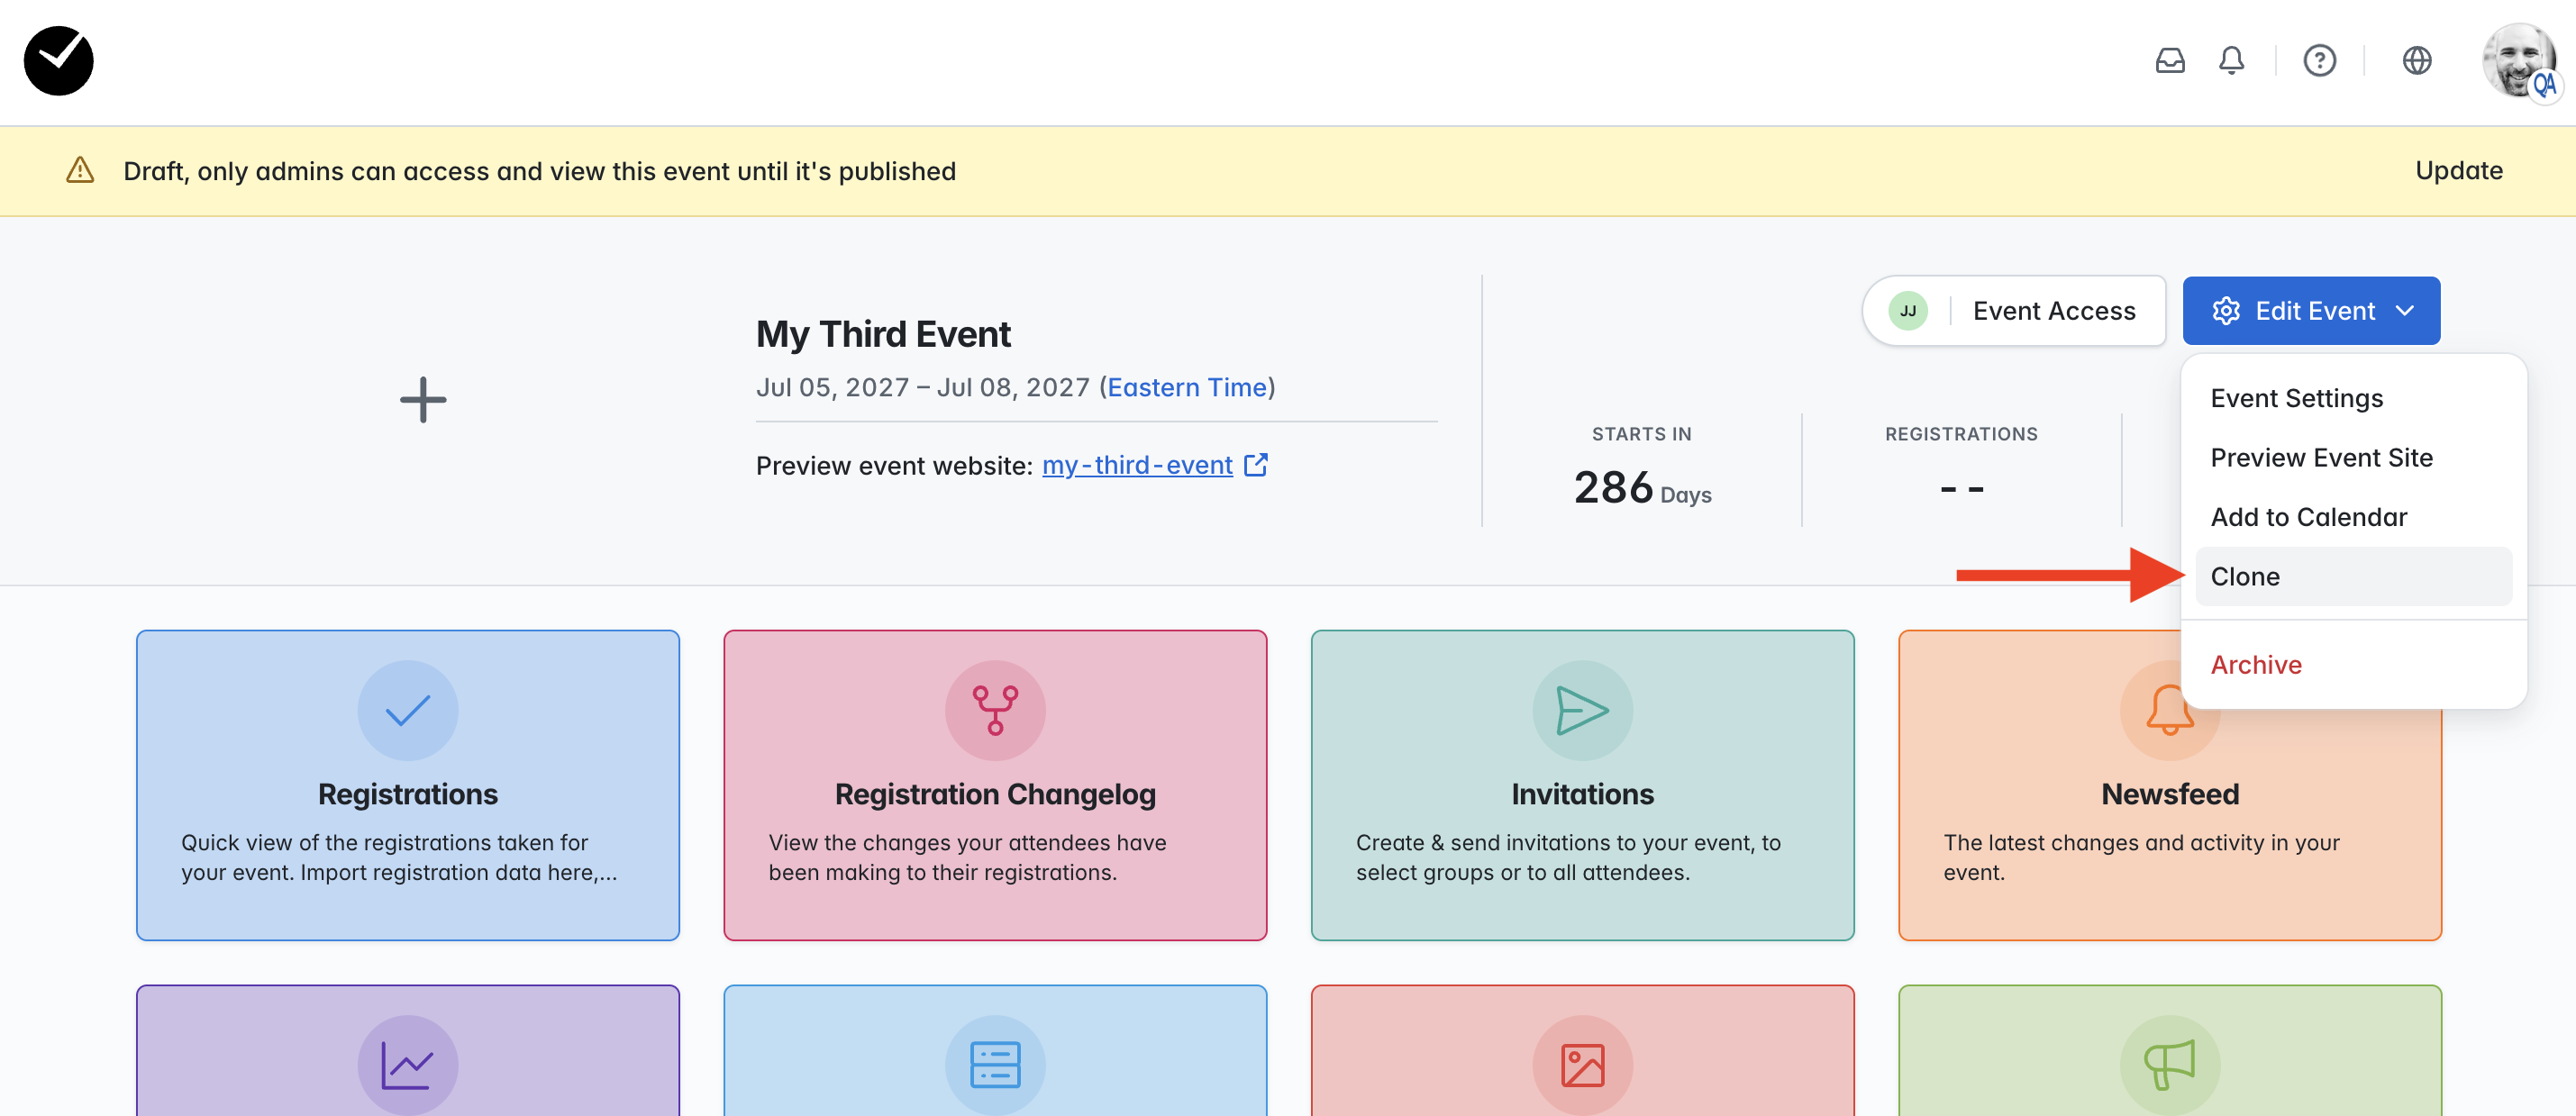
Once you have selected to 'Clone', you will see the following form:
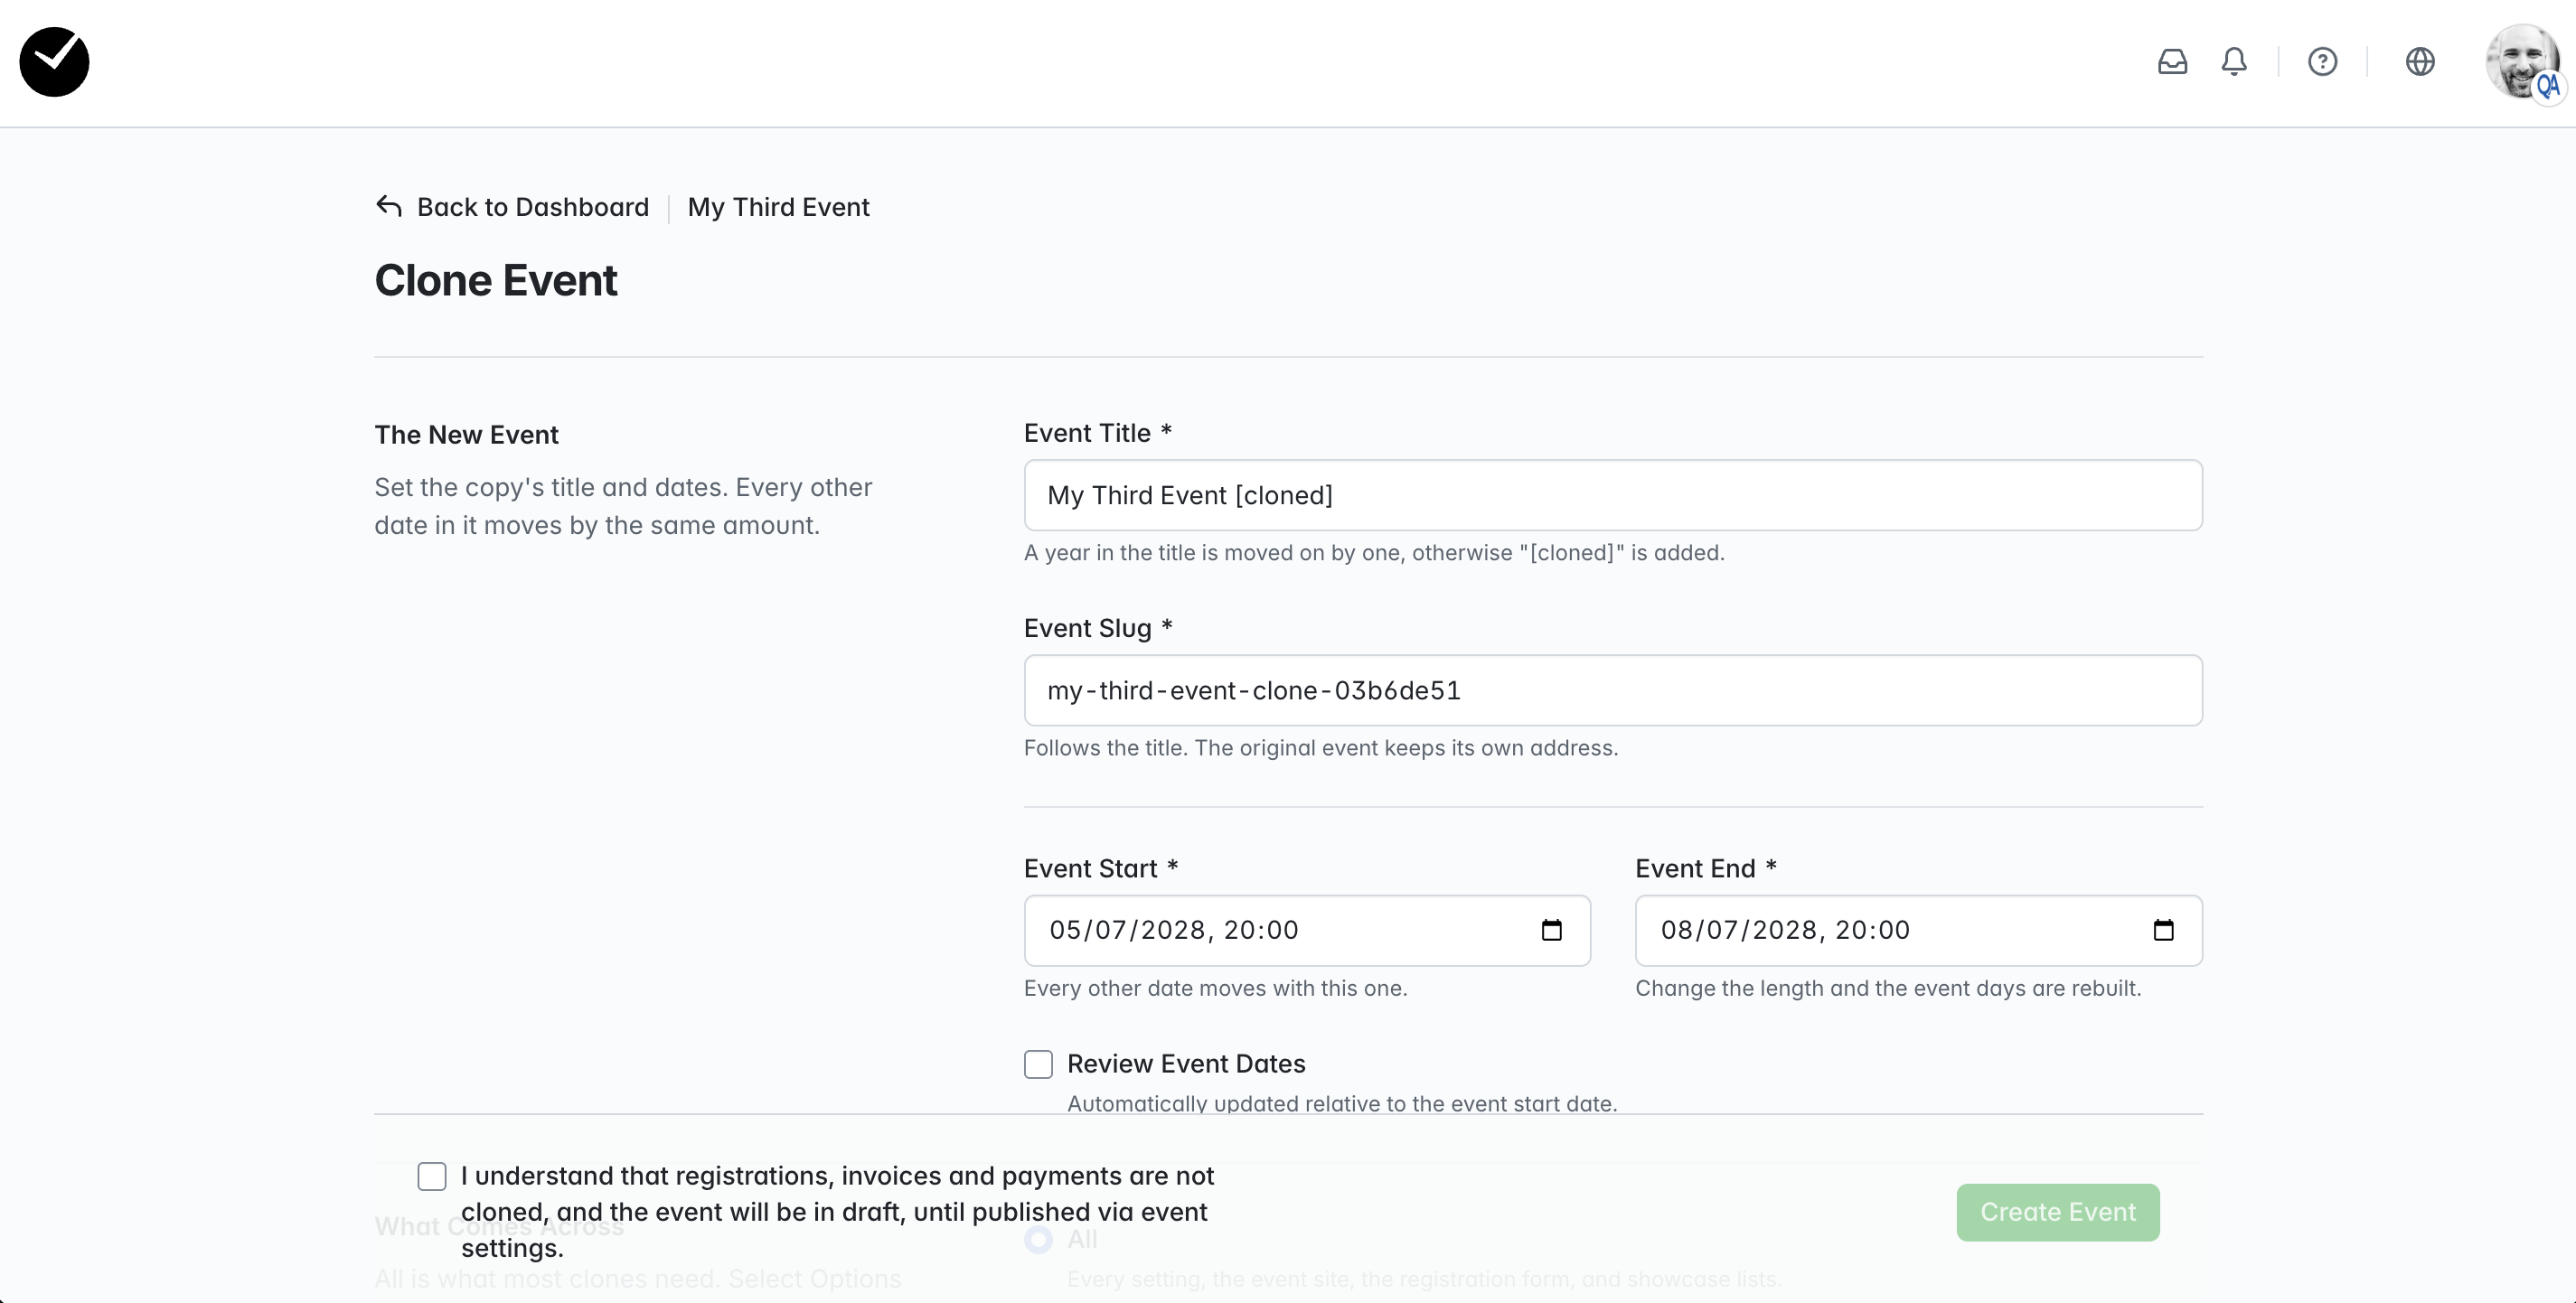
The following options will be available to you:
- Event Title - set the name of the cloned event here. By default, if the event has a year in the title, we will update the cloned event title to a year in advance (eg 'ABC Expo 2026' will become 'ABC Expo 2027' for the cloned event), otherwise the suffix '[cloned]' will be used. However, you can change the title to whatever you wish, as long as it does not match any other events within your organization! The event title for your cloned event can also be changed in your Event Settings once cloning is completed.
- Event Slug - set the event slug for your cloned event here. By default, we will provide a simple
-clone-NEW_EVENT_IDslug to ensure that you have a unique event slug available, but this can be changed to anything you wish, as long as the event slug is unique and is formatted correctly. Again this can be changed in your Event Settings once cloning is completed. - Event Start/End/Review Event Dates - in this area, you can choose the running dates for your cloned event. By default, we apply the same day/month as the original event, but incremented by one year in advance. If you toggle the 'Review Event Dates' checkbox, we will show you the relativity of the default date changes to allow you to review an amend as you wish:
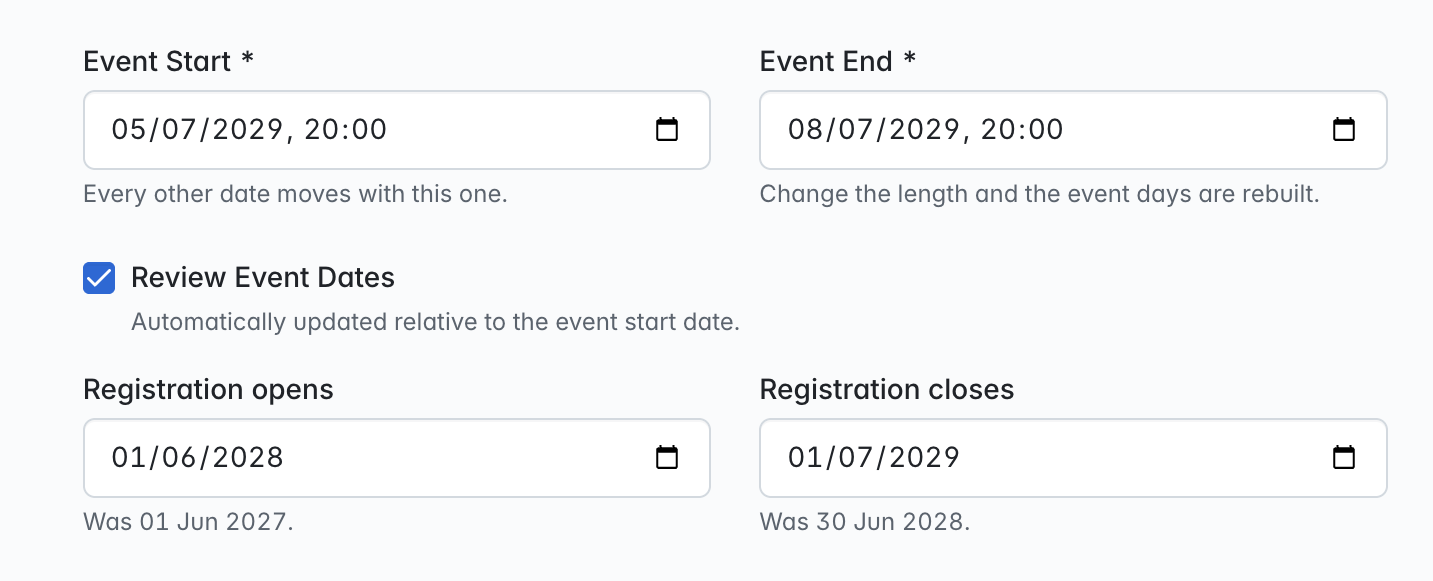
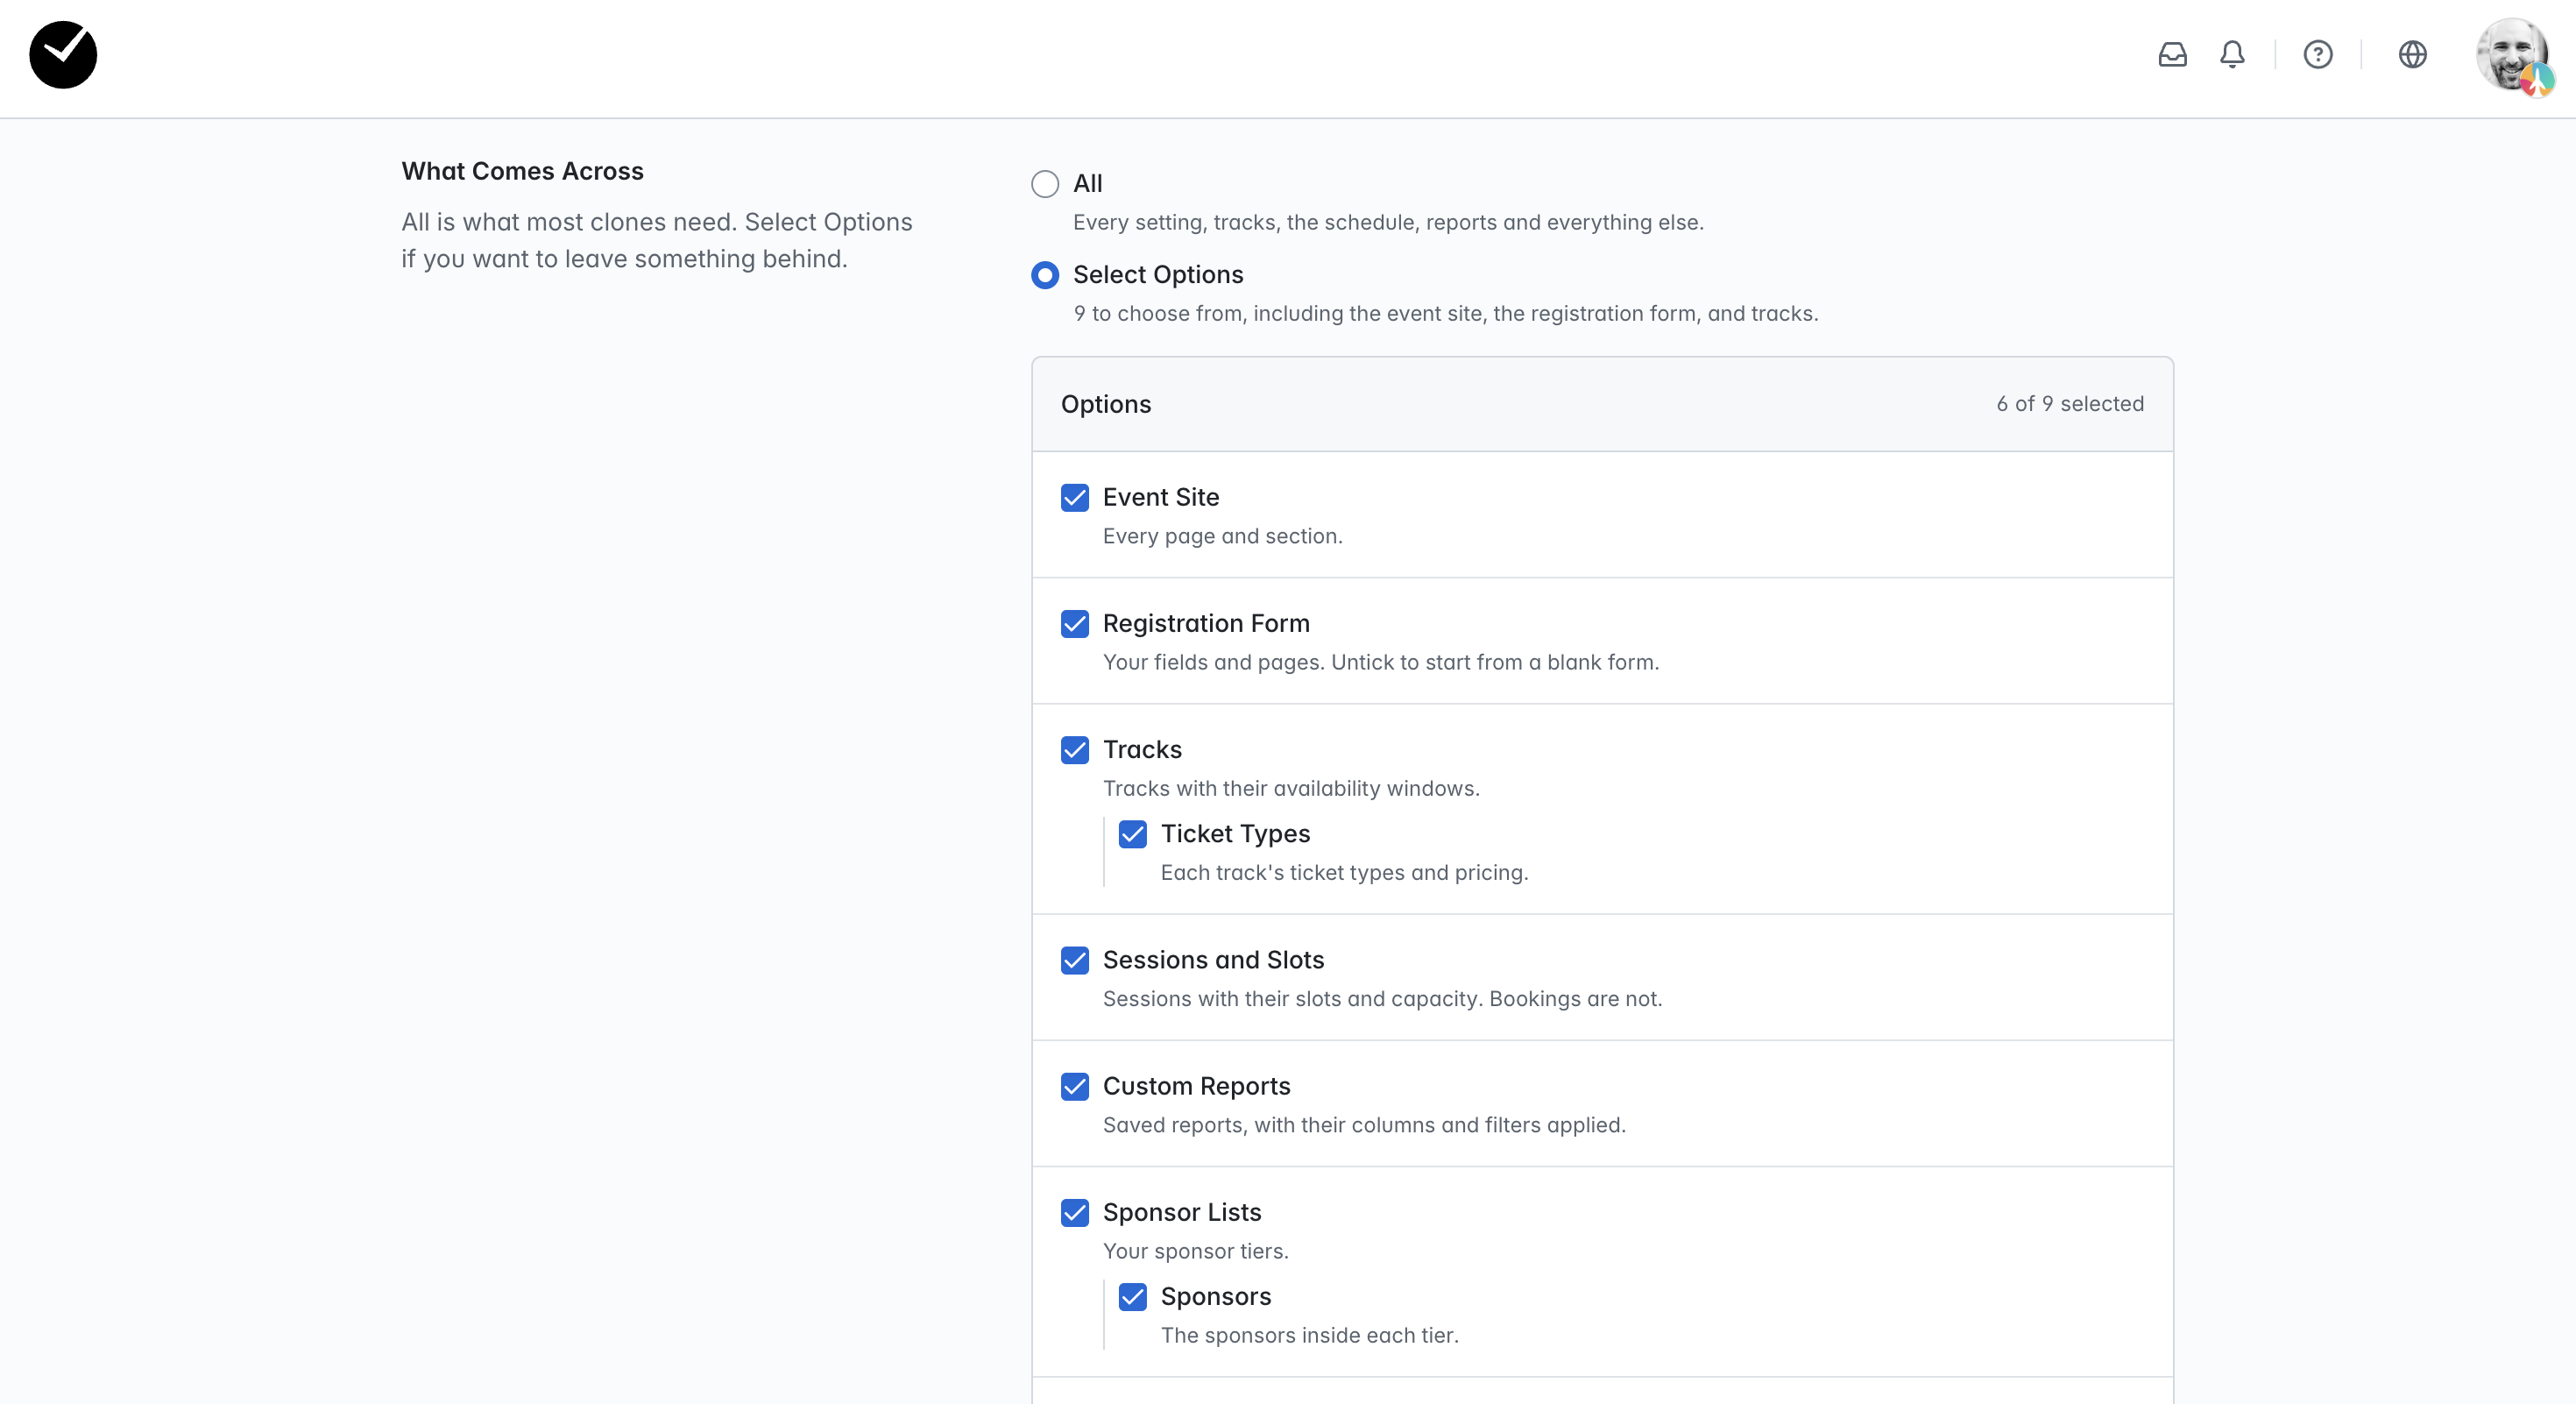
- What Comes Across - in this section, you can choose what you wish to clone from the original event. Event graphics will be transferred automatically, but generally anything else can be chosen by you! To copy everything, leave the selection set to 'All', but if you wish to pick and choose, select the 'Choose Options' option and select/unselect the items you wish to be transferred/omitted. The options presented will be based on the original event's content, so you may see less or more options than the example screenshot below depending on the original content:
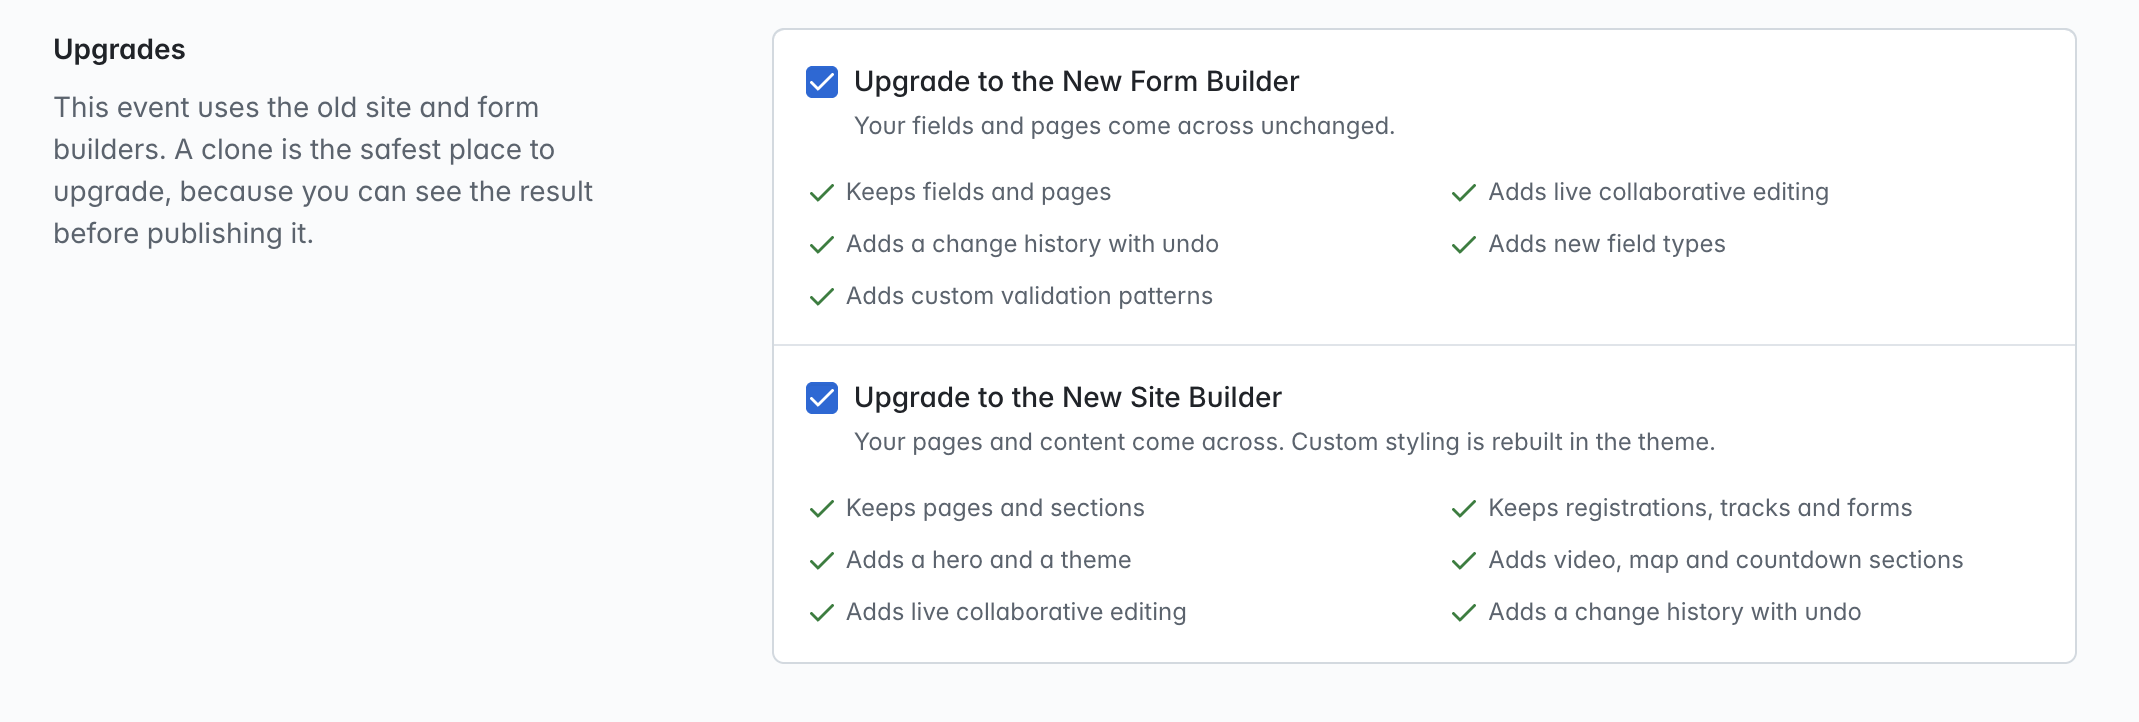
- Upgrades - if you have the new site and/or registration form editors enabled for your organization, but the event you are cloning from is using the old versions of the editors, you will see the 'Upgrades' section displayed. These upgrades are enabled by default when cloning an event, and will carry across all your event site/form data to the cloned event but with the new editor(s) in place for the event, allowing you to use the latest features contained in the new editors. If you do not wish to upgrade, simply uncheck the relevant checkboxes before you submit to clone the event:
Once you are ready to clone your event, click on the disclaimer checkbox at the bottom left of the page and then the 'Create Event' button when active:

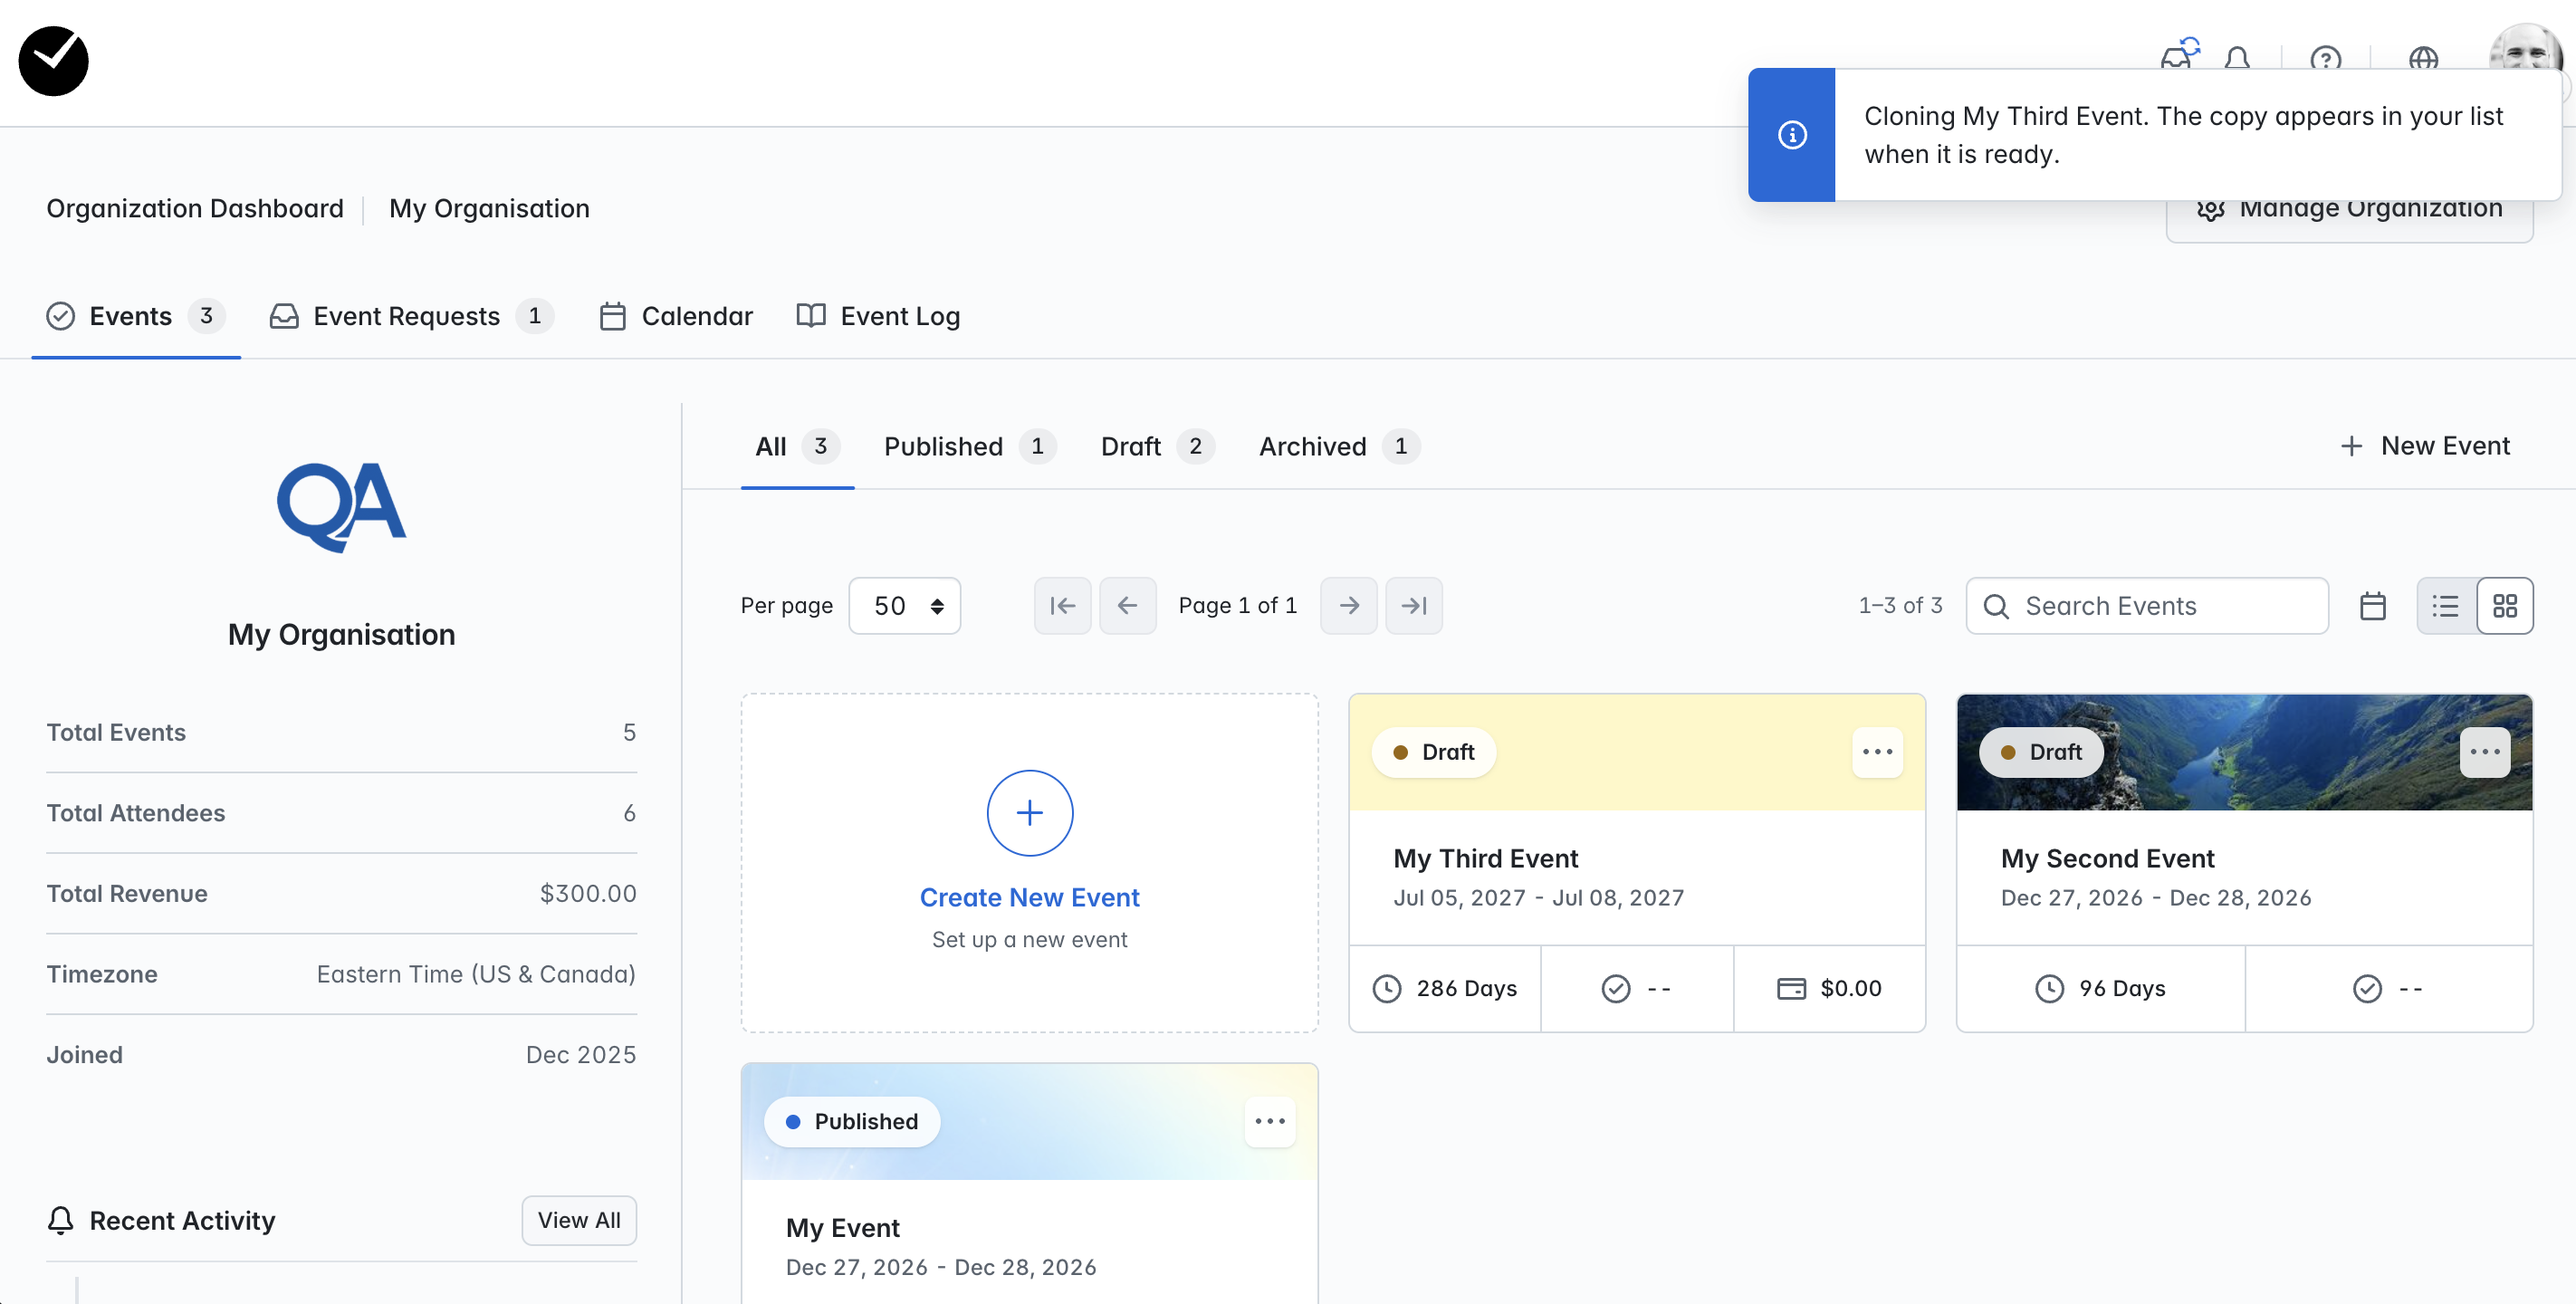
You will then be returned back to your Organization Dashboard and a message will be displayed at the top right of the page informing you that the event is now being cloned:
Depending on the options selected to be cloned and the complexity of the event configuration, this will take a short time to process. You can monitor the progress by hovering over the 'Operations' menu at the top right of the page - while cloning, a progress bar will be shown, and when completed, you will see that the event has been 'Cloned':
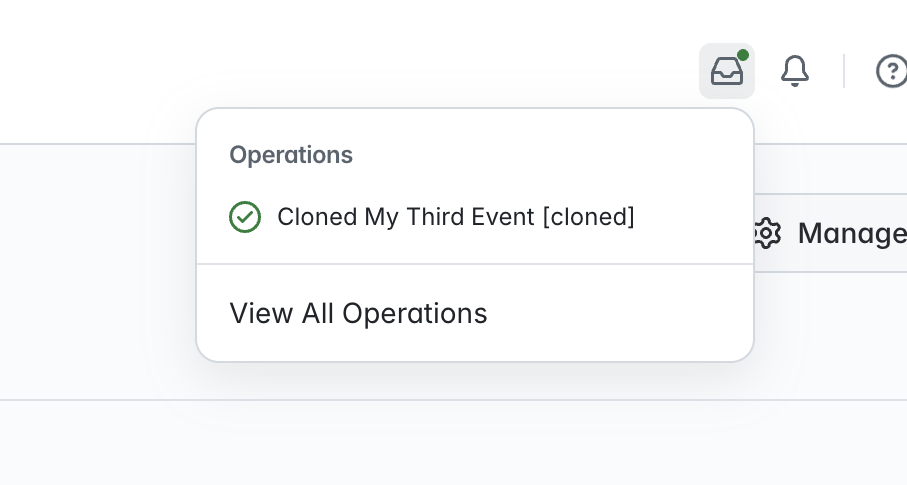
Once the event is shown as 'Cloned' with a green tick next to it, it is now ready to be accessed. You can get to your new event directly by either clicking on the item listed under the Operations menu, or refresh the page to see the new event in your events list.
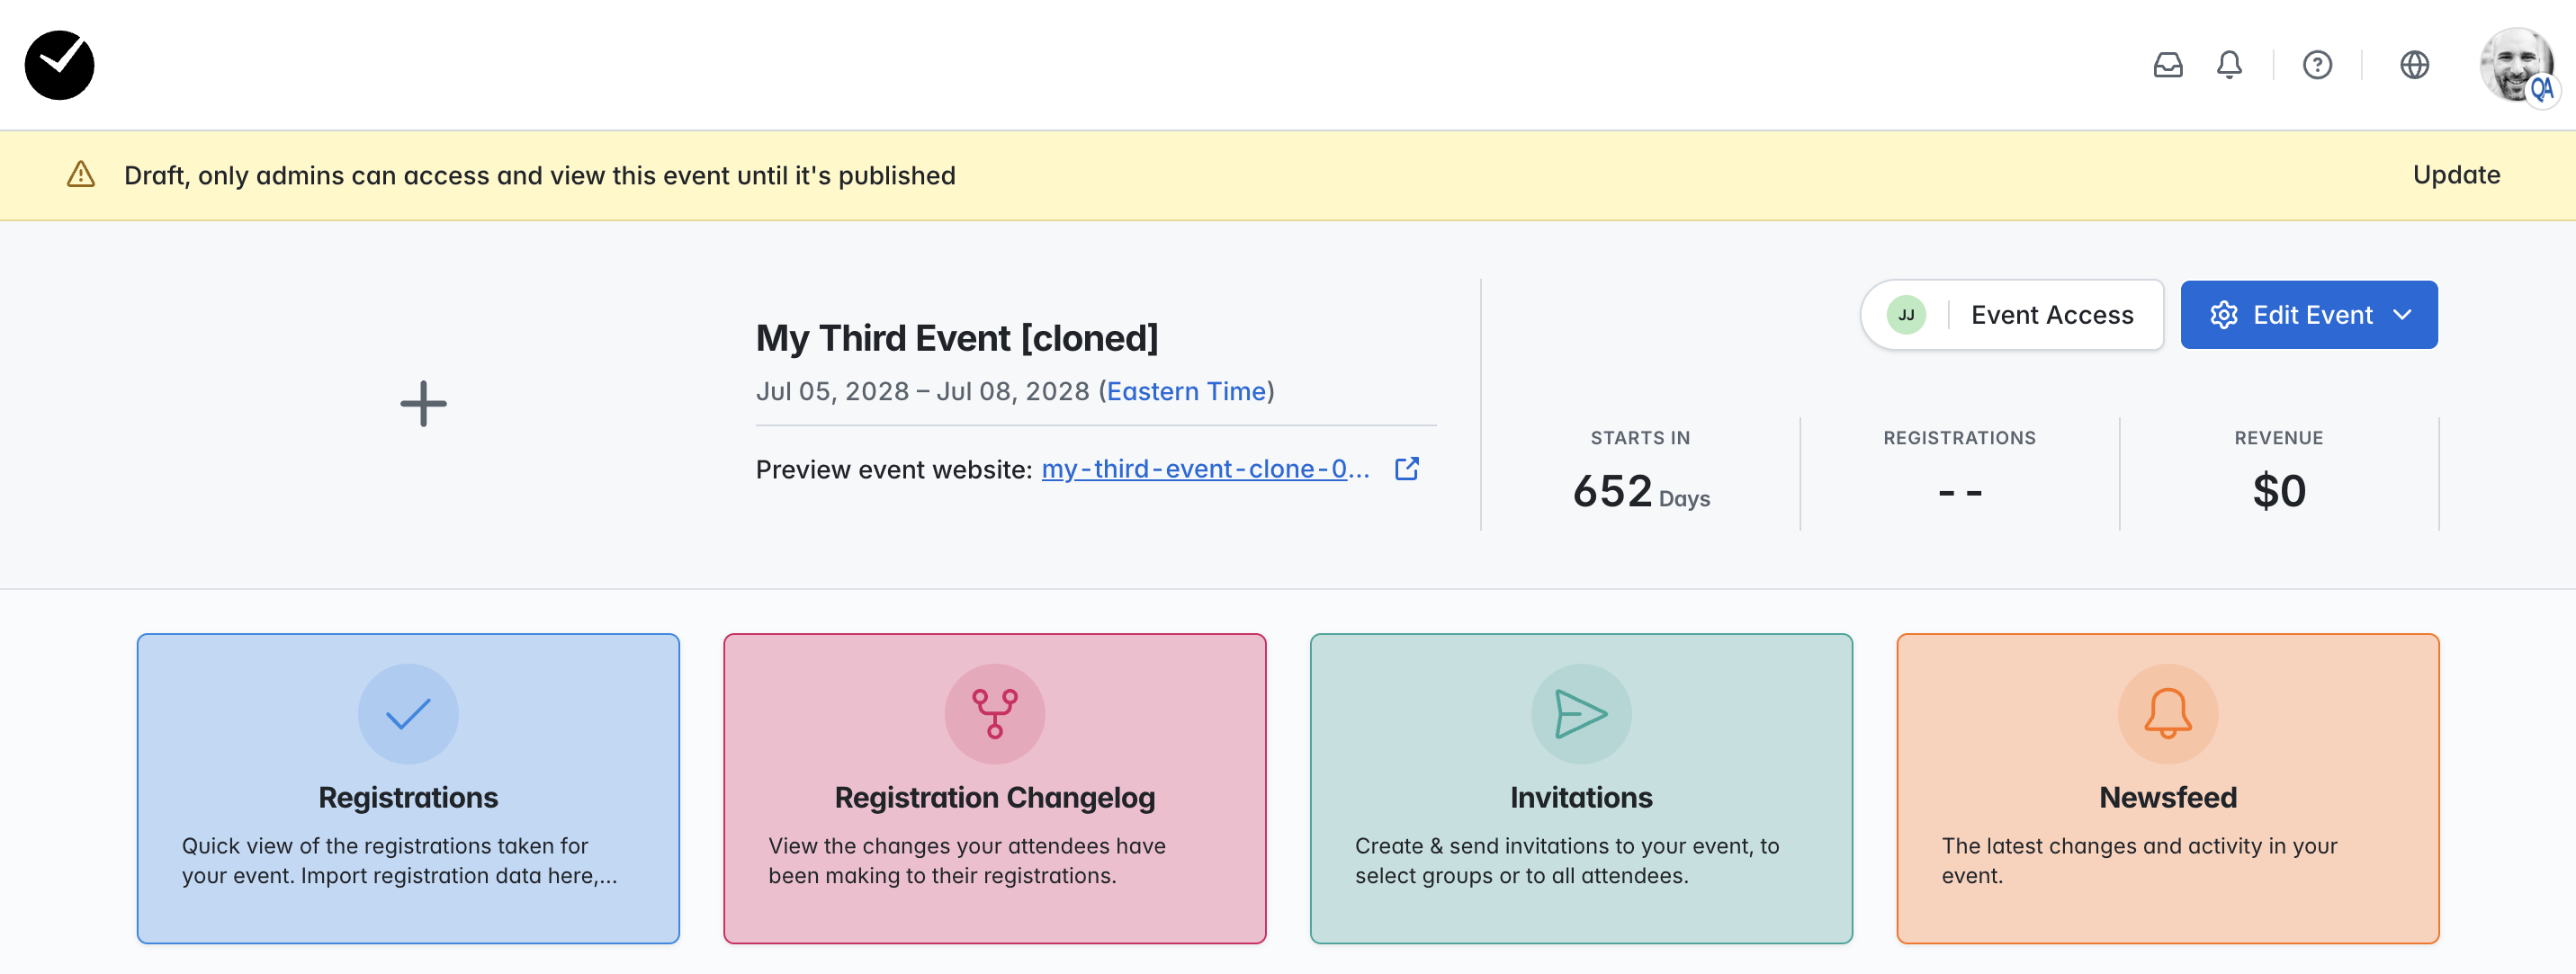
Is there a way to monitor who cloned an event and view failures if the cloning was unsuccessful?
If you wish to view historical data on events that have been cloned, or review failures, hover over the Operations icon at the top right of the page and select 'View All Operations':
Once you enter this area, you can see all operations that have occurred in your organization, including any events that were cloned, and who requested the cloning of the event:
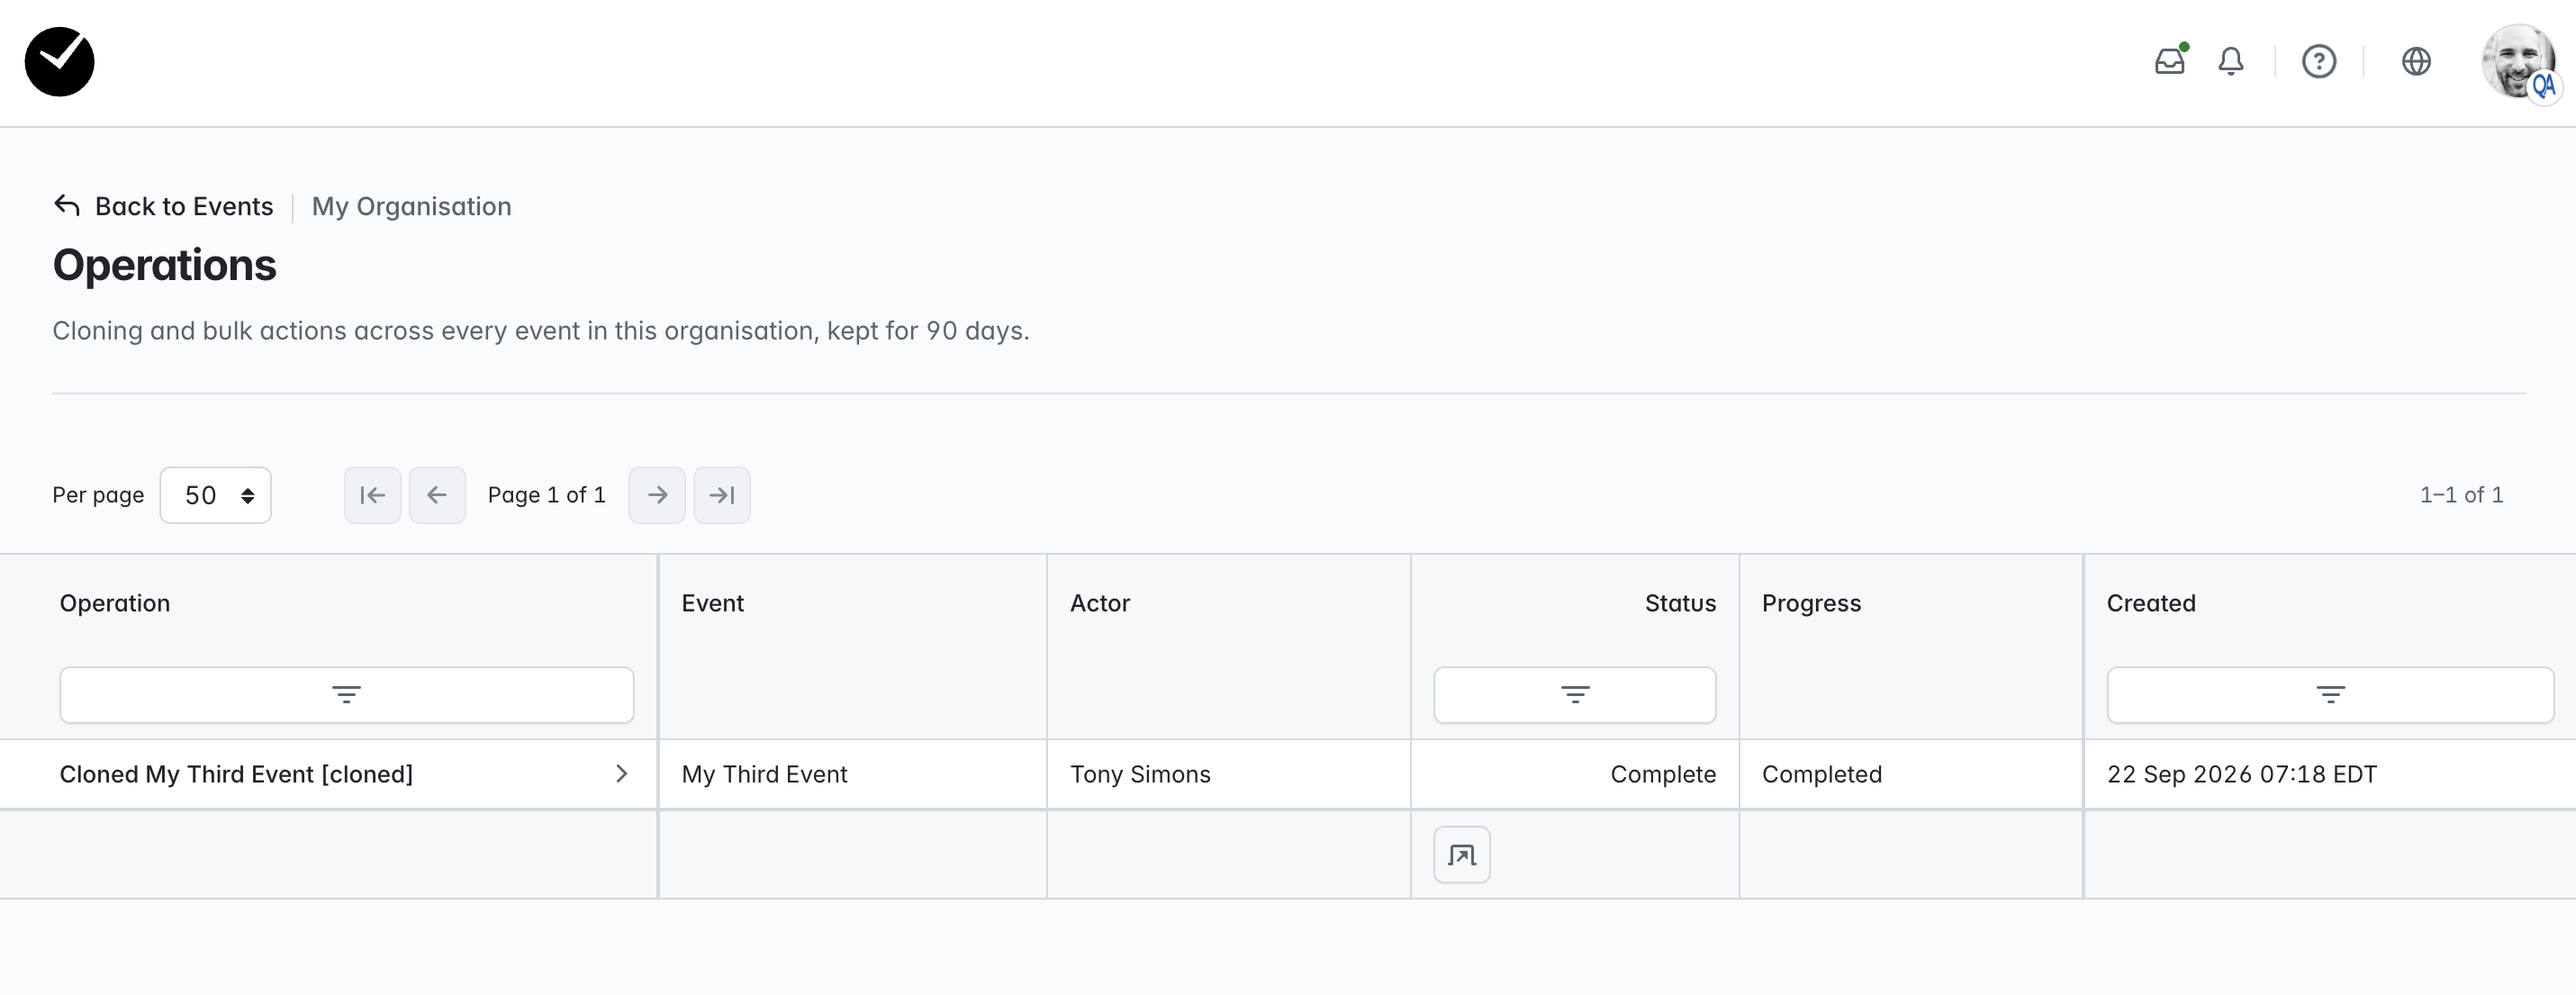
If you wish to review an individual cloning request, click on the '>' arrow next to the title of the event and you'll be taken to the summary page for the action:
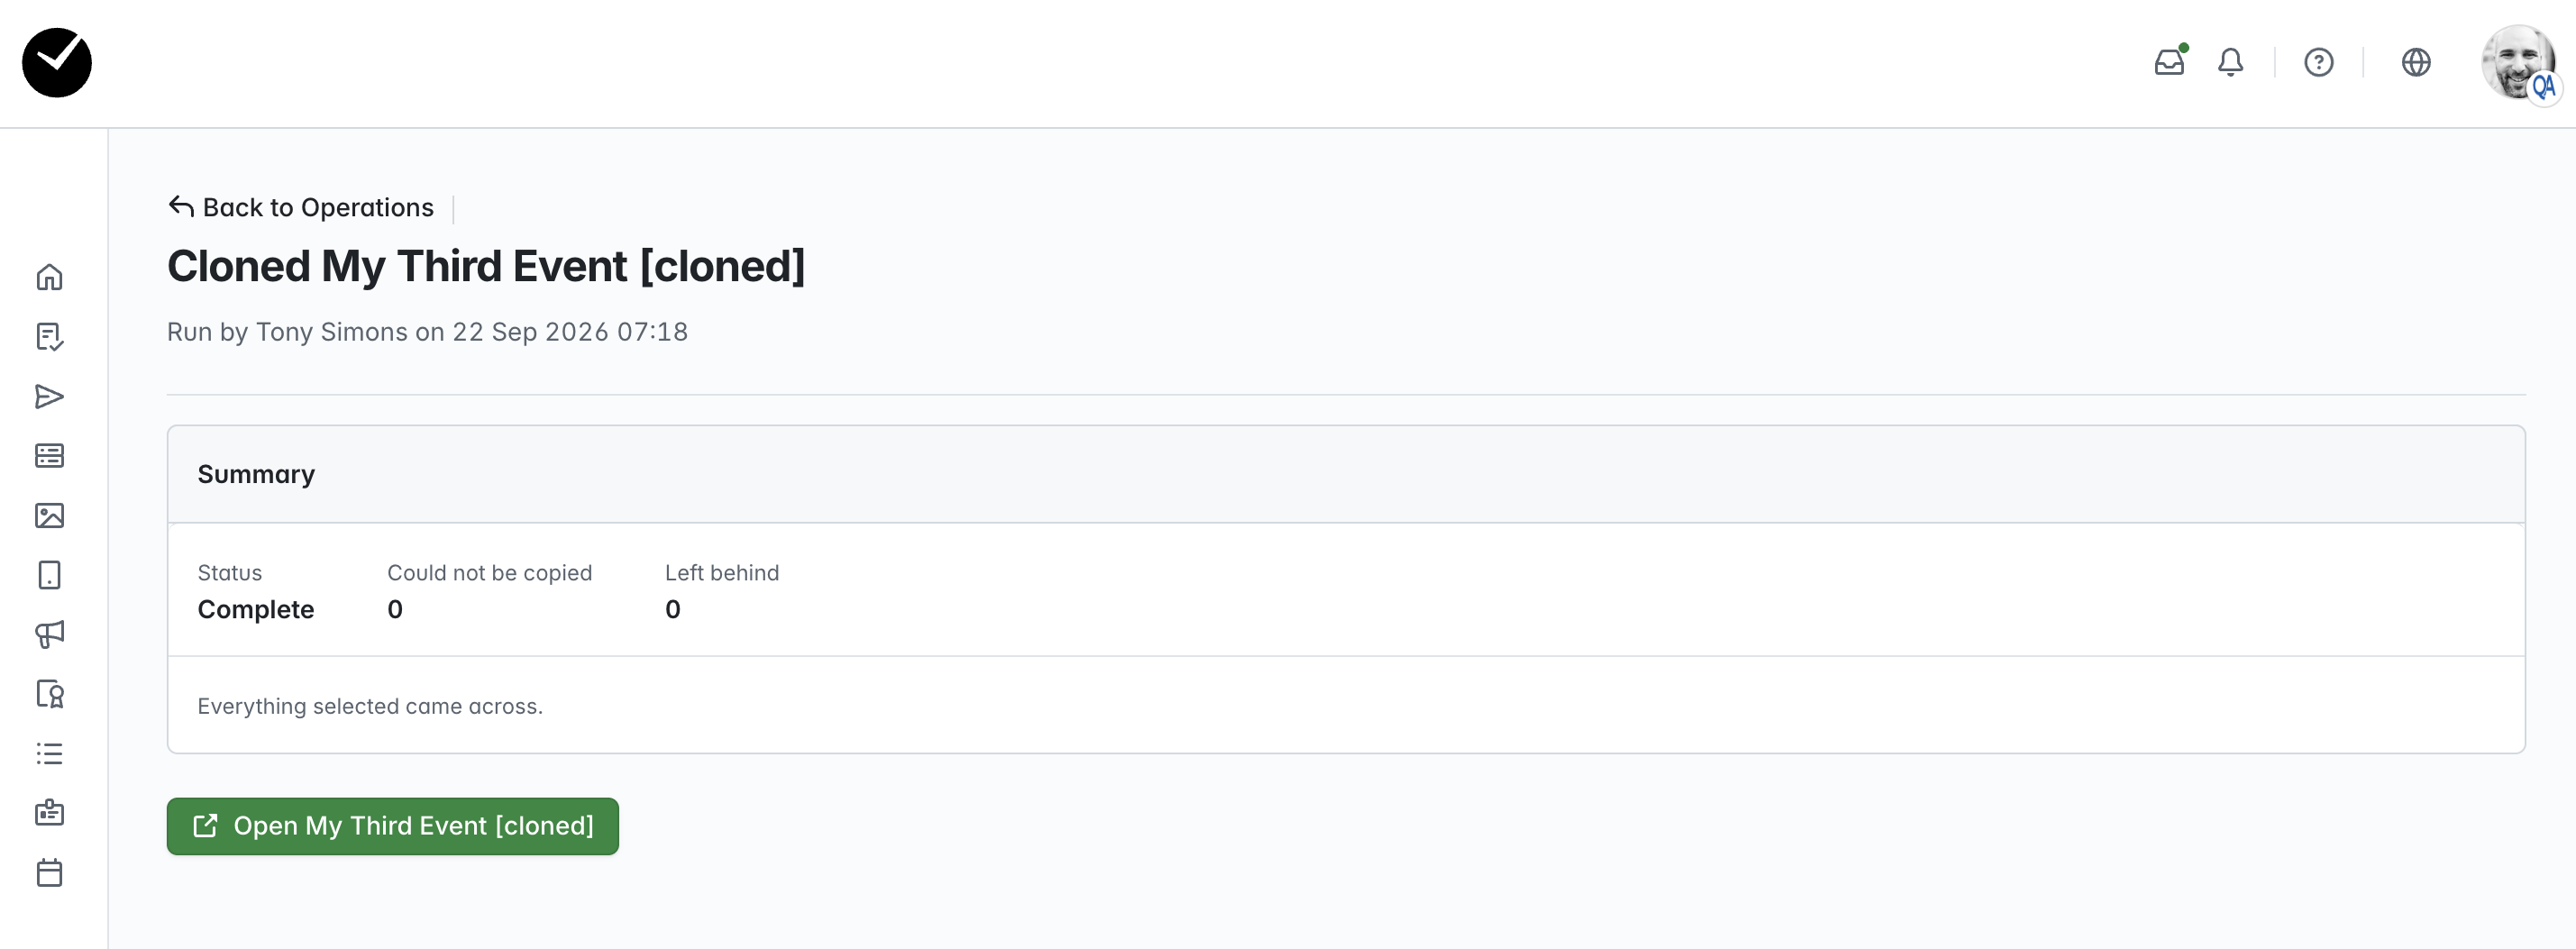
If the operation was successful, you will see a link to the event displayed. If the cloning was unsuccessful, you will see a grid displayed below the summary detailing the failures that occurred.