How do I configure my Event Settings to create an event that's right for me?
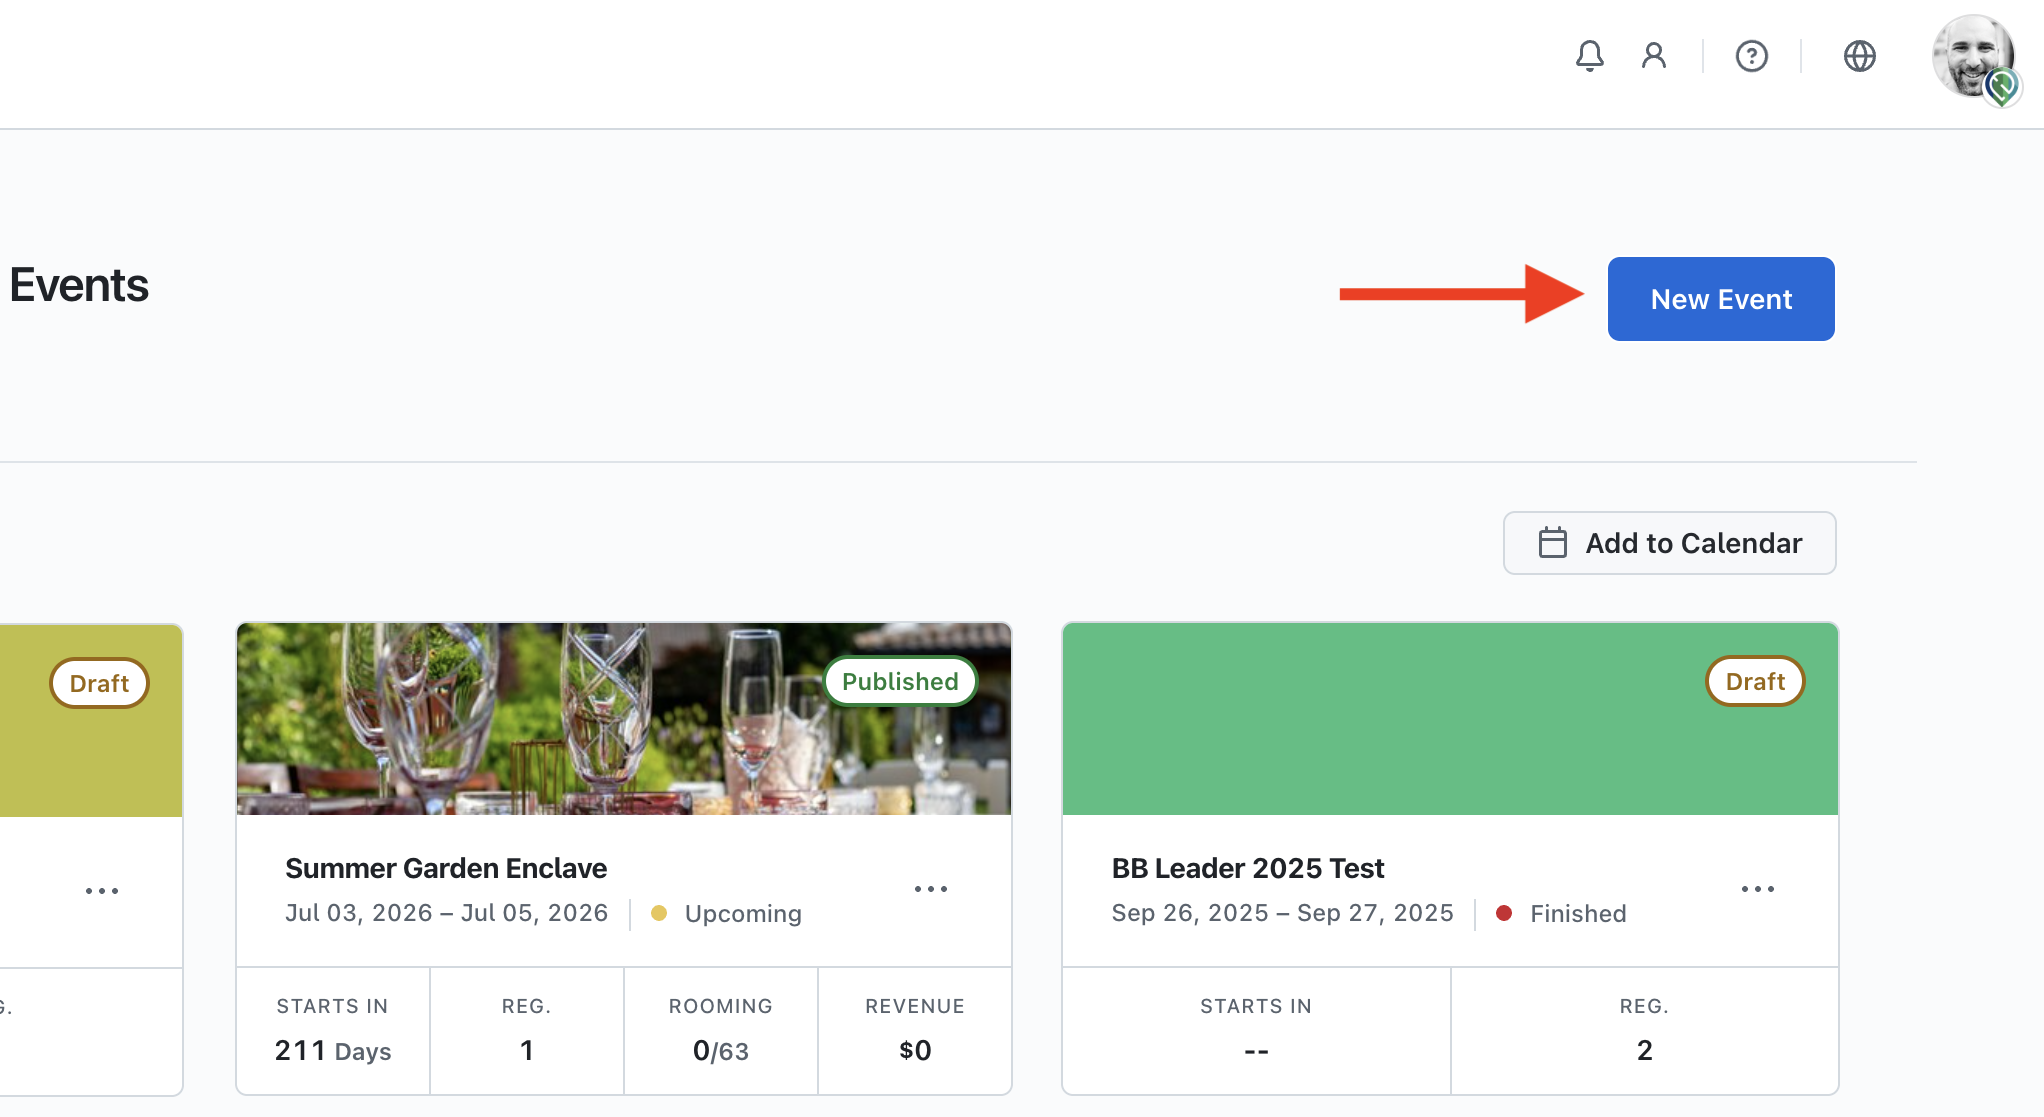
To begin creating a new event, go to your Organization Dashboard and select the 'New Event' button at the top of the page.
Once you have selected to create a new event, you will be redirected to the ‘Create Event’ form.
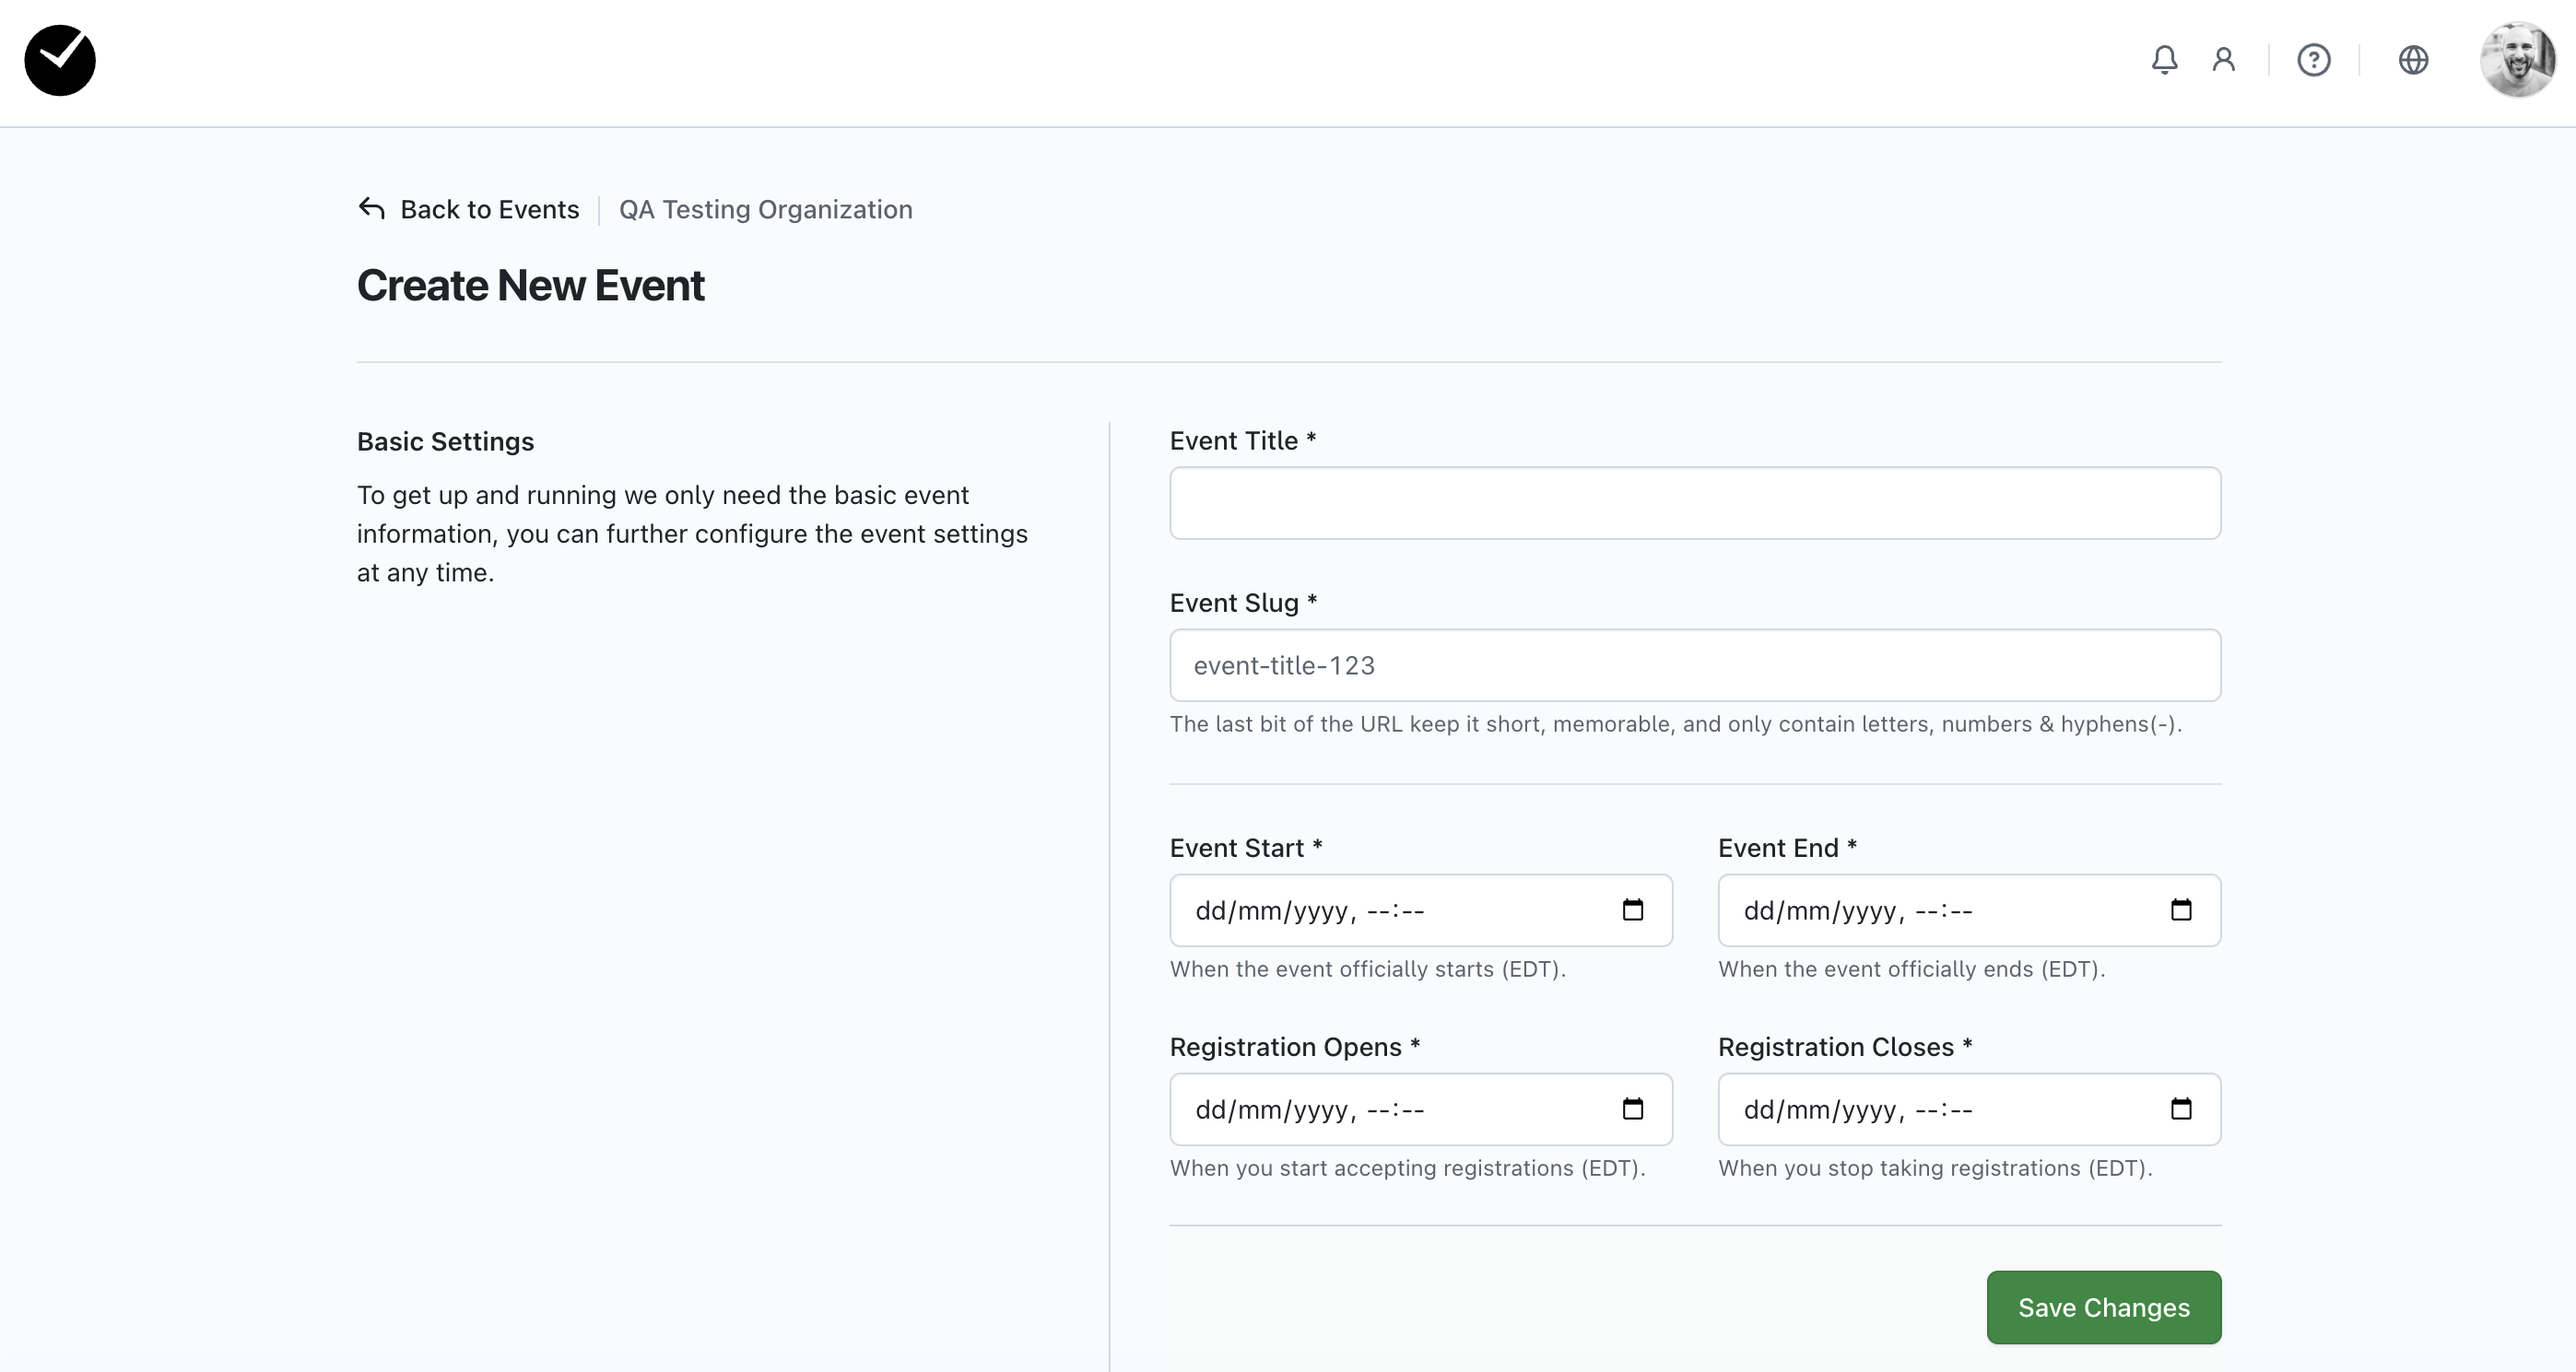
On here you will be asked to create your core event information before proceeding. These fields are mandatory, and must be completed before you can continue with creating your event:
- Event Title - The name of your event that will be displayed in all areas related to it.
- Event Slug - In this area you can personalise the URL given to your event website. It must be between 7 and 100 characters long and only contain letters numbers and hypens (-). Most importantly, do NOT change this after the event is ready to take registrations otherwise links in emails from your event will not work.
- Event Start - the date and time that your event will begin
- Event End - the date and time that your event will end
- Registration Opens - the date and time that you will allow attendees to be able to begin registering for your event
- Registration Closes - the date and time that registrations will close for your event
When you are happy that you have captured your core event information, click on the 'Save Changes' button to proceed. Once you have clicked on this, your event is now created and you will see the following page.
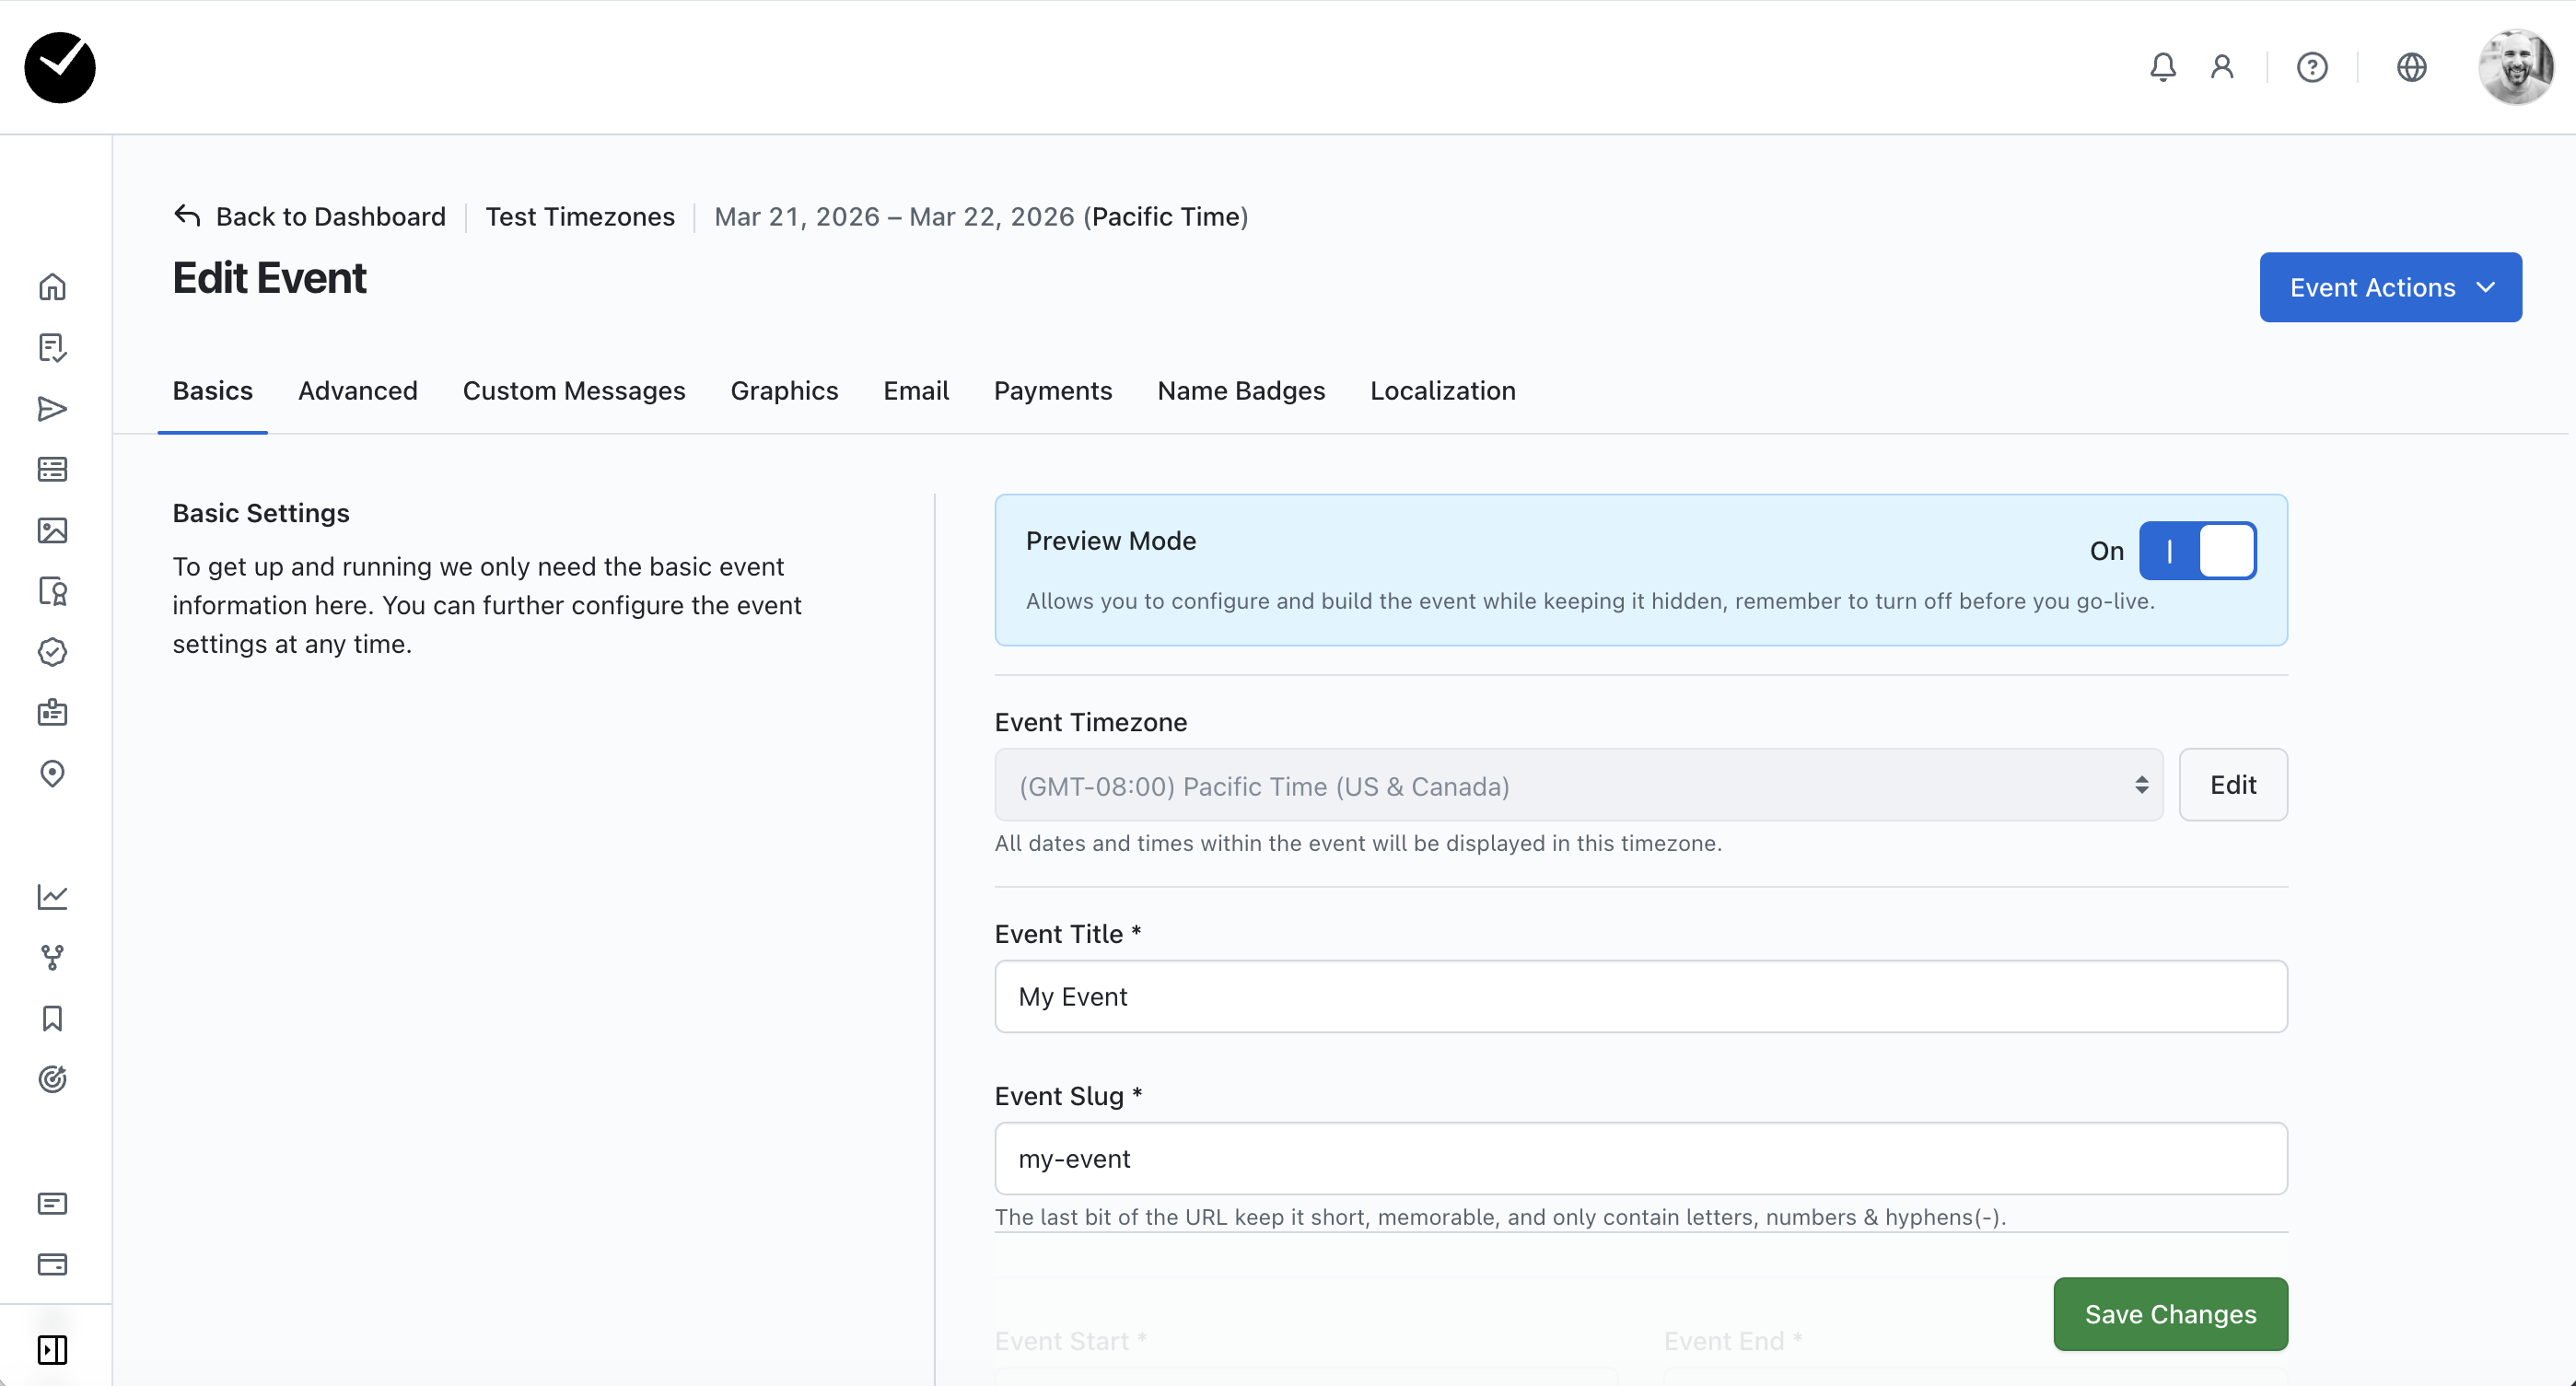
From here you have the option to configure your event how you wish. There are 7 other areas of configuration available to you here, which can be accessed by clicking on the relevant tab displayed. Please remember, when making changes to your event settings, always remember to save your changes before you leave the page:
Basics
The following additional options will be available to you once you have created your event:
- Event Timezone - select the timezone you wish your event to be in. When changed from your default timezone, all date/time related data will be shown in the timezone selected. Please refer to the article 'How do I set a time zone for my event?' for more details.
- Register By - overrides the dates/text displayed in Registration Closes, displaying 'Register by ...' instead.
- Registration Freeze - allows you to set a date that restricts existing attendees from editing their registration.
Advanced
This area allows you to add the following configurations:
- Attendee Cancellation Options - define whether you wish to allow attendees to cancel their registrations, and set a Cancellation Policy if desired.
- Registration Grace Period (minutes) - allows you to define how long pending registrations hold ticket capacity before expiring. Set to 60 minutes by default, minimum period is 5 minutes.
- Auto-Cancel Expired Registrations - automatically cancels registrations that exceed the 'Registration Grace Period'. When enabled, expired registrations are hard-cancelled and their session slots, ticket capacity, and room bookings are released. For more details on this feature, please refer to this article.
- External Event Site URL - if you are using an external marketing site for this event you can add the URL here and we'll update the attendee facing links in the registration emails.
- Custom Support Email Address - add a support email address for attendee inquiries. This will appear in the footer of your event site and registration form as well as attendee cancellation pages.
- Hide Event Dates - this will hide your event dates from attendees on system emails and event pages.
- Enable QR Codes - when active, QR codes will be included in registration emails, to help with name badge printing & lead retrieval features.
- Enable Attendees Register Others - this allows attendees to make additional registrations, linked to theirs, on any available track.
- Enable Invite Only - when enabled, access to the event website and registration form is only available via an invitation link.
- Enable Invitation RSVPs - this allows invited guests to choose to decline their invitations (giving an optional reason).
- Enforce Invited Email Address - this option enforces attendees to only be able to use the email address used for their invitation to register for your event.
- Use Bulk Mail Queue for Confirmations - this option allows you to 'bulk' queue all confirmation emails rather than send transactionally, which can be helpful in ensuring delivery in 'high traffic' events.
- Per-day arrival checkpoints - this option provides you with the ability to automatically create an 'arrival' checkpoint for each day of your event (as opposed to a single system checkpoint for arrival on the first day of the event). Can only be used for events less than 30 days, enabled by default for all events less than 30 days. For more information, see this article.
- Attendee Track Upgrade Options - this feature allows you to enable attendees to be able to change their current track once registered. Using this feature, you can choose whether you wish to enable this ability (this option is set to disabled by default), allow unrestricted track changes or upsell only, and set a cutoff date for when attendees can make track changes.
- Attendee Registration Transfer Options - this option allows you set if an attendee can choose to transfer their event registration to another person.
- Password Scope - using this option, you will have the choice to decided whether your attendees will need to create a separate login to register for the new event (Per Event), or ask attendees that have created a registration with a previous event you had to register using the same credentials (Global). This setting can be altered for your event until you receive your first registration - again, this field is mandatory and set to 'Per Event' by default.
Custom Messages
This area allows you to create custom messages for your event site, with the following options available:
- Navigation Link - this allows you to change the title of the link shown in the navigation menu to start registration. The default is 'Start Registration'
- Registration Section Heading - this allows you to change the title of the heading shown on the registration section. The default is 'Registration'
- Email Label - this allows you to change the title of the abel shown above the email field on the registration start page. The default is 'Email'
- Registration Button - this allows you to change the name of the button text on the registration start page. The default is 'Start Registration'
- Registration Not Open Yet - create a custom message to let your attendees know that it's too early to register.
- Registration By - create a custom message to let attendees know when they need to register by, the date is automatically appended to the message.
- Registration Closed - create a custom message that informs attendees that they can no longer register for the event.
- Registration Frozen - create a custom message that informs attendees they can no longer edit or amend their registrations.
- Registration Successful - create a custom message that is displayed on every successful registration.
- Event at Capacity - create a custom message that informs attendees that no registration options are available. Shown when all session booking slots are full or all registration tracks are at capacity.
Graphics
This area allows you to upload custom images for your event site:
- Event Logo - upload a graphic to be displayed as your event logo at the top of your event site. Only JPG, JPEG, PNG, and GIF file types are supported.
- Event Banner - upload a graphic to be displayed as your event banner at the top of your event site. This is displayed beneath your event logo. Only JPG, JPEG, PNG, and GIF file types are supported.
- PDF Logo - upload a graphic to be displayed on any PDFs created from within your event. Only JPG, JPEG, and PNG file types are supported.
This area provides the following customization options for your event emails, including the following:
- Email Sending Name - all emails are sent from [email protected] to ensure good deliverability. This setting customizes the name that appears in the recipients email inbox, which can be helpful when running an event for a third party.
- Email Logo - upload a graphic to be displayed as your email logo at the top of your event emails. Only JPG, JPEG, PNG, and GIF file types are supported.
- Email Banner - upload a graphic to be displayed as your email banner at the top of your event emails. This is displayed beneath your event logo. Only JPG, JPEG, PNG, and GIF file types are supported.
Advanced Settings:
- Show Session Choices - all confirmation emails will display a list of any sessions selected by the attendee during registration
- Show Guest Session Choices - all confirmation emails sent to registrants that have added guests to their registration will display a list of any sessions selected by both the attendee and their guest(s) during registration
-
Default Confirmation Message - this message appears at the top of all confirmation emails. You can also create track-specific messages that will override this default.
Payments
This area enables you to assign monetary values to choices and options in your event registration form editor, and enable payment options and gateways for your event. This revenue can be viewed per attendee on their registration form, or within Reports with the specific fields included. When the 'Fee & Payments Enabled' checkbox is selected, you can set the following configurations:
- Event Currency - set the event currency to be used in your event ($/£/€).
- Payment Gateway - if you have a payment gateway (or multiple payment gateways) added to your organization, you can select the payment gateway you wish to use via the dropdown provided.
- Payment Gateway instructions - add a custom message when you have a payment gateway enabled to assist attendees during checkout. This could include payment terms and alternate payment options.
- Require Billing Addresses? - adds a requirement for attendees to enter a billing address when they pay using a card. This can help reduce card fraud.
- Require Payment Captcha? - adds a requirement for attendees to pass a captcha test before submitting payment. Please note that not all payment gateways currently support this feature, please contact us for any queries in regards to this.
- Tax Rate (%) - allows you to set a tax rate for the event. All registration charges will have this tax added to them at checkout.
- Tax Description - add a custom message informing attendees about your tax rate, which attendees will see when they are charged tax on registrations.
- Accept Offline Payments - when enabled, this allows offline payments such as checks, wires, etc to be accepted at checkout. Note: a remittance email will be sent.
- Offline Payment Instructions - add a custom message informing attendees about how to create an offline payment during checkout.
- Offline Payment Minimum ($) - this is an optional feature that allows you to set a minimum payment for offline payment transactions.
- Payment Confirmation Message - create a custom message that the attendee will see when they successfully make payment.
- Payment Reminder Message - create a custom message for your payment reminders, which will be displayed at the top of your payment reminder email.
- PDF Invoice Custom Header - create a custom message for your PDF invoices, which will show at the top of the PDF invoice.
- PDF Invoice Custom Footer - create a custom message for your PDF invoices, which will show at the bottom of the PDF invoice.
Name Badges
This area allows you to configure the name badge template and background used for your event. The following options available are:
- Name Badge Template - select the template you wish to use from the dropdown provided. Please note that any custom name badge templates you wish to use will need to be imported by us prior to them being available on this page.
- Name Badge Background - upload an image that you'd like to be used as a background on your name badges.
- Enable Self Printing - when enabled, this allows attendees to download and print their own name badge via their registration page.
For more information on Name Badge printing, please refer to this article.
Localization
In this area, you can select the languages you wish to support in your event. Simply enable the languages you wish to support (English is supported by default), and once you've saved your selection, you will be able to create translations in your 'Translations' area (available from your Event Dashboard). Attendees can then select the language they wish to view your event site in from the top of the page, which will then translate all registration form text and emails for the attendee going forward.
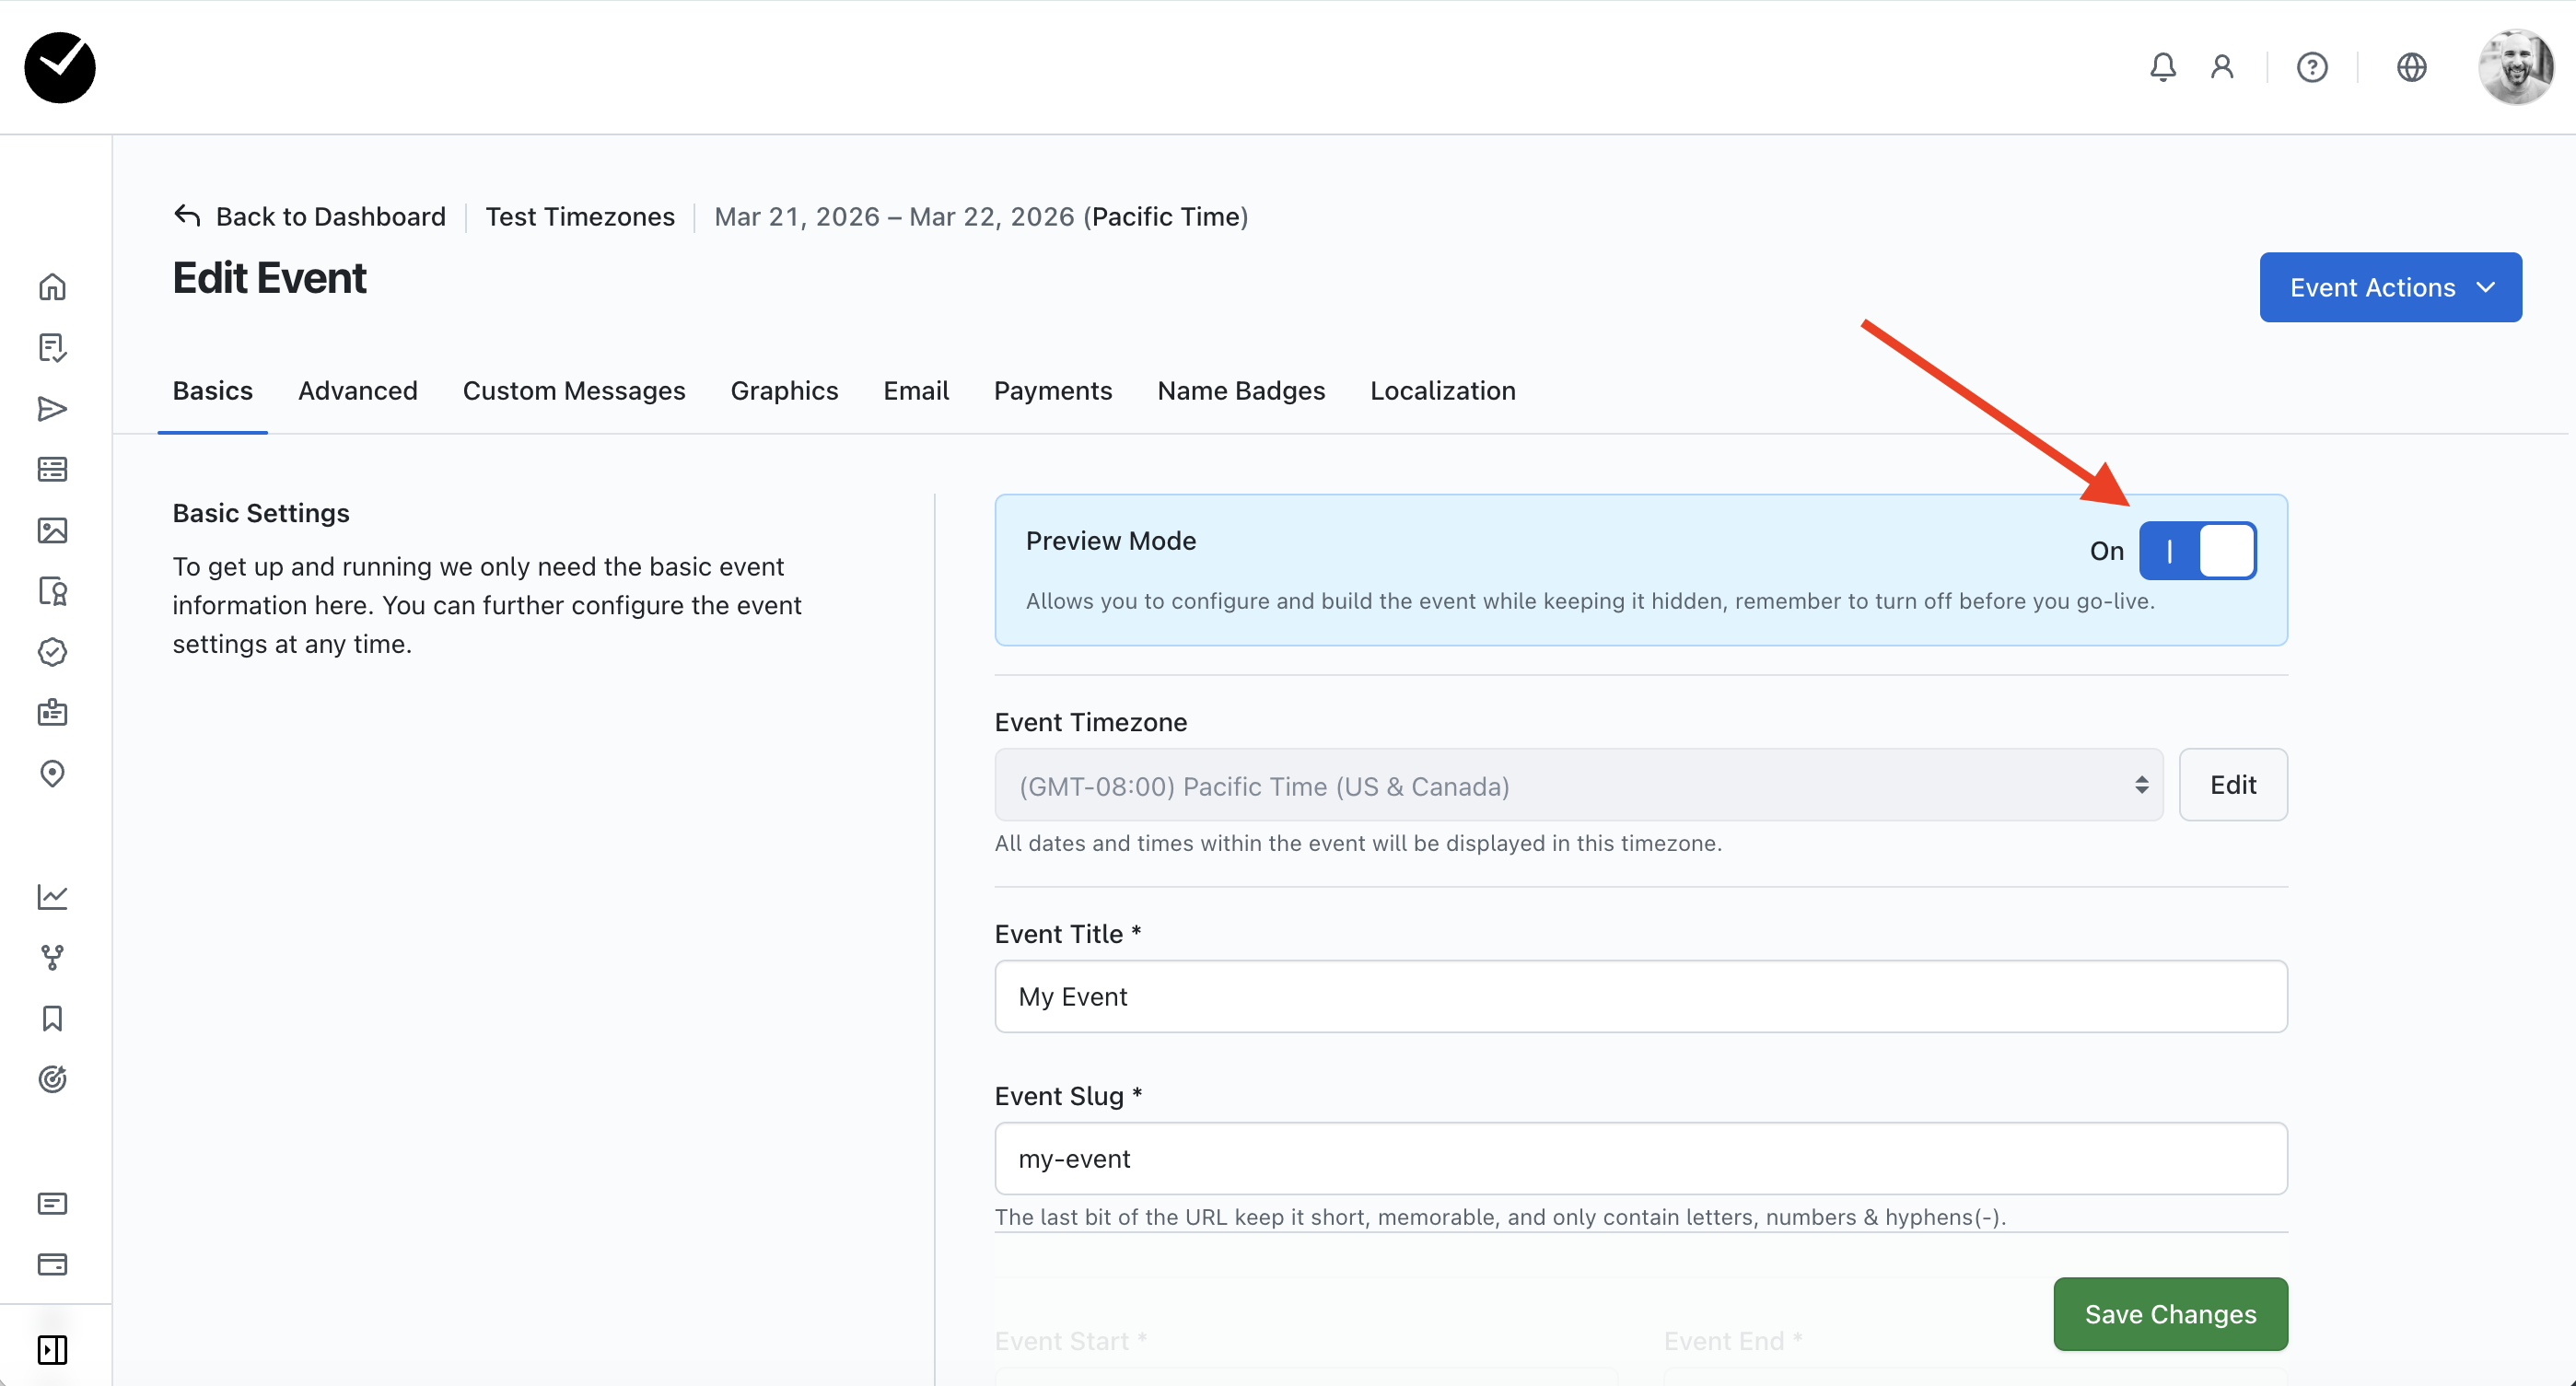
Once you are happy with your event configuration and you are ready to 'go live', proceed to the 'Basics' tab and click on the button on the 'Preview Mode' section. When enabled, your event site is not visible to attendees, but when disabled, your event is now live and ready for registrations!