Can I import and register a list of attendees?
You can import invitees en-masse by clicking on 'Registration Import' on the navigation sidebar in any area you are interacting with. You can also access this area from your event dashboard under the 'Data Imports' tile.

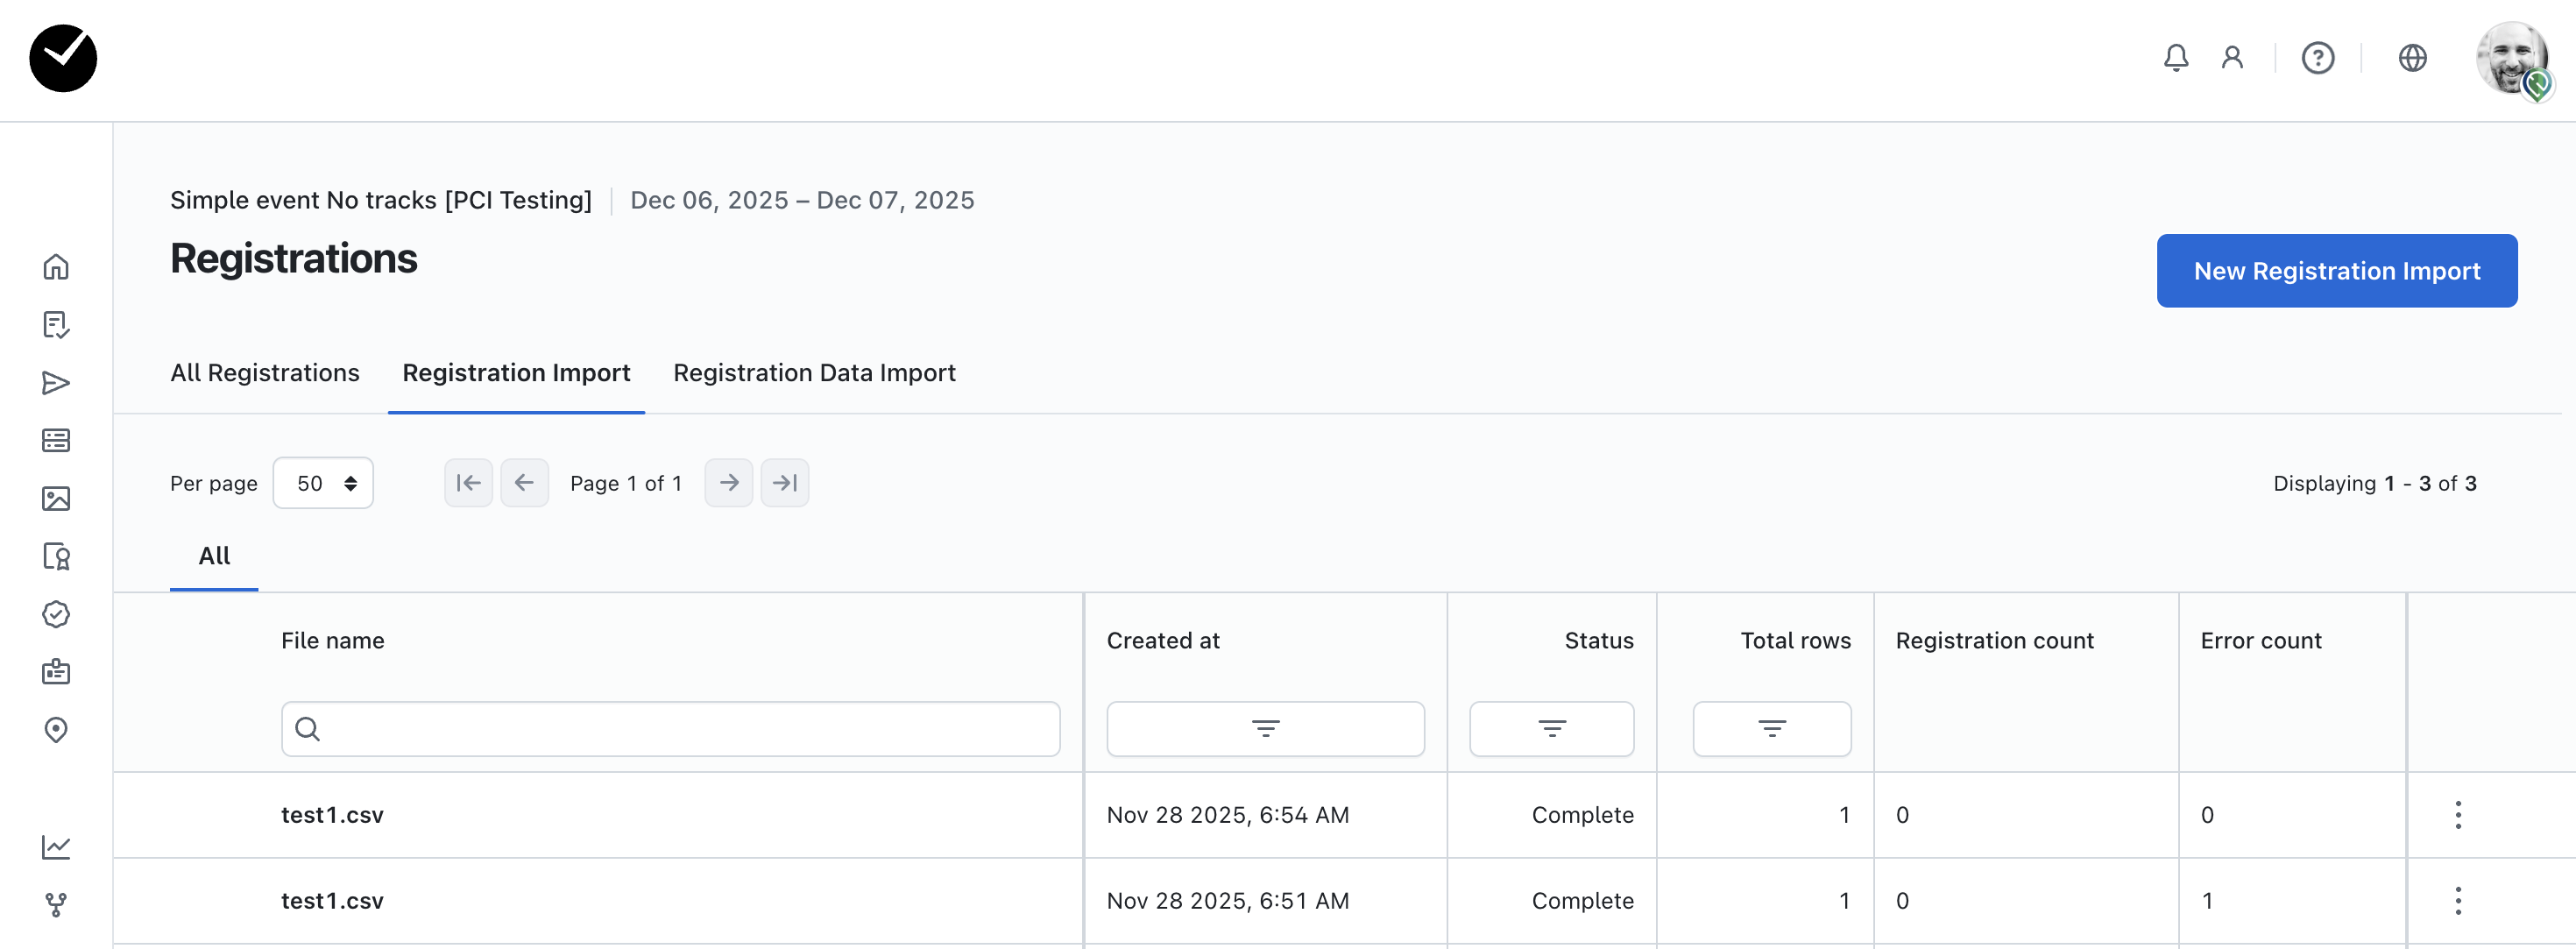
This is also available when interacting with your 'Registrations' page, simply click on the 'Registration Import' tab when in this area.
The first thing you need to do is click on the 'New Registration Import' button at the top right of the page.
Following this, you will need to download the CSV Registration Template for your event by clicking on the 'Download CSV Template' button displayed in bold in the main section of text on the page. If you have tracks added to your event, you will need to select the track type you want to import your attendees to before you download your template. These templates are specific to each event, so only use the template provided in the current event when creating registrations for it.

Once downloaded, open the CSV and begin entering your attendee information, beginning on the row saying 'Start adding registrations from this row'. Add your attendee information to this row in each column as defined in the rows above - the first row tells you the registration field, the second row tells you what information you should enter (and format if required) and the third row tells you if the field is 'required' (mandatory).
Please do not enter any characters or text into any of the rows or headers above the 'Start adding registrations from this row' row or your attendee registrations will not be able to be imported.
Once you have added all registration information for your first attendee, you can continue to add more by creating a new row below the 'Start adding registrations from this row' row and adding your next attendee's information in the same fashion. You can add as many or as few attendees as you wish, but all 'required' fields must be completed for each attendee, and the email address for each attendee must not match an attendee already registered for your event.
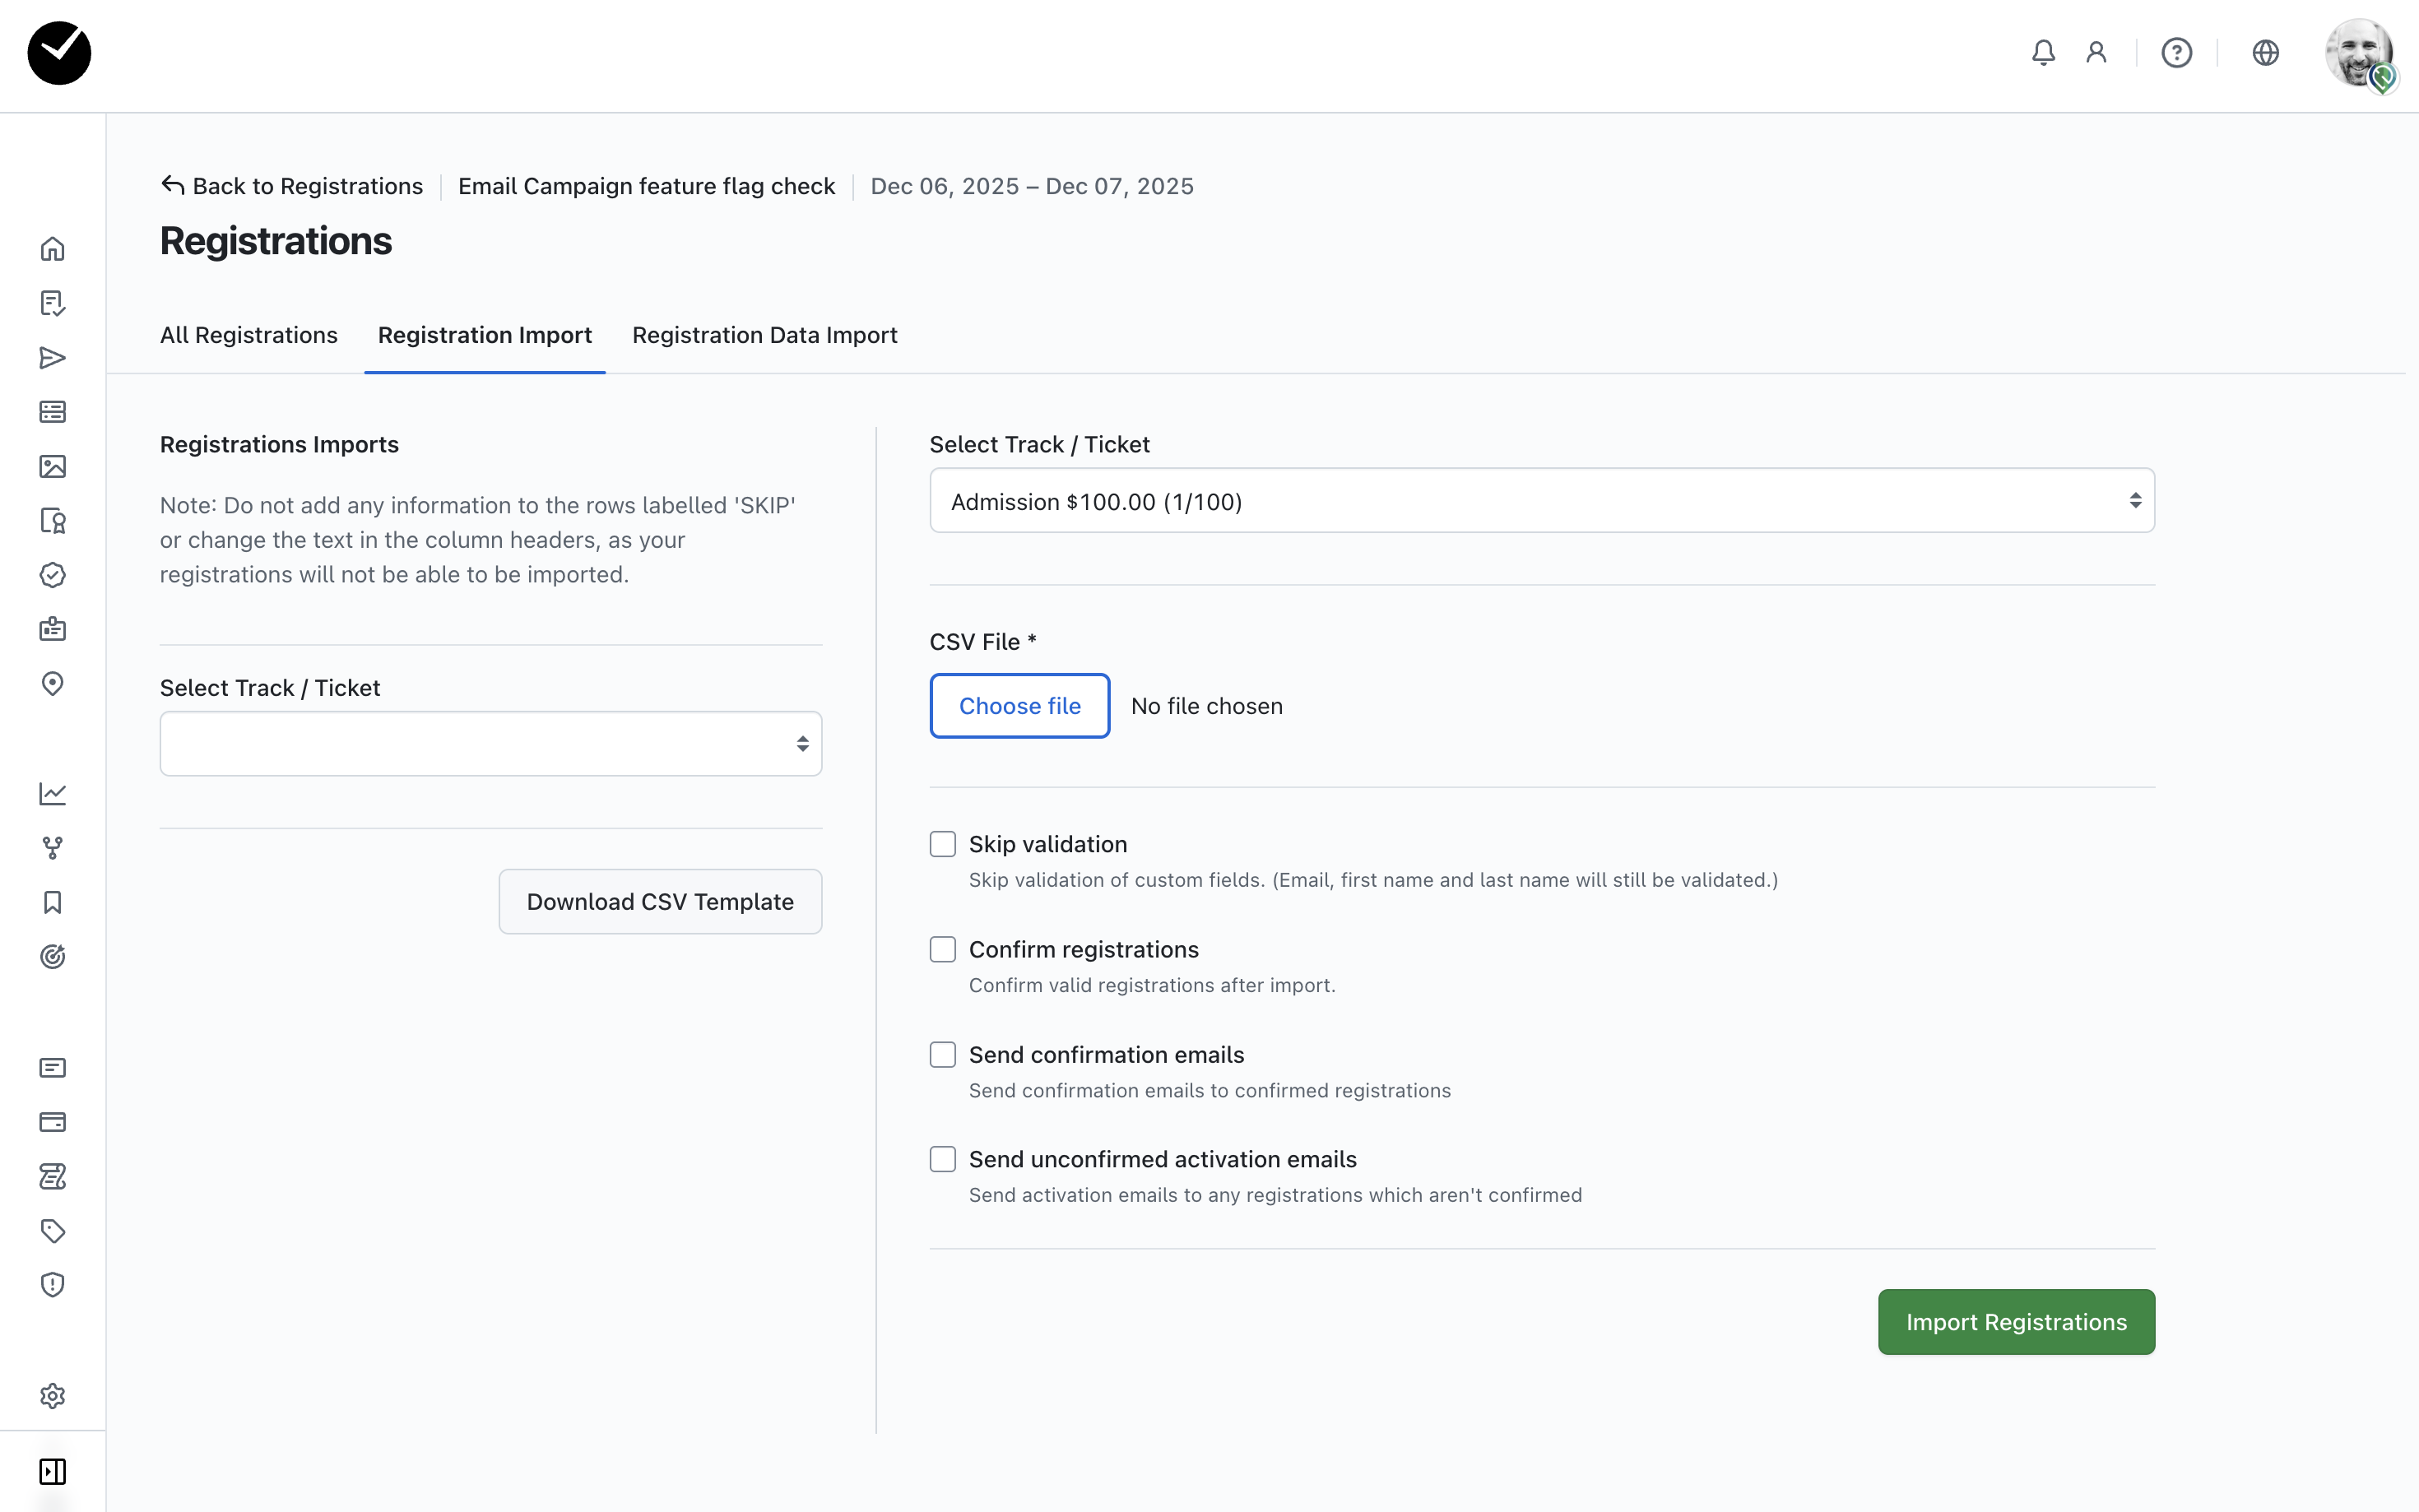
Once you are ready to upload your registrations CSV, return to your browser and click on the 'Choose File' option in the 'Upload CSV File' section. This will allow you to select the CSV file you wish to upload from your current device - please ensure that you have selected the correct CSV file that applies to the current event! Before you submit to import your attendees, there are a few additional options available for selection:
- Skip validation - this will ignore any data that is returned as invalid during your import, except email, first name and last name (as these are required to be valid for a valid registration)
- Confirm registrations - this will automatically confirm all successfully imported registrations when selected
- Send confirmation emails - this will automatically deliver confirmation emails to all confirmed imported registrations
- Send unconfirmed activation emails - this will automatically deliver activation emails to all unconfirmed imported registrations
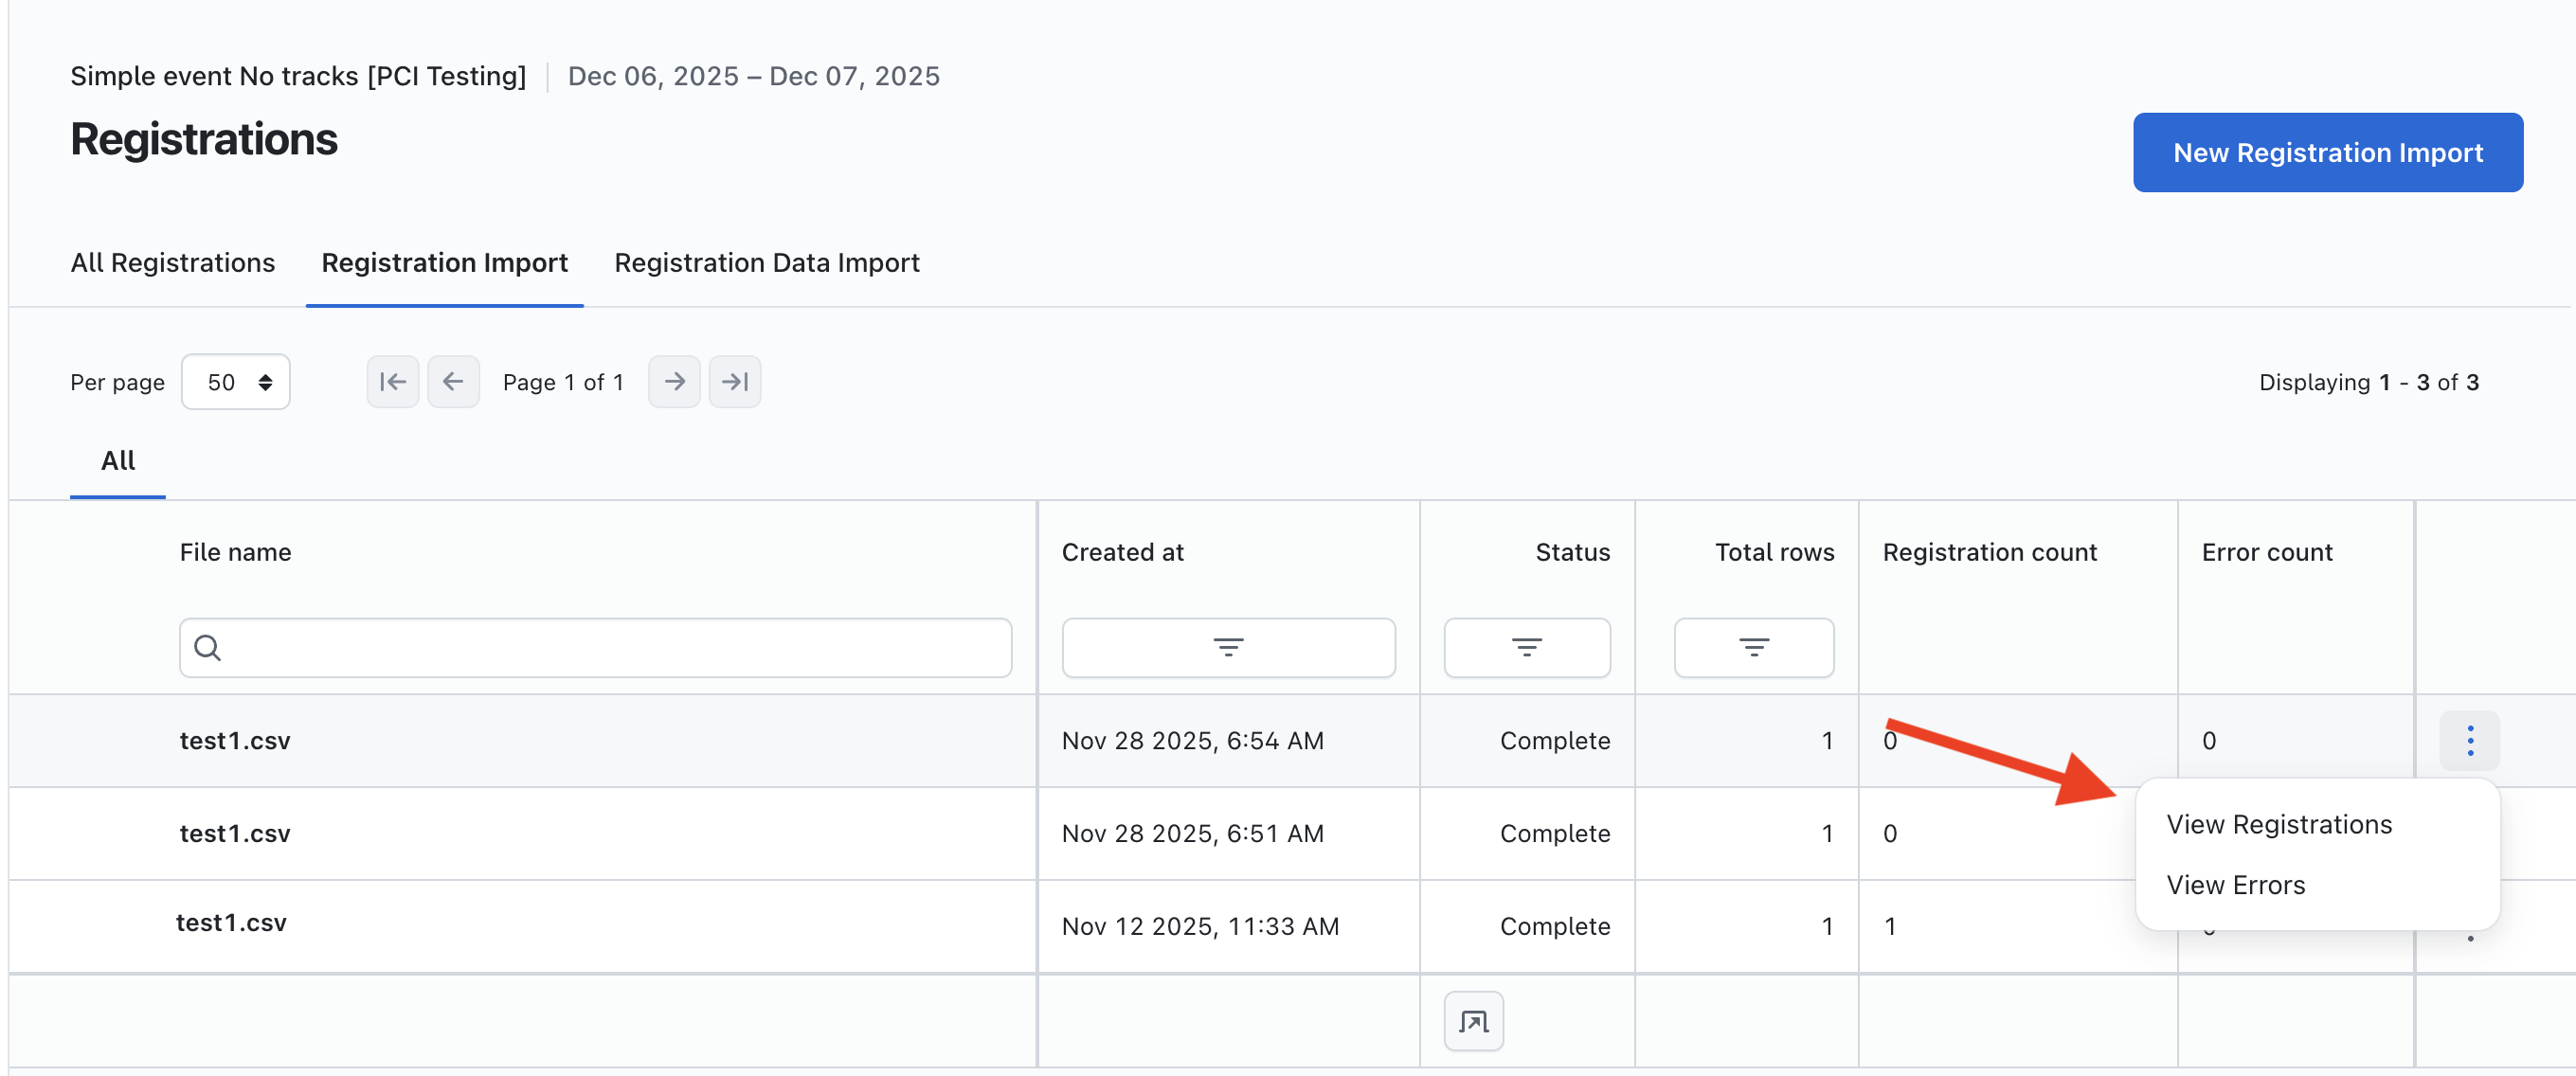
All of the above options are optional - the choice is yours. To complete your import, simply click on the 'Import Registrations' button - this will take you back to the main 'Registration Import' page, showing your current import at the top of the table. This will remain in a 'Pending' state until the import has completed - once completed, you will see the Registration Count and Error Count columns update and the status will be returned as 'Completed'.
To view errors or successful registration imports, simply click on the 3 dots at the end of the row of your import and select the option you wish to view.
If you wish to update existing registrations 'en masse', please view our article on managing registrations, which can be found here.