How do I manage my event translations?
To enable event translations, you must first select the languages you wish to translate for your attendees. This is done in the 'Localization' area of your Event Settings - please refer to this article for steps on configuring your Localization settings.
Once you have configured your Localization settings, select the 'Website Translations' tile on your Event Dashboard.
Once you select this tile, you will see the Translation Dashboard page:
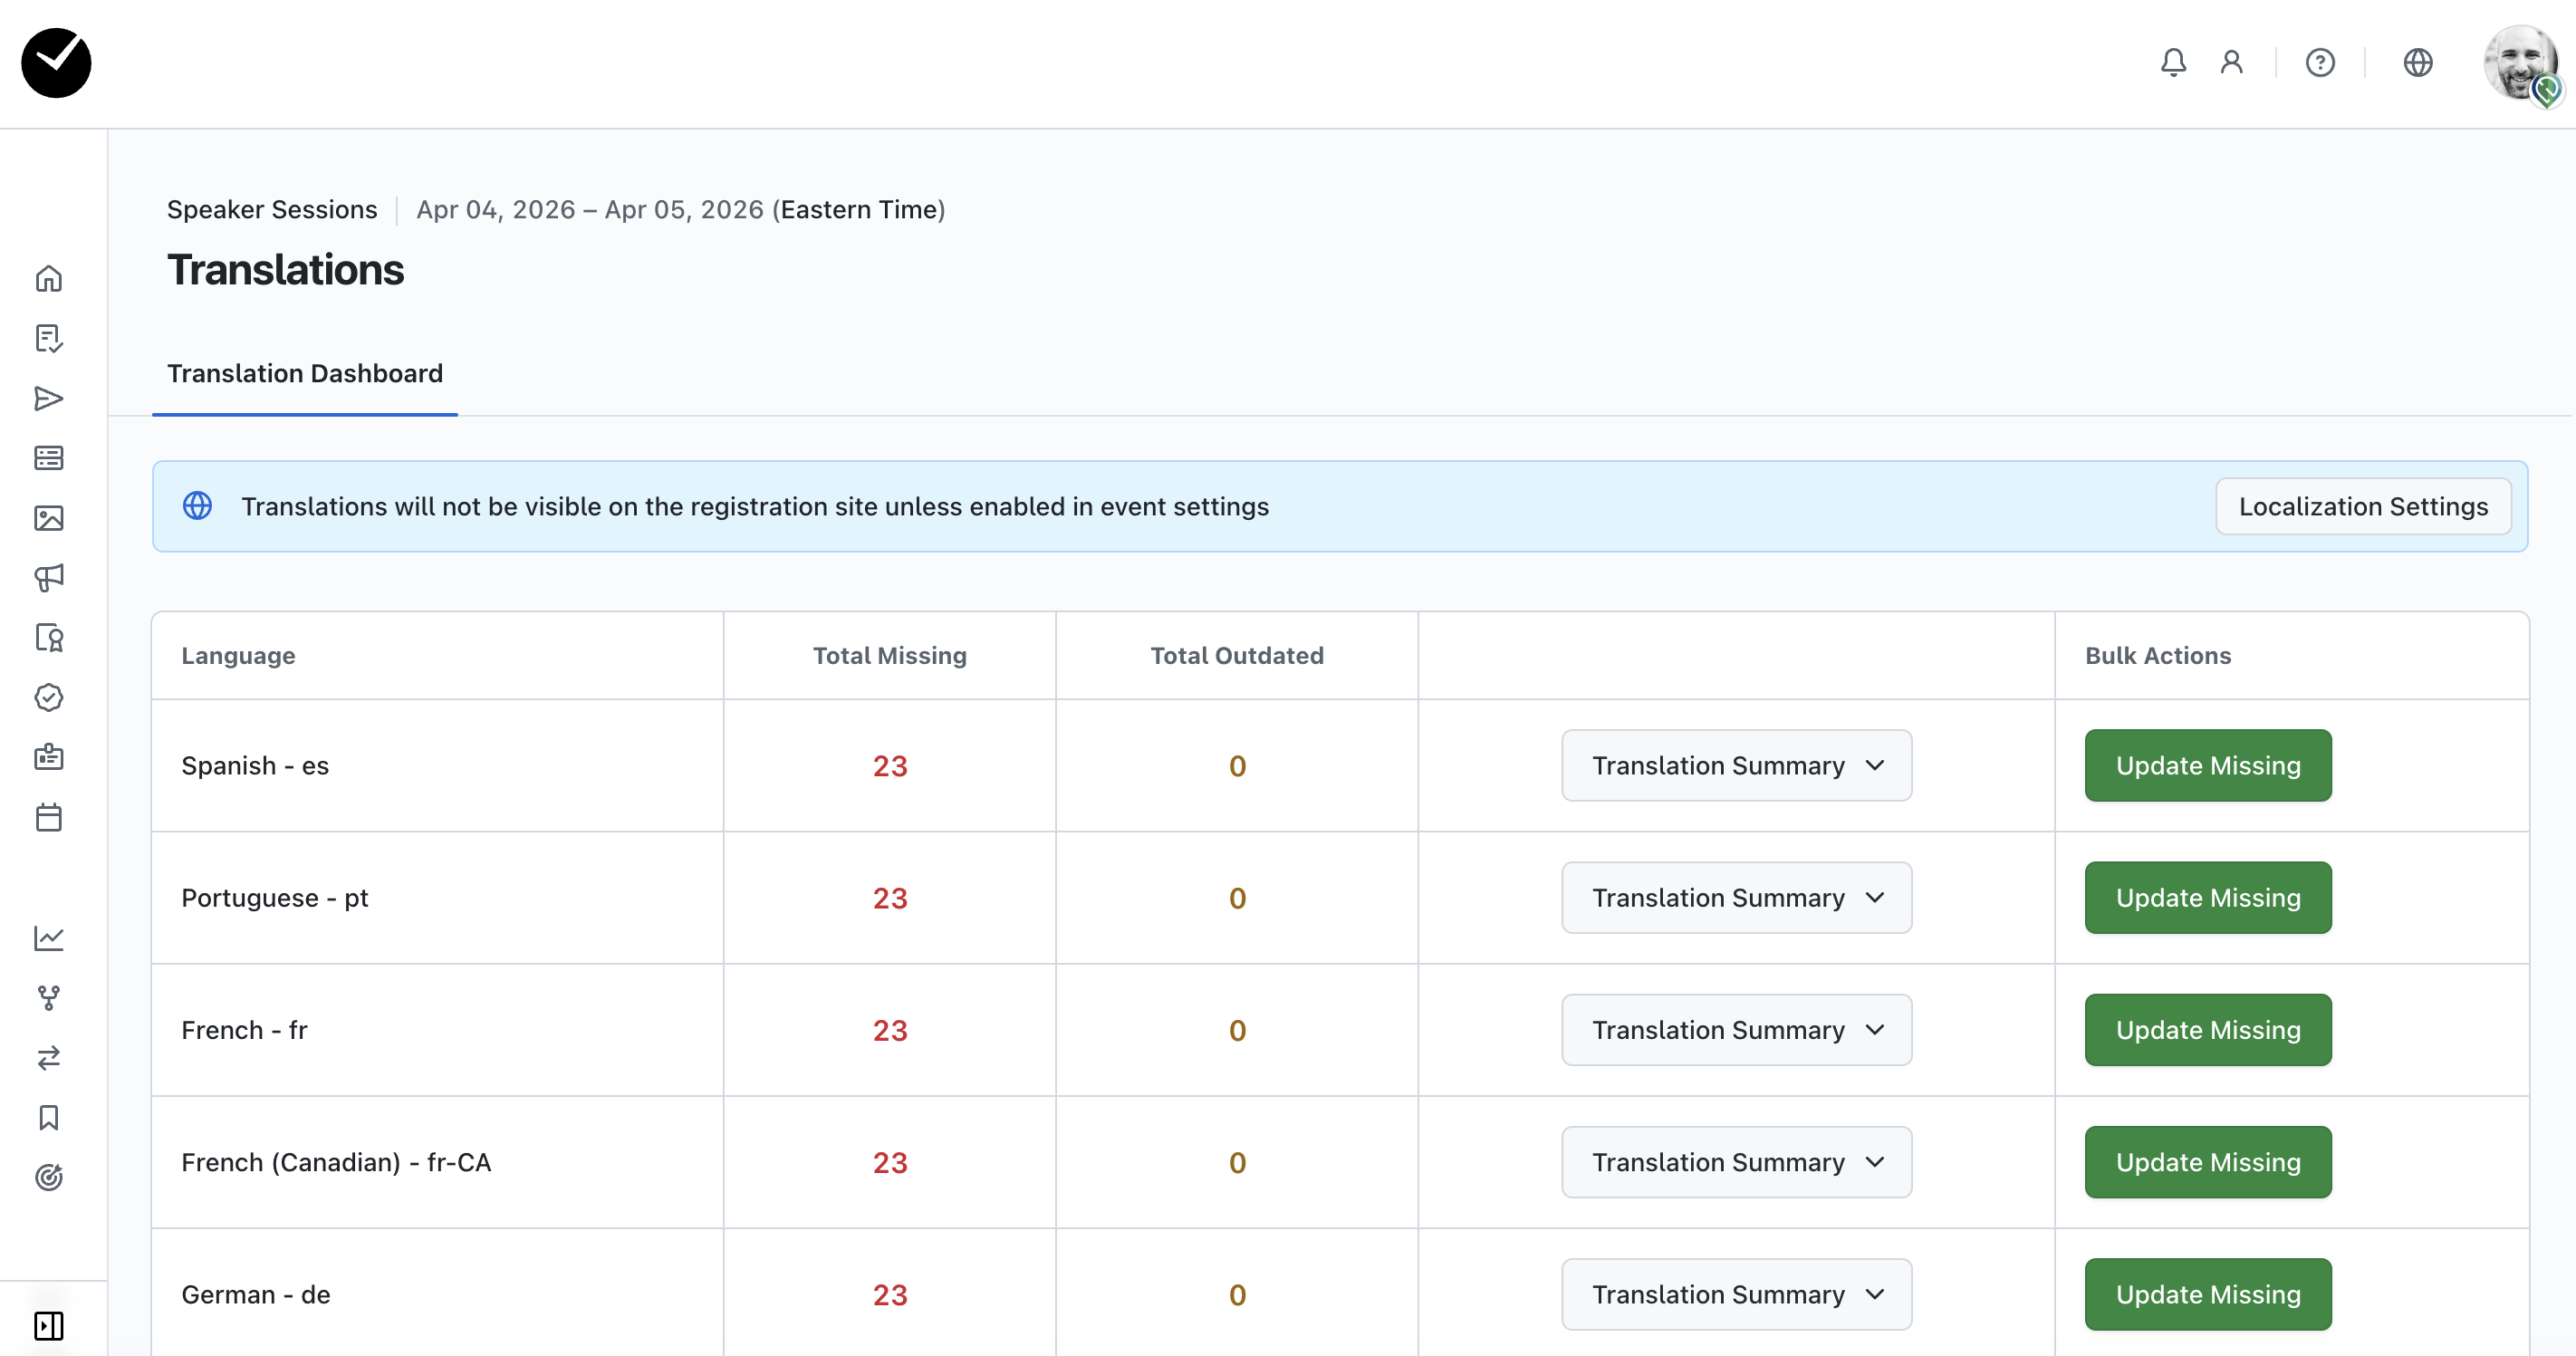
The main table displays a list of all supported languages and the number of outdated/missing translations picked up by our system.
To the right of this, you will see a 'Translation Summary' dropdown menu, where you can select individual areas in your event to translate (we will cover this area in more depth shortly). If you wish for all items to be 'auto-translated' for you, simply select the relevant 'Update Missing' button under the 'Bulk Actions' column and we'll do the hard work for you!
Creating bulk translations
As noted at the end of the last section above, to begin 'auto-translating' any supported language, simply select the relevant 'Update Missing' button under the 'Bulk Actions' column. You will then see the button changes to 'Translating', and the number of items in the 'Total Missing'/'Total Outdated' for the language should begin to decrease:
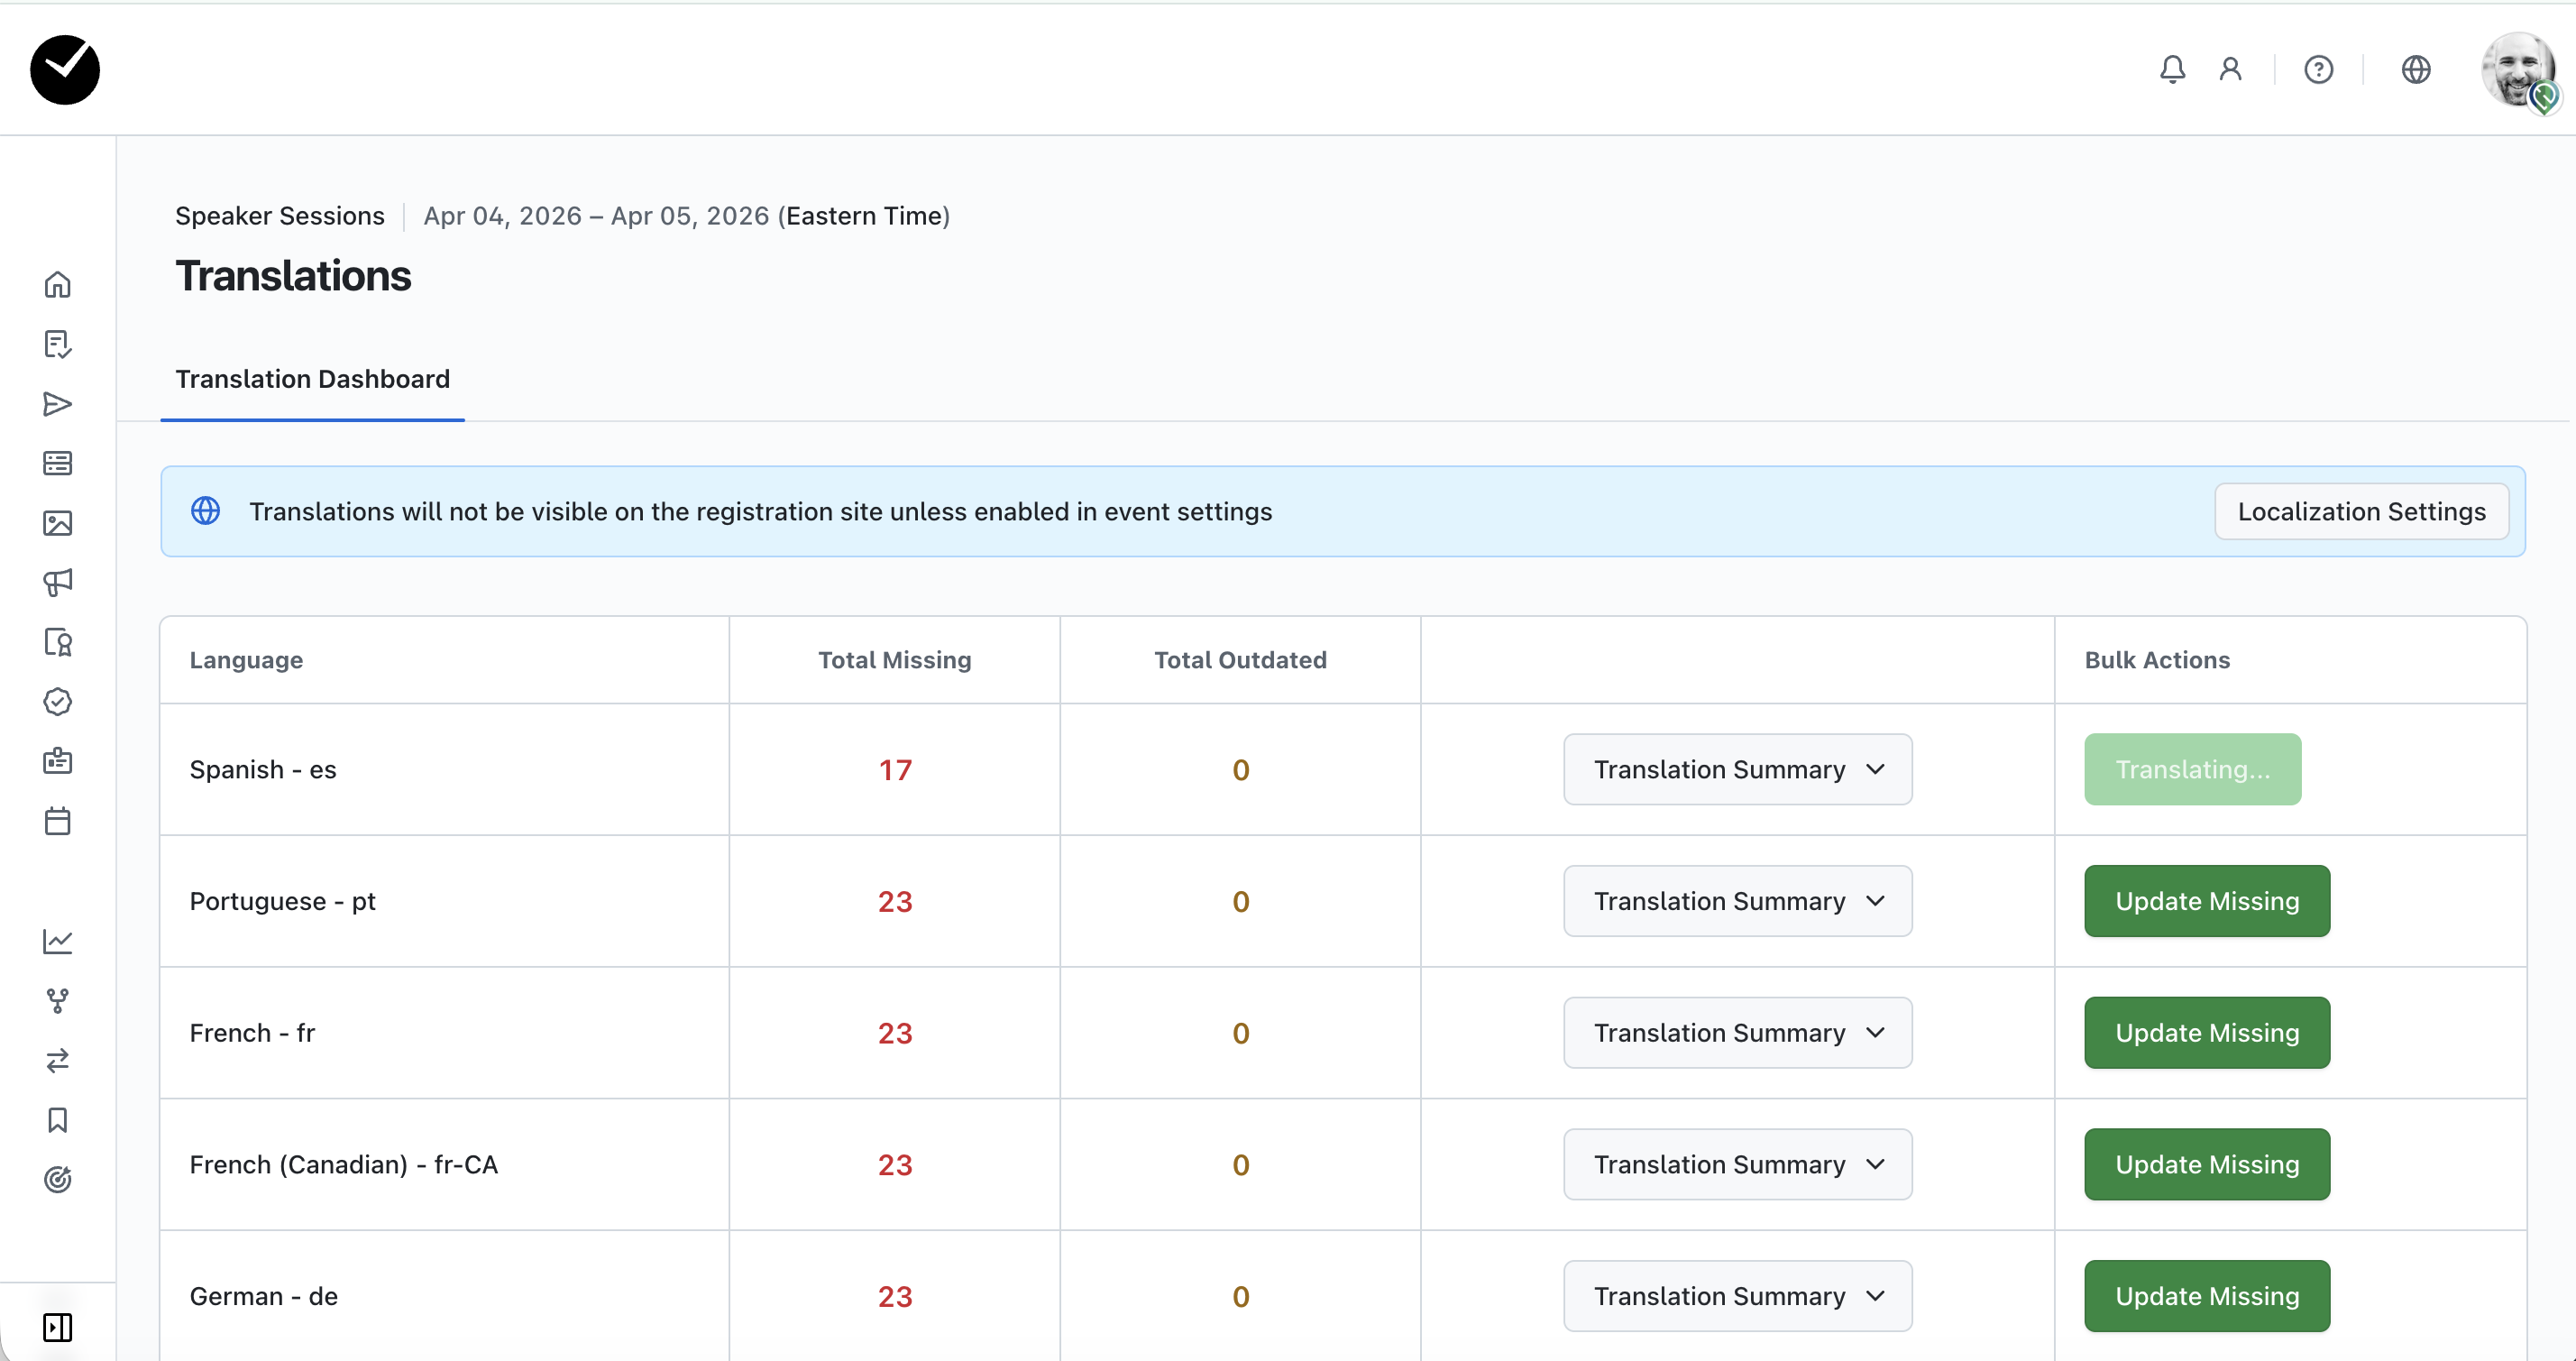
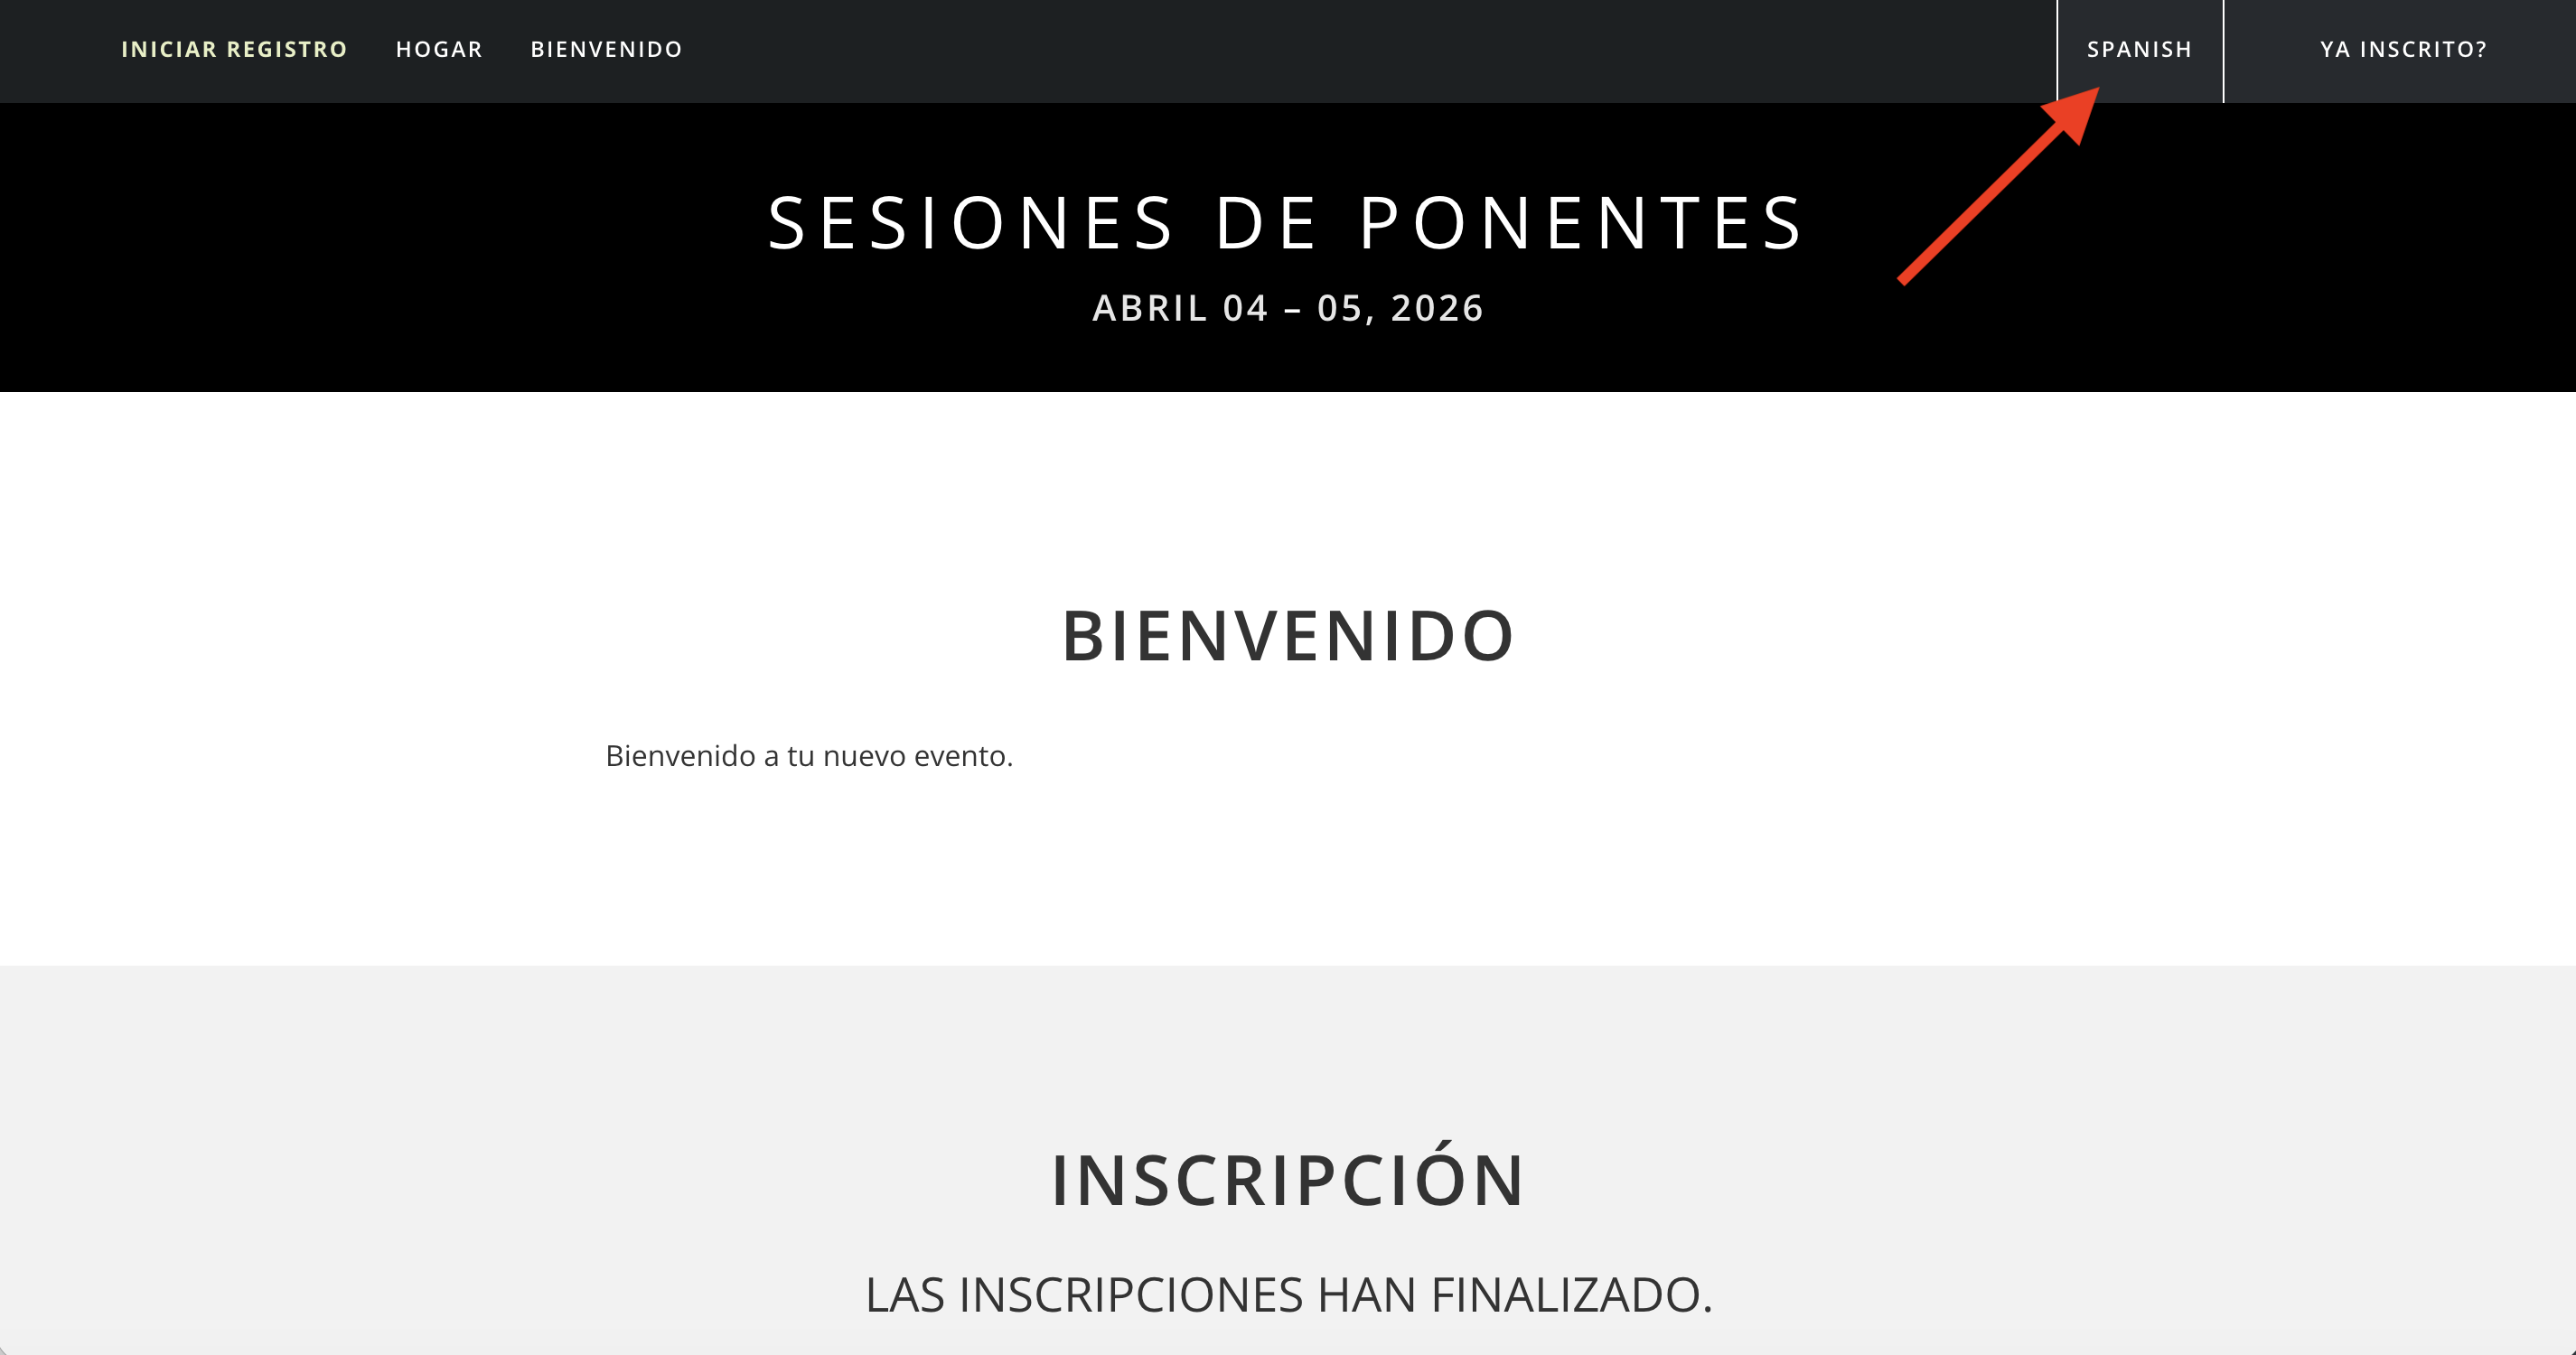
When all translations have been created/updated, the 'Total Missing'/'Total Outdated' items will show as '0'. Now when an attendee begins registering, they will see the translations applied when they select the language on your event microsite:
Managing individual translations
If you find that the translations generated for your event aren't quite right, you can make amendments using the 'Translation Summary' dropdown for the language.
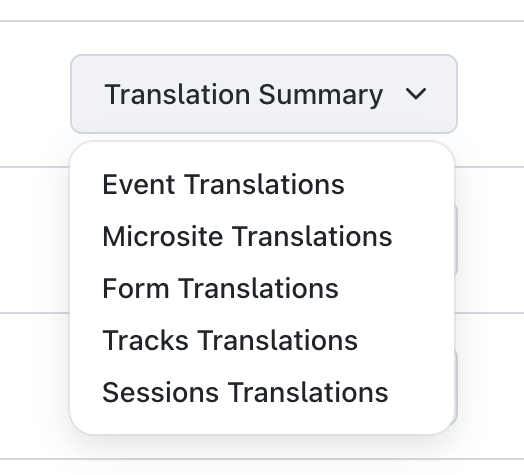
When clicking on this, you will see all areas you can edit - simply click on the area of the event you wish to address, and you'll be taken to the translations editor for the specific area.
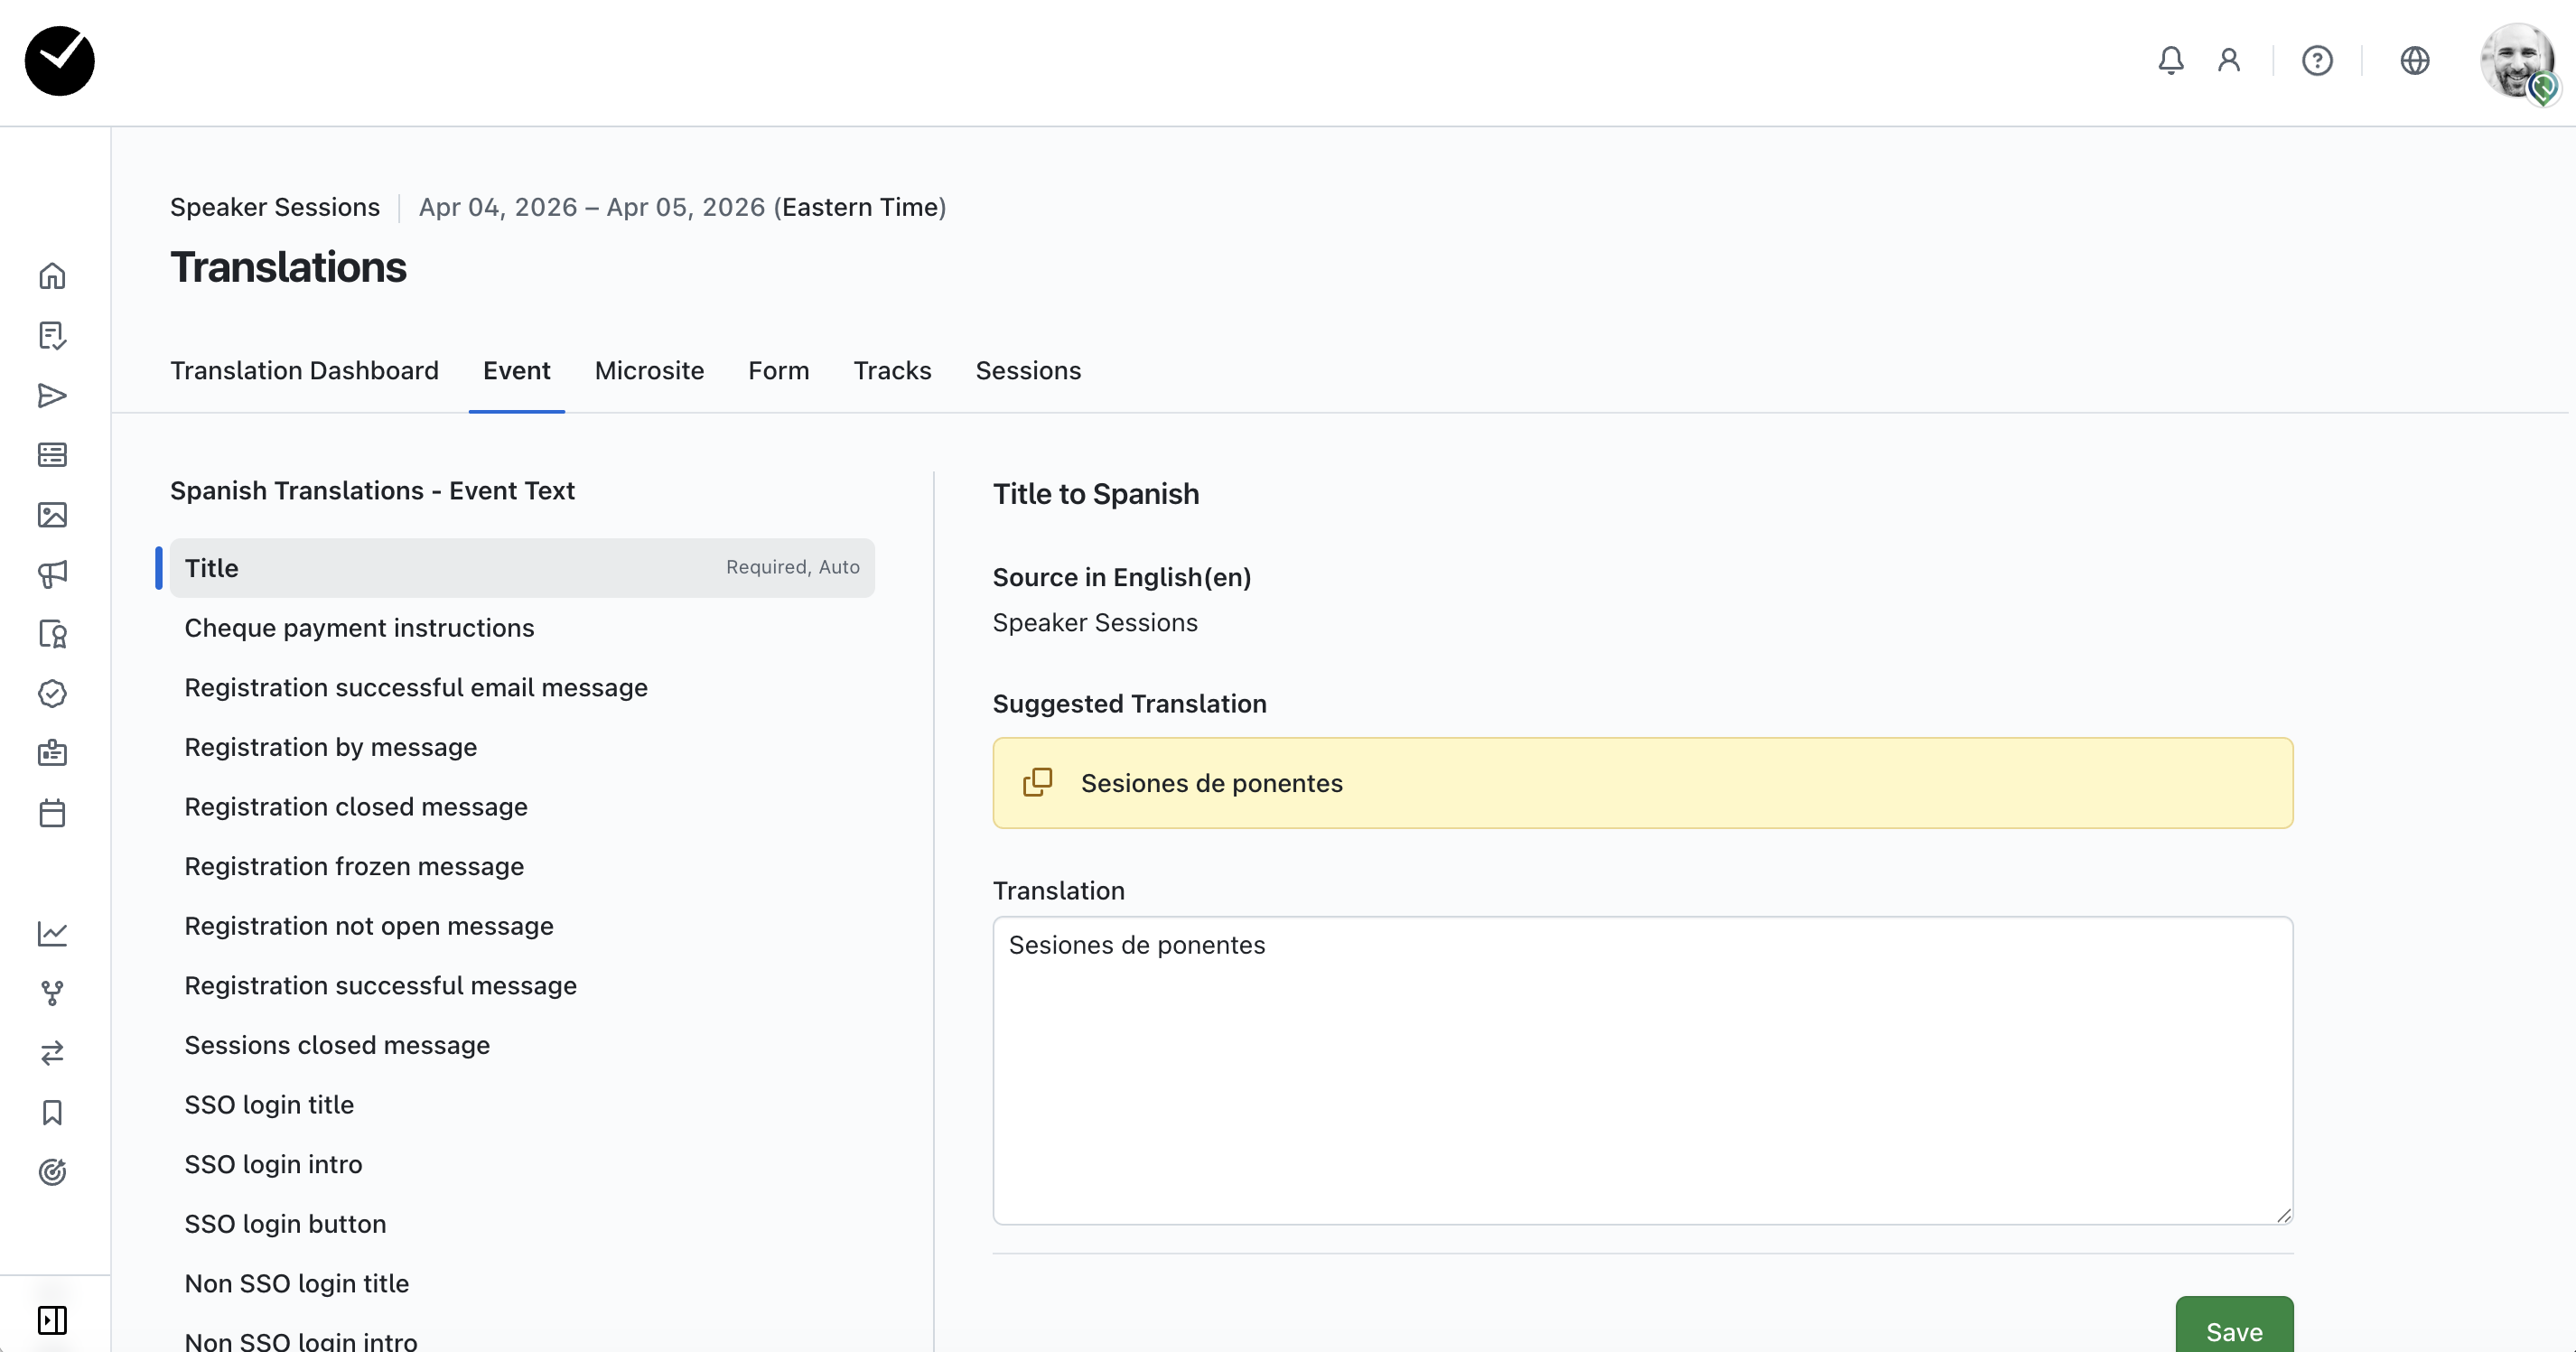
To the left, you will see a column displaying all items for the specific area. To begin editing, select the item you wish to interact with - you'll then see the following displayed:
- Source in English (en) - the original english text to be translated
- Suggested Translation - this is the automatic translation we have found for the english version of the item. This can be copied and pasted into the 'Translation' text area by clicking on the 'copy' icon
- Translation - this area is where you can manually change/add any translation. Simply enter the text you wish to display in this area for this item
When you are ready to save, click the 'Save' button. Your translation will now be updated for all attendees selecting this language option when registering. To return to the main translations area, just click on the 'Translation Dashboard' tab at the top of the page.